Home Blog Page 36

Chocolate Surprise Cookies

0

Chocolate Surprise Cookies are a delightful treat with a hidden twist that makes them irresistible. These cookies feature a soft, rich chocolate exterior that gives way to a surprise filling hidden inside—whether it’s a gooey marshmallow, a creamy peanut butter center, or a burst of caramel. The contrast between the chewy chocolate cookie and the unexpected filling creates a playful and delicious experience with every bite. Perfect for special occasions, holiday cookie swaps, or just when you want to surprise someone with a sweet treat, these cookies are sure to become a favorite.

Ingredients:

For the Cookie Dough:

  • 1/2 cup unsalted butter, softened
  • 1/2 cup granulated sugar
  • 1/2 cup brown sugar, packed
  • 1 large egg
  • 1 teaspoon vanilla extract
  • 1 1/2 cups all-purpose flour
  • 1/2 cup unsweetened cocoa powder
  • 1/2 teaspoon baking soda
  • 1/4 teaspoon salt

For the Surprise Filling:

  • 12 large marshmallows, halved (or mini peanut butter cups, chocolate-covered caramels, etc.)

For the Chocolate Drizzle (optional):

  • 1/2 cup semi-sweet chocolate chips
  • 1 teaspoon vegetable oil

Instructions:

  1. Prepare the Cookie Dough: In a large bowl, cream together the softened butter, granulated sugar, and brown sugar until light and fluffy. Beat in the egg and vanilla extract until well combined.
  2. Mix the Dry Ingredients: In a separate bowl, whisk together the flour, cocoa powder, baking soda, and salt. Gradually add the dry ingredients to the wet mixture, mixing until a soft dough forms.
  3. Shape and Fill the Cookies: Preheat your oven to 350°F (175°C) and line a baking sheet with parchment paper. Take a tablespoon of dough and flatten it slightly in your hand. Place a marshmallow half or other surprise filling in the center, then wrap the dough around it, ensuring the filling is completely covered. Roll the dough into a ball and place it on the prepared baking sheet. Repeat with the remaining dough and filling, spacing the cookies about 2 inches apart.
  4. Bake: Bake the cookies in the preheated oven for 10-12 minutes, or until the edges are set. The cookies may appear soft but will firm up as they cool. Allow them to cool on the baking sheet for a few minutes before transferring to a wire rack to cool completely.
  5. Add the Chocolate Drizzle (optional): If desired, melt the chocolate chips with the vegetable oil in a microwave-safe bowl, stirring every 20 seconds until smooth. Drizzle the melted chocolate over the cooled cookies for an extra touch of decadence.

These Chocolate Surprise Cookies are not only delicious but also fun to make and eat, offering a sweet surprise in every bite!


Lentil Shepherd’s Pie

0

Lentil Shepherd’s Pie is a delicious, hearty vegetarian twist on the traditional dish. This recipe swaps the classic ground meat for protein-packed lentils, making it a great plant-based option while keeping all the comforting flavors you expect from Shepherd’s Pie. The filling combines tender lentils, sautéed vegetables, and savory seasonings, topped with creamy mashed potatoes. It’s a wholesome, warming meal perfect for a cozy dinner that will satisfy both vegetarians and meat-eaters alike.

Ingredients:

For the filling:

  • 1 cup dried green or brown lentils, rinsed and drained
  • 1 tablespoon olive oil
  • 1 medium onion, diced
  • 2 carrots, diced
  • 2 cloves garlic, minced
  • 1 cup mushrooms, sliced
  • 1 tablespoon tomato paste
  • 1 tablespoon soy sauce
  • 1 teaspoon dried thyme
  • 1 teaspoon smoked paprika
  • 2 cups vegetable broth
  • Salt and pepper to taste
  • 1 cup frozen peas

For the mashed potato topping:

  • 4 large potatoes, peeled and cubed
  • 3 tablespoons butter (or vegan butter)
  • 1/2 cup milk (or plant-based milk)
  • Salt and pepper to taste

Instructions:

  1. Cook the lentils: In a medium pot, add lentils and vegetable broth. Bring to a boil, then reduce the heat and simmer for 20-25 minutes, or until lentils are tender. Drain and set aside.
  2. Make the filling: In a large skillet, heat olive oil over medium heat. Add onions and carrots, sautéing until softened, about 5-7 minutes. Add garlic and mushrooms and cook for another 3-4 minutes until mushrooms release their moisture.
  3. Add seasonings: Stir in tomato paste, soy sauce, thyme, and smoked paprika. Cook for 1-2 minutes to combine the flavors. Add cooked lentils and peas, stirring everything together. Season with salt and pepper to taste. Set aside.
  4. Prepare the mashed potatoes: While the filling is cooking, boil the potatoes in salted water until tender, about 15 minutes. Drain, then mash with butter and milk until smooth. Season with salt and pepper to taste.
  5. Assemble and bake: Preheat the oven to 375°F (190°C). Spread the lentil and vegetable filling evenly in a 9×13-inch baking dish. Top with the mashed potatoes, spreading them evenly over the filling. Use a fork to create texture on top for crispness.
  6. Bake: Place the dish in the oven and bake for 25-30 minutes, or until the top is golden brown. For extra crispness, you can broil the pie for 2-3 minutes at the end.
  7. Serve: Let the Lentil Shepherd’s Pie cool slightly before serving. Enjoy!

GRILLED VEGETABLE LASAGNA

Grilled Vegetable Lasagna is a fresh and hearty take on the classic dish, incorporating layers of smoky, grilled vegetables with creamy ricotta, marinara sauce, and gooey melted cheese. It’s perfect for a light, summer dinner or a hearty vegetarian meal. The grilling adds a smoky depth to the vegetables, making this dish deliciously unique.

Ingredients:

For the grilled vegetables:

  • 1 large zucchini, sliced lengthwise
  • 1 large yellow squash, sliced lengthwise
  • 1 large eggplant, sliced into rounds
  • 1 red bell pepper, sliced
  • 1 yellow bell pepper, sliced
  • 2 tablespoons olive oil
  • Salt and pepper, to taste

For the lasagna:

  • 9 lasagna noodles, cooked al dente
  • 2 cups ricotta cheese
  • 1/2 cup grated Parmesan cheese
  • 1 egg
  • 2 cups shredded mozzarella cheese
  • 3 cups marinara sauce (store-bought or homemade)
  • 2 tablespoons fresh basil, chopped (optional, for garnish)

Instructions:

  1. Preheat the grill: Heat your grill to medium-high. Brush the sliced vegetables with olive oil and season with salt and pepper.
  2. Grill the vegetables: Grill the zucchini, yellow squash, eggplant, and bell peppers for 3-4 minutes per side, until tender and lightly charred. Remove from the grill and set aside to cool slightly.
  3. Prepare the ricotta mixture: In a medium bowl, mix the ricotta cheese, grated Parmesan, egg, salt, and pepper until smooth.
  4. Assemble the lasagna: Preheat the oven to 375°F (190°C). In a 9×13-inch baking dish, spread a thin layer of marinara sauce on the bottom. Layer 3 lasagna noodles on top. Add a layer of grilled vegetables, followed by dollops of the ricotta mixture, and a sprinkle of mozzarella cheese. Repeat the layers: noodles, vegetables, ricotta, mozzarella, and marinara sauce until you’ve used all ingredients, finishing with a layer of marinara and mozzarella on top.
  5. Bake the lasagna: Cover the lasagna with foil and bake in the preheated oven for 25-30 minutes. Remove the foil and bake for another 10-15 minutes, or until the cheese on top is melted and bubbly.
  6. Garnish and serve: Remove the lasagna from the oven and let it rest for 10 minutes before slicing. Garnish with fresh basil and serve warm.

This Grilled Vegetable Lasagna is a wonderful, smoky, and cheesy dish perfect for any occasion. The grilled vegetables add a depth of flavor that takes this vegetarian lasagna to the next level!

Italian Grilled Cheese

0

Italian Grilled Cheese is a delightful twist on the classic comfort food, combining the gooey, melty goodness of a traditional grilled cheese with the bold flavors of Italy. This sandwich features layers of mozzarella and provolone cheese, fresh basil, and ripe tomatoes, all nestled between slices of crusty Italian bread. A spread of pesto or a drizzle of balsamic glaze elevates the flavors even further, making this a satisfying meal that’s as easy to prepare as it is delicious. Perfect for a quick lunch or a simple dinner, Italian Grilled Cheese offers a taste of Italy in every bite.

Ingredients:

  • 4 slices of Italian bread or ciabatta
  • 2 tablespoons unsalted butter, softened
  • 2 tablespoons pesto (store-bought or homemade)
  • 4 slices mozzarella cheese
  • 4 slices provolone cheese
  • 1 ripe tomato, thinly sliced
  • Fresh basil leaves
  • Balsamic glaze (optional, for drizzling)

Instructions:

  1. Prepare the Bread: Spread butter on one side of each slice of bread. On the other side of two slices, spread a layer of pesto.
  2. Assemble the Sandwich: On the pesto-coated side of one slice of bread, layer two slices of mozzarella cheese, followed by tomato slices, fresh basil leaves, and two slices of provolone cheese. Top with the second slice of bread, pesto side down. Repeat for the second sandwich.
  3. Cook the Sandwich: Heat a skillet or griddle over medium heat. Place the sandwiches in the skillet, buttered side down. Cook for 3-4 minutes on each side, or until the bread is golden brown and the cheese is melted.
  4. Serve: Remove the sandwiches from the skillet and let them cool slightly. If desired, drizzle with balsamic glaze before serving.

This Italian Grilled Cheese is a flavorful and comforting dish that’s perfect for a quick and satisfying meal, bringing a little bit of Italy to your table!

BALSAMIC VINAIGRETTE DRESSING

0

Balsamic Vinaigrette is a simple yet flavorful dressing that pairs beautifully with salads, roasted vegetables, or even as a marinade for meats. With its tangy and slightly sweet profile, this dressing is easy to make and adds a delicious touch to your favorite dishes. You can adjust the ingredients to your taste, making it as sweet or as tangy as you like.

Ingredients:

  • 1/4 cup balsamic vinegar
  • 3/4 cup extra virgin olive oil
  • 1 tablespoon Dijon mustard
  • 1-2 teaspoons honey or maple syrup (optional, for sweetness)
  • 1 garlic clove, minced
  • Salt and pepper, to taste

Instructions:

  1. Mix the vinegar and mustard: In a small bowl or jar, whisk together the balsamic vinegar and Dijon mustard until well combined.
  2. Add the olive oil: Slowly drizzle in the olive oil while whisking continuously to emulsify the dressing. Alternatively, you can add all the ingredients to a jar with a tight-fitting lid and shake vigorously until the dressing is combined.
  3. Add garlic and seasoning: Stir in the minced garlic, honey (if using), and season with salt and pepper to taste.
  4. Taste and adjust: Taste the dressing and adjust the sweetness, acidity, or seasoning as needed.
  5. Serve or store: Use the balsamic vinaigrette immediately or store it in an airtight container in the fridge for up to a week. Shake well before each use.

This homemade Balsamic Vinaigrette is a quick and flavorful way to dress up any salad, and it also works wonderfully as a marinade or drizzle for roasted veggies!

Cucumber, Tomato And Red Onion Salad

0

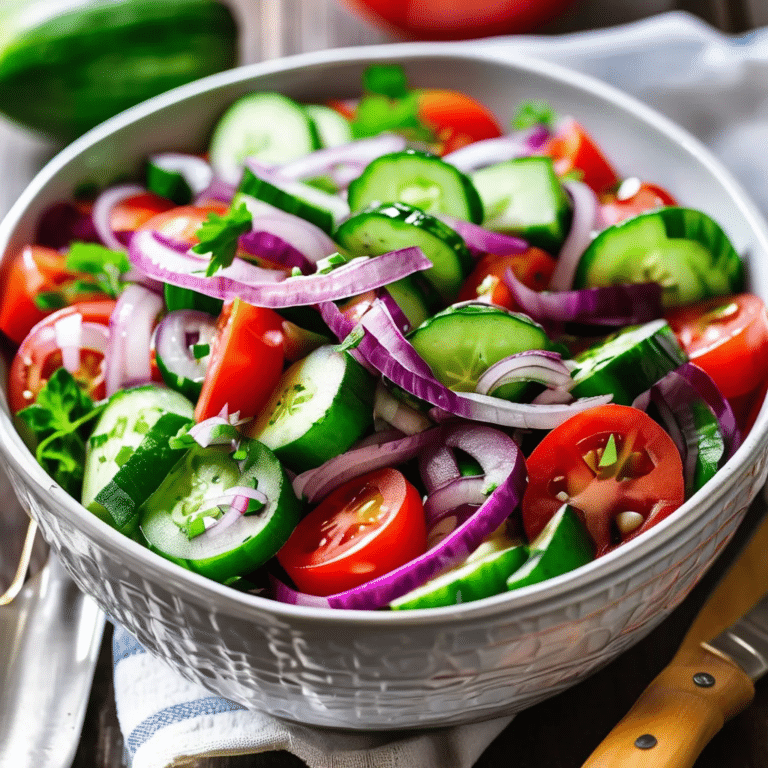
Cucumber, Tomato, and Red Onion Salad is a refreshing and vibrant dish that’s perfect for warm weather or as a light side to any meal. This simple salad combines crisp cucumbers, juicy tomatoes, and zesty red onions, all tossed in a tangy vinaigrette that enhances the natural flavors of the vegetables. It’s a versatile dish that pairs well with grilled meats, sandwiches, or can be enjoyed on its own for a quick, healthy snack. The bright colors and fresh taste make it a beautiful addition to any table, offering a burst of freshness with every bite.

Ingredients:

  • 2 large cucumbers, sliced
  • 4 ripe tomatoes, cut into wedges or diced
  • 1 small red onion, thinly sliced
  • 1/4 cup olive oil
  • 2 tablespoons red wine vinegar
  • 1 tablespoon lemon juice
  • 1 teaspoon dried oregano
  • Salt and pepper, to taste
  • Fresh basil or parsley, chopped (for garnish)

Instructions:

  1. Prepare the Vegetables: In a large bowl, combine the sliced cucumbers, tomatoes, and red onion.
  2. Make the Vinaigrette: In a small bowl or jar, whisk together the olive oil, red wine vinegar, lemon juice, dried oregano, salt, and pepper until well combined.
  3. Toss the Salad: Pour the vinaigrette over the vegetables and toss gently to coat everything evenly.
  4. Chill and Serve: Let the salad sit for about 10 minutes to allow the flavors to meld. Garnish with fresh basil or parsley before serving.

This Cucumber, Tomato, and Red Onion Salad is a crisp, tangy, and refreshing dish that’s perfect for any occasion!

Egg Bhurji

0

Egg Bhurji is a popular Indian dish, known for its simplicity and flavorful punch. Often compared to scrambled eggs, Egg Bhurji stands out due to its aromatic spices and the addition of vegetables like onions, tomatoes, and green chilies. It’s quick to prepare and makes a perfect breakfast or a light meal when paired with bread, parathas, or even rice. The combination of turmeric, cumin, and garam masala adds a subtle depth, while the fresh cilantro at the end brightens the dish, making it a favorite in many Indian households.

Ingredients:

  • 4 large eggs
  • 1 medium onion, finely chopped
  • 1 medium tomato, finely chopped
  • 2 green chilies, finely chopped
  • 1 teaspoon cumin seeds
  • 1/2 teaspoon turmeric powder
  • 1/2 teaspoon red chili powder (optional)
  • 1/2 teaspoon garam masala
  • 2 tablespoons oil or ghee
  • Salt to taste
  • Fresh cilantro, chopped (for garnish)

Instructions:

  1. Prepare the eggs: Crack the eggs into a bowl, add a pinch of salt, and whisk until combined. Set aside.
  2. Cook the vegetables: Heat oil or ghee in a pan over medium heat. Once hot, add the cumin seeds and let them sizzle for a few seconds.
  3. Sauté the onions: Add the chopped onions and cook until they turn golden brown.
  4. Add tomatoes and spices: Stir in the chopped tomatoes, green chilies, turmeric, and red chili powder (if using). Cook until the tomatoes soften and the oil starts to separate.
  5. Add the eggs: Pour the whisked eggs into the pan and stir continuously, scrambling them gently. Cook the eggs until they reach your desired consistency.
  6. Finish with spices: Just before turning off the heat, sprinkle garam masala over the eggs and mix well.
  7. Garnish and serve: Top with fresh cilantro and serve hot with bread, paratha, or rice.

Enjoy your delicious and spicy Egg Bhurji!

Crockpot White Chicken Chili

0

Crockpot White Chicken Chili is a comforting and hearty dish that’s perfect for a cozy dinner, especially on chilly days. This version of chili is made with tender chicken, creamy white beans, and a blend of spices that give it a subtle kick without being too overpowering. The slow cooker does all the work, melding the flavors together into a rich and satisfying meal that’s easy to prepare and always a crowd-pleaser. Serve it with a sprinkle of cheese, a dollop of sour cream, and a squeeze of lime for a delicious, warming bowl of comfort.

Ingredients:

  • 1 lb boneless, skinless chicken breasts or thighs
  • 1 medium onion, chopped
  • 2 cloves garlic, minced
  • 2 cans (15 oz each) white beans (such as cannellini or Great Northern), drained and rinsed
  • 1 can (4 oz) diced green chilies
  • 1 teaspoon ground cumin
  • 1 teaspoon chili powder
  • 1/2 teaspoon ground coriander
  • 1/2 teaspoon smoked paprika
  • 1/4 teaspoon cayenne pepper (optional, for extra heat)
  • 4 cups chicken broth
  • 1 cup frozen corn
  • 1/2 cup cream cheese, softened
  • 1/2 cup sour cream
  • Salt and pepper, to taste
  • Juice of 1 lime
  • Fresh cilantro, chopped (for garnish)
  • Shredded cheese, avocado slices, and tortilla chips (for serving)

Instructions:

  1. Prepare the Ingredients: In the bottom of a slow cooker, place the chicken breasts or thighs. Add the chopped onion, minced garlic, white beans, diced green chilies, cumin, chili powder, coriander, smoked paprika, cayenne pepper (if using), and chicken broth.
  2. Cook the Chili: Cover the slow cooker and cook on low for 6-7 hours or on high for 3-4 hours, until the chicken is tender and easily shreds with a fork.
  3. Shred the Chicken: Remove the chicken from the slow cooker and shred it with two forks. Return the shredded chicken to the slow cooker.
  4. Add Creaminess: Stir in the cream cheese and sour cream until fully melted and incorporated into the chili. Add the frozen corn and stir to combine. Cook for an additional 15-20 minutes on low, until the chili is heated through and creamy. Season with salt and pepper to taste.
  5. Finish and Serve: Just before serving, stir in the lime juice for a fresh burst of flavor. Ladle the chili into bowls and garnish with fresh cilantro. Serve with shredded cheese, avocado slices, and tortilla chips on the side.

This Crockpot White Chicken Chili is a rich and flavorful dish that’s easy to make and sure to become a family favorite!

CREAMY PASTA

Creamy Pasta is a rich and comforting dish that’s perfect for any night of the week. This simple yet delicious recipe combines al dente pasta with a smooth, velvety cream sauce. It’s versatile and can be enjoyed on its own or customized with your favorite additions, such as chicken, shrimp, mushrooms, or spinach. Whether you’re craving something indulgent or need a quick dinner, this creamy pasta will hit the spot.

Ingredients:

  • 12 oz pasta (such as fettuccine, penne, or spaghetti)
  • 2 tablespoons unsalted butter
  • 2 garlic cloves, minced
  • 1 1/2 cups heavy cream (or half-and-half for a lighter option)
  • 1 cup grated Parmesan cheese
  • 1/4 teaspoon ground nutmeg (optional)
  • Salt and pepper, to taste
  • Fresh parsley or basil, chopped (for garnish)
  • Optional additions: grilled chicken, shrimp, sautéed mushrooms, spinach, or sun-dried tomatoes

Instructions:

  1. Cook the pasta: Bring a large pot of salted water to a boil. Add the pasta and cook according to the package instructions until al dente. Reserve 1/2 cup of pasta water before draining the pasta, then drain and set aside.
  2. Make the cream sauce: In a large skillet, melt the butter over medium heat. Add the minced garlic and sauté for 1-2 minutes until fragrant, but not browned.
  3. Add the cream: Slowly pour in the heavy cream, stirring constantly. Bring the mixture to a simmer and let it cook for 3-4 minutes until slightly thickened.
  4. Add Parmesan and seasonings: Stir in the grated Parmesan cheese, allowing it to melt into the sauce. Add the nutmeg (if using) and season with salt and pepper to taste. If the sauce is too thick, add a bit of the reserved pasta water to reach your desired consistency.
  5. Combine the pasta and sauce: Add the cooked pasta to the skillet with the sauce, tossing to coat the pasta evenly. If you’re adding any extras like chicken, shrimp, or vegetables, stir them in at this point.
  6. Serve: Remove from heat and garnish with fresh parsley or basil. Serve hot, with extra Parmesan on the side if desired.

This Creamy Pasta is a luxurious, comforting dish that’s easy to customize and perfect for a quick, delicious meal. Enjoy it on its own or with your favorite add-ins!

Coconut Milk Ice Cream

0

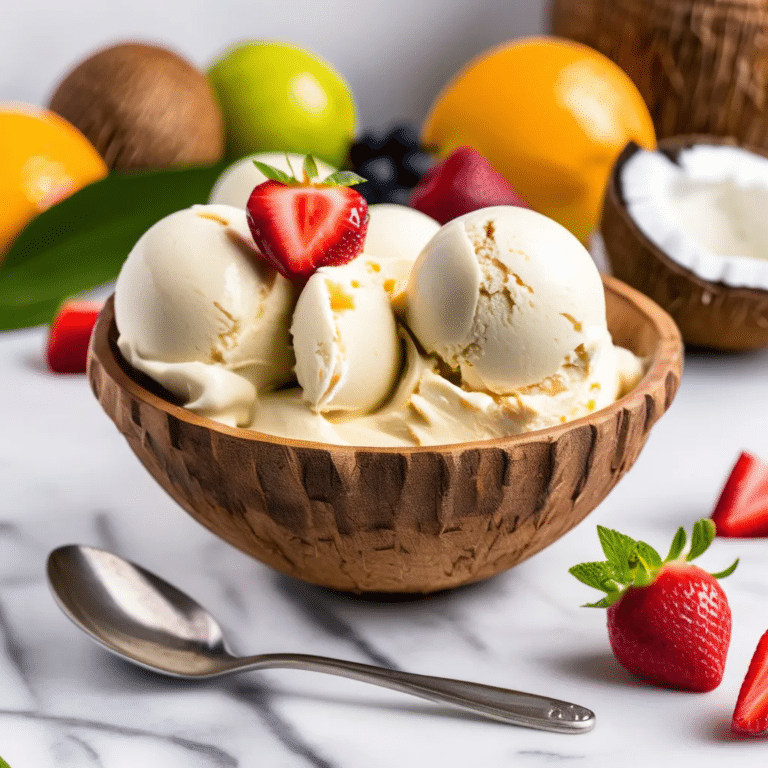
Coconut Milk Ice Cream is a creamy, dairy-free treat that’s perfect for those looking for a refreshing dessert with a tropical twist. Made with rich coconut milk, this ice cream has a luscious texture and a natural sweetness that pairs beautifully with a variety of flavors. Whether you enjoy it plain, infused with vanilla, or swirled with fruit or chocolate, Coconut Milk Ice Cream is a versatile and satisfying dessert. It’s easy to make at home and provides a wonderful alternative to traditional ice cream, offering a delightful taste of the tropics in every spoonful.

Ingredients:

  • 2 cans (13.5 oz each) full-fat coconut milk
  • 3/4 cup granulated sugar (or coconut sugar for a deeper flavor)
  • 1 tablespoon vanilla extract
  • Pinch of salt
  • Optional mix-ins: shredded coconut, chocolate chips, fruit puree, or nuts

Instructions:

  1. Prepare the Ice Cream Base: In a medium saucepan, combine the coconut milk, sugar, vanilla extract, and a pinch of salt. Heat the mixture over medium heat, stirring occasionally, until the sugar is fully dissolved and the mixture is smooth. Do not let it boil.
  2. Chill the Mixture: Remove the saucepan from the heat and let the mixture cool to room temperature. Once cooled, transfer it to the refrigerator and chill for at least 4 hours, or preferably overnight, until it is completely cold.
  3. Churn the Ice Cream: Pour the chilled coconut milk mixture into an ice cream maker and churn according to the manufacturer’s instructions, typically for 20-25 minutes, until the mixture reaches a soft-serve consistency. If you’re adding mix-ins, fold them in during the last few minutes of churning.
  4. Freeze Until Firm: Transfer the churned ice cream to a freezer-safe container. Cover and freeze for at least 4 hours, or until the ice cream is firm and scoopable.
  5. Serve: Scoop the coconut milk ice cream into bowls or cones, and enjoy it as is or with your favorite toppings.

This Coconut Milk Ice Cream is a deliciously creamy and refreshing dessert that will transport your taste buds to the tropics with every bite!