Home Blog Page 35

SLOW COOKER RIBS

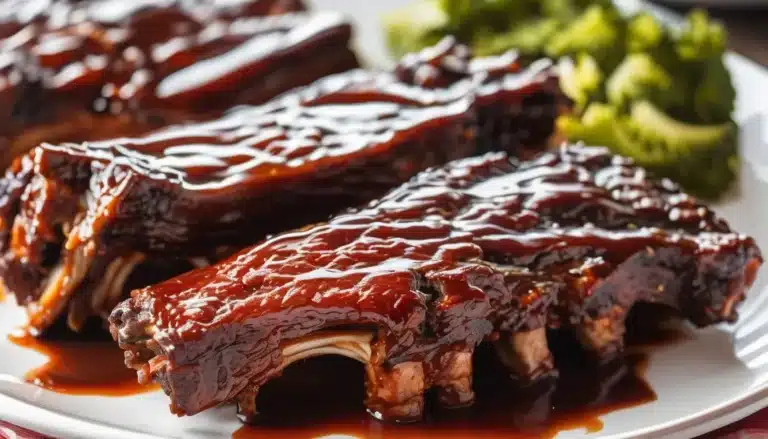
Slow Cooker Ribs are the perfect way to achieve tender, fall-off-the-bone ribs without the need for hours of grilling or smoking. The slow cooker allows the ribs to cook low and slow, infusing them with flavor and keeping them incredibly juicy. Finish them off with a broil or grill for that classic caramelized barbecue glaze.

Ingredients:

  • 2 racks baby back ribs or St. Louis-style ribs
  • 1/4 cup brown sugar
  • 1 tablespoon smoked paprika
  • 1 teaspoon garlic powder
  • 1 teaspoon onion powder
  • 1 teaspoon chili powder
  • 1 teaspoon salt
  • 1/2 teaspoon ground black pepper
  • 1/2 teaspoon cayenne pepper (optional, for heat)
  • 1 cup barbecue sauce (your favorite brand or homemade)

Instructions:

  1. Prepare the ribs: Pat the ribs dry with paper towels. Remove the thin membrane from the back of the ribs (this step makes the ribs more tender). If needed, cut the ribs into sections to fit in your slow cooker.
  2. Mix the dry rub: In a small bowl, combine the brown sugar, smoked paprika, garlic powder, onion powder, chili powder, salt, black pepper, and cayenne pepper (if using). Rub this spice mix generously all over the ribs, coating both sides.
  3. Place ribs in the slow cooker: Arrange the ribs in the slow cooker by stacking or standing them upright along the sides. You can roll them if needed.
  4. Cook the ribs: Cover the slow cooker and cook the ribs on low for 6-8 hours, or on high for 3-4 hours, until the ribs are tender and the meat easily pulls away from the bone.
  5. Finish with barbecue sauce: Once the ribs are cooked, carefully remove them from the slow cooker (they will be very tender). Preheat your oven’s broiler or a grill to medium-high. Brush the ribs generously with barbecue sauce on both sides. Place them under the broiler or on the grill for 5-7 minutes, or until the sauce is caramelized and sticky. Keep an eye on them to prevent burning.
  6. Serve: Let the ribs rest for a few minutes before slicing them between the bones. Serve with extra barbecue sauce on the side, along with your favorite sides like coleslaw, baked beans, or cornbread.

These Slow Cooker Ribs are perfect for a low-effort, big-flavor meal. The slow cooker does all the hard work, making this dish ideal for busy weeknights or weekend barbecues!


Red Velvet Cookies

0

These Red Velvet Cookies are a delightful twist on the classic cake, offering the same rich cocoa flavor and vibrant red color in cookie form. Soft and chewy with a slight crisp around the edges, they are perfect for any occasion—whether it’s Valentine’s Day, Christmas, or just because you’re craving something special. Each bite is filled with the iconic red velvet taste, complemented by a hint of vanilla and topped off with a luscious cream cheese frosting drizzle or white chocolate chips for extra indulgence.

Ingredients:

  • 1 ½ cups all-purpose flour
  • 2 tablespoons unsweetened cocoa powder
  • 1 teaspoon baking soda
  • ¼ teaspoon salt
  • ½ cup unsalted butter, softened
  • ¾ cup granulated sugar
  • ¼ cup brown sugar, packed
  • 1 large egg
  • 1 tablespoon milk
  • 1 teaspoon vanilla extract
  • 1 tablespoon red food coloring
  • 1 cup white chocolate chips or cream cheese frosting (optional)

Instructions:

  1. Preheat Oven: Preheat your oven to 350°F (175°C). Line a baking sheet with parchment paper or a silicone baking mat.
  2. Mix Dry Ingredients: In a medium bowl, whisk together the flour, cocoa powder, baking soda, and salt. Set aside.
  3. Cream Butter and Sugars: In a large bowl, using an electric mixer, beat the softened butter, granulated sugar, and brown sugar until light and fluffy, about 2-3 minutes.
  4. Add Wet Ingredients: Add the egg, milk, vanilla extract, and red food coloring to the butter mixture. Beat until well combined.
  5. Combine Mixtures: Gradually add the dry ingredients to the wet mixture, mixing until just combined. Do not overmix.
  6. Add Chocolate Chips (optional): If using white chocolate chips, gently fold them into the dough.
  7. Scoop Cookies: Using a cookie scoop or tablespoon, drop rounded balls of dough onto the prepared baking sheet, spacing them about 2 inches apart.
  8. Bake: Bake for 10-12 minutes, or until the edges are set but the centers still look soft. The cookies will firm up as they cool.
  9. Cool and Frost: Let the cookies cool on the baking sheet for 5 minutes before transferring them to a wire rack to cool completely. If desired, drizzle with cream cheese frosting for extra sweetness.

Enjoy these gorgeous and flavorful Red Velvet Cookies with a glass of milk or your favorite hot beverage!

IMPOSSIBLE PIE

Impossible Pie is a classic, old-fashioned dessert that magically forms its own crust as it bakes. The simple ingredients combine to create a custard-like filling, a buttery base, and a lightly golden top. It’s called “impossible” because it seems like the pie shouldn’t work, but it comes out perfectly every time! This quick and easy recipe is ideal for a fuss-free dessert.

Ingredients:

  • 1/2 cup all-purpose flour
  • 1 cup granulated sugar
  • 1/4 cup unsalted butter, melted
  • 4 large eggs
  • 2 cups whole milk
  • 1 cup shredded coconut (optional, for added texture)
  • 1 teaspoon vanilla extract
  • 1/4 teaspoon salt

Instructions:

  1. Preheat the oven: Preheat your oven to 350°F (175°C). Grease a 9-inch pie dish with butter or nonstick spray.
  2. Mix the ingredients: In a large bowl, whisk together the flour, sugar, melted butter, eggs, milk, coconut (if using), vanilla extract, and salt until smooth and well combined. You can use a hand mixer or whisk by hand.
  3. Pour into the pie dish: Pour the batter into the prepared pie dish. The batter will be thin, but it will set as it bakes.
  4. Bake the pie: Place the pie in the preheated oven and bake for 50-55 minutes, or until the top is golden and the center is set. You can test it by inserting a toothpick into the center; if it comes out clean, the pie is ready.
  5. Cool and serve: Let the pie cool to room temperature before slicing. The pie will form a custardy filling, a soft “crust” on the bottom, and a slightly golden top. Serve on its own, or with a dollop of whipped cream or a dusting of powdered sugar.

This Impossible Pie is a simple yet delicious dessert that requires minimal effort and delivers a rich, creamy, and satisfying treat. Perfect for any occasion!

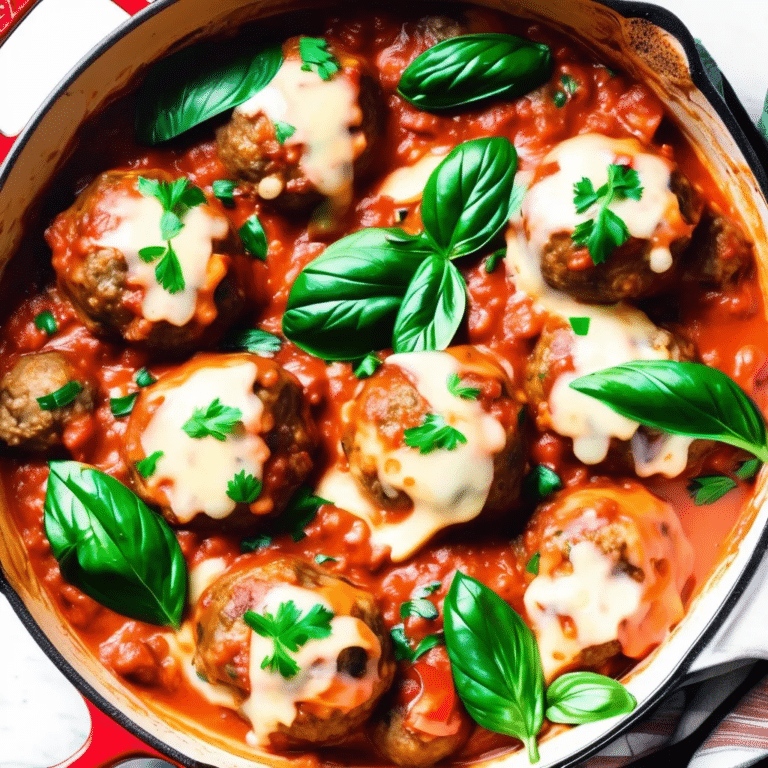
Cheesy Meatball Skillet

0

Cheesy Meatball Skillet is a comforting and hearty dish that brings together tender, juicy meatballs simmered in a rich marinara sauce, all topped with a generous layer of melted cheese. This one-pan wonder is perfect for busy weeknights or a cozy family dinner, offering a satisfying meal that’s easy to prepare and bursting with flavor. The combination of savory meatballs, tangy tomato sauce, and gooey cheese creates an irresistible dish that pairs beautifully with crusty bread, pasta, or a fresh salad. It’s the kind of meal that’s sure to become a family favorite.

Ingredients:

  • 1 lb ground beef (or a mix of beef and pork)
  • 1/4 cup breadcrumbs
  • 1/4 cup grated Parmesan cheese
  • 1 egg
  • 2 cloves garlic, minced
  • 1 teaspoon Italian seasoning
  • Salt and pepper, to taste
  • 2 tablespoons olive oil
  • 1 jar (24 oz) marinara sauce
  • 1 1/2 cups shredded mozzarella cheese
  • Fresh basil or parsley, chopped (for garnish)

Instructions:

  1. Prepare the Meatballs: In a large mixing bowl, combine the ground beef, breadcrumbs, Parmesan cheese, egg, minced garlic, Italian seasoning, salt, and pepper. Mix until just combined, being careful not to overwork the meat. Form the mixture into small meatballs, about 1 to 1.5 inches in diameter.
  2. Cook the Meatballs: Heat the olive oil in a large oven-safe skillet over medium heat. Add the meatballs in batches, cooking until browned on all sides, about 5-7 minutes. The meatballs do not need to be fully cooked at this stage as they will finish cooking in the sauce. Remove the meatballs from the skillet and set aside.
  3. Simmer in Marinara Sauce: In the same skillet, pour in the marinara sauce, scraping up any browned bits from the bottom of the pan. Return the meatballs to the skillet, nestling them into the sauce. Reduce the heat to low, cover, and let the meatballs simmer in the sauce for 10-15 minutes, until fully cooked through.
  4. Add the Cheese: Preheat your oven to broil. Sprinkle the shredded mozzarella cheese evenly over the meatballs and sauce. Transfer the skillet to the oven and broil for 2-3 minutes, or until the cheese is melted and bubbly with a golden brown top.
  5. Serve: Remove the skillet from the oven and let it cool slightly. Garnish with fresh basil or parsley before serving.

Enjoy this Cheesy Meatball Skillet as a comforting, cheesy, and delicious dish that’s sure to please everyone at the table!

STRAWBERRY YOGURT MUFFINS

Strawberry Yogurt Muffins are soft, moist, and bursting with fresh strawberries. The addition of yogurt gives these muffins a light and fluffy texture while adding a subtle tang that pairs beautifully with the sweetness of the strawberries. These muffins make for a perfect breakfast, snack, or even dessert.

Ingredients:

  • 1 1/2 cups all-purpose flour
  • 1/2 teaspoon baking soda
  • 1 teaspoon baking powder
  • 1/4 teaspoon salt
  • 1/2 cup granulated sugar
  • 1/4 cup brown sugar, packed
  • 1/2 cup plain or vanilla Greek yogurt
  • 1/4 cup milk
  • 1/4 cup vegetable oil or melted butter
  • 1 large egg
  • 1 teaspoon vanilla extract
  • 1 cup fresh strawberries, diced
  • Optional: 1 tablespoon sugar for sprinkling on top

Instructions:

  1. Preheat the oven: Preheat your oven to 375°F (190°C). Line a 12-cup muffin tin with paper liners or lightly grease the cups.
  2. Mix the dry ingredients: In a medium bowl, whisk together the flour, baking soda, baking powder, and salt. Set aside.
  3. Combine the wet ingredients: In a large bowl, whisk together the granulated sugar, brown sugar, Greek yogurt, milk, vegetable oil (or melted butter), egg, and vanilla extract until smooth and well combined.
  4. Add the dry ingredients: Gradually stir the dry ingredients into the wet ingredients, mixing until just combined. Be careful not to overmix.
  5. Fold in the strawberries: Gently fold in the diced strawberries, distributing them evenly throughout the batter.
  6. Fill the muffin tin: Divide the batter evenly among the prepared muffin cups, filling each about 3/4 full. If desired, sprinkle a little extra sugar on top of each muffin for a crunchy, sweet topping.
  7. Bake the muffins: Bake in the preheated oven for 18-22 minutes, or until a toothpick inserted into the center of a muffin comes out clean. The tops should be golden and slightly firm to the touch.
  8. Cool and serve: Allow the muffins to cool in the tin for 5 minutes before transferring them to a wire rack to cool completely.

These Strawberry Yogurt Muffins are soft, fruity, and perfect for any time of day. They’re an easy and delicious way to use up fresh strawberries and enjoy a sweet treat!

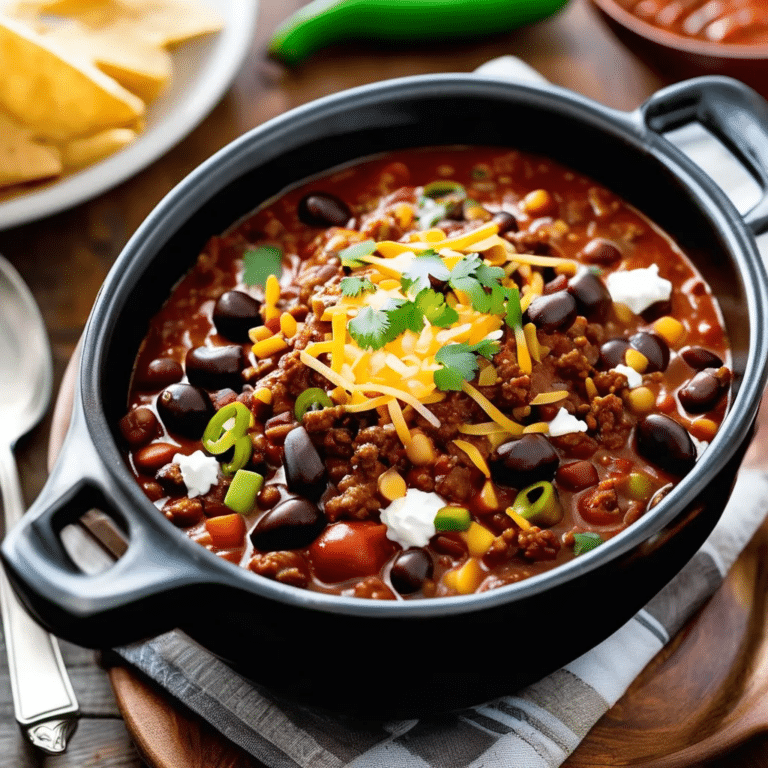
Super Bowl Chili

0

Super Bowl Chili is the ultimate game day dish, packed with hearty flavors that are sure to satisfy a hungry crowd. This robust and flavorful chili is made with a mix of ground beef, beans, and a medley of spices that create a rich, savory base. Slow-cooked to perfection, the chili develops deep, complex flavors with just the right amount of heat. Whether served with cornbread, over nachos, or simply by the bowlful with your favorite toppings, this chili is the perfect centerpiece for any Super Bowl gathering, keeping everyone fueled and ready for the game.

Ingredients:

  • 2 lbs ground beef
  • 1 large onion, chopped
  • 4 cloves garlic, minced
  • 1 green bell pepper, chopped
  • 1 red bell pepper, chopped
  • 1 can (15 oz) kidney beans, drained and rinsed
  • 1 can (15 oz) black beans, drained and rinsed
  • 1 can (15 oz) pinto beans, drained and rinsed
  • 2 cans (14.5 oz each) diced tomatoes
  • 1 can (6 oz) tomato paste
  • 1 cup beef broth
  • 2 tablespoons chili powder
  • 1 tablespoon ground cumin
  • 1 tablespoon smoked paprika
  • 1 teaspoon ground oregano
  • 1 teaspoon cayenne pepper (adjust to taste)
  • Salt and pepper, to taste
  • 1 tablespoon olive oil
  • Optional toppings: shredded cheese, sour cream, sliced jalapeños, chopped green onions, fresh cilantro

Instructions:

  1. Brown the Beef: In a large pot or Dutch oven, heat the olive oil over medium heat. Add the ground beef and cook until browned, breaking it up with a spoon as it cooks. Drain any excess fat if necessary.
  2. Sauté the Vegetables: Add the chopped onion, garlic, green bell pepper, and red bell pepper to the pot. Sauté until the vegetables are softened, about 5-7 minutes.
  3. Add the Beans and Tomatoes: Stir in the kidney beans, black beans, pinto beans, diced tomatoes, and tomato paste. Mix well to combine.
  4. Season the Chili: Add the beef broth, chili powder, cumin, smoked paprika, oregano, cayenne pepper, salt, and pepper. Stir everything together and bring the mixture to a simmer.
  5. Slow Cook: Reduce the heat to low, cover the pot, and let the chili simmer for at least 1 hour, stirring occasionally. The longer it simmers, the deeper the flavors will develop. If the chili becomes too thick, add a bit more beef broth or water to reach your desired consistency.
  6. Serve: Taste and adjust seasoning if necessary. Serve the chili hot with your choice of toppings like shredded cheese, sour cream, sliced jalapeños, chopped green onions, or fresh cilantro.

This Super Bowl Chili is a crowd-pleaser, full of bold flavors and hearty ingredients that are perfect for celebrating game day with friends and family!

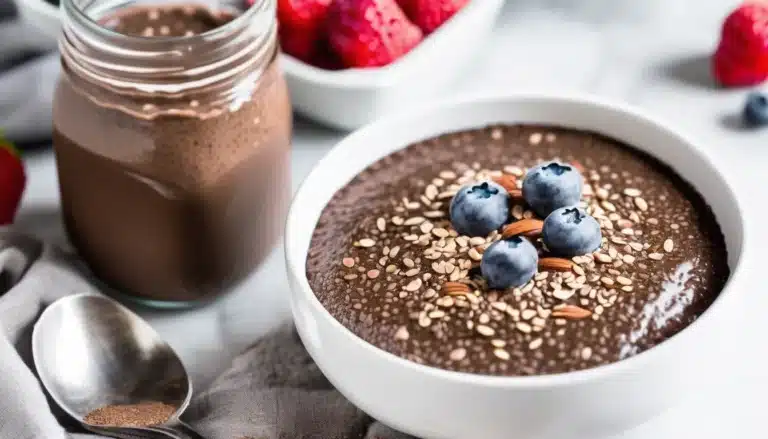
Chocolate Chia Seed Pudding

0

Chocolate Chia Seed Pudding is a simple, healthy, and delicious dessert or snack that’s perfect for satisfying your chocolate cravings while still being packed with nutrients. The chia seeds absorb the liquid to create a thick, creamy pudding texture, while also providing fiber, omega-3 fatty acids, and protein. This pudding is versatile, allowing you to adjust the sweetness and flavorings to suit your taste. It’s an ideal make-ahead treat that you can customize with toppings like fresh berries, nuts, or coconut flakes for added texture and flavor.

Ingredients:

  • 1/4 cup chia seeds
  • 1 cup unsweetened almond milk (or milk of choice)
  • 2 tablespoons unsweetened cocoa powder
  • 2 tablespoons maple syrup (or sweetener of choice)
  • 1/2 teaspoon vanilla extract
  • Pinch of sea salt

Instructions:

  1. In a medium-sized bowl, whisk together the almond milk, cocoa powder, maple syrup, vanilla extract, and sea salt until smooth and fully combined.
  2. Add the chia seeds to the mixture, stirring well to ensure they are evenly distributed.
  3. Cover the bowl and refrigerate for at least 2 hours, or overnight. Stir the mixture again after the first 30 minutes to prevent clumping.
  4. Once the pudding has thickened, give it a good stir to ensure a smooth texture.
  5. Serve the chocolate chia seed pudding with your favorite toppings, such as fresh berries, shredded coconut, or chopped nuts.

Enjoy a creamy, chocolatey treat that’s both indulgent and nutritious!

CRANBERRY TEA

Cranberry Tea is a warm and comforting drink that’s perfect for cold days, holiday gatherings, or simply when you want something refreshing yet soothing. Made with tart cranberries, citrus, and spices, this tea is both flavorful and aromatic. It’s easy to make and can be served hot or iced.

Ingredients:

  • 4 cups water
  • 2 cups fresh or frozen cranberries
  • 1/4 cup honey or sugar (adjust to taste)
  • 1 cinnamon stick
  • 4 whole cloves
  • 1 orange, sliced
  • 2 black tea bags (optional, for extra flavor)
  • 1 tablespoon lemon juice
  • Fresh mint (optional, for garnish)

Instructions:

  1. Cook the cranberries: In a medium saucepan, bring the water and cranberries to a boil over medium-high heat. Reduce the heat to low and let the cranberries simmer for about 10 minutes until they start to burst.
  2. Add the spices and citrus: Add the cinnamon stick, whole cloves, orange slices, and honey (or sugar) to the cranberry mixture. Let the tea simmer for another 5-7 minutes, stirring occasionally.
  3. Add the tea (optional): If you want a stronger tea flavor, add the black tea bags to the saucepan and let them steep for 3-5 minutes. Remove the tea bags once the desired strength is reached.
  4. Strain and add lemon juice: Strain the cranberry tea through a fine mesh sieve to remove the solids. Stir in the lemon juice.
  5. Serve: Serve the cranberry tea hot with a slice of orange or fresh mint for garnish, or chill it and serve over ice for a refreshing cold beverage.

This Cranberry Tea is a delightful mix of tart and sweet with warming spices, perfect for sipping during the holidays or cozy evenings.

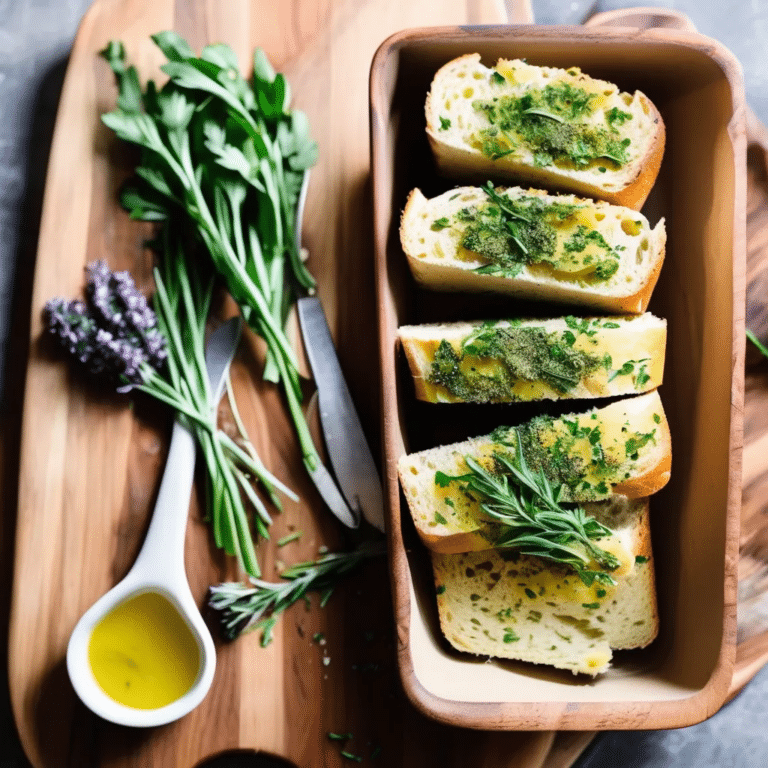
Herbed Garlic Bread

0

Herbed Garlic Bread is a flavorful and aromatic twist on the classic garlic bread, perfect as a side dish for pasta, soups, or grilled meats. This version takes the simple pleasure of garlic bread and elevates it with a blend of fresh herbs like parsley, thyme, and rosemary, combined with rich, melted butter and minced garlic. The result is a loaf that’s crispy on the outside, soft and buttery on the inside, with a burst of herbal freshness in every bite. Easy to make and always a crowd-pleaser, Herbed Garlic Bread adds a touch of elegance to any meal.

Ingredients:

  • 1 loaf of crusty French or Italian bread
  • 1/2 cup unsalted butter, softened
  • 4 cloves garlic, minced
  • 2 tablespoons fresh parsley, finely chopped
  • 1 tablespoon fresh thyme, finely chopped
  • 1 tablespoon fresh rosemary, finely chopped
  • 1/4 teaspoon salt
  • 1/4 teaspoon freshly ground black pepper
  • 1/4 cup grated Parmesan cheese (optional)

Instructions:

  1. Preheat the Oven: Preheat your oven to 375°F (190°C). Line a baking sheet with aluminum foil for easy cleanup.
  2. Prepare the Garlic Herb Butter: In a medium bowl, combine the softened butter, minced garlic, chopped parsley, thyme, and rosemary. Add the salt and pepper, and mix until well combined.
  3. Slice the Bread: Slice the loaf of bread in half lengthwise. Spread the garlic herb butter evenly over both halves of the bread. If you like, sprinkle grated Parmesan cheese over the top for an extra layer of flavor.
  4. Bake the Bread: Place the buttered bread halves on the prepared baking sheet, cut side up. Bake in the preheated oven for 10-15 minutes, or until the bread is golden and crispy around the edges.
  5. Serve: Remove the bread from the oven and let it cool slightly. Slice the bread into individual pieces and serve warm.

This Herbed Garlic Bread is the perfect accompaniment to any meal, adding a burst of garlicky, herby goodness that everyone will love!

GLUTEN FREE CHICKEN POT PIE

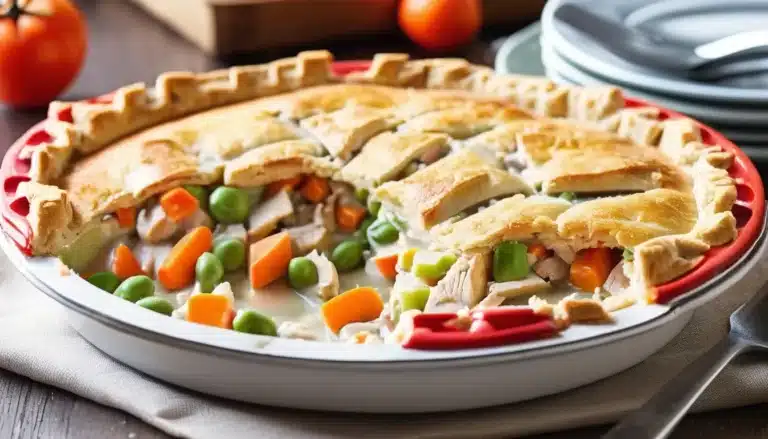
This Gluten-Free Chicken Pot Pie is a comforting and hearty dish filled with tender chicken, vegetables, and a creamy sauce, all topped with a flaky, gluten-free crust. Perfect for anyone avoiding gluten, this version has all the warmth and coziness of the classic dish, with a few simple adjustments to keep it gluten-free.

Ingredients:

For the filling:

  • 2 tablespoons olive oil or butter
  • 1 lb boneless, skinless chicken breasts or thighs, diced
  • 1 small onion, diced
  • 2 garlic cloves, minced
  • 2 medium carrots, diced
  • 2 celery stalks, diced
  • 1 cup frozen peas
  • 1/3 cup gluten-free all-purpose flour (or cornstarch)
  • 2 cups chicken broth (gluten-free)
  • 1 cup milk or cream
  • 1 teaspoon dried thyme
  • Salt and pepper, to taste

For the gluten-free crust:

  • 1 1/2 cups gluten-free all-purpose flour
  • 1/2 teaspoon xanthan gum (if your flour blend doesn’t contain it)
  • 1 teaspoon baking powder
  • 1/2 teaspoon salt
  • 1/2 cup cold unsalted butter, cut into cubes
  • 1 egg, lightly beaten
  • 3-4 tablespoons cold water

Instructions:

  1. Prepare the filling:
    • In a large skillet, heat olive oil over medium heat. Add the diced chicken and cook for 5-7 minutes, or until the chicken is browned and cooked through. Remove the chicken from the skillet and set aside.
    • In the same skillet, add the diced onion, garlic, carrots, and celery. Sauté for about 5 minutes, until the vegetables are softened. Stir in the gluten-free flour or cornstarch and cook for 1-2 minutes to eliminate the raw flour taste.
    • Slowly pour in the chicken broth and milk, stirring constantly until the sauce thickens, about 5-7 minutes. Add the cooked chicken, frozen peas, thyme, salt, and pepper. Let the filling simmer for another 5 minutes, then remove from heat.
  2. Preheat the oven: Preheat your oven to 400°F (200°C).
  3. Make the gluten-free crust:
    • In a large bowl, whisk together the gluten-free flour, xanthan gum (if using), baking powder, and salt. Cut in the cold butter using a pastry cutter or your hands until the mixture resembles coarse crumbs.
    • Stir in the beaten egg and add cold water, one tablespoon at a time, until the dough comes together. Knead the dough gently until smooth, then wrap it in plastic wrap and chill for 15-20 minutes.
  4. Assemble the pot pie:
    • Pour the chicken and vegetable filling into a 9-inch pie dish or casserole dish. Roll out the gluten-free dough on a lightly floured surface to fit over the top of the dish.
    • Place the dough over the filling, trimming any excess and crimping the edges. Cut a few small slits in the top of the crust to allow steam to escape.
  5. Bake the pot pie:
    • Bake in the preheated oven for 25-30 minutes, or until the crust is golden brown and the filling is bubbling. If the crust is browning too quickly, cover the edges with foil.
  6. Serve: Let the pot pie cool for about 10 minutes before serving. Enjoy warm with a side salad or on its own.

This Gluten-Free Chicken Pot Pie is a comforting, savory meal that’s perfect for gluten-free eaters, offering all the delicious flavors of the classic dish with a flaky, gluten-free crust!