Home Blog Page 37

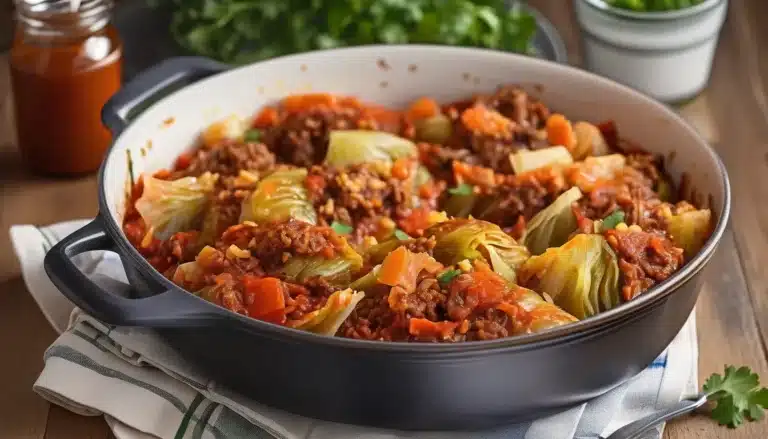
UNSTUFFED CABBAGE

Unstuffed Cabbage is a simplified version of traditional stuffed cabbage rolls, delivering the same delicious flavors without the extra work. This hearty, one-pot dish combines ground beef, cabbage, and rice, simmered in a savory tomato sauce. It’s perfect for a cozy weeknight meal and offers all the comfort of cabbage rolls in a fraction of the time.

Ingredients:

  • 1 lb ground beef (or ground turkey or pork)
  • 1 medium onion, chopped
  • 3 garlic cloves, minced
  • 1 medium head of green cabbage, chopped
  • 1 (14.5 oz) can diced tomatoes
  • 1 (15 oz) can tomato sauce
  • 1/2 cup beef broth (or water)
  • 1 tablespoon tomato paste
  • 1 tablespoon Worcestershire sauce
  • 1/2 teaspoon paprika
  • 1/2 teaspoon dried thyme
  • Salt and pepper, to taste
  • 1/2 cup uncooked white rice (or use pre-cooked rice for faster prep)
  • 1 tablespoon olive oil (for sautéing)
  • Fresh parsley, chopped (for garnish)

Instructions:

  1. Cook the beef: In a large pot or Dutch oven, heat the olive oil over medium heat. Add the ground beef and cook, breaking it up with a spoon, until browned and cooked through. Drain any excess fat if necessary.
  2. Add onions and garlic: Add the chopped onions to the beef and sauté for 4-5 minutes, until softened. Stir in the minced garlic and cook for another minute until fragrant.
  3. Add the cabbage: Stir in the chopped cabbage and cook for 5-7 minutes, until it begins to soften.
  4. Add the tomato mixture: Add the diced tomatoes, tomato sauce, beef broth, tomato paste, Worcestershire sauce, paprika, thyme, salt, and pepper. Stir to combine and bring the mixture to a simmer.
  5. Add the rice: Stir in the uncooked rice. Reduce the heat to low, cover the pot, and let the mixture simmer for 20-25 minutes, stirring occasionally, until the cabbage and rice are tender.

    (If using pre-cooked rice, add it during the last 5 minutes of simmering.)

  6. Serve: Once the rice is cooked and the flavors have melded, remove the pot from heat. Garnish with fresh parsley and serve warm.

This Unstuffed Cabbage is a quick and comforting meal, offering all the flavors of stuffed cabbage rolls with much less effort. Perfect for a busy weeknight or a cozy family dinner!


CHOCOLATE TURTLE CHEESECAKE

0

Chocolate Turtle Cheesecake is a decadent dessert that combines the rich flavors of chocolate, caramel, and pecans. This creamy cheesecake is topped with gooey caramel sauce, crunchy pecans, and a drizzle of chocolate, creating the perfect indulgent treat for special occasions or when you’re craving something truly spectacular.

Ingredients:

For the crust:

  • 1 1/2 cups chocolate graham cracker crumbs (or Oreo crumbs)
  • 1/4 cup unsalted butter, melted

For the cheesecake:

  • 24 oz cream cheese, softened
  • 1 cup granulated sugar
  • 1/4 cup brown sugar
  • 3 large eggs
  • 1/2 cup sour cream
  • 1/2 cup heavy cream
  • 1/4 cup cocoa powder
  • 1 cup semi-sweet chocolate chips, melted and slightly cooled
  • 1 teaspoon vanilla extract

For the turtle topping:

  • 1/2 cup caramel sauce (store-bought or homemade)
  • 1 cup pecans, toasted and chopped
  • 1/2 cup semi-sweet chocolate chips, melted

Instructions:

  1. Preheat the oven: Preheat your oven to 325°F (163°C). Grease a 9-inch springform pan and wrap the outside of the pan with aluminum foil to prevent leaks.
  2. Prepare the crust: In a medium bowl, combine the chocolate graham cracker crumbs and melted butter. Press the mixture evenly into the bottom of the prepared springform pan. Bake for 10 minutes, then remove from the oven and set aside to cool.
  3. Make the cheesecake filling: In a large bowl, beat the softened cream cheese and both sugars together until smooth and creamy, about 2-3 minutes. Add the eggs one at a time, beating well after each addition. Mix in the sour cream, heavy cream, cocoa powder, melted chocolate, and vanilla extract until fully combined and smooth.
  4. Bake the cheesecake: Pour the cheesecake batter over the cooled crust. Place the springform pan in a large roasting pan and pour hot water into the roasting pan, filling it halfway up the sides of the springform pan to create a water bath. This helps prevent cracks in the cheesecake. Bake for 60-70 minutes, or until the center is set but still slightly jiggly.
  5. Cool the cheesecake: Turn off the oven and crack the door open slightly, allowing the cheesecake to cool gradually in the oven for about 1 hour. Remove the cheesecake from the water bath, place it on a cooling rack, and allow it to cool to room temperature. Once cooled, refrigerate the cheesecake for at least 4 hours or overnight.
  6. Add the turtle topping: Once the cheesecake is chilled, pour the caramel sauce over the top, spreading it evenly. Sprinkle the toasted, chopped pecans over the caramel. Drizzle the melted chocolate over the top to complete the turtle topping.
  7. Serve: Slice the cheesecake and serve chilled. Store any leftovers in the refrigerator.

This Chocolate Turtle Cheesecake is rich, creamy, and loaded with caramel, chocolate, and pecans, making it the perfect dessert for any special occasion or indulgent treat!

BACON CANDY

0

Bacon Candy, also known as candied bacon, is a sweet and savory treat that combines crispy bacon with caramelized brown sugar and a hint of spice. It’s an irresistible snack or appetizer that’s perfect for parties, brunch, or even as a garnish for cocktails like a Bloody Mary. The combination of smoky, salty bacon with a sweet coating makes this a crowd-pleaser.

Ingredients:

  • 12 slices thick-cut bacon
  • 1/2 cup brown sugar, packed
  • 1 tablespoon maple syrup (optional, for extra flavor)
  • 1/4 teaspoon cayenne pepper (optional, for a hint of spice)
  • 1/2 teaspoon black pepper

Instructions:

  1. Preheat the oven: Preheat your oven to 375°F (190°C). Line a baking sheet with aluminum foil and place a wire rack on top. This setup helps the bacon cook evenly and allows the excess fat to drip away.
  2. Prepare the bacon: Lay the bacon slices out in a single layer on the wire rack.
  3. Mix the coating: In a small bowl, combine the brown sugar, maple syrup (if using), cayenne pepper, and black pepper. Stir until well mixed.
  4. Coat the bacon: Sprinkle the brown sugar mixture evenly over each bacon slice, pressing gently so it adheres. Make sure both sides of the bacon are coated if you want extra caramelization.
  5. Bake the bacon: Place the baking sheet in the preheated oven and bake for 20-25 minutes, or until the bacon is crispy and the sugar has caramelized. Keep an eye on it to ensure the sugar doesn’t burn.
  6. Cool and serve: Remove the bacon from the oven and let it cool on the wire rack for a few minutes. The bacon will crisp up as it cools. Once cooled, serve the candied bacon as a snack, appetizer, or garnish.

Bacon Candy is a deliciously addictive treat that balances sweet, salty, and spicy flavors. It’s perfect for any occasion, from brunches to cocktail hours, and it’s sure to disappear quickly!

Baked Mostaccioli

0

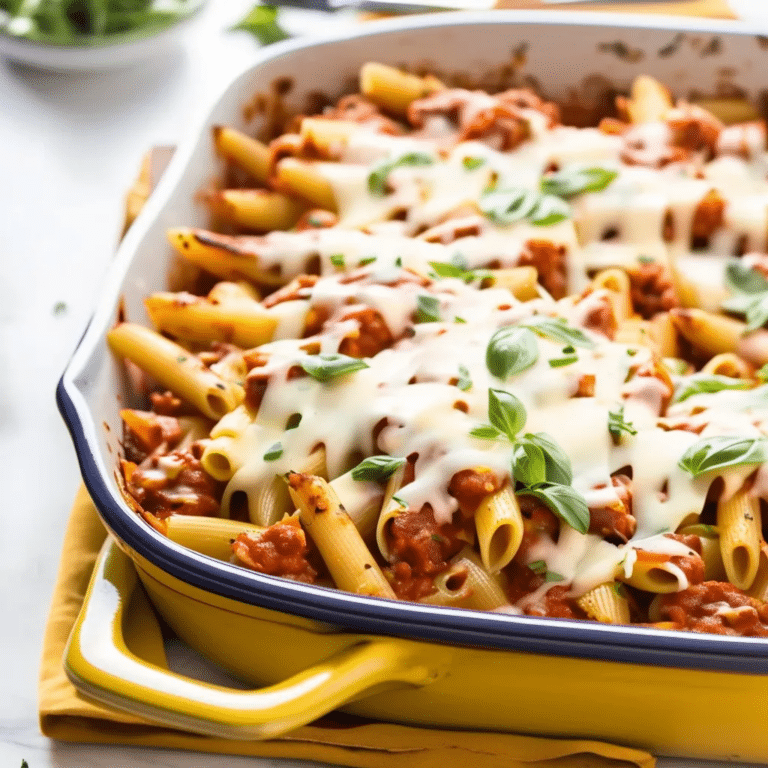
Baked Mostaccioli is a comforting and satisfying pasta dish that’s perfect for family dinners or potluck gatherings. This Italian-American classic features tender mostaccioli pasta tossed in a hearty tomato sauce with layers of melted cheese, making every bite a delicious blend of flavors and textures. The dish is baked to perfection, with the top layer of cheese bubbling and golden brown, while the pasta absorbs the rich flavors of the sauce. Easy to prepare and always a crowd-pleaser, Baked Mostaccioli is a go-to dish when you want something warm, cheesy, and irresistibly delicious.

Ingredients:

  • 1 lb mostaccioli pasta
  • 1 lb Italian sausage or ground beef
  • 1 small onion, finely chopped
  • 3 cloves garlic, minced
  • 1 jar (24 oz) marinara sauce
  • 1 can (14.5 oz) diced tomatoes, undrained
  • 1 teaspoon dried oregano
  • 1 teaspoon dried basil
  • 1/2 teaspoon red pepper flakes (optional)
  • Salt and pepper, to taste
  • 2 cups shredded mozzarella cheese
  • 1/2 cup grated Parmesan cheese
  • Fresh parsley, chopped (for garnish)

Instructions:

  1. Cook the Pasta: Preheat your oven to 375°F (190°C). Bring a large pot of salted water to a boil. Add the mostaccioli pasta and cook according to the package instructions until al dente. Drain the pasta and set aside.
  2. Prepare the Sauce: While the pasta is cooking, heat a large skillet over medium heat. Add the Italian sausage or ground beef and cook, breaking it up with a spoon, until browned and cooked through. Drain excess fat if necessary. Add the chopped onion and garlic to the skillet and sauté until the onion is soft and translucent, about 5 minutes.
  3. Combine the Sauce: Stir in the marinara sauce, diced tomatoes, oregano, basil, red pepper flakes (if using), salt, and pepper. Bring the sauce to a simmer and let it cook for 10-15 minutes, allowing the flavors to meld.
  4. Assemble the Mostaccioli: In a large mixing bowl, combine the cooked pasta with the sauce, making sure the pasta is well coated. Transfer half of the pasta mixture to a 9×13-inch baking dish. Sprinkle half of the shredded mozzarella cheese over the pasta. Add the remaining pasta mixture on top, followed by the rest of the mozzarella cheese and the grated Parmesan cheese.
  5. Bake: Cover the baking dish with aluminum foil and bake in the preheated oven for 20 minutes. Remove the foil and bake for an additional 10-15 minutes, or until the cheese is melted and bubbly, and the top is golden brown.
  6. Serve: Let the baked mostaccioli cool for a few minutes before serving. Garnish with chopped fresh parsley, and serve hot.

Baked Mostaccioli is a comforting, cheesy delight that’s perfect for feeding a crowd or enjoying as leftovers the next day!

IRISH NACHOS

0

Irish Nachos are a delicious twist on traditional nachos, using crispy potato slices instead of tortilla chips as the base. Topped with melted cheese, bacon, green onions, and sour cream, this pub-style appetizer is perfect for game day, parties, or any gathering. The potatoes offer a hearty and crispy foundation that pairs wonderfully with all the toppings.

Ingredients:

  • 4-5 medium russet potatoes, sliced thinly (about 1/4 inch thick)
  • 2 tablespoons olive oil
  • 1 teaspoon garlic powder
  • 1 teaspoon smoked paprika
  • Salt and pepper, to taste
  • 1 1/2 cups shredded cheddar cheese (or a mix of cheddar and Monterey Jack)
  • 1/2 cup cooked bacon, crumbled
  • 1/4 cup green onions, sliced
  • 1/4 cup sour cream
  • Fresh parsley or chives (optional, for garnish)
  • Jalapeños or diced tomatoes (optional, for extra toppings)

Instructions:

  1. Preheat the oven: Preheat your oven to 425°F (220°C). Line a baking sheet with parchment paper or lightly grease it.
  2. Prepare the potatoes: In a large bowl, toss the sliced potatoes with olive oil, garlic powder, smoked paprika, salt, and pepper. Make sure the potato slices are evenly coated with the oil and seasonings.
  3. Bake the potatoes: Arrange the potato slices in a single layer on the prepared baking sheet. Bake for 20-25 minutes, flipping halfway through, until the potatoes are golden brown and crispy on the edges.
  4. Add the toppings: Remove the potatoes from the oven and transfer them to an oven-safe dish or keep them on the same baking sheet. Sprinkle the shredded cheese evenly over the potatoes, followed by the crumbled bacon.
  5. Melt the cheese: Return the potatoes to the oven and bake for an additional 5-7 minutes, or until the cheese is melted and bubbly.
  6. Finish with toppings: Remove from the oven and sprinkle the sliced green onions on top. Drizzle with sour cream and add any additional toppings like jalapeños, diced tomatoes, or fresh parsley.
  7. Serve: Serve the Irish Nachos hot with extra sour cream or your favorite dipping sauces on the side.

These Irish Nachos are a fun, crispy, and indulgent dish perfect for sharing. Whether you’re watching a game or just craving a tasty appetizer, these potato nachos will be a hit!

Maple Glazed Sweet Potatoes

0

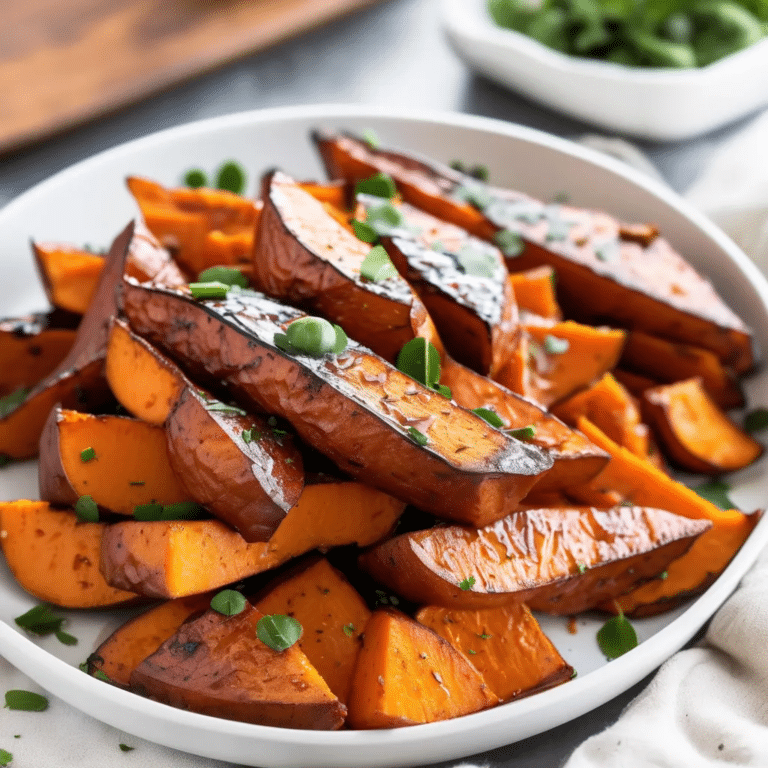
Maple Glazed Sweet Potatoes are a simple yet luxurious side dish that perfectly captures the cozy flavors of fall. Roasted until tender, these sweet potatoes are then coated in a rich, buttery maple glaze that brings out their natural sweetness while adding a delightful caramelized finish. With just the right balance of sweet and savory, this dish pairs beautifully with roasted meats, holiday feasts, or can even stand alone as a satisfying vegetarian option. The golden, sticky glaze and the creamy texture of the sweet potatoes make each bite a warm, comforting experience.

Ingredients:

  • 4 medium sweet potatoes, peeled and cut into 1-inch cubes
  • 2 tablespoons olive oil
  • Salt and pepper, to taste
  • 1/4 cup unsalted butter
  • 1/3 cup pure maple syrup
  • 2 tablespoons brown sugar
  • 1 teaspoon ground cinnamon
  • 1/4 teaspoon ground nutmeg
  • 1 teaspoon vanilla extract
  • Fresh thyme or rosemary (optional, for garnish)

Instructions:

  1. Roast the Sweet Potatoes: Preheat your oven to 400°F (200°C). Place the cubed sweet potatoes on a large baking sheet. Drizzle with olive oil and season with salt and pepper. Toss to coat evenly. Spread the sweet potatoes in a single layer and roast for 25-30 minutes, or until they are tender and slightly caramelized, tossing halfway through.
  2. Prepare the Maple Glaze: While the sweet potatoes are roasting, melt the butter in a small saucepan over medium heat. Add the maple syrup, brown sugar, cinnamon, and nutmeg. Stir to combine and bring to a simmer. Let the mixture cook for 2-3 minutes, stirring occasionally, until it thickens slightly. Remove from heat and stir in the vanilla extract.
  3. Glaze the Sweet Potatoes: Once the sweet potatoes are done roasting, transfer them to a large bowl. Pour the warm maple glaze over the sweet potatoes and gently toss to coat them evenly.
  4. Serve: Transfer the glazed sweet potatoes to a serving dish. Garnish with fresh thyme or rosemary if desired, and serve warm.

These Maple Glazed Sweet Potatoes are sure to be a hit with their sweet, buttery glaze that makes this dish a standout on any table!

ITALIAN CHICKEN BAKE

Italian Chicken Bake is a simple, flavorful dish that combines tender chicken breasts with tomatoes, mozzarella, and herbs for an easy yet satisfying meal. This one-pan dinner is perfect for busy weeknights, as it requires minimal prep and can be served with pasta, rice, or crusty bread to soak up all the delicious juices. With the classic flavors of Italy—basil, garlic, and tomatoes—this dish will quickly become a family favorite.

Ingredients:

  • 4 boneless, skinless chicken breasts
  • 1 tablespoon olive oil
  • 1 teaspoon garlic powder
  • 1 teaspoon dried Italian seasoning
  • Salt and pepper, to taste
  • 1 (14.5 oz) can diced tomatoes (or 2 cups cherry tomatoes, halved)
  • 1 cup shredded mozzarella cheese
  • 1/4 cup grated Parmesan cheese
  • 1/4 cup fresh basil, chopped (or 1 teaspoon dried basil)
  • 1 tablespoon balsamic vinegar (optional, for extra flavor)
  • Fresh basil leaves, for garnish (optional)

Instructions:

  1. Preheat the oven: Preheat your oven to 375°F (190°C). Lightly grease a 9×13-inch baking dish or oven-safe skillet with olive oil.
  2. Season the chicken: Place the chicken breasts in the prepared baking dish. Drizzle with olive oil and season both sides with garlic powder, Italian seasoning, salt, and pepper.
  3. Add the tomatoes: Pour the diced tomatoes (or halved cherry tomatoes) over the chicken, spreading them evenly around the chicken breasts. If using balsamic vinegar, drizzle it over the tomatoes for added flavor.
  4. Top with cheese: Sprinkle the mozzarella and Parmesan cheeses evenly over the chicken and tomatoes. Add the chopped basil over the top.
  5. Bake the chicken: Place the dish in the preheated oven and bake for 25-30 minutes, or until the chicken reaches an internal temperature of 165°F (74°C) and the cheese is melted and bubbly.
  6. Garnish and serve: Remove the Italian Chicken Bake from the oven and let it rest for a few minutes. Garnish with fresh basil leaves if desired, and serve with pasta, rice, or a side of crusty bread.

This Italian Chicken Bake is a comforting, cheesy, and flavorful dish that’s easy to make and perfect for any night of the week. Enjoy this hearty meal with a fresh green salad or your favorite side dishes!

Raspberry Coconut Bars

0

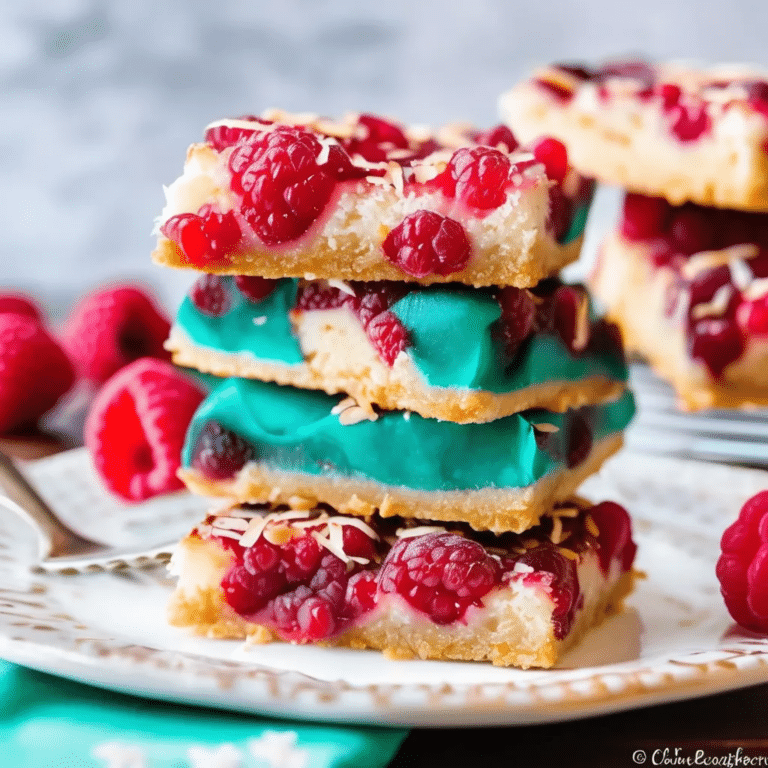
Raspberry Coconut Bars are a delightful and indulgent treat that combines the tangy sweetness of raspberries with the rich, tropical flavor of coconut. These bars feature a buttery shortbread crust topped with a layer of sweet raspberry preserves, all crowned with a chewy, golden coconut topping. Perfect for afternoon tea, dessert, or as a special treat for any occasion, these bars are a beautiful blend of textures and flavors. The crisp crust, gooey raspberry layer, and toasted coconut topping make each bite a deliciously satisfying experience.

Ingredients:

For the Crust:

  • 1 cup all-purpose flour
  • 1/4 cup granulated sugar
  • 1/4 teaspoon salt
  • 1/2 cup unsalted butter, cold and cubed

For the Raspberry Layer:

  • 3/4 cup raspberry preserves

For the Coconut Topping:

  • 2 large eggs
  • 1 cup granulated sugar
  • 1 teaspoon vanilla extract
  • 1 1/2 cups sweetened shredded coconut
  • 1/4 cup all-purpose flour
  • 1/4 teaspoon baking powder
  • Pinch of salt

Instructions:

  1. Prepare the Crust: Preheat your oven to 350°F (175°C). Line an 8×8-inch baking pan with parchment paper, leaving an overhang on the sides for easy removal. In a medium bowl, combine the flour, sugar, and salt. Cut in the cold, cubed butter using a pastry cutter or your fingers until the mixture resembles coarse crumbs. Press the mixture evenly into the bottom of the prepared baking pan. Bake for 15-18 minutes, or until the crust is lightly golden. Remove from the oven and let it cool slightly.
  2. Add the Raspberry Layer: Spread the raspberry preserves evenly over the warm crust.
  3. Prepare the Coconut Topping: In a medium bowl, whisk together the eggs and sugar until well combined. Stir in the vanilla extract. In a separate bowl, mix the shredded coconut, flour, baking powder, and salt. Add the dry ingredients to the egg mixture and stir until fully combined.
  4. Top and Bake: Spoon the coconut mixture over the raspberry layer, spreading it out evenly. Return the pan to the oven and bake for 25-30 minutes, or until the coconut topping is golden brown and set.
  5. Cool and Serve: Allow the bars to cool completely in the pan before lifting them out using the parchment paper overhang. Cut into squares or bars and serve.

These Raspberry Coconut Bars are sure to be a hit with their perfect balance of fruity sweetness and rich, chewy coconut goodness!

ROASTED GARLIC POTATO SOUP

Roasted Garlic Potato Soup is a rich, creamy, and comforting dish, perfect for cooler weather or when you’re craving something hearty. The roasted garlic adds a deep, mellow flavor that complements the creamy potatoes beautifully. This soup is simple to make and can be customized with toppings like crispy bacon, chives, or shredded cheese for extra flavor.

Ingredients:

  • 2 heads of garlic
  • 1 tablespoon olive oil
  • 6 medium potatoes (Yukon Gold or Russet), peeled and diced
  • 1 medium onion, chopped
  • 4 cups vegetable or chicken broth
  • 1 cup heavy cream (or milk for a lighter option)
  • 2 tablespoons unsalted butter
  • 1 teaspoon dried thyme (optional)
  • Salt and pepper, to taste
  • Toppings: crispy bacon, shredded cheese, chives, sour cream (optional)

Instructions:

  1. Roast the garlic: Preheat your oven to 400°F (200°C). Slice the tops off the heads of garlic to expose the cloves. Drizzle the garlic with olive oil, wrap them in aluminum foil, and roast for 30-40 minutes, or until the cloves are soft and golden brown. Once roasted, allow them to cool slightly, then squeeze the cloves out of their skins and set aside.
  2. Cook the potatoes: While the garlic is roasting, peel and dice the potatoes. In a large pot, melt the butter over medium heat. Add the chopped onion and sauté for about 5 minutes, until softened and translucent.
  3. Add the broth and potatoes: Pour the vegetable or chicken broth into the pot with the onions. Add the diced potatoes and bring the mixture to a boil. Reduce the heat to low and simmer for 15-20 minutes, or until the potatoes are tender.
  4. Blend the soup: Once the potatoes are cooked, stir in the roasted garlic cloves. Use an immersion blender to puree the soup until smooth. Alternatively, carefully transfer the soup in batches to a blender and blend until smooth.
  5. Add the cream: Stir in the heavy cream (or milk) and dried thyme (if using). Season with salt and pepper to taste. Let the soup simmer for an additional 5 minutes, stirring occasionally, to allow the flavors to meld.
  6. Serve: Ladle the roasted garlic potato soup into bowls and top with your favorite garnishes such as crispy bacon, shredded cheese, chives, or a dollop of sour cream.

This Roasted Garlic Potato Soup is creamy, full of flavor, and perfect for a cozy meal. Pair it with crusty bread for dipping, and enjoy!

Onion Tomato Chutney

0

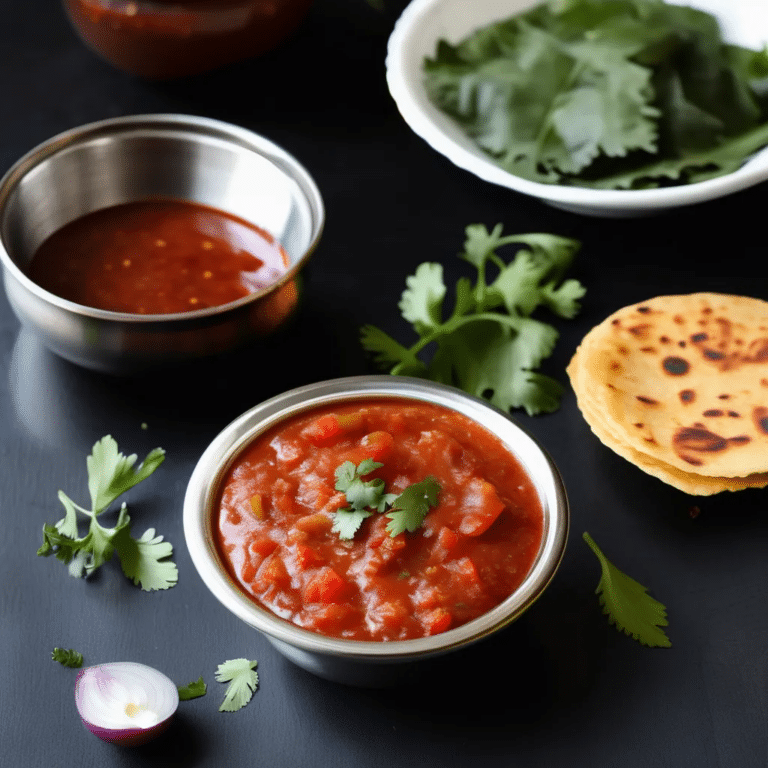
Onion Tomato Chutney is a vibrant and flavorful South Indian condiment that pairs perfectly with dosas, idlis, or any savory snack. This chutney is a simple yet delicious blend of sautéed onions and ripe tomatoes, cooked down with aromatic spices until they meld into a tangy, slightly sweet, and spicy sauce. The chutney is then blended to a smooth consistency, making it a versatile accompaniment that can elevate any meal with its rich, robust flavors. Whether served with breakfast dishes or as a side to complement your main course, Onion Tomato Chutney is sure to add a burst of flavor to your plate.

Ingredients:

  • 2 tablespoons oil (vegetable or coconut oil)
  • 1 large onion, chopped
  • 2 large tomatoes, chopped
  • 2-3 dried red chilies (adjust to taste)
  • 1 teaspoon mustard seeds
  • 1 teaspoon urad dal (split black gram)
  • 1/2 teaspoon cumin seeds
  • 1/4 teaspoon asafoetida (hing)
  • 1/4 teaspoon turmeric powder
  • 2-3 cloves garlic, minced
  • 1-inch piece ginger, minced
  • Salt to taste
  • Fresh cilantro, chopped (for garnish, optional)

For Tempering (optional):

  • 1 tablespoon oil
  • 1/2 teaspoon mustard seeds
  • 1/2 teaspoon urad dal
  • 1-2 dried red chilies
  • A few curry leaves

Instructions:

  1. Sauté the Onions and Spices: Heat 2 tablespoons of oil in a pan over medium heat. Add the mustard seeds, urad dal, and cumin seeds. Let them splutter for a few seconds. Then, add the dried red chilies, asafoetida, turmeric powder, minced garlic, and ginger. Sauté for about 1 minute until fragrant.
  2. Cook the Onions and Tomatoes: Add the chopped onions to the pan and sauté until they turn golden brown, about 5-7 minutes. Next, add the chopped tomatoes and a pinch of salt. Cook until the tomatoes soften and break down, about 5-7 minutes, stirring occasionally.
  3. Blend the Chutney: Allow the onion-tomato mixture to cool slightly. Transfer it to a blender and blend until smooth. You can add a little water if needed to achieve your desired consistency. Taste and adjust salt as needed.
  4. Tempering (Optional): For added flavor, you can prepare a tempering. In a small pan, heat 1 tablespoon of oil. Add mustard seeds, urad dal, dried red chilies, and curry leaves. Once the mustard seeds start to splutter and the urad dal turns golden, pour this tempering over the chutney.
  5. Serve: Garnish the chutney with fresh cilantro if desired. Serve the Onion Tomato Chutney with dosas, idlis, parathas, or as a side dish with your favorite meals.

Enjoy this tangy, spicy Onion Tomato Chutney that adds a delicious kick to any dish!