Home Blog Page 38

TRAIL MIX ENERGY BITES

0

Trail Mix Energy Bites are a nutritious, no-bake snack that’s perfect for a quick energy boost. Packed with oats, nuts, dried fruit, and seeds, these bites are easy to make and can be customized with your favorite trail mix ingredients. They’re great for pre- or post-workout snacks, lunchboxes, or as a healthy treat to keep you going throughout the day.

Ingredients:

  • 1 1/2 cups rolled oats
  • 1/2 cup peanut butter (or almond butter)
  • 1/3 cup honey or maple syrup
  • 1/3 cup mini chocolate chips or dark chocolate chunks
  • 1/4 cup dried cranberries or raisins
  • 1/4 cup chopped nuts (such as almonds, walnuts, or peanuts)
  • 2 tablespoons chia seeds or flaxseeds (optional)
  • 1 teaspoon vanilla extract
  • Pinch of salt

Instructions:

  1. Combine the wet ingredients: In a large bowl, mix together the peanut butter, honey (or maple syrup), vanilla extract, and a pinch of salt until smooth and well combined.
  2. Add the dry ingredients: Stir in the rolled oats, chocolate chips, dried cranberries, chopped nuts, and chia seeds (or flaxseeds, if using). Mix until all the ingredients are evenly distributed and the mixture starts to come together.
  3. Form the energy bites: Using your hands or a small cookie scoop, roll the mixture into bite-sized balls (about 1-1.5 inches in diameter). If the mixture is too sticky, you can refrigerate it for 10-15 minutes to make it easier to handle.
  4. Chill and store: Place the energy bites on a baking sheet or plate and refrigerate for at least 30 minutes to set. Once set, transfer them to an airtight container and store in the fridge for up to 1 week or freeze for longer storage.

These Trail Mix Energy Bites are perfect for a quick, nutritious snack that’s packed with protein, healthy fats, and fiber to keep you energized throughout the day. Enjoy them as a grab-and-go snack whenever you need a boost!


Chocolate Yummies

0

Chocolate Yummies are a simple, no-bake treat that combines the rich, indulgent flavor of chocolate with the crunch of oats and the sweetness of coconut. Perfect for satisfying a sweet tooth in a pinch, these bite-sized goodies come together in minutes and require just a handful of ingredients. With their chewy texture and chocolatey goodness, Chocolate Yummies are a hit for both kids and adults alike. Whether you’re looking for a quick snack or an easy dessert to share at gatherings, these treats are as delicious as they are effortless to make.

Ingredients

  • 1/2 cup unsalted butter
  • 1/2 cup milk
  • 2 cups granulated sugar
  • 1/4 cup unsweetened cocoa powder
  • 1/2 cup peanut butter (optional)
  • 1 tsp vanilla extract
  • 3 cups quick-cooking oats
  • 1 cup shredded coconut (optional)

Instructions

  1. Melt the butter: In a medium saucepan, melt the butter over medium heat. Stir in the milk, sugar, and cocoa powder, whisking until smooth. Bring the mixture to a gentle boil and let it simmer for about 1-2 minutes, stirring constantly.
  2. Add peanut butter and vanilla: Remove the saucepan from the heat and stir in the peanut butter (if using) and vanilla extract until smooth and fully combined.
  3. Mix in the oats: Stir in the quick-cooking oats and shredded coconut until everything is well mixed.
  4. Form the yummies: Drop spoonfuls of the mixture onto wax paper or a lined baking sheet, forming small mounds. Let them cool and set for at least 30 minutes.
  5. Serve: Once set, enjoy your Chocolate Yummies! Store any leftovers in an airtight container.

These Chocolate Yummies are an easy, no-bake treat that delivers a satisfying combination of chewy oats, sweet coconut, and rich chocolate, perfect for when you need a quick and delicious dessert!

Buffalo Chicken Potato Skins

0

Buffalo Chicken Potato Skins are a mouthwatering appetizer that combines the best of two favorite comfort foods: spicy Buffalo chicken and crispy potato skins. These tasty bites feature potato skins that are baked to golden perfection, then stuffed with a mixture of shredded Buffalo chicken, melted cheese, and a drizzle of tangy hot sauce. Finished with a sprinkle of green onions and a side of cooling ranch or blue cheese dressing, these potato skins are perfect for game day, parties, or any time you’re craving a savory, spicy treat. The combination of flavors and textures makes them an irresistible addition to any snack spread.

Ingredients:

  • 4 large russet potatoes, scrubbed clean
  • 2 cups cooked, shredded chicken
  • 1/2 cup Buffalo sauce (plus more for drizzling)
  • 1/2 cup shredded cheddar cheese
  • 1/2 cup shredded mozzarella cheese
  • 2 tablespoons melted butter
  • Salt and pepper, to taste
  • 1/4 cup sliced green onions (for garnish)
  • Ranch or blue cheese dressing (for serving)

Instructions:

  1. Prepare the Potatoes: Preheat your oven to 400°F (200°C). Pierce the potatoes several times with a fork and place them directly on the oven rack. Bake for 45-60 minutes, or until the potatoes are tender when pierced with a fork. Remove from the oven and let them cool slightly.
  2. Prepare the Potato Skins: Once the potatoes are cool enough to handle, slice them in half lengthwise. Carefully scoop out most of the flesh, leaving a thin layer of potato attached to the skin. (You can save the scooped-out potato for another use, like mashed potatoes.)
  3. Crisp the Skins: Brush the insides of the potato skins with melted butter and season with salt and pepper. Place the skins on a baking sheet, skin-side up, and bake for 10 minutes. Flip them over and bake for another 5-10 minutes, until the edges are crispy and golden brown.
  4. Prepare the Buffalo Chicken Filling: In a bowl, toss the shredded chicken with the Buffalo sauce until well-coated.
  5. Stuff the Potato Skins: Fill each potato skin with the Buffalo chicken mixture, then top with a generous sprinkle of cheddar and mozzarella cheese. Return the stuffed potato skins to the oven and bake for another 5-7 minutes, or until the cheese is melted and bubbly.
  6. Garnish and Serve: Remove the potato skins from the oven and drizzle with additional Buffalo sauce if desired. Garnish with sliced green onions and serve hot with ranch or blue cheese dressing on the side.

These Buffalo Chicken Potato Skins are sure to be a hit, offering the perfect combination of crispy, cheesy, and spicy goodness in every bite!

SHRIMP SCAMPI ZOODLES

Shrimp Scampi Zoodles is a light, flavorful, and healthy twist on the classic shrimp scampi, substituting zucchini noodles (zoodles) for traditional pasta. This dish is bursting with garlic, lemon, and buttery shrimp flavors while keeping it low-carb and packed with veggies. It’s quick to make and perfect for a weeknight dinner that feels indulgent but is nutritious!

Ingredients:

  • 1 1/2 lbs large shrimp, peeled and deveined
  • 4 medium zucchinis, spiralized into noodles
  • 3 tablespoons olive oil
  • 3 tablespoons unsalted butter
  • 4 garlic cloves, minced
  • 1/2 teaspoon red pepper flakes (optional, for heat)
  • 1/2 cup chicken broth or white wine
  • 1 tablespoon lemon juice (freshly squeezed)
  • 1/4 cup fresh parsley, chopped
  • Salt and pepper, to taste
  • Freshly grated Parmesan cheese (optional, for garnish)
  • Lemon wedges (optional, for serving)

Instructions:

  1. Prepare the zoodles: Spiralize the zucchini into noodles using a spiralizer. If you don’t have a spiralizer, you can use a vegetable peeler to create thin ribbons or julienne them with a knife. Set the zoodles aside.
  2. Cook the shrimp: In a large skillet, heat 2 tablespoons of olive oil over medium heat. Season the shrimp with salt and pepper, then add them to the skillet. Cook the shrimp for about 2 minutes per side, or until they turn pink and opaque. Remove the shrimp from the skillet and set aside.
  3. Make the scampi sauce: In the same skillet, add the remaining tablespoon of olive oil and 2 tablespoons of butter. Once melted, add the minced garlic and red pepper flakes (if using), and sauté for 1 minute until fragrant.
  4. Add the broth and lemon: Stir in the chicken broth (or white wine) and lemon juice, bringing the mixture to a simmer. Let it cook for 2-3 minutes to reduce slightly.
  5. Combine the zoodles and shrimp: Add the zoodles to the skillet and toss them gently in the sauce for 2-3 minutes, just until they begin to soften. Return the cooked shrimp to the skillet and toss everything together to coat the shrimp and zoodles in the sauce.
  6. Finish and serve: Remove the skillet from heat and stir in the remaining tablespoon of butter and chopped parsley. Taste and adjust seasoning with more salt, pepper, or lemon juice if needed.
  7. Garnish and enjoy: Serve the Shrimp Scampi Zoodles hot, garnished with freshly grated Parmesan cheese and lemon wedges on the side, if desired.

This Shrimp Scampi Zoodles dish is light, fresh, and full of vibrant flavors, making it a delicious and healthy option for any meal!

Lamb And Barley Soup

0

Lamb and Barley Soup is a hearty and comforting dish that brings together tender pieces of lamb, wholesome barley, and an assortment of vegetables in a rich, savory broth. This rustic soup is perfect for chilly days when you crave something warm and nourishing. The barley adds a delightful chewy texture, while the lamb infuses the soup with deep, robust flavors. Slowly simmered to perfection, this soup is a satisfying meal on its own, offering a delicious blend of meat, grains, and vegetables that will warm you from the inside out.

Ingredients:

  • 1 lb (450g) lamb shoulder, cut into bite-sized pieces
  • 1 tablespoon olive oil
  • 1 large onion, chopped
  • 2 cloves garlic, minced
  • 2 carrots, diced
  • 2 celery stalks, diced
  • 1 parsnip, diced (optional)
  • 1 cup pearl barley, rinsed
  • 6 cups beef or lamb broth
  • 1 can (14.5 oz) diced tomatoes, undrained
  • 2 bay leaves
  • 1 teaspoon dried thyme
  • 1 teaspoon dried rosemary
  • Salt and pepper, to taste
  • Fresh parsley, chopped (for garnish)

Instructions:

  1. Brown the Lamb: In a large pot or Dutch oven, heat the olive oil over medium-high heat. Add the lamb pieces and brown them on all sides, about 5-7 minutes. Remove the lamb from the pot and set aside.
  2. Sauté the Vegetables: In the same pot, add the chopped onion, carrots, celery, and parsnip (if using). Sauté the vegetables over medium heat until they start to soften, about 5 minutes. Add the minced garlic and cook for another minute until fragrant.
  3. Add the Barley and Broth: Stir in the rinsed barley, and then add the broth and diced tomatoes with their juices. Return the browned lamb to the pot.
  4. Season and Simmer: Add the bay leaves, dried thyme, dried rosemary, salt, and pepper. Bring the soup to a boil, then reduce the heat to low. Cover and let the soup simmer gently for 1 to 1 1/2 hours, or until the lamb is tender and the barley is cooked through.
  5. Adjust Seasoning: Taste the soup and adjust the seasoning with more salt and pepper if needed. Remove the bay leaves before serving.
  6. Serve: Ladle the soup into bowls and garnish with freshly chopped parsley. Serve with crusty bread on the side for a complete meal.

Enjoy this Lamb and Barley Soup as a comforting and filling dish that’s perfect for warming up on a cold day.

Crock Pot Red Beans And Rice

0

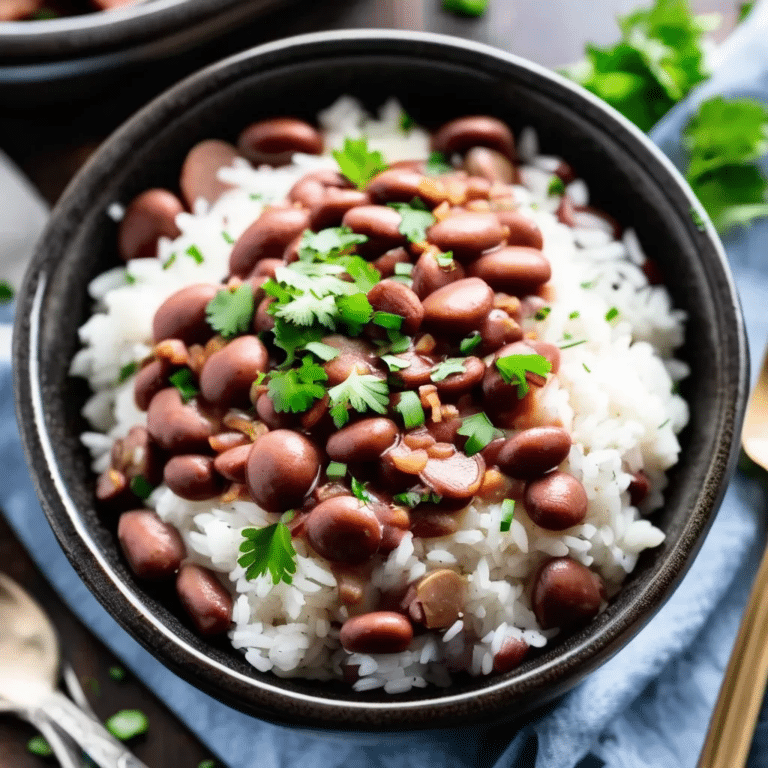
Crock Pot Red Beans and Rice is a comforting, hearty dish that’s packed with flavor and easy to make. Traditionally a Southern favorite, this slow-cooked version allows the beans to simmer with sausage, spices, and aromatics, resulting in a rich, smoky, and savory meal. The creamy red beans, combined with the perfect amount of spice, are served over fluffy white rice for a satisfying dinner that’s perfect for busy weeknights. This dish is not only budget-friendly but also feeds a crowd, making it a fantastic go-to recipe for family gatherings or meal prep.

Ingredients

  • 1 lb dried red beans, rinsed and soaked overnight
  • 1 lb smoked sausage (Andouille or smoked sausage), sliced
  • 1 onion, diced
  • 1 green bell pepper, diced
  • 2 celery stalks, diced
  • 3 cloves garlic, minced
  • 1 tsp paprika
  • 1 tsp thyme
  • 1/2 tsp cayenne pepper (optional for heat)
  • 2 bay leaves
  • 6 cups chicken broth or water
  • Salt and pepper to taste
  • 4 cups cooked white rice
  • Fresh parsley or green onions for garnish (optional)

Instructions

  1. Prepare the ingredients: After soaking the red beans overnight, drain and rinse them. Set aside.
  2. Assemble in the crock pot: In your crock pot, combine the soaked red beans, sausage slices, onion, bell pepper, celery, garlic, paprika, thyme, cayenne pepper (if using), bay leaves, and chicken broth.
  3. Cook the beans: Cover the crock pot and cook on low for 7-8 hours or on high for 4-5 hours, until the beans are tender and the liquid has thickened. Stir occasionally, especially during the last hour of cooking.
  4. Season and serve: Remove the bay leaves, then season the beans with salt and pepper to taste. Serve the red beans over cooked white rice and garnish with fresh parsley or green onions if desired.

This Crock Pot Red Beans and Rice is a flavorful, slow-cooked dish that’s easy to prepare and delivers a rich, satisfying meal with minimal effort, perfect for any night of the week!

RUSSIAN SALAD

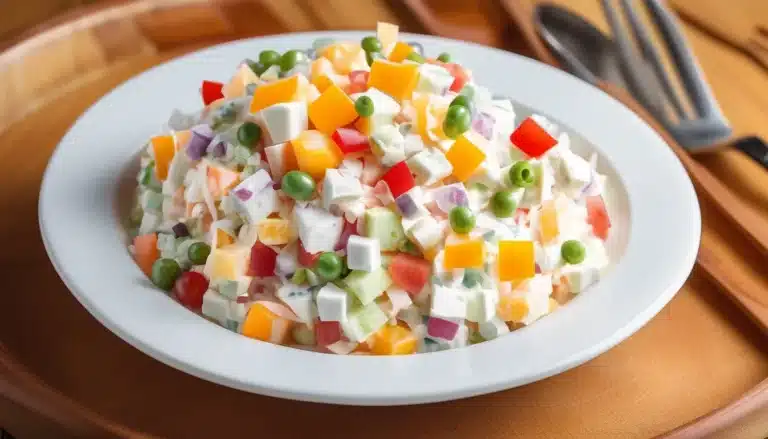
Russian Salad, also known as Olivier Salad, is a traditional Russian dish made with diced vegetables, boiled potatoes, eggs, and sometimes meat, all bound together in a creamy mayonnaise dressing. It’s a classic salad often served at holidays, special occasions, or family gatherings. It’s rich, filling, and delicious, making it a great side dish for a variety of meals.

Ingredients:

  • 3 medium potatoes, boiled, peeled, and diced
  • 2 medium carrots, boiled and diced
  • 1/2 cup peas (fresh or frozen, cooked)
  • 3 large eggs, hard-boiled and diced
  • 1/2 cup pickles (gherkins), finely chopped
  • 1/2 cup cooked ham or boiled chicken, diced (optional)
  • 1/4 cup red onion, finely chopped (optional)
  • 1/2 cup mayonnaise
  • 1 tablespoon Dijon mustard (optional)
  • Salt and pepper, to taste
  • Fresh parsley or dill, for garnish (optional)

Instructions:

  1. Cook the vegetables: Boil the potatoes and carrots in salted water until tender, then drain and let them cool. Once cool, peel and dice the potatoes and carrots into small cubes.
  2. Cook the eggs: Hard-boil the eggs, peel them, and dice them into small pieces.
  3. Prepare the other ingredients: If using ham or chicken, dice it into small cubes. Chop the pickles and, if using, red onions. Cook the peas if they’re not already cooked.
  4. Mix the salad: In a large bowl, combine the diced potatoes, carrots, eggs, peas, pickles, and ham or chicken (if using). Add the chopped onion if desired.
  5. Add the dressing: Stir in the mayonnaise and Dijon mustard (if using) until everything is evenly coated. Season the salad with salt and pepper to taste.
  6. Chill and serve: Cover the salad and refrigerate for at least 30 minutes to let the flavors meld together. Garnish with fresh parsley or dill before serving.

Russian Salad is perfect for potlucks, family gatherings, or as a side dish for grilled meats. Enjoy this classic, hearty, and flavorful dish!

Chocolate Cherry Thumbprint Cookies

0

Chocolate Cherry Thumbprint Cookies are a delightful treat that combines the rich, decadent taste of chocolate with the sweet, tart burst of cherry filling. These cookies feature a tender chocolate base with a thumbprint indentation filled with cherry preserves or a maraschino cherry, making them as beautiful as they are delicious. Perfect for holiday baking or any special occasion, these cookies offer a perfect balance of flavors and textures, with the deep cocoa flavor complementing the fruity cherry center. Their elegant appearance and irresistible taste make them a standout addition to any dessert table.

Ingredients:

For the Cookies:

  • 1 cup unsalted butter, softened
  • 2/3 cup granulated sugar
  • 1/3 cup brown sugar, packed
  • 1 large egg
  • 1 teaspoon vanilla extract
  • 2 cups all-purpose flour
  • 1/2 cup unsweetened cocoa powder
  • 1/2 teaspoon salt
  • 1/4 teaspoon baking powder

For the Filling:

  • 1/2 cup cherry preserves or maraschino cherries, halved
  • 1/2 cup semi-sweet chocolate chips
  • 1 tablespoon heavy cream

Instructions:

  1. Prepare the Dough: In a large mixing bowl, cream together the softened butter, granulated sugar, and brown sugar until light and fluffy. Beat in the egg and vanilla extract until well combined.
  2. Mix the Dry Ingredients: In a separate bowl, whisk together the flour, cocoa powder, salt, and baking powder. Gradually add the dry ingredients to the wet mixture, mixing until a smooth dough forms.
  3. Shape the Cookies: Preheat your oven to 350°F (175°C) and line a baking sheet with parchment paper. Roll the dough into 1-inch balls and place them on the prepared baking sheet, spacing them about 2 inches apart. Use your thumb or the back of a spoon to create a small indentation in the center of each dough ball.
  4. Fill the Cookies: Spoon a small amount of cherry preserves into each indentation, or place a halved maraschino cherry in the center of each cookie.
  5. Bake: Bake the cookies in the preheated oven for 10-12 minutes, or until the edges are set and the tops are slightly cracked. Remove from the oven and let them cool on the baking sheet for a few minutes before transferring to a wire rack to cool completely.
  6. Make the Chocolate Drizzle: While the cookies cool, melt the chocolate chips with the heavy cream in a microwave-safe bowl in 20-second intervals, stirring until smooth. Drizzle the melted chocolate over the cooled cookies.
  7. Serve: Allow the chocolate to set before serving. Store the cookies in an airtight container at room temperature.

These Chocolate Cherry Thumbprint Cookies are sure to be a hit, with their perfect blend of rich chocolate and sweet cherry making them a crowd-pleaser at any gathering!

Thai Coconut Chicken Soup

0

Thai Coconut Chicken Soup, also known as Tom Kha Gai, is a fragrant and soothing dish that showcases the harmonious balance of flavors characteristic of Thai cuisine. This creamy soup is made with tender chicken simmered in a rich coconut milk broth infused with lemongrass, galangal, and kaffir lime leaves. The addition of mushrooms, lime juice, and a touch of fish sauce brings a delightful mix of tangy, savory, and slightly spicy notes to the soup. Finished with fresh cilantro and a hint of chili, this comforting and aromatic soup is perfect for warming up on a cool day or as an appetizer for a Thai-inspired meal.

Ingredients:

  • 1 lb (450g) boneless, skinless chicken thighs or breasts, thinly sliced
  • 2 cups coconut milk
  • 2 cups chicken broth
  • 1 stalk lemongrass, trimmed and smashed
  • 3-4 slices galangal (or ginger if unavailable)
  • 3-4 kaffir lime leaves, torn into pieces
  • 8 oz (225g) mushrooms, sliced (shiitake or button mushrooms work well)
  • 2-3 Thai bird’s eye chilies, sliced (adjust to taste)
  • 2 tablespoons fish sauce
  • 2 tablespoons lime juice (or to taste)
  • 1 tablespoon sugar (optional)
  • Fresh cilantro, chopped (for garnish)
  • Green onions, sliced (for garnish)
  • Lime wedges (for serving)

Instructions:

  1. Prepare the Broth: In a large pot, combine the chicken broth, coconut milk, lemongrass, galangal, and kaffir lime leaves. Bring to a gentle simmer over medium heat, allowing the flavors to infuse the broth, about 10 minutes.
  2. Add the Chicken and Mushrooms: Add the sliced chicken and mushrooms to the pot. Simmer for another 10-15 minutes, until the chicken is cooked through and the mushrooms are tender.
  3. Season the Soup: Stir in the fish sauce, lime juice, and sugar if using. Taste the soup and adjust the seasoning by adding more fish sauce or lime juice as needed. If you prefer a spicier soup, add more sliced chilies.
  4. Garnish and Serve: Remove the lemongrass and galangal slices before serving. Ladle the soup into bowls and garnish with fresh cilantro and sliced green onions. Serve with lime wedges on the side for an extra burst of citrus.

Enjoy the warm, comforting flavors of Thai Coconut Chicken Soup, a dish that brings the exotic tastes of Thailand straight to your table.

Curd Rice

0

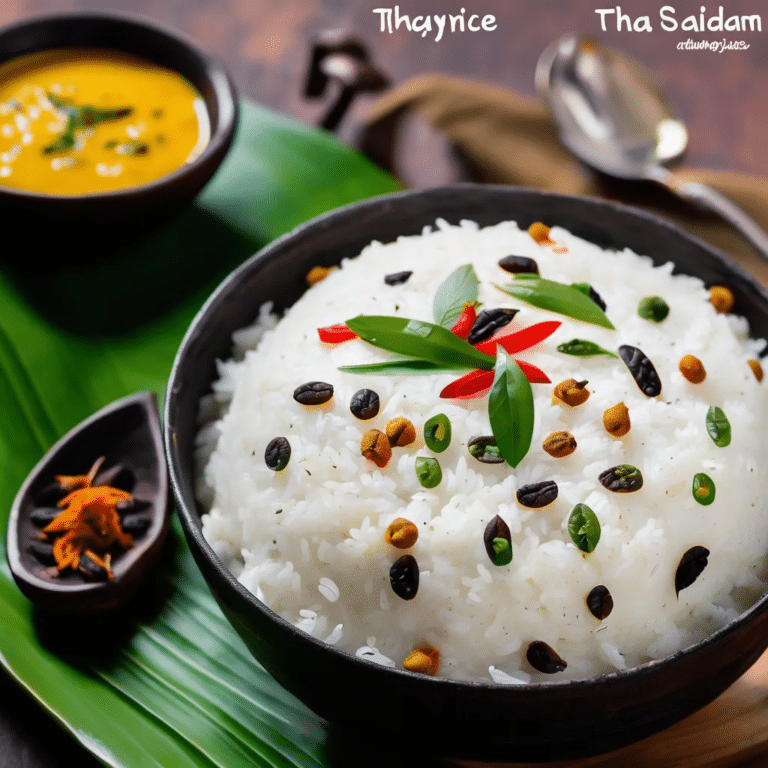
Curd Rice, also known as “Thayir Sadam” in South India, is a simple yet incredibly satisfying dish that offers a cooling respite, especially in warm climates. This comforting dish is made by mixing cooked rice with creamy yogurt and then tempering it with aromatic spices like mustard seeds, curry leaves, and green chilies. Often enjoyed as a light meal or as part of a larger South Indian feast, Curd Rice is a perfect blend of tangy, creamy, and mildly spiced flavors. It’s usually garnished with fresh cilantro and pomegranate seeds or grapes, adding a refreshing burst of sweetness and texture to each bite.

Ingredients:

  • 1 cup cooked rice (preferably short-grain rice)
  • 1 cup plain yogurt (curd)
  • 1/4 cup milk (optional, for a creamier texture)
  • Salt to taste
  • 1 tablespoon oil
  • 1 teaspoon mustard seeds
  • 1 teaspoon urad dal (split black gram)
  • 1/2 teaspoon chana dal (split Bengal gram)
  • 1-2 green chilies, finely chopped
  • 1-inch piece ginger, finely chopped
  • 1-2 dried red chilies
  • A pinch of asafoetida (hing)
  • 10-12 curry leaves
  • Fresh cilantro, chopped (for garnish)
  • Pomegranate seeds or grapes (for garnish, optional)

Instructions:

  1. Prepare the Rice: Allow the cooked rice to cool slightly. You can spread it out on a plate to cool it faster. The rice should be slightly mashed for the best texture.
  2. Mix the Curd: In a large bowl, mix the cooled rice with the yogurt. Add the milk if you prefer a creamier consistency. Stir in salt to taste, and mix until the rice is well-coated and creamy.
  3. Temper the Spices: Heat the oil in a small pan over medium heat. Add the mustard seeds and let them crackle. Then add the urad dal, chana dal, and fry until they turn golden brown. Add the chopped green chilies, ginger, dried red chilies, asafoetida, and curry leaves. Sauté for a minute until the curry leaves are crisp and fragrant.
  4. Combine: Pour the tempered spices over the curd rice mixture and mix well to evenly distribute the flavors.
  5. Garnish and Serve: Garnish with fresh cilantro and pomegranate seeds or grapes if using. Serve the Curd Rice chilled or at room temperature.

Enjoy this refreshing and wholesome Curd Rice, a dish that brings comfort and cooling relief with each delicious spoonful.