Home Blog Page 39

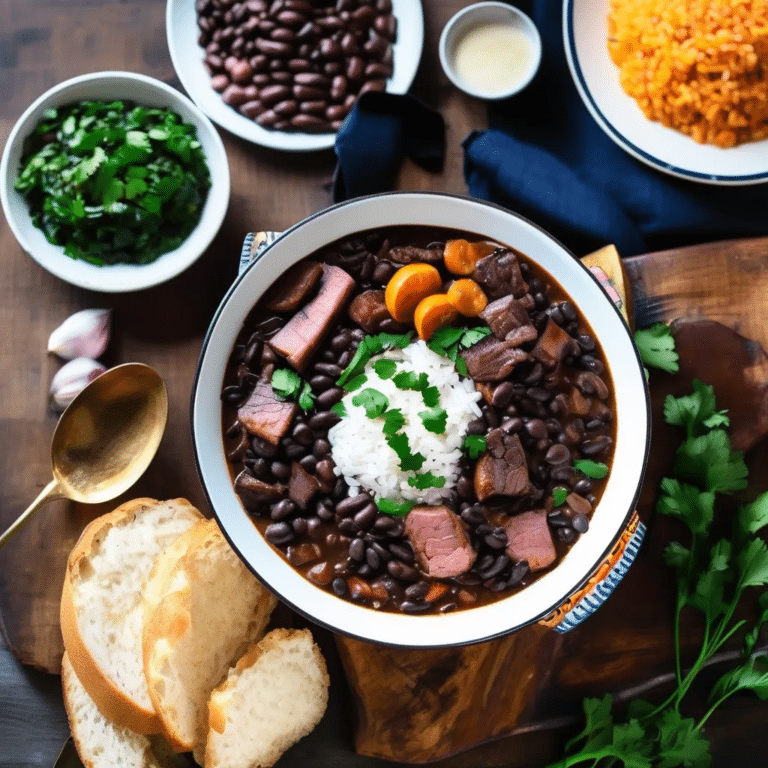
Brazilian Feijoada

0

Brazilian Feijoada is a hearty, comforting stew that is considered the national dish of Brazil. This rich and flavorful dish is made with black beans slow-cooked with a variety of smoked and salted meats, such as pork ribs, sausages, and bacon, infused with garlic, onions, and spices. Feijoada is traditionally served with rice, collard greens, orange slices, and farofa (toasted cassava flour), creating a perfect balance of flavors and textures. This dish is often enjoyed during gatherings with family and friends, where its deep, savory flavors and warming qualities make it the centerpiece of a celebratory meal.

Ingredients:

  • 2 cups dried black beans, soaked overnight
  • 1 lb (450g) pork shoulder, cut into cubes
  • 1/2 lb (225g) pork ribs, cut into pieces
  • 1/2 lb (225g) smoked sausage, sliced
  • 1/4 lb (115g) bacon, chopped
  • 1/2 lb (225g) carne seca (Brazilian dried beef) or corned beef, soaked overnight and cut into cubes
  • 1 large onion, finely chopped
  • 4 cloves garlic, minced
  • 2 bay leaves
  • 1 teaspoon ground cumin
  • 1 teaspoon smoked paprika
  • Salt and black pepper, to taste
  • 6 cups water or beef broth
  • 2 tablespoons olive oil
  • Fresh cilantro, chopped (for garnish)

For Serving:

  • White rice
  • Sautéed collard greens
  • Orange slices
  • Farofa (toasted cassava flour)

Instructions:

  1. Prepare the Beans: Drain and rinse the soaked black beans. Set aside.
  2. Brown the Meats: In a large pot or Dutch oven, heat the olive oil over medium heat. Add the chopped bacon and cook until crispy. Remove the bacon with a slotted spoon and set aside. In the same pot, brown the pork shoulder, pork ribs, and carne seca (or corned beef) in batches until they develop a nice crust. Remove the meats from the pot and set aside.
  3. Sauté the Aromatics: In the same pot, add the chopped onion and garlic. Sauté until the onion is softened and translucent, about 5 minutes.
  4. Combine the Ingredients: Return all the browned meats to the pot, along with the sausage and the cooked bacon. Add the soaked black beans, bay leaves, ground cumin, smoked paprika, and a generous amount of black pepper. Pour in the water or beef broth, ensuring the beans and meats are fully submerged. Stir to combine.
  5. Cook the Feijoada: Bring the mixture to a boil, then reduce the heat to low and cover the pot. Let the feijoada simmer gently for 2-3 hours, or until the beans are tender and the meats are falling apart. Stir occasionally and add more water if necessary to keep the ingredients covered.
  6. Season and Serve: Once the feijoada is cooked, taste and adjust the seasoning with salt if needed. Remove the bay leaves before serving. Garnish with fresh cilantro.
  7. Serve: Serve the feijoada hot, accompanied by white rice, sautéed collard greens, orange slices, and farofa on the side.

Enjoy this traditional Brazilian Feijoada, a soulful dish that brings the flavors of Brazil right to your table, perfect for sharing with loved ones.

Basic Sugar Cookie Dough

0

Basic Sugar Cookie Dough is a versatile and essential recipe for creating classic sugar cookies that can be shaped, decorated, and customized for any occasion. Whether you’re baking for a holiday, a celebration, or just a fun project with the family, this dough delivers cookies that are buttery, crisp around the edges, and perfectly soft in the center. With just the right amount of sweetness, this dough is easy to work with, making it perfect for rolling out, cutting into shapes, or even just baking as drop cookies. Decorate with icing, sprinkles, or enjoy them plain—this dough is your go-to for delicious homemade sugar cookies.

Ingredients

  • 2 3/4 cups all-purpose flour
  • 1 tsp baking powder
  • 1/4 tsp salt
  • 1 cup unsalted butter, softened
  • 1 1/2 cups granulated sugar
  • 1 large egg
  • 2 tsp vanilla extract
  • 1 tbsp milk

Instructions

  1. Mix the dry ingredients: In a medium bowl, whisk together the flour, baking powder, and salt. Set aside.
  2. Cream the butter and sugar: In a large mixing bowl, beat the softened butter and granulated sugar together with an electric mixer until light and fluffy, about 2-3 minutes. Add the egg, vanilla extract, and milk, and continue to beat until well combined.
  3. Combine the wet and dry ingredients: Gradually add the dry ingredients to the wet ingredients, mixing until a smooth dough forms. If the dough feels too soft to roll out, cover and chill it in the refrigerator for about 30 minutes.
  4. Prepare to bake: Preheat the oven to 350°F (175°C) and line baking sheets with parchment paper.
  5. Shape the cookies: Roll out the dough on a lightly floured surface to about 1/4-inch thickness. Use cookie cutters to cut out shapes, or scoop tablespoons of dough to make drop cookies. Place the cookies on the prepared baking sheets, leaving about 2 inches of space between them.
  6. Bake: Bake for 8-10 minutes, or until the edges are just starting to turn golden. Let the cookies cool on the baking sheet for a few minutes before transferring them to a wire rack to cool completely.

This Basic Sugar Cookie Dough is perfect for rolling out and decorating, offering a deliciously sweet and buttery base for all your favorite cookie creations!

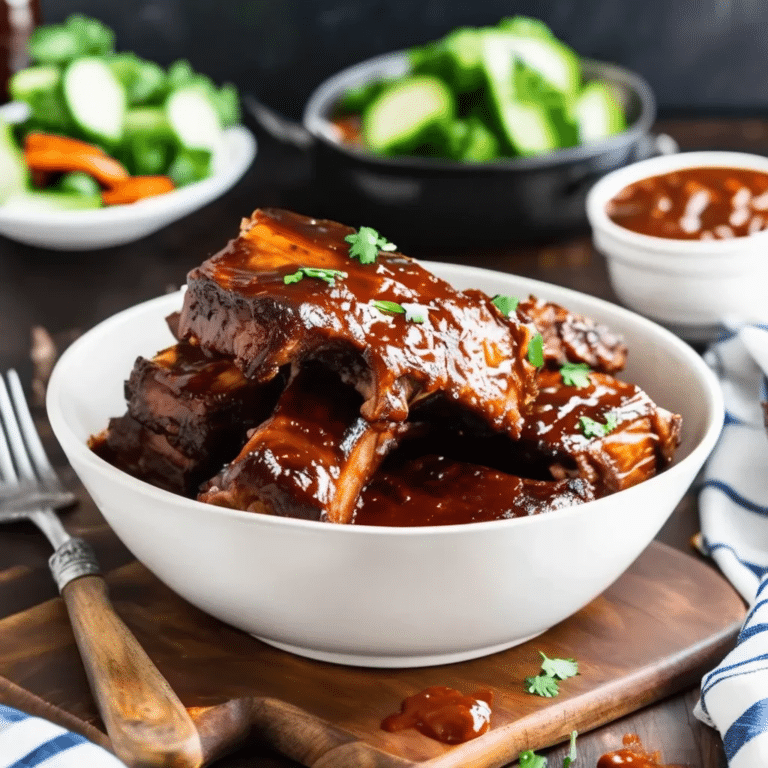
Crock Pot Ribs

0

Crock Pot Ribs are a tender, juicy, and flavorful way to enjoy slow-cooked barbecue without the fuss of a grill or smoker. These fall-off-the-bone ribs are cooked low and slow in the crock pot, absorbing the rich flavors of a smoky, sweet barbecue sauce as they become melt-in-your-mouth tender. With minimal effort, this recipe is perfect for busy days or when you want a delicious, comforting meal that tastes like it took hours of preparation. Whether served with mashed potatoes, coleslaw, or corn on the cob, these crock pot ribs are sure to satisfy any BBQ craving.

Ingredients

  • 3-4 lbs pork baby back ribs
  • 1 tbsp paprika
  • 1 tsp garlic powder
  • 1 tsp onion powder
  • 1 tsp salt
  • 1/2 tsp black pepper
  • 1/2 tsp smoked paprika (optional)
  • 1/2 tsp chili powder (optional for heat)
  • 1 1/2 cups barbecue sauce
  • 1/4 cup apple cider vinegar or water

Instructions

  1. Prepare the ribs: Remove the silver skin from the back of the ribs if necessary. In a small bowl, mix together the paprika, garlic powder, onion powder, salt, pepper, smoked paprika, and chili powder. Rub this spice mixture all over the ribs, ensuring they are well-coated.
  2. Add to the crock pot: Place the seasoned ribs into the crock pot, standing them up along the sides to fit. Pour the apple cider vinegar (or water) into the bottom of the crock pot, which will help keep the ribs moist.
  3. Cook the ribs: Cover and cook on low for 6-8 hours or on high for 4-5 hours, until the ribs are tender and easily pull apart with a fork.
  4. Add barbecue sauce: About 30 minutes before serving, brush the ribs generously with barbecue sauce. For extra flavor, you can transfer the ribs to a baking sheet and broil them in the oven for 3-5 minutes to caramelize the sauce.
  5. Serve: Serve the ribs hot with additional barbecue sauce on the side.

These Crock Pot Ribs are an easy and delicious way to enjoy tender, flavorful barbecue ribs, perfect for any occasion without the hassle of grilling!

CROCK POT PEACH COBBLER

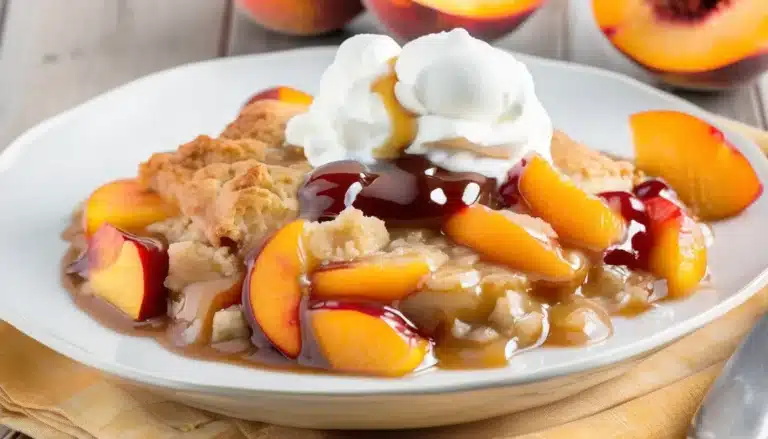
Crock Pot Peach Cobbler is a warm, comforting dessert that’s easy to prepare and perfect for using up fresh or canned peaches. This recipe delivers all the flavors of a classic cobbler with minimal effort, as the slow cooker does most of the work. The juicy peaches cook down into a sweet, syrupy base while the batter creates a soft, golden topping. Serve this cobbler with a scoop of vanilla ice cream for an extra treat!

Ingredients:

  • 4 cups fresh peaches, peeled and sliced (or 2 cans of peaches, drained)
  • 1/2 cup granulated sugar
  • 1 teaspoon cinnamon
  • 1 tablespoon lemon juice
  • 1 cup all-purpose flour
  • 1/2 cup brown sugar, packed
  • 1 teaspoon baking powder
  • 1/4 teaspoon salt
  • 1/2 cup unsalted butter, melted
  • 1 teaspoon vanilla extract
  • 1/2 cup milk

Instructions:

  1. Prepare the peaches: If using fresh peaches, peel and slice them. In a bowl, toss the peaches with granulated sugar, cinnamon, and lemon juice. Set aside.
  2. Make the batter: In another bowl, whisk together the flour, brown sugar, baking powder, and salt. Add the melted butter, vanilla extract, and milk, stirring until the batter is smooth.
  3. Assemble the cobbler: Grease the bottom and sides of your crock pot with butter or nonstick spray. Spread the prepared peach mixture evenly in the bottom of the crock pot. Pour the batter over the top, spreading it out gently with a spatula to cover most of the peaches.
  4. Cook the cobbler: Cover and cook on high for 2 to 3 hours, or until the top is golden and a toothpick inserted into the batter comes out clean. The edges should be slightly crispy, and the peaches will be bubbling underneath.
  5. Serve: Let the cobbler cool slightly before serving. Spoon the warm cobbler into bowls and serve with a scoop of vanilla ice cream or whipped cream, if desired.

This Crock Pot Peach Cobbler is a deliciously easy dessert that’s perfect for summer or any time of year when you’re craving a fruity, comforting treat!

APPLE AND PEAR CHUTNEY

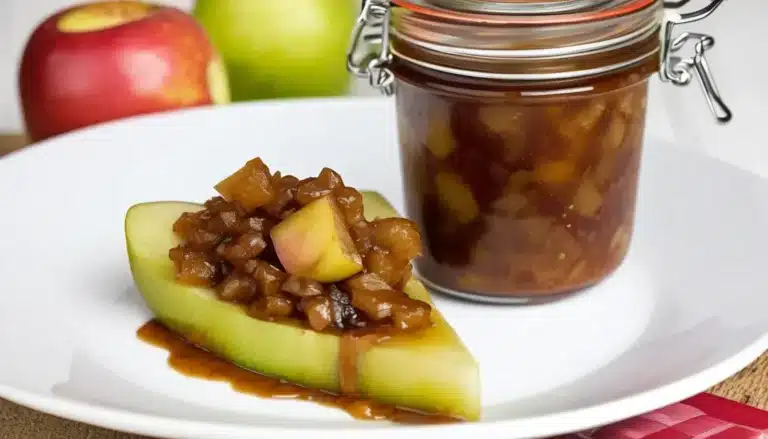
Apple and Pear Chutney is a sweet, tangy, and slightly spiced condiment that pairs beautifully with a variety of dishes, from roasted meats and cheeses to curries and sandwiches. Made with fresh apples, pears, and warm spices, this chutney is a wonderful balance of fruity sweetness and savory depth. It’s perfect for adding a burst of flavor to your meals, and it stores well, making it great for gifting or meal prepping.

Ingredients:

  • 2 medium apples, peeled, cored, and diced
  • 2 medium pears, peeled, cored, and diced
  • 1 small onion, finely chopped
  • 1/2 cup brown sugar
  • 1/2 cup apple cider vinegar
  • 1/4 cup raisins or dried cranberries (optional)
  • 1 tablespoon fresh ginger, finely chopped
  • 1 garlic clove, minced
  • 1/2 teaspoon ground cinnamon
  • 1/4 teaspoon ground cloves
  • 1/4 teaspoon ground allspice
  • 1/4 teaspoon ground nutmeg
  • 1/4 teaspoon red chili flakes (optional, for heat)
  • Salt and pepper, to taste

Instructions:

  1. Prepare the fruit: Peel, core, and dice the apples and pears. Set aside.
  2. Sauté the aromatics: In a large saucepan, heat a small amount of oil over medium heat. Add the chopped onion and sauté for 3-4 minutes until softened. Add the ginger and garlic, and cook for another 1-2 minutes until fragrant.
  3. Add the fruit and spices: Stir in the diced apples, pears, raisins (if using), cinnamon, cloves, allspice, nutmeg, and red chili flakes (if using). Stir well to combine the fruit with the spices.
  4. Add sugar and vinegar: Pour in the apple cider vinegar and add the brown sugar. Stir until the sugar dissolves.
  5. Simmer the chutney: Bring the mixture to a boil, then reduce the heat and simmer uncovered for about 30-40 minutes, stirring occasionally. Cook until the fruit is tender and the mixture has thickened to a chutney-like consistency.
  6. Adjust seasoning: Taste and adjust the seasoning with salt, pepper, and additional sugar or vinegar if needed, depending on your preferred balance of sweet and tangy.
  7. Cool and store: Once the chutney has thickened and the flavors have melded together, remove it from the heat. Let it cool slightly before transferring to sterilized jars. Store in the refrigerator for up to 2 weeks, or process the jars in a water bath for longer shelf life.

This Apple and Pear Chutney is a versatile condiment that adds a punch of flavor to your meals, whether served with cheese boards, grilled meats, or even as a spread for sandwiches!

RED VELVET PANCAKES WITH CREAM CHEESE GLAZE

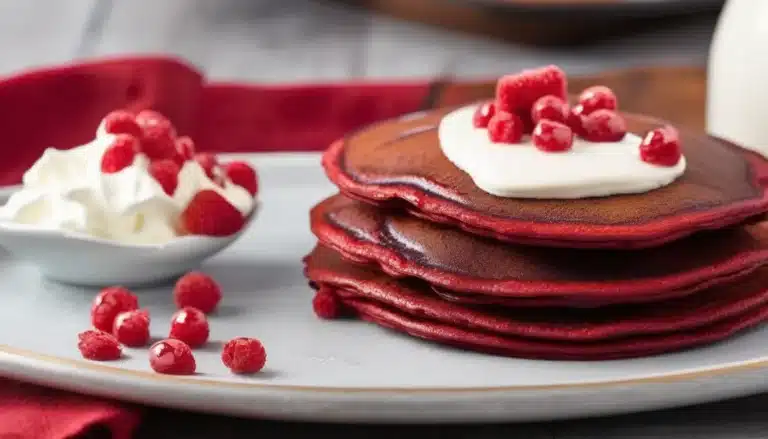
Red Velvet Pancakes with Cream Cheese Glaze are a deliciously decadent breakfast treat. These pancakes are fluffy, slightly chocolatey, and have the signature red velvet color. Topped with a rich, sweet cream cheese glaze, they make for a perfect special occasion breakfast or brunch. They’re sure to impress anyone who loves the classic red velvet cake flavor in a fun, breakfast-friendly form.

Ingredients:

For the Pancakes:

  • 1 1/2 cups all-purpose flour
  • 2 tablespoons cocoa powder
  • 2 tablespoons granulated sugar
  • 1 teaspoon baking powder
  • 1/2 teaspoon baking soda
  • 1/4 teaspoon salt
  • 1 large egg
  • 1 cup buttermilk
  • 1/2 cup milk
  • 1 teaspoon vanilla extract
  • 2 tablespoons melted butter
  • 1 tablespoon red food coloring (more or less to reach desired color)

For the Cream Cheese Glaze:

  • 4 oz cream cheese, softened
  • 1/4 cup powdered sugar
  • 1/4 cup milk (or more for desired consistency)
  • 1 teaspoon vanilla extract

Instructions:

  1. Prepare the Pancake Batter:
    • In a large bowl, whisk together the flour, cocoa powder, sugar, baking powder, baking soda, and salt.
    • In a separate bowl, whisk together the egg, buttermilk, milk, vanilla extract, melted butter, and red food coloring.
    • Pour the wet ingredients into the dry ingredients and stir until just combined. Be careful not to overmix; the batter should be slightly lumpy.
  2. Cook the Pancakes:
    • Heat a nonstick skillet or griddle over medium heat and lightly grease it with butter or oil.
    • Pour about 1/4 cup of batter onto the skillet for each pancake. Cook until bubbles form on the surface and the edges start to look set, about 2-3 minutes. Flip the pancakes and cook for an additional 1-2 minutes until cooked through.
    • Transfer the pancakes to a plate and keep warm while you cook the remaining batter.
  3. Make the Cream Cheese Glaze:
    • In a medium bowl, beat together the softened cream cheese, powdered sugar, milk, and vanilla extract until smooth and creamy. Add more milk if needed to reach your desired glaze consistency.
  4. Assemble and Serve:
    • Stack the red velvet pancakes on a plate and drizzle generously with the cream cheese glaze. Garnish with extra powdered sugar, berries, or a dollop of whipped cream if desired.

These Red Velvet Pancakes with Cream Cheese Glaze are the perfect indulgence for breakfast or brunch, delivering all the rich flavors of red velvet cake in pancake form! Enjoy!

CAULIFLOWER POTATO SALAD

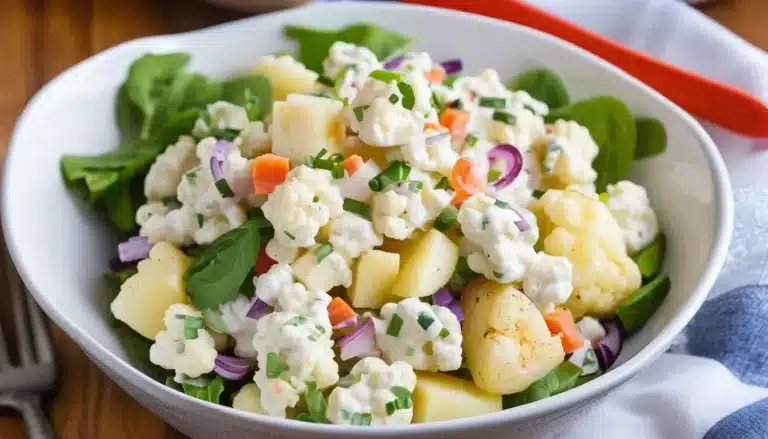
Cauliflower Potato Salad is a lighter, low-carb twist on the traditional potato salad, replacing some or all of the potatoes with tender cauliflower. This dish is creamy, flavorful, and packed with all the classic flavors you love in potato salad—perfect for picnics, barbecues, or as a healthy side dish. The combination of cauliflower and potatoes adds a wonderful texture, while the tangy dressing and crisp veggies bring the salad to life.

Ingredients:

  • 1 medium head of cauliflower, cut into florets
  • 3-4 medium potatoes, peeled and diced (optional, you can replace with more cauliflower for a low-carb version)
  • 3 hard-boiled eggs, chopped
  • 1/2 cup mayonnaise (or Greek yogurt for a lighter option)
  • 1 tablespoon Dijon mustard
  • 1 tablespoon apple cider vinegar
  • 1 teaspoon honey or sugar (optional, for sweetness)
  • 2 celery stalks, finely chopped
  • 1/4 cup red onion, finely chopped
  • 1/4 cup dill pickles, chopped (optional)
  • 1 tablespoon fresh dill, chopped (optional)
  • Salt and pepper, to taste
  • Paprika (for garnish)
  • Fresh parsley (for garnish)

Instructions:

  1. Cook the cauliflower and potatoes: Bring a large pot of salted water to a boil. Add the diced potatoes (if using) and cook for 10-12 minutes until tender but firm. In the last 5-6 minutes of cooking, add the cauliflower florets. Drain and allow the vegetables to cool.
  2. Prepare the dressing: In a small bowl, whisk together the mayonnaise, Dijon mustard, apple cider vinegar, and honey (if using). Season with salt and pepper to taste. Adjust the flavors by adding more vinegar for tang or mustard for extra zest.
  3. Assemble the salad: In a large mixing bowl, combine the cooked cauliflower, potatoes, chopped hard-boiled eggs, celery, red onion, pickles (if using), and fresh dill. Gently toss the ingredients together.
  4. Add the dressing: Pour the prepared dressing over the cauliflower mixture and stir gently to coat everything evenly. Be careful not to break up the cauliflower florets too much.
  5. Chill and serve: Cover the salad and refrigerate for at least 30 minutes to allow the flavors to meld. Before serving, sprinkle with paprika and garnish with fresh parsley for a pop of color.

This Cauliflower Potato Salad offers the creamy texture and classic flavors of traditional potato salad with a lighter, veggie-packed twist. It’s a perfect side dish for any gathering or a healthier alternative to a beloved comfort food!

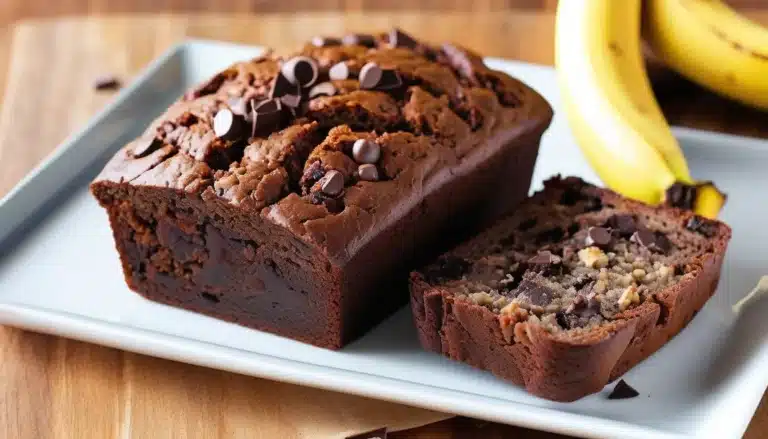
CHOCOLATE BANANA NUT BREAD

Chocolate Banana Nut Bread is a rich and moist twist on classic banana bread, combining the flavors of ripe bananas, chocolate, and crunchy nuts. Perfect for breakfast, as a snack, or even dessert, this bread is easy to make and satisfies your sweet tooth while still being packed with flavor and texture. The chocolate chips melt into the bread, creating pockets of gooey goodness with every bite.

Ingredients:

  • 1 1/2 cups all-purpose flour
  • 1/4 cup unsweetened cocoa powder
  • 1 teaspoon baking soda
  • 1/2 teaspoon salt
  • 1/2 cup unsalted butter, softened
  • 1/2 cup granulated sugar
  • 1/2 cup brown sugar, packed
  • 2 large eggs
  • 1 teaspoon vanilla extract
  • 3 ripe bananas, mashed
  • 1/4 cup sour cream or yogurt (optional, for extra moisture)
  • 1/2 cup chopped walnuts (or pecans)
  • 1/2 cup semisweet or dark chocolate chips

Instructions:

  1. Preheat the oven: Preheat your oven to 350°F (175°C). Grease a 9×5-inch loaf pan or line it with parchment paper for easy removal.
  2. Mix the dry ingredients: In a medium bowl, whisk together the flour, cocoa powder, baking soda, and salt. Set aside.
  3. Cream the butter and sugars: In a large bowl, using an electric mixer, beat the softened butter, granulated sugar, and brown sugar together until light and fluffy, about 3 minutes. Add the eggs one at a time, beating well after each addition. Stir in the vanilla extract.
  4. Add the bananas and sour cream: Mix in the mashed bananas and sour cream (if using) until well combined.
  5. Combine wet and dry ingredients: Gradually add the dry ingredients to the wet ingredients, mixing until just combined. Be careful not to overmix.
  6. Fold in the nuts and chocolate chips: Gently fold in the chopped walnuts and chocolate chips until evenly distributed throughout the batter.
  7. Bake the bread: Pour the batter into the prepared loaf pan and smooth the top. Bake in the preheated oven for 55-65 minutes, or until a toothpick inserted into the center comes out clean or with just a few moist crumbs.
  8. Cool and serve: Allow the bread to cool in the pan for 10-15 minutes, then transfer it to a wire rack to cool completely before slicing.

This Chocolate Banana Nut Bread is a delicious combination of chocolatey goodness, sweet bananas, and crunchy nuts, making it the perfect treat for any time of day. Enjoy it warm with a spread of butter, or simply on its own!

QUICHE MUFFINS

Quiche Muffins are a delightful, portable twist on the classic quiche, making them perfect for breakfast, brunch, or a grab-and-go snack. These mini quiches are baked in a muffin tin, and you can customize them with your favorite fillings like cheese, vegetables, or meats. They’re easy to make, versatile, and great for meal prepping ahead of time.

Ingredients:

  • 6 large eggs
  • 1/2 cup milk or cream
  • 1/2 cup shredded cheese (cheddar, Swiss, or your favorite)
  • 1/2 cup cooked and crumbled bacon, sausage, or ham (optional)
  • 1/2 cup chopped vegetables (spinach, bell peppers, onions, mushrooms, etc.)
  • Salt and pepper, to taste
  • 1/4 teaspoon garlic powder (optional)
  • 1/4 teaspoon dried thyme or any herbs you like (optional)
  • Nonstick cooking spray or butter (for greasing the muffin tin)

Instructions:

  1. Preheat the oven: Preheat your oven to 350°F (175°C). Grease a 12-cup muffin tin with nonstick cooking spray or butter.
  2. Prepare the egg mixture: In a large bowl, whisk together the eggs, milk or cream, salt, pepper, garlic powder (if using), and herbs. Whisk until fully combined and slightly frothy.
  3. Add the fillings: Divide the cooked meat (if using), vegetables, and cheese evenly among the muffin cups. You can mix and match the fillings in each muffin cup if desired.
  4. Pour the egg mixture: Carefully pour the egg mixture into each muffin cup, filling about 3/4 of the way full. The eggs will puff up slightly while baking, so leave a little room at the top.
  5. Bake the quiche muffins: Place the muffin tin in the preheated oven and bake for 18-22 minutes, or until the quiche muffins are set and lightly golden on top. A toothpick inserted into the center should come out clean.
  6. Cool and serve: Allow the quiche muffins to cool in the tin for 5 minutes before removing them. Serve warm or at room temperature.

These Quiche Muffins are perfect for meal prepping and can be stored in the fridge for up to 4 days or frozen for up to 3 months. Simply reheat them in the microwave for a quick, delicious breakfast or snack!

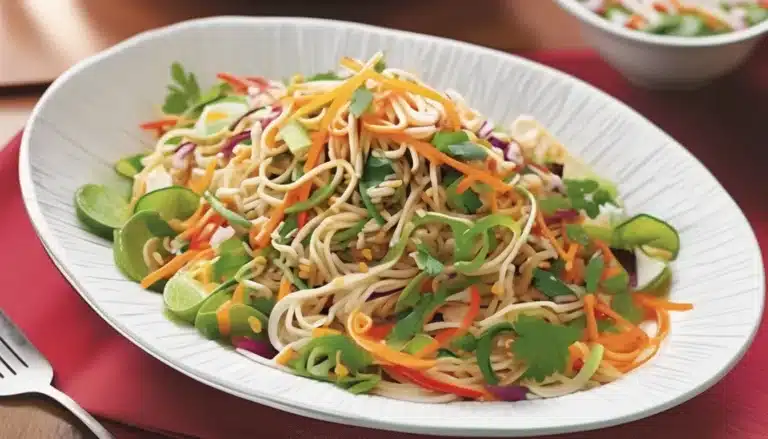
ASIAN NOODLE SALAD

Asian Noodle Salad is a refreshing, vibrant dish made with tender noodles, crunchy vegetables, and a tangy sesame-ginger dressing. This salad is perfect for a light lunch, side dish, or even a main course when topped with grilled chicken or tofu. It’s quick, easy to make, and can be customized with your favorite ingredients like fresh herbs, nuts, or a bit of spice for a kick!

Ingredients:

  • 8 oz rice noodles or soba noodles (you can also use spaghetti or other noodles)
  • 1 cup shredded carrots
  • 1 cup thinly sliced bell peppers (red, yellow, or green)
  • 1 cup thinly sliced cucumber
  • 1/2 cup red cabbage, shredded (optional)
  • 1/4 cup chopped green onions
  • 1/4 cup chopped fresh cilantro or mint (optional)
  • 1/4 cup toasted peanuts or sesame seeds (for garnish)

For the dressing:

  • 1/4 cup soy sauce
  • 2 tablespoons rice vinegar
  • 1 tablespoon sesame oil
  • 1 tablespoon honey or maple syrup
  • 1 tablespoon lime juice
  • 1 garlic clove, minced
  • 1 teaspoon fresh ginger, grated
  • 1 teaspoon sriracha or chili garlic sauce (optional, for heat)
  • Salt and pepper, to taste

Instructions:

  1. Cook the noodles: Cook the noodles according to the package instructions. Drain and rinse under cold water to cool the noodles and stop the cooking process. Set aside.
  2. Prepare the vegetables: While the noodles are cooking, prepare the vegetables by slicing the bell peppers, cucumbers, and carrots. Shred the cabbage if using. Set aside.
  3. Make the dressing: In a small bowl, whisk together the soy sauce, rice vinegar, sesame oil, honey (or maple syrup), lime juice, garlic, ginger, and sriracha (if using). Taste and adjust seasoning with salt, pepper, or more lime juice if needed.
  4. Toss the salad: In a large bowl, combine the cooked noodles, sliced vegetables, green onions, and fresh herbs. Pour the dressing over the top and toss everything together until well coated.
  5. Garnish and serve: Sprinkle the toasted peanuts or sesame seeds over the salad for added crunch. Serve the salad chilled or at room temperature.

This Asian Noodle Salad is light, fresh, and packed with bold flavors, making it a perfect dish for any occasion. Enjoy it as is, or add your favorite protein like grilled chicken, shrimp, or tofu for a heartier meal!