Home Blog Page 21

Tropical Fruit Salsa

0

This vibrant and refreshing Tropical Fruit Salsa is a perfect blend of sweet, tangy, and zesty flavors. It brings together juicy tropical fruits like pineapple, mango, and kiwi with a hint of heat from jalapeƱos and a bright finish of lime and cilantro. Whether served as a dip with tortilla chips, a topping for grilled fish or chicken, or as a colorful salad, this salsa will transport you straight to a tropical paradise with each bite.

Ingredients:

  • 1 cup pineapple, diced
  • 1 cup mango, diced
  • 1 kiwi, peeled and diced
  • 1/2 red bell pepper, finely chopped
  • 1/4 red onion, finely chopped
  • 1 jalapeƱo, seeded and minced (optional)
  • 1/4 cup fresh cilantro, chopped
  • Juice of 1 lime
  • Salt to taste

Instructions:

  1. In a medium-sized bowl, combine the diced pineapple, mango, and kiwi.
  2. Add the chopped red bell pepper, red onion, and jalapeƱo (if using) to the bowl.
  3. Stir in the chopped cilantro and squeeze the fresh lime juice over the mixture.
  4. Season with a pinch of salt to enhance the flavors and mix everything together gently.
  5. Cover and refrigerate for 15-20 minutes to allow the flavors to meld.
  6. Serve chilled with chips or as a topping for your favorite grilled meats or seafood.

Enjoy the refreshing taste of the tropics!

TOMATO AND BEAN SOUP

Tomato and Bean Soup is a hearty, nourishing dish that’s both simple and satisfying. The combination of rich, tangy tomatoes and protein-packed beans makes this soup a wholesome meal perfect for any time of year. It’s a versatile recipe that can be easily customized with your favorite herbs and vegetables. Serve it with crusty bread for a comforting lunch or light dinner, or as a starter for a larger meal. Whether you’re looking for a quick weeknight dinner or something cozy for a chilly day, this soup is sure to hit the spot.

Ingredients:

  • 2 tablespoons olive oil
  • 1 medium onion, diced
  • 2 garlic cloves, minced
  • 1 medium carrot, diced
  • 1 celery stalk, diced
  • 1 (28-ounce) can crushed tomatoes
  • 4 cups vegetable or chicken broth
  • 1 (15-ounce) can cannellini beans, drained and rinsed (or any white beans)
  • 1 (15-ounce) can red kidney beans, drained and rinsed
  • 1 teaspoon dried oregano
  • 1 teaspoon dried basil
  • 1/4 teaspoon red pepper flakes (optional, for heat)
  • Salt and pepper to taste
  • Fresh parsley or basil for garnish
  • Parmesan cheese (optional)

Instructions:

  1. SautƩ the vegetables: In a large pot, heat the olive oil over medium heat. Add the diced onion, carrot, and celery, and sautƩ for 5-7 minutes, until softened. Add the garlic and cook for another minute until fragrant.
  2. Add the tomatoes and broth: Pour in the crushed tomatoes and broth, stirring to combine. Bring the mixture to a simmer.
  3. Season and add beans: Stir in the oregano, basil, red pepper flakes (if using), and a pinch of salt and pepper. Add the drained beans, and let the soup simmer for 15-20 minutes, allowing the flavors to meld.
  4. Taste and adjust seasoning: Taste the soup and adjust the seasoning with more salt, pepper, or herbs as needed.
  5. Serve: Ladle the soup into bowls and garnish with fresh parsley or basil. If desired, sprinkle with grated Parmesan cheese for extra richness.

This Tomato and Bean Soup is a delicious and healthy option for a quick meal. It’s perfect with some toasted bread or a simple salad on the side. Enjoy!

Chunky Chili

0

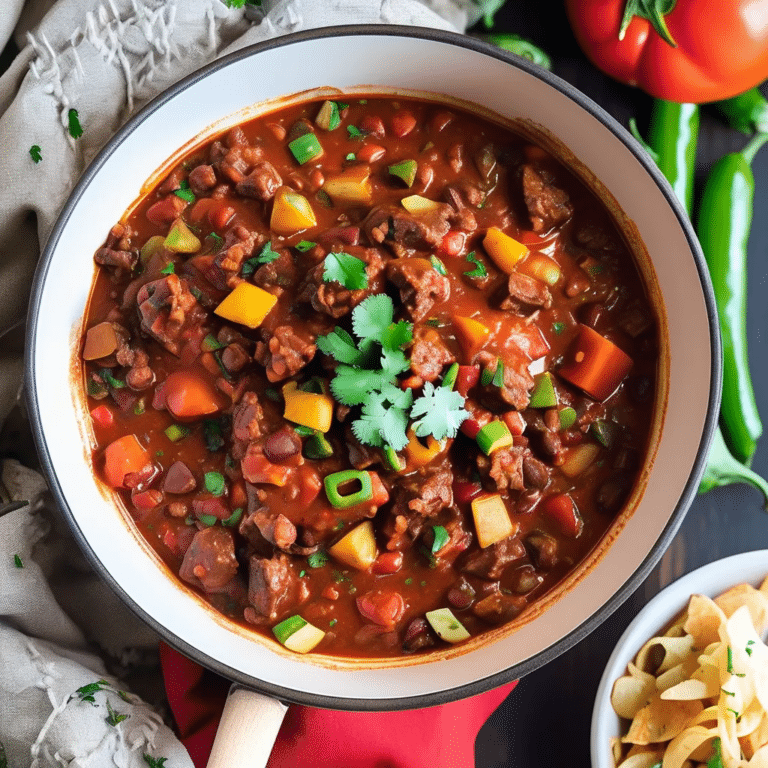
Chunky Chili is a hearty, robust dish that’s perfect for those who love their chili thick, rich, and packed with texture. This classic comfort food features generous chunks of beef, tender beans, and a medley of vegetables simmered together in a flavorful tomato-based sauce. The combination of spices like chili powder, cumin, and paprika gives it a deep, smoky flavor with just the right amount of heat. Perfect for a cozy dinner, game day, or a casual gathering, this chunky chili is not only satisfying but also versatile, as it can be customized with your favorite toppings like shredded cheese, sour cream, or chopped cilantro. Serve it with cornbread or tortilla chips for a complete, comforting meal that will warm you from the inside out.

Ingredients:

  • 2 tablespoons olive oil
  • 1 1/2 lbs beef chuck or ground beef, cut into 1-inch chunks
  • 1 large onion, chopped
  • 3 cloves garlic, minced
  • 1 green bell pepper, chopped
  • 1 red bell pepper, chopped
  • 2 jalapeƱos, seeded and chopped (optional for extra heat)
  • 1 can (14.5 oz) diced tomatoes
  • 1 can (15 oz) tomato sauce
  • 1 can (6 oz) tomato paste
  • 2 cups beef broth
  • 1 can (15 oz) kidney beans, drained and rinsed
  • 1 can (15 oz) black beans, drained and rinsed
  • 1 can (15 oz) pinto beans, drained and rinsed
  • 2 tablespoons chili powder
  • 1 tablespoon ground cumin
  • 1 teaspoon smoked paprika
  • 1 teaspoon oregano
  • 1/2 teaspoon cayenne pepper (optional for heat)
  • Salt and pepper, to taste
  • Shredded cheddar cheese, sour cream, chopped cilantro, and sliced green onions (optional, for garnish)

Instructions:

  1. Brown the Beef: In a large pot or Dutch oven, heat the olive oil over medium-high heat. Add the beef chunks and brown them on all sides, about 5-7 minutes. Remove the beef with a slotted spoon and set aside.
  2. SautƩ the Vegetables: In the same pot, add the chopped onion, garlic, green bell pepper, red bell pepper, and jalapeƱos (if using). SautƩ for about 5 minutes, or until the vegetables are softened.
  3. Add the Tomatoes and Spices: Stir in the diced tomatoes, tomato sauce, tomato paste, and beef broth. Add the chili powder, cumin, smoked paprika, oregano, cayenne pepper (if using), and salt and pepper. Stir to combine all the ingredients.
  4. Simmer the Chili: Return the browned beef to the pot and bring the mixture to a simmer. Cover the pot and let the chili cook on low heat for 1 1/2 to 2 hours, stirring occasionally, until the beef is tender and the flavors have melded together.
  5. Add the Beans: About 30 minutes before serving, stir in the kidney beans, black beans, and pinto beans. Continue to simmer uncovered until the beans are heated through and the chili thickens to your desired consistency.
  6. Serve: Ladle the chunky chili into bowls and garnish with your favorite toppings, such as shredded cheddar cheese, sour cream, chopped cilantro, or sliced green onions. Serve with cornbread or tortilla chips on the side.

This Chunky Chili is a warm, comforting dish that’s sure to become a favorite in your household, offering a satisfying and flavorful meal that’s perfect for any occasion.

Orange Dream Cake

0

Orange Dream Cake is a light, citrusy dessert that brings a refreshing burst of flavor in every bite. Combining the zestiness of fresh oranges with the sweetness of a creamy, dreamy frosting, this cake is perfect for special occasions or simply when you’re craving something bright and sweet. The cake layers are moist, thanks to the addition of fresh orange juice, and the orange-flavored frosting adds a velvety finish that melts in your mouth. Topped with slices of fresh oranges or a dusting of orange zest, this cake is sure to become a favorite among citrus lovers!

Ingredients:

For the Cake:

  • 2 ½ cups all-purpose flour
  • 1 ½ cups granulated sugar
  • 2 ½ teaspoons baking powder
  • ½ teaspoon salt
  • 1 cup unsalted butter, softened
  • 4 large eggs
  • 1 cup fresh orange juice
  • 1 tablespoon orange zest
  • 1 teaspoon vanilla extract

For the Frosting:

  • 1 cup unsalted butter, softened
  • 4 cups powdered sugar
  • 2 tablespoons fresh orange juice
  • 1 tablespoon orange zest
  • 1 teaspoon vanilla extract
  • 2-3 tablespoons heavy cream (optional, for desired consistency)

Garnish:

  • Fresh orange slices or additional orange zest

Instructions:

  1. Prepare the Cake:
    • Preheat your oven to 350°F (175°C). Grease and flour two 9-inch round cake pans.
    • In a large mixing bowl, sift together the flour, baking powder, and salt. Set aside.
    • In a separate bowl, cream the butter and sugar together until light and fluffy, about 2-3 minutes. Add the eggs one at a time, beating well after each addition.
    • Add the orange zest, orange juice, and vanilla extract, mixing until combined.
    • Gradually add the dry ingredients to the wet mixture, mixing until smooth and well combined.
    • Divide the batter evenly between the prepared pans and bake for 25-30 minutes, or until a toothpick inserted into the center comes out clean.
    • Allow the cakes to cool in the pans for 10 minutes before transferring them to a wire rack to cool completely.
  2. Make the Frosting:
    • In a large bowl, beat the softened butter until creamy. Gradually add the powdered sugar, mixing on low speed until combined.
    • Add the orange juice, orange zest, and vanilla extract, beating until the frosting is smooth and creamy. If the frosting is too thick, add heavy cream, 1 tablespoon at a time, until you reach the desired consistency.
  3. Assemble the Cake:
    • Place one cake layer on a serving plate and spread a generous amount of frosting on top. Place the second cake layer on top and frost the top and sides of the cake.
    • Garnish with fresh orange slices or a sprinkle of orange zest for a vibrant finish.
  4. Serve:
    • Slice and enjoy your Orange Dream Cake! Store any leftovers in an airtight container at room temperature for up to 3 days.

This cake is best served chilled for a refreshing treat, or at room temperature for a softer texture. Enjoy!

BASIL CREAM CHICKEN

Basil Cream Chicken is a rich and flavorful dish that combines tender, pan-seared chicken breasts with a luxurious creamy sauce infused with fresh basil. This simple yet elegant recipe is perfect for a weeknight dinner or a special occasion. The vibrant basil adds a burst of freshness that balances the creamy sauce, making it both hearty and refreshing. Serve it over pasta, rice, or with roasted vegetables for a delicious, comforting meal.

Ingredients:

  • 4 boneless, skinless chicken breasts
  • 1 tablespoon olive oil
  • 1 tablespoon butter
  • 2 garlic cloves, minced
  • 1 cup heavy cream
  • 1/2 cup chicken broth
  • 1/2 cup grated Parmesan cheese
  • 1/4 cup fresh basil leaves, chopped
  • Salt and pepper to taste
  • Optional: crushed red pepper flakes for heat
  • Extra fresh basil for garnish

Instructions:

  1. Season the chicken: Pat the chicken breasts dry and season both sides generously with salt and pepper.
  2. Sear the chicken: In a large skillet, heat the olive oil and butter over medium-high heat. Once hot, add the chicken breasts and cook for 5-7 minutes on each side, or until golden brown and cooked through. The internal temperature should reach 165°F (75°C). Remove the chicken from the skillet and set aside.
  3. Make the garlic and cream sauce: In the same skillet, reduce the heat to medium, and add the minced garlic. Cook for about 1 minute until fragrant, being careful not to burn it. Add the chicken broth and heavy cream, stirring to combine.
  4. Thicken the sauce: Bring the sauce to a simmer and stir in the Parmesan cheese. Let it cook for 3-4 minutes, stirring occasionally, until the sauce thickens slightly.
  5. Add the basil: Stir in the chopped fresh basil and season the sauce with salt, pepper, and a pinch of crushed red pepper flakes (if desired).
  6. Return the chicken: Place the seared chicken breasts back into the skillet, spooning the creamy basil sauce over the top. Simmer for another 2-3 minutes to let the flavors meld.
  7. Serve: Garnish with extra fresh basil and serve the chicken hot with the creamy basil sauce.

This Basil Cream Chicken is indulgent and full of flavor, perfect for serving with pasta, mashed potatoes, or even crusty bread to soak up that delicious sauce!

Turkey Roulade

0

Turkey Roulade is an elegant and flavorful dish that’s perfect for holidays or special gatherings. A turkey breast is butterflied, pounded thin, and filled with a savory stuffing before being rolled up and roasted to perfection. The result is a beautiful spiral of tender turkey and stuffing in every slice. It’s a great way to add sophistication to your meal while offering a unique presentation. The stuffing can be customized with your favorite herbs, dried fruits, or even sausage to suit your tastes, making this dish as versatile as it is delicious.

Ingredients:

  • 1 boneless turkey breast (about 3 pounds)
  • 2 tbsp olive oil
  • 1 small onion, finely chopped
  • 2 garlic cloves, minced
  • 1 cup breadcrumbs
  • 1/2 cup chicken broth
  • 1/4 cup dried cranberries
  • 1/4 cup chopped walnuts or pecans
  • 1 tbsp fresh parsley, chopped
  • 1 tbsp fresh sage, chopped
  • 1 tbsp fresh thyme, chopped
  • Salt and pepper to taste
  • Kitchen twine

Instructions:

  1. Prepare the stuffing: In a skillet, heat the olive oil over medium heat. Add the chopped onion and sautƩ until soft, about 5 minutes. Add the garlic and cook for another minute. Stir in the breadcrumbs, cranberries, nuts, parsley, sage, and thyme. Pour in the chicken broth and mix well until the stuffing is moist but not soggy. Season with salt and pepper. Set aside to cool.
  2. Prepare the turkey: Lay the turkey breast flat on a cutting board and use a sharp knife to butterfly it (cut horizontally to open it like a book). Cover with plastic wrap and gently pound the turkey to an even thickness, about 1/2-inch thick. Remove the plastic wrap and season both sides with salt and pepper.
  3. Assemble the roulade: Spread the prepared stuffing evenly over the turkey breast, leaving a 1-inch border around the edges. Carefully roll the turkey breast up tightly, starting from the shorter end, to form a roulade. Tie the roulade with kitchen twine at 1-inch intervals to secure it.
  4. Roast the roulade: Preheat your oven to 375°F (190°C). Place the turkey roulade on a baking sheet, seam side down. Rub the outside of the roulade with a little olive oil and season with salt and pepper. Roast for 1 to 1 1/2 hours, or until the internal temperature reaches 165°F (75°C).
  5. Rest and slice: Remove the roulade from the oven and let it rest for 10-15 minutes before removing the twine. Slice into 1-inch thick rounds and serve.

Enjoy your flavorful turkey roulade with your favorite side dishes!

Vegetable Hakka Noodles

0

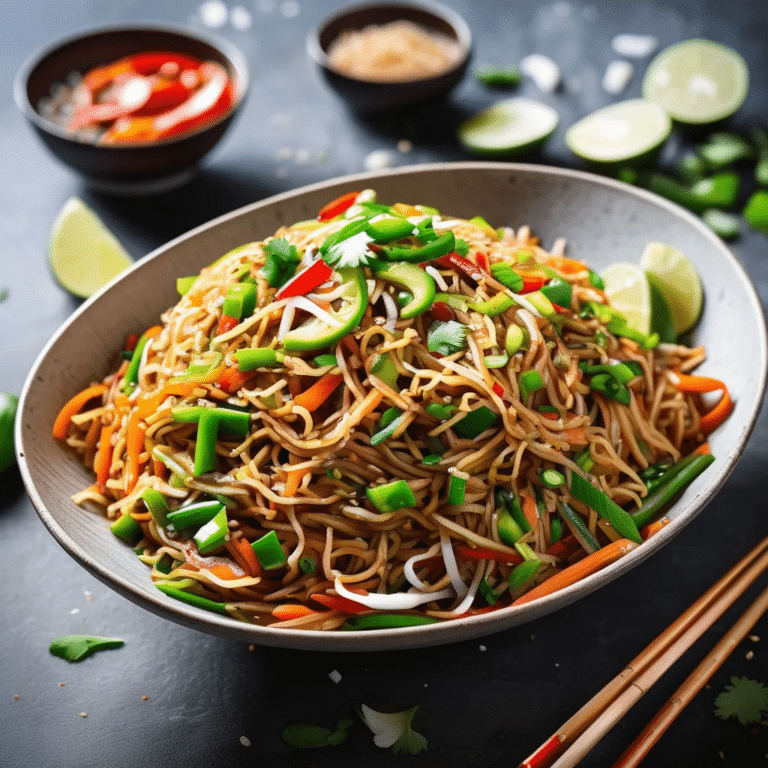
Vegetable Hakka Noodles are a popular Indo-Chinese dish that brings together the best of both cuisines in a quick, flavorful stir-fry. These noodles are tossed with a vibrant mix of fresh vegetables, seasoned with soy sauce, and infused with the subtle heat of ginger, garlic, and chili. The result is a satisfying dish that’s full of textures and tastes—crunchy vegetables, tender noodles, and a savory sauce. Perfect as a main course or a side dish, Vegetable Hakka Noodles are a versatile and delicious way to enjoy a healthy, home-cooked meal that’s bursting with flavor.

Ingredients:

  • 8 oz (225 g) Hakka noodles or chow mein noodles
  • 2 tablespoons vegetable oil
  • 2 cloves garlic, minced
  • 1-inch piece ginger, minced
  • 1 green chili, finely chopped (optional for heat)
  • 1 onion, thinly sliced
  • 1 bell pepper, thinly sliced (any color)
  • 1 carrot, julienned
  • 1 cup shredded cabbage
  • 1/2 cup snap peas or green beans, trimmed and cut into pieces
  • 2-3 tablespoons soy sauce
  • 1 tablespoon vinegar (rice vinegar or white vinegar)
  • 1 tablespoon chili sauce (optional for extra heat)
  • 1 teaspoon sesame oil
  • Salt and pepper, to taste
  • Green onions, chopped (for garnish)
  • Sesame seeds (optional, for garnish)

Instructions:

  1. Cook the Noodles: Bring a large pot of water to a boil. Add the Hakka noodles and cook according to the package instructions until al dente. Drain the noodles and rinse them under cold water to stop the cooking process. Toss the noodles with a little vegetable oil to prevent them from sticking together and set aside.
  2. Prepare the Vegetables: While the noodles are cooking, prepare all the vegetables by slicing and julienning them as needed.
  3. Stir-Fry the Aromatics: Heat the vegetable oil in a large wok or skillet over medium-high heat. Add the minced garlic, ginger, and green chili (if using) and stir-fry for about 30 seconds until fragrant.
  4. Cook the Vegetables: Add the sliced onion, bell pepper, carrot, cabbage, and snap peas or green beans to the wok. Stir-fry for 3-4 minutes until the vegetables are slightly softened but still crisp.
  5. Add the Noodles and Sauce: Add the cooked noodles to the wok, followed by the soy sauce, vinegar, chili sauce (if using), and sesame oil. Toss everything together until the noodles are well coated with the sauce and the vegetables are evenly distributed. Stir-fry for another 2-3 minutes to heat everything through.
  6. Season and Serve: Taste and adjust the seasoning with salt and pepper if needed. Garnish with chopped green onions and sesame seeds if desired. Serve the Vegetable Hakka Noodles hot, either on their own or as a side dish.

These Vegetable Hakka Noodles are a delicious, quick, and easy meal that’s perfect for satisfying your cravings for something savory and full of vibrant flavors.

COSMOPOLITAN COCKTAIL

0

The Cosmopolitan, or ā€œCosmo,ā€ is a timeless and chic cocktail that combines the tartness of cranberry juice with the brightness of lime and the subtle sweetness of orange liqueur, all anchored by a smooth vodka base. Popularized in the 1990s, it’s an elegant and refreshing drink, perfect for both casual sipping and more formal gatherings. Its striking pink hue and balanced flavor make it a modern classic in the world of cocktails.

Ingredients:

  • 1 1/2 oz vodka (preferably citrus vodka)
  • 1 oz Cointreau (or any orange liqueur)
  • 1/2 oz fresh lime juice
  • 1/2 oz cranberry juice
  • Ice
  • Lime wheel or twist, or a slice of orange peel (for garnish)

Instructions:

  1. Chill your glass: Start by chilling your martini glass by filling it with ice water or placing it in the freezer for a few minutes.
  2. Mix the ingredients: In a cocktail shaker, combine the vodka, Cointreau, lime juice, and cranberry juice. Fill the shaker with ice and shake vigorously for about 15-20 seconds until well chilled.
  3. Strain and serve: Empty the ice from your martini glass, then strain the cocktail mixture into the chilled glass.
  4. Garnish: Garnish with a lime wheel, twist of lime, or a strip of orange peel for a touch of citrus aroma.

The Cosmopolitan is best enjoyed cold, so be sure to serve immediately for the most refreshing experience. Cheers!

Chocolate Mousse With Raspberries

0

Indulge in the velvety smoothness of this classic chocolate mousse paired with the tart brightness of fresh raspberries. This elegant dessert is perfect for any special occasion or whenever you’re in the mood to treat yourself. The richness of the chocolate mousse is beautifully balanced by the juicy raspberries, creating a delightful contrast of flavors and textures. Light and airy, yet deeply satisfying, this mousse is a chocolate lover’s dream with a fruity twist that adds a refreshing note to each spoonful.

Ingredients:

  • 6 oz bittersweet chocolate, finely chopped
  • 3 tbsp unsalted butter
  • 3 large eggs, separated
  • ¼ cup sugar
  • 1 cup heavy cream
  • 1 tsp vanilla extract
  • 1 pint fresh raspberries
  • Optional garnish: chocolate shavings or powdered sugar

Instructions:

  1. Melt the chocolate: In a heatproof bowl, combine the chopped chocolate and butter. Place over a pot of simmering water (double boiler method) and gently melt, stirring occasionally until smooth. Remove from heat and let cool slightly.
  2. Beat the egg yolks: In a separate bowl, whisk the egg yolks with 2 tablespoons of sugar until thick and pale. Gradually add the cooled melted chocolate into the yolk mixture, stirring until combined.
  3. Whip the cream: In a chilled bowl, whip the heavy cream until soft peaks form. Add the vanilla extract and continue whipping until the cream holds firm peaks. Gently fold the whipped cream into the chocolate mixture until fully incorporated.
  4. Beat the egg whites: In a clean bowl, beat the egg whites until soft peaks form. Gradually add the remaining 2 tablespoons of sugar and beat until stiff peaks form. Gently fold the egg whites into the chocolate mixture, being careful not to deflate the mousse.
  5. Chill the mousse: Divide the mousse into individual serving dishes or a large bowl. Cover and refrigerate for at least 2 hours or until set.
  6. Serve with raspberries: Just before serving, top each portion with fresh raspberries. Optionally, garnish with chocolate shavings or a dusting of powdered sugar.

Enjoy your decadent Chocolate Mousse with Raspberries!

Honey Soy Salmon

0

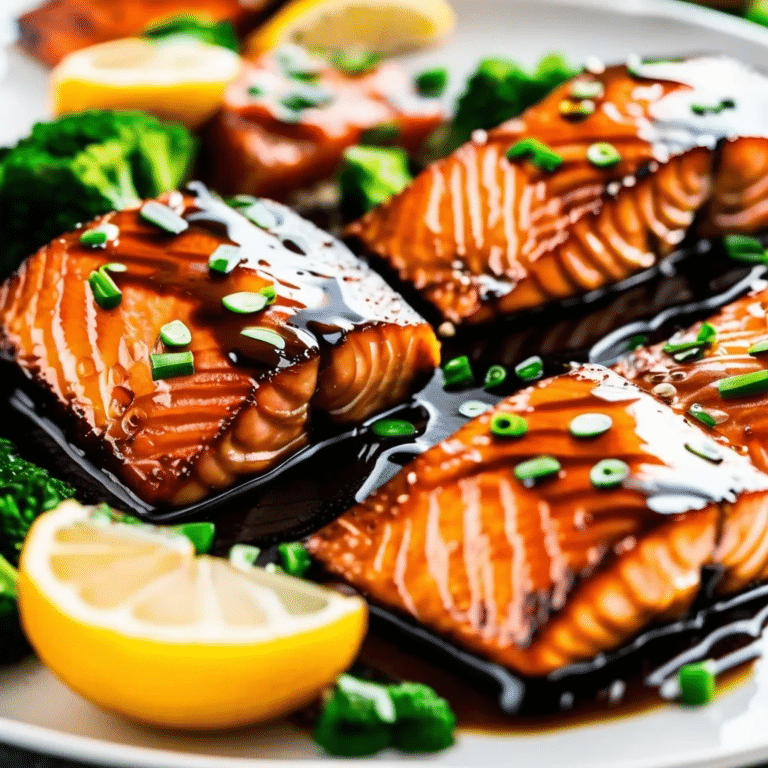
Honey Soy Salmon is a quick and flavorful dish that combines the rich, buttery taste of salmon with a sweet and savory glaze made from honey, soy sauce, and garlic. This easy-to-make recipe is perfect for weeknight dinners or special occasions, offering a delicious balance of flavors with minimal effort. The salmon fillets are baked or pan-seared to perfection, leaving them tender and flaky, while the glaze caramelizes beautifully, adding a glossy finish to the dish. Serve it with rice, steamed vegetables, or a fresh salad for a healthy and satisfying meal that everyone will love.

Ingredients

  • 4 salmon fillets (skin-on or skinless)
  • 1/4 cup honey
  • 1/4 cup soy sauce (low-sodium preferred)
  • 2 cloves garlic, minced
  • 1 tbsp olive oil
  • 1 tbsp fresh lemon juice
  • 1 tsp grated ginger (optional)
  • 1/4 tsp black pepper
  • Sesame seeds and chopped green onions for garnish (optional)

Instructions

  1. Preheat the oven (if baking): Preheat your oven to 400°F (200°C). Line a baking sheet with parchment paper or lightly grease it.
  2. Prepare the marinade: In a small bowl, whisk together the honey, soy sauce, minced garlic, olive oil, lemon juice, ginger (if using), and black pepper.
  3. Marinate the salmon: Place the salmon fillets in a shallow dish and pour the honey-soy marinade over them, ensuring each piece is well-coated. Let the salmon marinate for 15-20 minutes.
  4. Cook the salmon:
    • Baking method: Place the marinated salmon on the prepared baking sheet and bake for 12-15 minutes, or until the salmon is cooked through and flakes easily with a fork.
    • Pan-searing method: Heat a skillet over medium heat and sear the salmon for 4-5 minutes per side, spooning any leftover marinade over the fish as it cooks.
  5. Garnish and serve: Once cooked, transfer the salmon to a serving plate. Garnish with sesame seeds and chopped green onions, if desired. Serve with rice, vegetables, or a fresh salad.

This Honey Soy Salmon is a perfectly balanced dish with sweet and savory flavors that complement the rich, flaky texture of the salmon, making it a delicious and healthy option for any meal!