Home Blog Page 20

Chickpea Tikka Masala

0

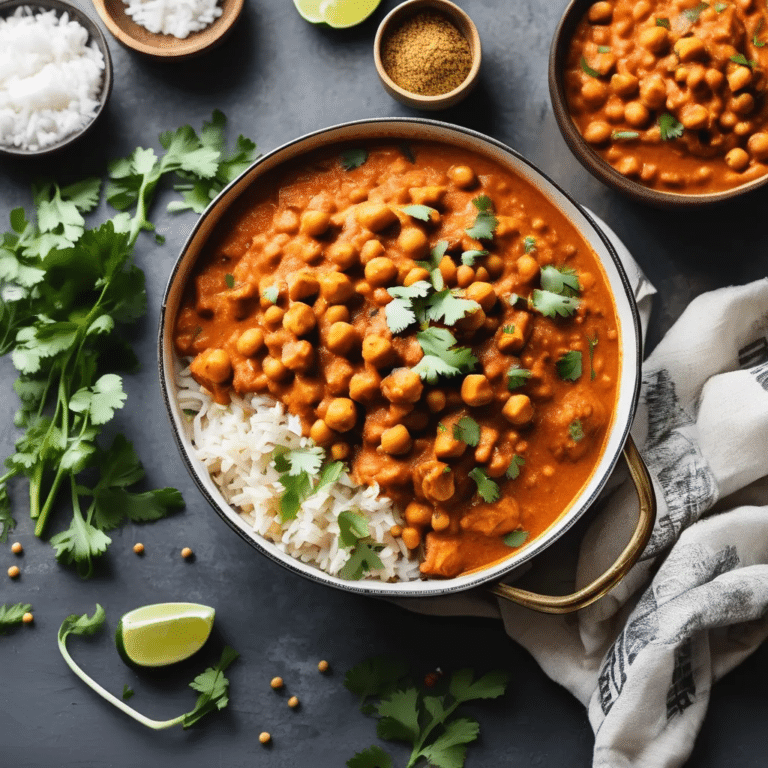
Chickpea Tikka Masala is a delicious and hearty vegetarian twist on the classic Indian dish, offering all the rich, creamy flavors of traditional tikka masala with the added benefits of plant-based protein from chickpeas. This dish features tender chickpeas simmered in a spiced tomato and coconut milk sauce, infused with garam masala, cumin, and turmeric, creating a comforting and satisfying meal that’s perfect for any night of the week. Served over fluffy basmati rice or with warm naan bread, Chickpea Tikka Masala is a flavorful and nutritious option that’s sure to become a favorite for vegetarians and meat-eaters alike.

Ingredients:

  • 2 tablespoons vegetable oil
  • 1 large onion, finely chopped
  • 3 cloves garlic, minced
  • 1-inch piece of ginger, minced
  • 1 can (15 oz) chickpeas, drained and rinsed
  • 1 can (14.5 oz) diced tomatoes
  • 1 can (14 oz) coconut milk
  • 2 tablespoons tomato paste
  • 1 tablespoon garam masala
  • 1 teaspoon ground cumin
  • 1 teaspoon ground coriander
  • 1/2 teaspoon ground turmeric
  • 1/2 teaspoon chili powder (optional, for heat)
  • Salt and pepper, to taste
  • Fresh cilantro, chopped (for garnish)
  • Cooked basmati rice or naan bread (for serving)

Instructions:

  1. Sauté the Aromatics: In a large skillet or pot, heat the vegetable oil over medium heat. Add the chopped onion and sauté until soft and translucent, about 5 minutes. Add the minced garlic and ginger, and cook for another 2 minutes until fragrant.
  2. Add the Spices: Stir in the garam masala, cumin, coriander, turmeric, and chili powder (if using). Cook the spices with the onion mixture for 1-2 minutes, stirring constantly, to release their flavors.
  3. Add Tomatoes and Tomato Paste: Add the diced tomatoes and tomato paste to the skillet, stirring well to combine. Let the mixture simmer for 5 minutes, allowing the tomatoes to break down and the flavors to meld together.
  4. Add Chickpeas and Coconut Milk: Stir in the chickpeas, making sure they are well coated with the tomato and spice mixture. Pour in the coconut milk, stirring to combine. Bring the mixture to a simmer and cook for 15-20 minutes, allowing the sauce to thicken and the chickpeas to absorb the flavors. Season with salt and pepper to taste.
  5. Serve: Once the sauce has thickened and the chickpeas are tender, remove the skillet from the heat. Garnish with freshly chopped cilantro and serve the Chickpea Tikka Masala over cooked basmati rice or with warm naan bread.

Chickpea Tikka Masala is a comforting and flavorful dish that’s easy to prepare and perfect for those looking to enjoy a delicious, vegetarian-friendly version of a classic Indian favorite.

Picnic Potato Salad

0

This Picnic Potato Salad is the perfect side dish for any outdoor gathering, combining tender potatoes, crunchy vegetables, and a tangy, creamy dressing. With a balance of textures and flavors, this salad offers just the right amount of tang from the mustard and vinegar, complemented by the sweetness of relish and the creaminess of mayonnaise. It’s a crowd-pleaser, easy to make ahead, and ideal for barbecues, picnics, or potlucks. Simple yet packed with flavor, this salad is a nostalgic summer favorite that pairs well with grilled meats or sandwiches.

Ingredients:

  • 2 pounds potatoes, peeled and cubed
  • 3 large hard-boiled eggs, chopped
  • 1/2 cup mayonnaise
  • 2 tablespoons Dijon mustard
  • 2 tablespoons apple cider vinegar
  • 1 tablespoon sweet pickle relish
  • 1/4 cup finely chopped red onion
  • 1/4 cup finely chopped celery
  • 2 tablespoons chopped fresh parsley
  • Salt and pepper, to taste
  • Paprika, for garnish (optional)

Instructions:

  1. Cook the potatoes: Place the cubed potatoes in a large pot and cover with water. Bring to a boil over medium-high heat, then reduce to a simmer. Cook for 10-12 minutes, or until the potatoes are tender but still firm. Drain and let cool slightly.
  2. Prepare the dressing: In a large bowl, whisk together the mayonnaise, Dijon mustard, apple cider vinegar, and sweet pickle relish until smooth.
  3. Assemble the salad: Add the cooled potatoes, chopped eggs, red onion, celery, and parsley to the bowl with the dressing. Gently toss everything together to combine, making sure the potatoes are well-coated.
  4. Season and chill: Season the salad with salt and pepper to taste. Cover the bowl and refrigerate for at least 1 hour to allow the flavors to meld.
  5. Serve: Before serving, garnish with a sprinkle of paprika for color if desired. Serve chilled and enjoy!

This Picnic Potato Salad can be made a day ahead, making it convenient for busy party preparations.

Homemade Nutter Butters

0

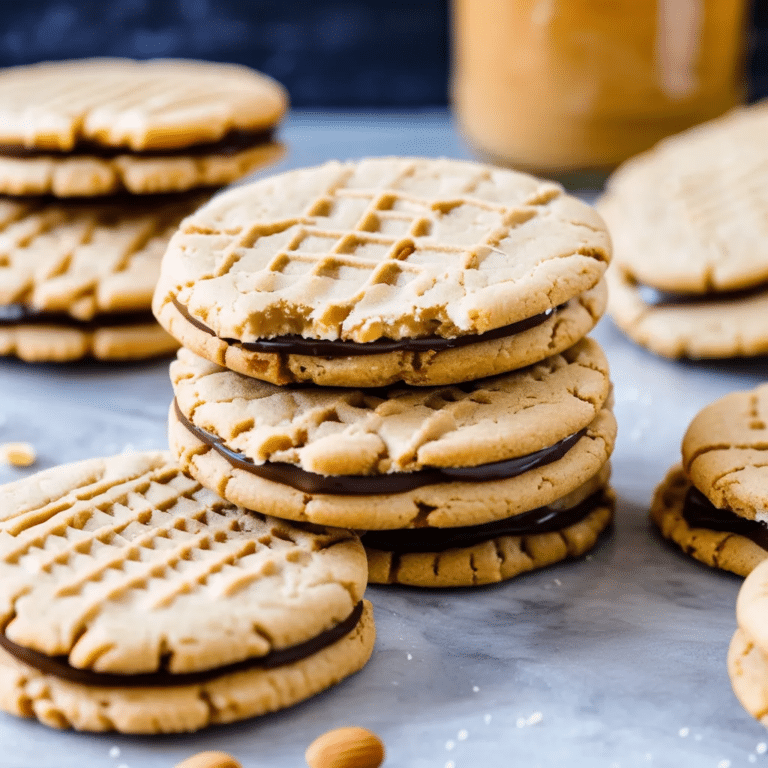
Homemade Nutter Butters are a delightful recreation of the classic peanut butter sandwich cookies, offering a rich, nutty flavor that’s even better than the store-bought version. These cookies feature two crisp, buttery peanut cookies sandwiched together with a smooth, creamy peanut butter filling. Perfect for peanut butter lovers, these cookies are the ultimate indulgence, balancing sweet and salty in every bite. Whether you’re making them for a special treat or just to satisfy a craving, Homemade Nutter Butters are easy to prepare and sure to become a favorite in your cookie jar.

Ingredients:

For the Cookies:

  • 1/2 cup unsalted butter, softened
  • 1/2 cup creamy peanut butter
  • 1/2 cup granulated sugar
  • 1/2 cup brown sugar, packed
  • 1 large egg
  • 1 teaspoon vanilla extract
  • 1 1/4 cups all-purpose flour
  • 1/2 teaspoon baking soda
  • 1/4 teaspoon baking powder
  • 1/4 teaspoon salt

For the Filling:

  • 1/2 cup creamy peanut butter
  • 1/4 cup unsalted butter, softened
  • 1 cup powdered sugar
  • 1-2 tablespoons milk (as needed)

Instructions:

  1. Preheat the Oven: Preheat your oven to 350°F (175°C). Line two baking sheets with parchment paper.
  2. Make the Cookie Dough: In a large mixing bowl, cream together the softened butter, peanut butter, granulated sugar, and brown sugar until light and fluffy, about 2-3 minutes. Add the egg and vanilla extract, and beat until well combined.
  3. Combine the Dry Ingredients: In a separate bowl, whisk together the flour, baking soda, baking powder, and salt. Gradually add the dry ingredients to the wet mixture, mixing until just combined.
  4. Shape the Cookies: Roll the dough into small balls, about 1 teaspoon of dough each, and place them on the prepared baking sheets. Flatten each ball with a fork, making a crisscross pattern to mimic the classic Nutter Butter shape. Alternatively, shape the dough into small ovals and press with a fork to create a more traditional look.
  5. Bake: Bake the cookies in the preheated oven for 8-10 minutes, or until the edges are lightly golden. Remove from the oven and let the cookies cool on the baking sheets for a few minutes before transferring them to a wire rack to cool completely.
  6. Prepare the Filling: In a medium bowl, beat together the peanut butter and softened butter until smooth. Gradually add the powdered sugar, mixing until well combined. Add milk, one tablespoon at a time, until the filling reaches a smooth, spreadable consistency.
  7. Assemble the Cookies: Once the cookies are completely cool, spread a generous amount of peanut butter filling on the flat side of one cookie, then sandwich it with another cookie.
  8. Serve and Store: Enjoy the Homemade Nutter Butters immediately, or store them in an airtight container at room temperature for up to a week.

These Homemade Nutter Butters are a nostalgic and delicious treat, perfect for sharing with family and friends or enjoying as a sweet indulgence any time of day.

Chicken Caesar Burgers

0

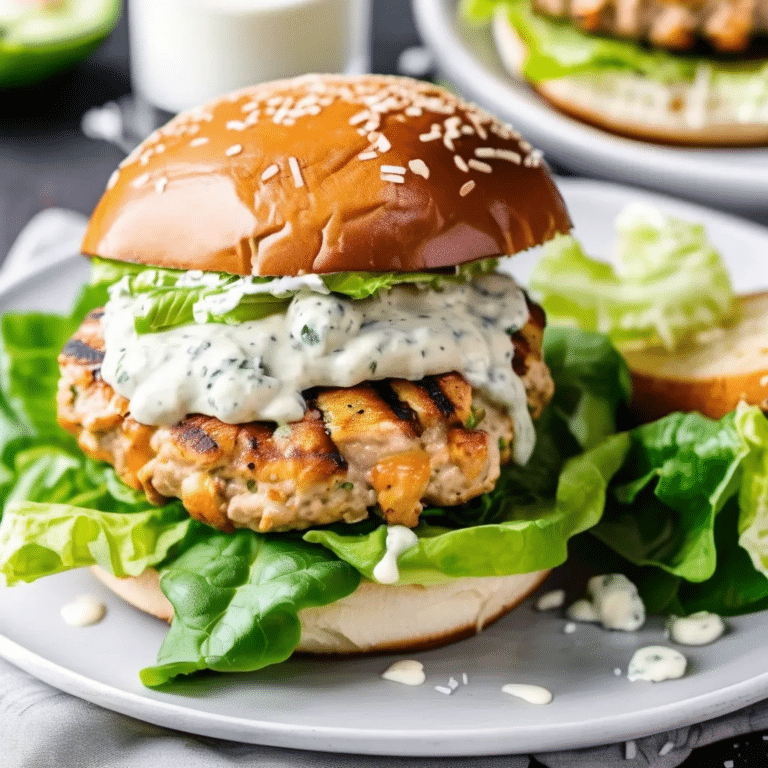
Chicken Caesar Burgers are a delicious twist on the classic Caesar salad, transforming it into a hearty and flavorful burger. Juicy ground chicken patties are infused with the bold flavors of Parmesan cheese, garlic, and Caesar dressing, then grilled to perfection. Topped with crisp romaine lettuce, a little extra Caesar dressing, and even a sprinkle of Parmesan, these burgers are perfect for a light yet satisfying meal. Serve them on toasted buns with your favorite sides for a fresh take on both burgers and Caesar salad.

Ingredients

  • 1 lb ground chicken
  • 1/3 cup grated Parmesan cheese
  • 1/4 cup Caesar dressing
  • 1 clove garlic, minced
  • 1/4 tsp black pepper
  • 1/4 tsp salt
  • 1/4 cup breadcrumbs (optional for binding)
  • 4 hamburger buns, toasted
  • Romaine lettuce leaves for topping
  • Extra Caesar dressing for drizzling
  • Shaved Parmesan cheese (optional, for garnish)

Instructions

  1. Prepare the burger patties: In a large bowl, combine the ground chicken, grated Parmesan cheese, Caesar dressing, minced garlic, black pepper, salt, and breadcrumbs (if using). Mix until all the ingredients are well combined, but be careful not to overmix.
  2. Form the patties: Divide the mixture into 4 equal portions and shape them into patties.
  3. Cook the burgers: Preheat a grill or stovetop skillet over medium heat. Cook the chicken patties for 5-6 minutes per side, or until they are cooked through and reach an internal temperature of 165°F (74°C).
  4. Assemble the burgers: Place each chicken patty on a toasted bun. Top with romaine lettuce, a drizzle of Caesar dressing, and some shaved Parmesan cheese if desired.
  5. Serve: Serve the burgers hot with your favorite sides like fries, salad, or roasted vegetables.

These Chicken Caesar Burgers are a flavorful and satisfying way to enjoy the tangy, savory goodness of Caesar salad in a fun and creative burger form!

SLOW COOKED LAMB SHANKS

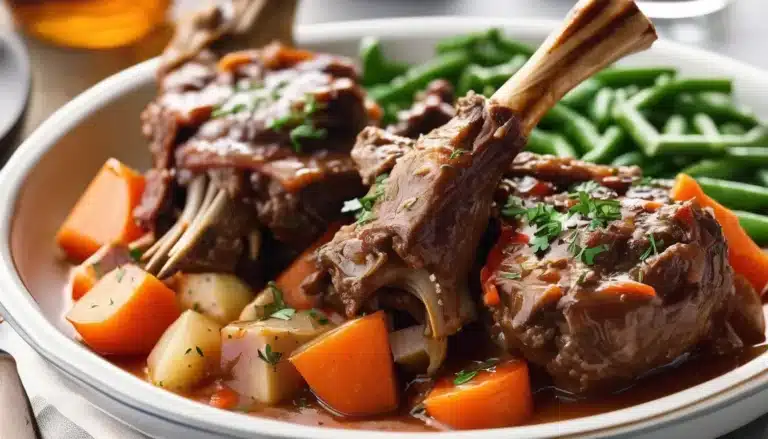
Slow-cooked lamb shanks are the epitome of comfort food, with tender, fall-off-the-bone meat braised in a rich, flavorful sauce. Using a slow cooker makes this dish incredibly easy, allowing the lamb to slowly cook and absorb all the wonderful flavors from herbs, vegetables, and wine. This dish is perfect for special occasions or a cozy weekend meal, requiring minimal effort but delivering a luxurious, deeply satisfying result. Serve the lamb shanks with mashed potatoes, polenta, or crusty bread to soak up the delicious sauce.

Ingredients:

  • 4 lamb shanks
  • Salt and pepper, to taste
  • 2 tablespoons olive oil
  • 1 large onion, chopped
  • 3 garlic cloves, minced
  • 2 large carrots, chopped
  • 2 celery stalks, chopped
  • 1 cup red wine (or beef broth if avoiding alcohol)
  • 1 cup beef or chicken broth
  • 1 (14.5-ounce) can diced tomatoes
  • 2 tablespoons tomato paste
  • 1 teaspoon dried thyme
  • 1 teaspoon dried rosemary
  • 2 bay leaves
  • 1 tablespoon balsamic vinegar
  • Fresh parsley for garnish (optional)

Instructions:

  1. Season and sear the lamb shanks: Pat the lamb shanks dry and season generously with salt and pepper. In a large skillet, heat the olive oil over medium-high heat. Sear the lamb shanks for about 3-4 minutes on each side, until browned all over. Transfer the lamb shanks to the slow cooker.
  2. Sauté the vegetables: In the same skillet, add the chopped onion, carrots, and celery. Sauté for 5-7 minutes, until softened. Add the minced garlic and cook for another minute until fragrant. Transfer the sautéed vegetables to the slow cooker.
  3. Prepare the braising liquid: In the skillet, pour in the red wine and bring it to a simmer, scraping up any browned bits from the bottom of the pan. Let it reduce slightly for 2-3 minutes. Stir in the broth, diced tomatoes, tomato paste, thyme, rosemary, and bay leaves. Pour this mixture over the lamb shanks and vegetables in the slow cooker.
  4. Cook the lamb: Cover the slow cooker and cook on low for 7-8 hours or on high for 4-5 hours, until the lamb is tender and easily falls off the bone.
  5. Add balsamic vinegar: About 30 minutes before the lamb shanks are done, stir in the balsamic vinegar for a rich, tangy finish to the sauce.
  6. Serve: Once the lamb shanks are fully cooked, remove the bay leaves and discard. Serve the lamb shanks with the sauce spooned over the top, and garnish with fresh parsley if desired.

These slow-cooked lamb shanks are incredibly tender and flavorful, perfect for serving over creamy mashed potatoes, polenta, or alongside roasted vegetables. The braising liquid transforms into a rich sauce that will have everyone coming back for seconds!

Pumpkin Spice Waffles

0

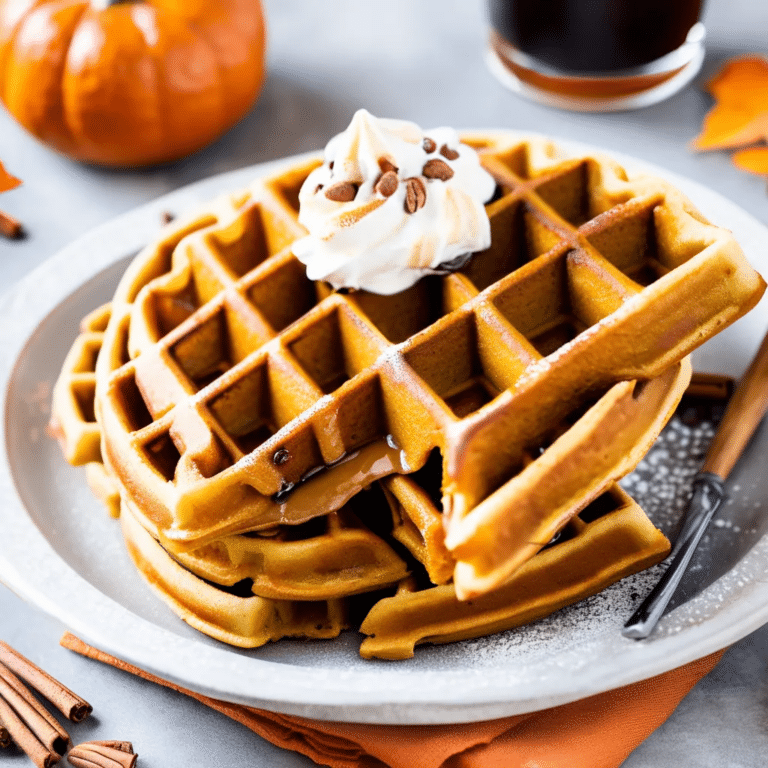
Pumpkin Spice Waffles are a delightful way to embrace the cozy flavors of fall. These waffles are infused with warm spices like cinnamon, nutmeg, and cloves, and enriched with pumpkin puree, creating a deliciously fluffy and aromatic breakfast treat. Perfect for chilly mornings or weekend brunches, Pumpkin Spice Waffles bring the essence of autumn to your plate, offering a comforting and festive start to your day. Top them with maple syrup, whipped cream, and a sprinkle of cinnamon for an extra-special touch that will make them a favorite in your seasonal recipe collection.

Ingredients:

  • 1 1/2 cups all-purpose flour
  • 2 tablespoons brown sugar
  • 2 teaspoons baking powder
  • 1 teaspoon ground cinnamon
  • 1/2 teaspoon ground ginger
  • 1/4 teaspoon ground nutmeg
  • 1/4 teaspoon ground cloves
  • 1/4 teaspoon salt
  • 1 cup milk (dairy or plant-based)
  • 1/2 cup pumpkin puree
  • 2 large eggs
  • 1/4 cup unsalted butter, melted
  • 1 teaspoon vanilla extract

Instructions:

  1. Preheat the Waffle Iron: Preheat your waffle iron according to the manufacturer’s instructions.
  2. Mix the Dry Ingredients: In a large mixing bowl, whisk together the flour, brown sugar, baking powder, cinnamon, ginger, nutmeg, cloves, and salt until well combined.
  3. Combine the Wet Ingredients: In a separate bowl, whisk together the milk, pumpkin puree, eggs, melted butter, and vanilla extract until smooth.
  4. Make the Batter: Pour the wet ingredients into the dry ingredients and stir until just combined. Be careful not to overmix; the batter should be slightly lumpy.
  5. Cook the Waffles: Lightly grease the waffle iron with non-stick spray or butter. Pour the batter onto the hot waffle iron, using enough to cover the surface but not overflow. Cook according to the waffle iron’s instructions, usually about 3-5 minutes, until the waffles are golden brown and crisp.
  6. Serve: Serve the Pumpkin Spice Waffles warm, topped with maple syrup, whipped cream, and a sprinkle of cinnamon, if desired.

These Pumpkin Spice Waffles are a perfect fall breakfast, combining the rich, spiced flavors of pumpkin pie with the light, crispy texture of waffles. Enjoy them as a seasonal treat that’s sure to bring warmth and comfort to your morning routine.

Gluten Free Pumpkin Bread

0

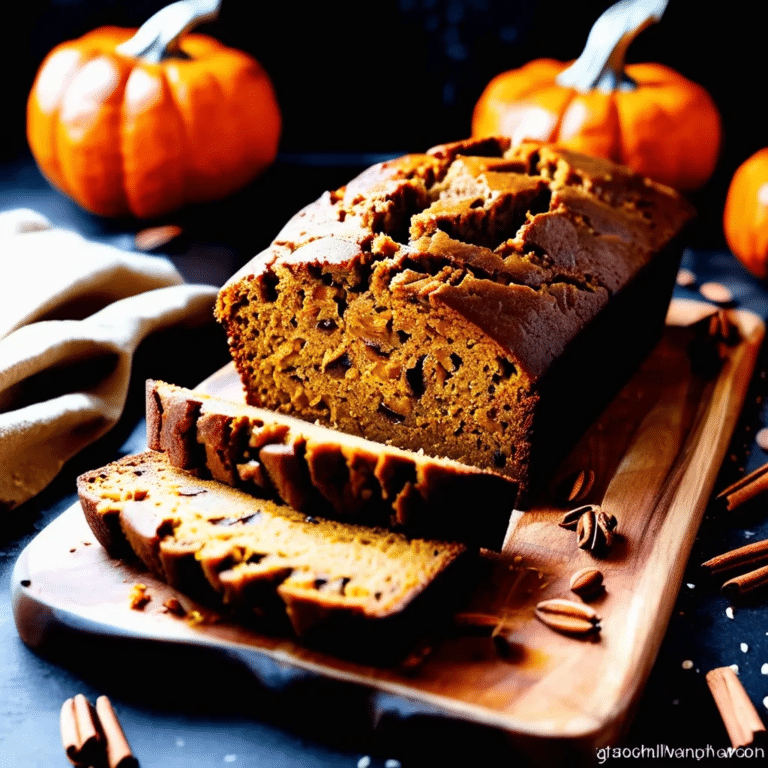
Gluten-Free Pumpkin Bread is a delicious and moist loaf that’s packed with warm fall flavors like cinnamon, nutmeg, and cloves. This easy-to-make bread is perfect for anyone following a gluten-free diet, but it’s so flavorful that everyone will enjoy it! Made with pumpkin puree, it stays wonderfully tender and has just the right amount of sweetness. Whether enjoyed for breakfast, as a snack, or a dessert, this comforting and spiced pumpkin bread is a great way to celebrate the autumn season while keeping it gluten-free.

Ingredients

  • 1 3/4 cups gluten-free all-purpose flour
  • 1 tsp baking soda
  • 1/2 tsp baking powder
  • 1/2 tsp salt
  • 1 tsp ground cinnamon
  • 1/2 tsp ground nutmeg
  • 1/4 tsp ground cloves
  • 1/2 cup granulated sugar
  • 1/2 cup brown sugar, packed
  • 1 cup pumpkin puree (not pumpkin pie filling)
  • 2 large eggs
  • 1/2 cup vegetable oil or melted coconut oil
  • 1 tsp vanilla extract
  • 1/4 cup milk (dairy or dairy-free)

Instructions

  1. Preheat the oven: Preheat your oven to 350°F (175°C). Grease a 9×5-inch loaf pan or line it with parchment paper.
  2. Mix the dry ingredients: In a medium bowl, whisk together the gluten-free flour, baking soda, baking powder, salt, cinnamon, nutmeg, and cloves.
  3. Mix the wet ingredients: In a large bowl, whisk together the pumpkin puree, granulated sugar, brown sugar, eggs, oil, vanilla extract, and milk until well combined.
  4. Combine the wet and dry ingredients: Gradually add the dry ingredients to the wet ingredients, stirring until just combined. Be careful not to overmix.
  5. Bake the bread: Pour the batter into the prepared loaf pan and smooth the top. Bake for 50-60 minutes, or until a toothpick inserted into the center comes out clean.
  6. Cool and serve: Allow the pumpkin bread to cool in the pan for 10-15 minutes, then transfer to a wire rack to cool completely. Slice and enjoy!

This Gluten-Free Pumpkin Bread is soft, flavorful, and perfect for autumn, making it a crowd-pleaser that’s both gluten-free and delicious!

STUFFED AUBERGINES

Stuffed aubergines are a delightful and wholesome dish that showcases the rich, tender texture of roasted aubergines filled with a flavorful stuffing. Whether filled with a hearty meat mixture or a savory vegetarian blend, this dish is perfect for a family dinner or a special occasion. The stuffing options are endless, but this recipe uses a classic Mediterranean-inspired combination of ground meat, vegetables, and herbs. Topped with cheese and baked to perfection, stuffed aubergines are satisfying, healthy, and full of bold flavors.

Ingredients:

  • 2 large aubergines (eggplants), halved lengthwise
  • 2 tablespoons olive oil
  • 1 onion, finely chopped
  • 2 garlic cloves, minced
  • 1/2 pound (225g) ground beef or lamb (or use lentils for a vegetarian option)
  • 1 cup diced tomatoes (fresh or canned)
  • 1/2 teaspoon ground cumin
  • 1/2 teaspoon paprika
  • Salt and pepper to taste
  • 1/4 cup chopped fresh parsley or cilantro
  • 1/4 cup grated Parmesan or crumbled feta cheese (optional)
  • 1/2 cup shredded mozzarella or cheddar cheese (for topping)

Instructions:

  1. Prepare the aubergines: Preheat the oven to 400°F (200°C). Scoop out the flesh from the aubergine halves, leaving about 1/2 inch of shell intact. Dice the scooped-out flesh and set it aside. Brush the aubergine halves with olive oil, season with salt and pepper, and place them cut-side down on a baking sheet. Roast in the preheated oven for about 20 minutes until they are tender but not falling apart.
  2. Make the filling: While the aubergines are roasting, heat the remaining olive oil in a large pan over medium heat. Add the chopped onion and garlic, and sauté for 3-4 minutes until softened. Add the ground meat (or lentils for a vegetarian option) and cook until browned, breaking it up with a spoon as it cooks. Stir in the diced aubergine flesh, tomatoes, cumin, paprika, salt, and pepper. Cook for another 5-7 minutes, until the vegetables are tender and the flavors have melded.
  3. Assemble the stuffed aubergines: Remove the roasted aubergines from the oven and carefully flip them over. Fill each aubergine half with the prepared stuffing mixture, pressing it down gently. Top with Parmesan or feta cheese if using, and then sprinkle shredded mozzarella or cheddar on top.
  4. Bake: Return the stuffed aubergines to the oven and bake for another 15-20 minutes, until the cheese is melted and golden brown.
  5. Garnish and serve: Once the stuffed aubergines are baked, garnish with fresh parsley or cilantro and serve warm.

These stuffed aubergines are hearty, flavorful, and make a perfect main course on their own, or they can be served with a side of salad or couscous for a complete meal. Enjoy!

Johnny Marzetti

0

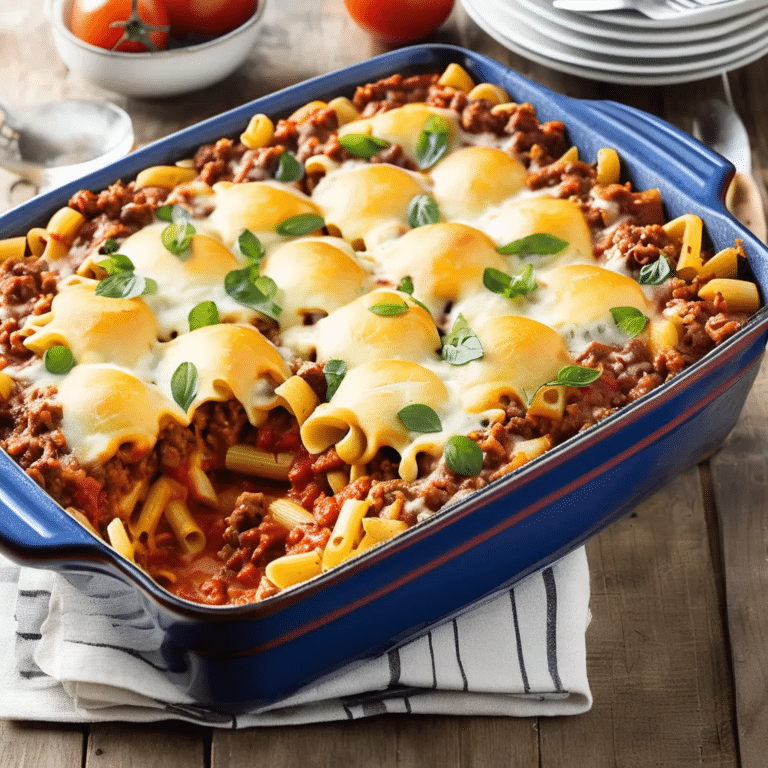
Johnny Marzetti is a classic American casserole that brings together ground beef, tender pasta, and a flavorful tomato sauce, all topped with melted cheese. This hearty dish has its roots in the Midwest, particularly Ohio, where it became a beloved comfort food in the early 20th century. Named after the brother of a Columbus restaurateur, Johnny Marzetti is perfect for family dinners, potlucks, or any occasion where you want to serve something warm, filling, and utterly satisfying. The combination of savory beef, tangy tomato sauce, and gooey cheese makes this casserole an instant crowd-pleaser, and it’s even better as leftovers the next day.

Ingredients:

  • 1 lb ground beef
  • 1 medium onion, chopped
  • 1 green bell pepper, chopped
  • 2 cloves garlic, minced
  • 1 can (14.5 oz) diced tomatoes
  • 1 can (8 oz) tomato sauce
  • 1 can (6 oz) tomato paste
  • 1 teaspoon dried oregano
  • 1 teaspoon dried basil
  • 1/2 teaspoon sugar
  • Salt and pepper, to taste
  • 8 oz elbow macaroni or other small pasta
  • 2 cups shredded cheddar cheese
  • 1/2 cup shredded mozzarella cheese
  • Fresh parsley, chopped (for garnish, optional)

Instructions:

  1. Cook the Pasta: Bring a large pot of salted water to a boil. Add the pasta and cook according to the package instructions until al dente. Drain and set aside.
  2. Brown the Beef: In a large skillet, cook the ground beef over medium heat until browned, breaking it up with a spoon as it cooks. Drain any excess fat.
  3. Sauté the Vegetables: Add the chopped onion, green bell pepper, and minced garlic to the skillet with the beef. Cook for 5-7 minutes, or until the vegetables are softened.
  4. Add the Tomatoes and Seasoning: Stir in the diced tomatoes, tomato sauce, tomato paste, oregano, basil, sugar, salt, and pepper. Simmer the mixture for 10-15 minutes, allowing the flavors to meld together.
  5. Combine with Pasta: Preheat your oven to 350°F (175°C). In a large mixing bowl, combine the cooked pasta with the meat sauce, stirring until well coated.
  6. Assemble the Casserole: Transfer the pasta and sauce mixture to a greased 9×13-inch baking dish. Sprinkle the shredded cheddar cheese evenly over the top, followed by the mozzarella cheese.
  7. Bake: Place the baking dish in the preheated oven and bake for 25-30 minutes, or until the cheese is melted and bubbly.
  8. Serve: Remove the casserole from the oven and let it cool slightly before serving. Garnish with chopped fresh parsley if desired, and enjoy this warm, comforting dish.

Johnny Marzetti is a timeless casserole that’s sure to become a favorite in your home, offering a delicious and comforting meal that’s perfect for any night of the week.

BEAN AND CHEESE BURRITOS

Bean and Cheese Burritos are a simple yet flavorful meal that can be whipped up in no time. They’re filled with creamy refried beans and gooey melted cheese, making them both satisfying and comforting. Whether you’re looking for a quick weeknight dinner, a make-ahead lunch, or something to customize with your favorite toppings, these burritos are a go-to favorite. They can be enjoyed on their own or served with salsa, guacamole, or sour cream for extra flavor. Plus, they’re budget-friendly and can easily be made in large batches!

Ingredients:

  • 1 (15-ounce) can refried beans (or homemade refried beans)
  • 1 1/2 cups shredded cheese (cheddar, Monterey Jack, or a blend)
  • 4 large flour tortillas
  • 1 teaspoon ground cumin
  • 1/2 teaspoon chili powder
  • 1/4 teaspoon garlic powder
  • 1/4 teaspoon onion powder
  • Salt and pepper to taste
  • Optional: Salsa, sour cream, guacamole, or hot sauce for serving

Instructions:

  1. Warm the beans: In a small saucepan over medium heat, warm the refried beans. Stir in the cumin, chili powder, garlic powder, onion powder, and season with salt and pepper to taste. Heat for about 5 minutes, stirring occasionally, until the beans are warmed through and the spices are well combined.
  2. Heat the tortillas: While the beans are warming, heat the tortillas. You can do this by placing each tortilla in a dry skillet over medium heat for about 30 seconds per side until soft and pliable, or by microwaving them between damp paper towels for 20-30 seconds.
  3. Assemble the burritos: Lay one tortilla flat and spread a generous amount of the refried beans down the center. Sprinkle a good amount of shredded cheese on top of the beans.
  4. Fold the burrito: Fold the sides of the tortilla in, then roll it up tightly from the bottom to form the burrito. Repeat this process for the remaining tortillas.
  5. Optional step (crisp the burritos): If you like a slightly crispy burrito, heat a skillet over medium heat and cook each burrito seam-side down for about 1-2 minutes on each side until golden and crispy.
  6. Serve: Serve the burritos hot with salsa, sour cream, guacamole, or your favorite toppings.

These Bean and Cheese Burritos are not only delicious but incredibly versatile. You can add rice, sautéed vegetables, or even meat if you want to make them more filling. Enjoy!