Home Blog Page 22

TRADITIONAL APPLE PIE

Traditional Apple Pie is a timeless dessert, known for its flaky, buttery crust and a sweet, cinnamon-spiced apple filling. This classic pie is perfect for any occasion, whether it’s a holiday gathering, a family dinner, or just a cozy treat to enjoy with a scoop of vanilla ice cream. The combination of tender apples and warm spices creates a comforting, delicious dessert that’s hard to resist. Making apple pie from scratch might seem like a labor of love, but the reward is a homemade pie with a perfect balance of sweetness, tartness, and buttery goodness.

Ingredients:

For the Crust:

  • 2 1/2 cups all-purpose flour
  • 1 teaspoon salt
  • 1 tablespoon granulated sugar
  • 1 cup (2 sticks) unsalted butter, cold and cubed
  • 1/4 to 1/2 cup ice water

For the Filling:

  • 6-7 medium apples (Granny Smith, Honeycrisp, or a mix), peeled, cored, and thinly sliced
  • 3/4 cup granulated sugar
  • 1/4 cup brown sugar
  • 1 teaspoon cinnamon
  • 1/4 teaspoon nutmeg
  • 1 tablespoon lemon juice
  • 2 tablespoons all-purpose flour
  • 1 tablespoon unsalted butter, cut into small pieces
  • 1 teaspoon vanilla extract (optional)

For the Egg Wash:

  • 1 egg, beaten
  • 1 tablespoon milk or water
  • Granulated sugar for sprinkling on top (optional)

Instructions:

  1. Prepare the pie crust: In a large bowl, whisk together the flour, salt, and sugar. Add the cold, cubed butter and cut it into the flour using a pastry cutter or your fingers until the mixture resembles coarse crumbs with some pea-sized butter pieces. Gradually add the ice water, 1 tablespoon at a time, and mix just until the dough comes together. Divide the dough in half, form each half into a disk, wrap them in plastic wrap, and refrigerate for at least 1 hour.
  2. Prepare the filling: In a large bowl, combine the sliced apples, granulated sugar, brown sugar, cinnamon, nutmeg, lemon juice, and flour. Toss the apples until they are well coated. Set aside for 15-20 minutes to allow the apples to release some juices.
  3. Preheat the oven to 425°F (220°C). Place a baking sheet on the lower rack of the oven to catch any drips from the pie.
  4. Roll out the crust: On a lightly floured surface, roll out one disk of the chilled dough to fit a 9-inch pie dish, leaving some overhang. Carefully transfer the dough to the pie dish and trim any excess, leaving about a 1-inch overhang. Roll out the second disk for the top crust.
  5. Assemble the pie: Pour the apple filling into the prepared pie crust, mounding it slightly in the center. Dot the filling with small pieces of butter. Lay the second rolled-out dough over the filling, trim any excess, and crimp the edges to seal the pie. You can also cut strips of dough and create a lattice top if desired.
  6. Egg wash and sugar: Brush the top of the pie with the egg wash (beaten egg mixed with milk or water) and sprinkle with granulated sugar for extra sweetness and a golden finish. Cut a few small slits in the top crust to allow steam to escape.
  7. Bake: Place the pie on the preheated baking sheet in the oven. Bake for 20 minutes at 425°F, then reduce the heat to 375°F (190°C) and continue baking for 40-45 minutes, or until the crust is golden brown and the apple filling is bubbling. If the edges start to brown too quickly, cover them with foil or a pie shield.
  8. Cool: Remove the pie from the oven and allow it to cool for at least 2 hours before serving. This helps the filling set.

Serve warm with a scoop of vanilla ice cream or a dollop of whipped cream for a comforting, delicious treat!

Chocolate Chip Pumpkin Banana Bread

0

This delightful Chocolate Chip Pumpkin Banana Bread combines the best of fall flavors with the comfort of a classic banana bread. The addition of pumpkin puree lends a warm, spiced note while keeping the bread moist and tender. Mashed bananas add natural sweetness, and chocolate chips melt into gooey pockets throughout the loaf, making every bite a sweet surprise. Perfect for breakfast, a snack, or even dessert, this bread is an irresistible way to enjoy the flavors of pumpkin and banana together.

Ingredients:

  • 1 1/2 cups all-purpose flour
  • 1 tsp baking soda
  • 1/2 tsp baking powder
  • 1/2 tsp salt
  • 1 tsp ground cinnamon
  • 1/2 tsp ground nutmeg
  • 1/2 tsp ground ginger
  • 1/2 cup unsalted butter, melted
  • 1/2 cup granulated sugar
  • 1/2 cup brown sugar, packed
  • 1 cup pumpkin puree
  • 2 large ripe bananas, mashed
  • 2 large eggs
  • 1 tsp vanilla extract
  • 1 cup chocolate chips (semi-sweet or milk chocolate)

Instructions:

  1. Preheat oven to 350°F (175°C). Grease a 9×5-inch loaf pan or line it with parchment paper.
  2. In a medium bowl, whisk together the flour, baking soda, baking powder, salt, cinnamon, nutmeg, and ginger.
  3. In a large bowl, combine the melted butter, granulated sugar, and brown sugar. Mix in the pumpkin puree, mashed bananas, eggs, and vanilla extract until smooth.
  4. Gradually add the dry ingredients to the wet ingredients, mixing until just combined. Be careful not to overmix.
  5. Fold in the chocolate chips, ensuring they are evenly distributed throughout the batter.
  6. Pour the batter into the prepared loaf pan and smooth the top with a spatula.
  7. Bake for 60-70 minutes, or until a toothpick inserted into the center of the bread comes out clean.
  8. Let the bread cool in the pan for about 10 minutes before transferring it to a wire rack to cool completely.

Enjoy your Chocolate Chip Pumpkin Banana Bread warm or at room temperature, and store any leftovers in an airtight container!

Old-fashioned Gingerbread

0

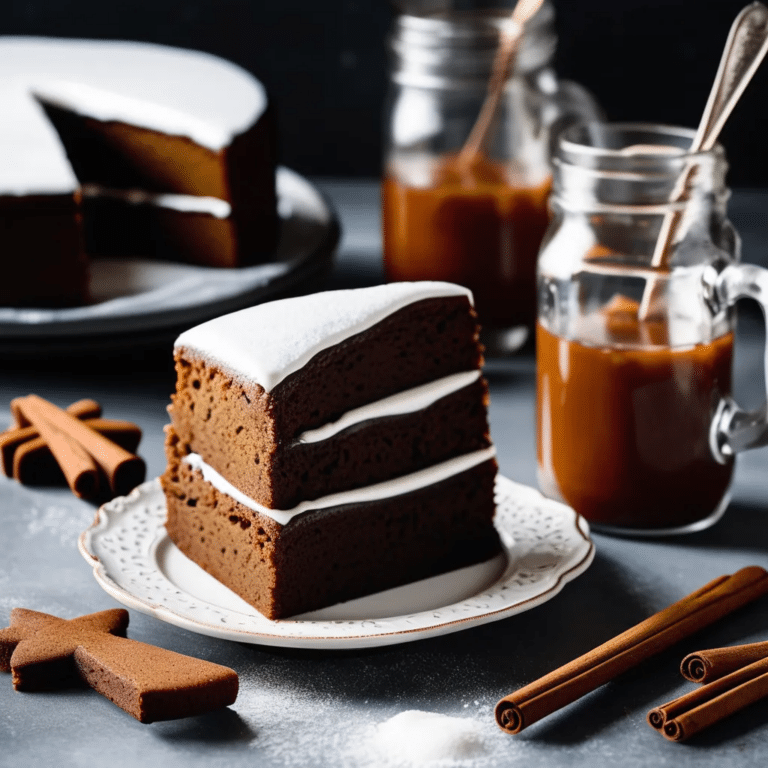
Old-Fashioned Gingerbread is a timeless, cozy dessert that fills your kitchen with the warm and inviting aromas of molasses, ginger, and cinnamon. This classic recipe yields a moist, tender cake with a deep, rich flavor that’s both spicy and sweet, capturing the essence of holiday baking. Perfect for cold winter days or as a nostalgic treat anytime, Old-Fashioned Gingerbread can be enjoyed on its own, dusted with powdered sugar, or topped with a dollop of whipped cream. Whether served warm or at room temperature, this gingerbread is sure to bring comfort and joy with every bite.

Ingredients:

  • 1/2 cup unsalted butter, softened
  • 1/2 cup brown sugar, packed
  • 1 large egg
  • 1 cup molasses
  • 2 1/2 cups all-purpose flour
  • 1 1/2 teaspoons baking soda
  • 1 teaspoon ground ginger
  • 1 teaspoon ground cinnamon
  • 1/2 teaspoon ground cloves
  • 1/2 teaspoon salt
  • 1 cup hot water
  • Powdered sugar, for dusting (optional)
  • Whipped cream or vanilla ice cream, for serving (optional)

Instructions:

  1. Preheat the Oven: Preheat your oven to 350°F (175°C). Grease and flour an 8×8-inch square baking pan or line it with parchment paper.
  2. Cream the Butter and Sugar: In a large mixing bowl, cream together the softened butter and brown sugar until light and fluffy. Beat in the egg until well combined.
  3. Add the Molasses: Stir in the molasses until fully incorporated, scraping down the sides of the bowl as needed.
  4. Mix the Dry Ingredients: In a separate bowl, whisk together the flour, baking soda, ground ginger, cinnamon, cloves, and salt.
  5. Combine the Wet and Dry Ingredients: Gradually add the dry ingredients to the molasses mixture, alternating with the hot water, beginning and ending with the dry ingredients. Mix until just combined, being careful not to overmix.
  6. Bake the Gingerbread: Pour the batter into the prepared baking pan and smooth the top with a spatula. Bake in the preheated oven for 35-40 minutes, or until a toothpick inserted into the center comes out clean.
  7. Cool and Serve: Allow the gingerbread to cool in the pan for 10 minutes before transferring it to a wire rack to cool completely. Dust with powdered sugar if desired, and serve warm or at room temperature with whipped cream or vanilla ice cream.

This Old-Fashioned Gingerbread is a heartwarming dessert that brings the nostalgic flavors of yesteryear to your table, perfect for sharing with loved ones during the holidays or anytime you crave a taste of comfort.

BACON WRAPPED BRUSSELS SPROUTS

Bacon Wrapped Brussels Sprouts are the perfect blend of savory, crispy, and slightly sweet flavors, making them a fantastic appetizer or side dish for any occasion. The smoky, salty bacon perfectly complements the earthy taste of Brussels sprouts, and when roasted, the sprouts become tender with crispy edges. These bite-sized treats are easy to make and always a crowd-pleaser, whether for a holiday gathering, game day, or a simple weeknight dinner. With minimal ingredients and maximum flavor, they bring out the best in Brussels sprouts.

Ingredients:

  • 1 lb Brussels sprouts, trimmed
  • 12 slices of bacon, halved (thin-cut bacon works best)
  • 2 tablespoons olive oil
  • 1 tablespoon balsamic glaze or honey (optional)
  • Freshly ground black pepper to taste
  • Toothpicks (for securing the bacon)

Instructions:

  1. Preheat the oven to 400°F (200°C). Line a baking sheet with parchment paper or aluminum foil for easier cleanup.
  2. Prepare the Brussels sprouts: Trim the ends of the Brussels sprouts and remove any yellow or damaged outer leaves. If the sprouts are large, cut them in half.
  3. Wrap the sprouts in bacon: Wrap each Brussels sprout with half a slice of bacon, securing it with a toothpick. If you’re using smaller Brussels sprouts, you can also secure the bacon by tucking the ends underneath the sprouts without using toothpicks.
  4. Season and drizzle: Place the bacon-wrapped Brussels sprouts on the prepared baking sheet. Drizzle with olive oil and season with freshly ground black pepper. If you’re using balsamic glaze or honey, lightly drizzle it over the wrapped sprouts for a touch of sweetness.
  5. Roast: Roast in the preheated oven for 25-30 minutes, turning halfway through, until the bacon is crispy and the Brussels sprouts are tender. Keep an eye on them during the last few minutes to avoid burning.
  6. Serve: Remove the toothpicks (if used) before serving and enjoy these crispy, savory bites hot from the oven.

These Bacon Wrapped Brussels Sprouts are simple yet impressive, adding a delightful twist to your meal or gathering!

Brussels Sprouts Soup

0

This creamy Brussels sprouts soup is a cozy and nutritious dish that highlights the earthy flavors of Brussels sprouts in a smooth, velvety base. Blending Brussels sprouts with onions, garlic, and potatoes, this soup delivers a rich, yet light flavor profile. The addition of a bit of cream adds luxurious texture without overwhelming the natural taste of the vegetables. It’s a comforting, hearty soup that’s perfect for cold days, served with crusty bread or a fresh salad for a complete meal.

Ingredients:

  • 1 lb Brussels sprouts, trimmed and halved
  • 1 medium onion, chopped
  • 2 garlic cloves, minced
  • 1 large potato, peeled and diced
  • 4 cups vegetable or chicken broth
  • 1 cup heavy cream or milk (optional for a creamier soup)
  • 2 tbsp olive oil
  • Salt and pepper, to taste
  • Fresh thyme or parsley, for garnish (optional)

Instructions:

  1. In a large pot, heat olive oil over medium heat. Add the chopped onion and cook until soft and translucent, about 5 minutes.
  2. Add the minced garlic and cook for another 1-2 minutes until fragrant.
  3. Stir in the diced potatoes and Brussels sprouts. Season with a pinch of salt and pepper. Cook for about 5 minutes, stirring occasionally, to allow the vegetables to develop some flavor.
  4. Pour in the broth and bring the mixture to a boil. Reduce the heat and let it simmer for 20-25 minutes, or until the vegetables are tender.
  5. Using an immersion blender (or transferring the soup in batches to a blender), blend the soup until smooth and creamy.
  6. Stir in the cream (if using), and heat the soup until warmed through. Adjust seasoning with salt and pepper.
  7. Serve hot, garnished with fresh thyme or parsley if desired.

Enjoy the warmth and comfort of this delightful Brussels sprouts soup!

Eggnog Cookies

0

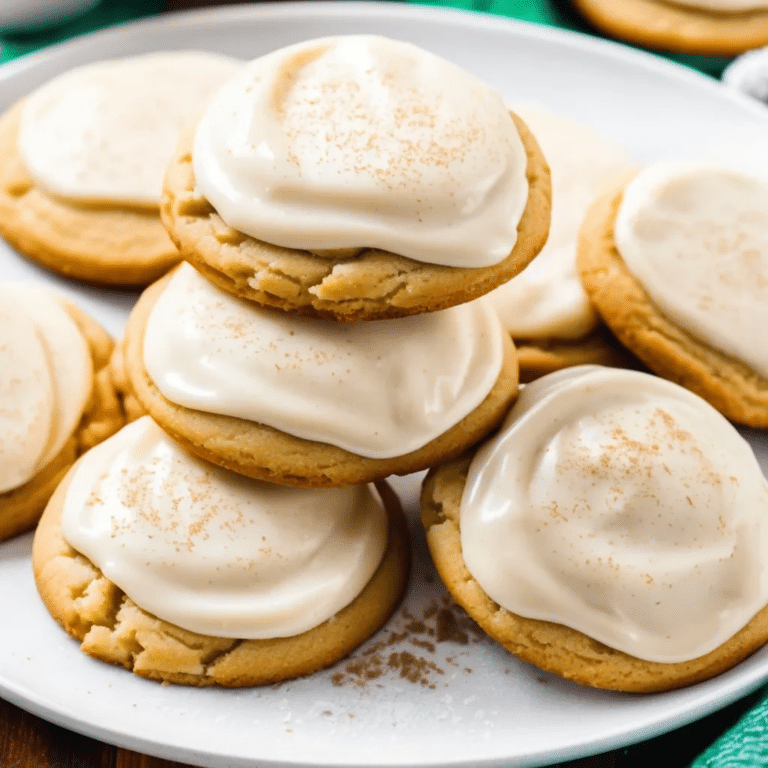
Eggnog Cookies are a festive and delicious holiday treat that captures the creamy, spiced flavors of classic eggnog in a soft, buttery cookie. With hints of nutmeg, cinnamon, and vanilla, these cookies are perfect for the holiday season, offering a warm and cozy bite in every mouthful. Topped with a sweet eggnog glaze, they are irresistibly soft and flavorful, making them a delightful addition to any cookie platter or holiday gathering. Whether you love sipping eggnog or are looking for a new seasonal dessert, these cookies are sure to become a holiday favorite.

Ingredients

For the cookies:

  • 2 1/4 cups all-purpose flour
  • 1/2 tsp baking soda
  • 1/4 tsp baking powder
  • 1/4 tsp ground nutmeg
  • 1/4 tsp ground cinnamon
  • 1/4 tsp salt
  • 1/2 cup unsalted butter, softened
  • 1/2 cup granulated sugar
  • 1/2 cup brown sugar, packed
  • 1 large egg
  • 1/4 cup eggnog
  • 1 tsp vanilla extract

For the eggnog glaze:

  • 1 cup powdered sugar
  • 2-3 tbsp eggnog
  • A pinch of ground nutmeg for garnish

Instructions

  1. Preheat the oven: Preheat your oven to 350°F (175°C). Line a baking sheet with parchment paper or lightly grease it.
  2. Mix the dry ingredients: In a medium bowl, whisk together the flour, baking soda, baking powder, nutmeg, cinnamon, and salt. Set aside.
  3. Cream the butter and sugars: In a large bowl, beat the softened butter, granulated sugar, and brown sugar together until light and fluffy, about 2-3 minutes. Add the egg, eggnog, and vanilla extract, mixing until smooth.
  4. Combine wet and dry ingredients: Gradually add the dry ingredients to the wet ingredients, mixing until just combined.
  5. Bake the cookies: Drop rounded tablespoons of dough onto the prepared baking sheet, spacing them about 2 inches apart. Bake for 10-12 minutes, or until the edges are lightly golden. Let the cookies cool on the baking sheet for a few minutes before transferring them to a wire rack to cool completely.
  6. Make the glaze: In a small bowl, whisk together the powdered sugar and eggnog until smooth. Drizzle the glaze over the cooled cookies and sprinkle with a pinch of nutmeg for extra flavor.

These Eggnog Cookies are soft, spiced, and perfectly sweet, making them a festive and flavorful dessert that’s ideal for celebrating the holiday season!

Roasted Cauliflower Tacos

0

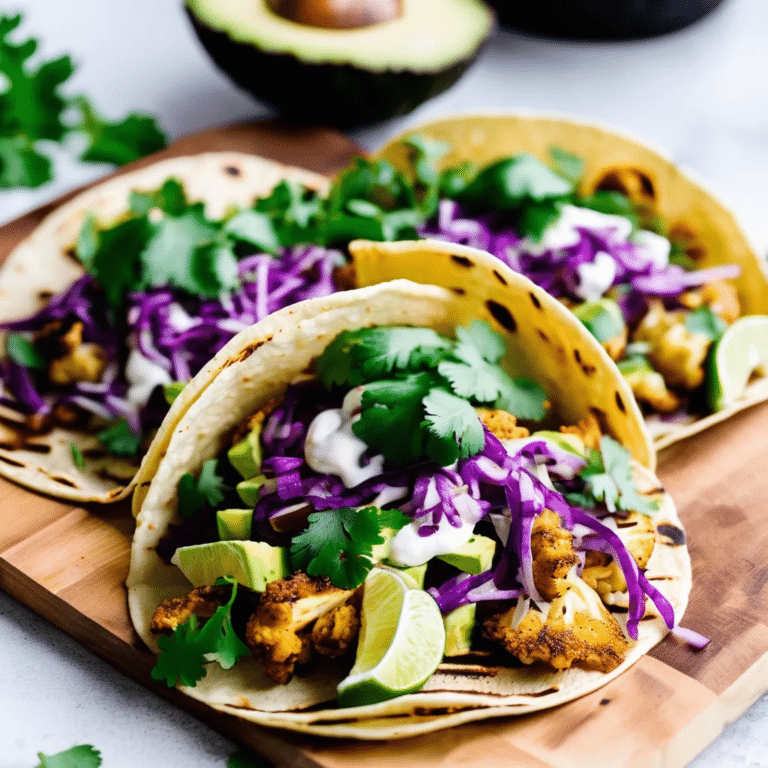
Roasted Cauliflower Tacos are a flavorful and healthy alternative to traditional tacos, featuring tender cauliflower florets seasoned with bold spices and roasted to perfection. The cauliflower’s natural sweetness and slightly crispy edges pair beautifully with a variety of toppings, such as fresh avocado, tangy slaw, and creamy sauces, making these tacos both satisfying and delicious. Perfect for a meatless meal, these tacos are not only easy to prepare but also versatile, allowing you to customize them with your favorite taco toppings. Whether you’re a vegetarian or simply looking to add more plant-based meals to your diet, Roasted Cauliflower Tacos are a delightful option that will quickly become a favorite.

Ingredients:

  • 1 large head of cauliflower, cut into bite-sized florets
  • 2 tablespoons olive oil
  • 1 teaspoon ground cumin
  • 1 teaspoon smoked paprika
  • 1/2 teaspoon chili powder
  • 1/2 teaspoon garlic powder
  • 1/2 teaspoon onion powder
  • 1/2 teaspoon salt
  • 1/4 teaspoon black pepper
  • 8 small corn or flour tortillas
  • 1 avocado, sliced
  • 1 cup shredded red cabbage or slaw mix
  • 1/4 cup chopped fresh cilantro
  • Lime wedges, for serving

For the Creamy Lime Sauce:

  • 1/2 cup sour cream or Greek yogurt
  • 1 tablespoon lime juice
  • 1 teaspoon lime zest
  • 1/2 teaspoon honey or agave syrup
  • Salt and pepper, to taste

Instructions:

  1. Preheat the Oven: Preheat your oven to 425°F (220°C). Line a baking sheet with parchment paper.
  2. Season the Cauliflower: In a large bowl, toss the cauliflower florets with olive oil, cumin, smoked paprika, chili powder, garlic powder, onion powder, salt, and black pepper until evenly coated.
  3. Roast the Cauliflower: Spread the seasoned cauliflower evenly on the prepared baking sheet. Roast in the preheated oven for 25-30 minutes, or until the cauliflower is tender and slightly crispy on the edges, tossing halfway through.
  4. Make the Creamy Lime Sauce: While the cauliflower is roasting, prepare the sauce by combining the sour cream (or Greek yogurt), lime juice, lime zest, honey, salt, and pepper in a small bowl. Stir until smooth and set aside.
  5. Assemble the Tacos: Warm the tortillas in a dry skillet or directly over a gas flame for a few seconds on each side. Fill each tortilla with a generous portion of roasted cauliflower, a few slices of avocado, shredded red cabbage, and a sprinkle of chopped cilantro.
  6. Drizzle with Sauce and Serve: Drizzle the tacos with the creamy lime sauce and serve with lime wedges on the side for an extra squeeze of citrus.

These Roasted Cauliflower Tacos are a vibrant, tasty, and healthy option that brings a fresh twist to taco night, perfect for anyone looking to enjoy a delicious meatless meal.

GREEN CHILE CHEESEBURGERS

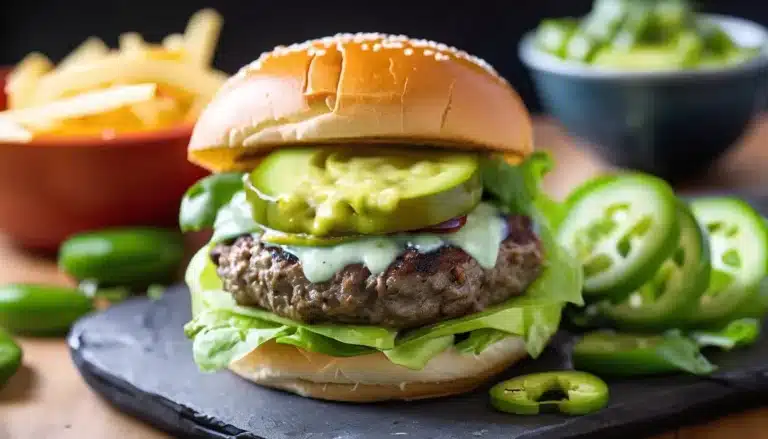
Green Chile Cheeseburgers are a bold and flavorful twist on the classic burger, offering the perfect combination of juicy beef patties, melty cheese, and the smoky, slightly spicy kick of roasted green chiles. This southwestern favorite brings a delicious depth of flavor that transforms an everyday burger into something special. The roasted green chiles add just the right amount of heat, complemented by the richness of cheese and the savoriness of the beef, making it a must-try for burger enthusiasts who enjoy a little spice in their meals.

Ingredients:

  • 1 1/2 lbs ground beef (80/20 for juicier burgers)
  • Salt and black pepper, to taste
  • 1 teaspoon garlic powder
  • 1 teaspoon onion powder
  • 4 large green chiles (Hatch chiles or Anaheim work well)
  • 4 slices of cheddar, pepper jack, or American cheese
  • 4 burger buns
  • Butter for toasting buns (optional)

Toppings:

  • Lettuce
  • Sliced tomatoes
  • Sliced onions
  • Mayonnaise, mustard, or ketchup (optional)

Instructions:

  1. Roast the green chiles: If you’re using fresh green chiles, roast them over an open flame (or under the broiler) until the skin is charred and blistered. Transfer the chiles to a bowl, cover, and let them steam for 10 minutes. Peel off the charred skin, remove the seeds, and chop the chiles into strips or small pieces. Set aside.
  2. Preheat the grill or pan: Heat your grill or cast-iron skillet over medium-high heat.
  3. Prepare the beef patties: In a bowl, combine the ground beef with garlic powder, onion powder, salt, and black pepper. Mix gently to combine, being careful not to overwork the meat. Form the mixture into 4 patties, pressing a small dimple in the center of each to ensure even cooking.
  4. Cook the patties: Place the patties on the hot grill or pan and cook for about 4-5 minutes on the first side. Flip and cook for another 3-4 minutes on the other side, or until the burgers reach your desired level of doneness.
  5. Add the cheese and green chiles: During the last minute of cooking, place a slice of cheese on each patty and top with a spoonful of the roasted green chiles. Cover the burgers with a lid or tent them with foil to help melt the cheese.
  6. Toast the buns: If desired, lightly butter the burger buns and toast them on the grill or in the skillet until golden brown.
  7. Assemble the burgers: Spread mayonnaise, mustard, or ketchup on the buns if using, then layer the burgers with lettuce, tomatoes, onions, and any other toppings you like.
  8. Serve: Enjoy your Green Chile Cheeseburgers while they’re hot and the cheese is perfectly melted!

These burgers bring a punch of flavor with the roasted green chiles and make a great summer grill option or a spicy twist to your regular burger night!

Cheesy Quinoa Bites

0

Cheesy Quinoa Bites are a tasty and nutritious snack that combines the wholesome goodness of quinoa with the irresistible flavor of melted cheese. These bite-sized treats are perfect for appetizers, lunchbox additions, or a quick and healthy snack on the go. Packed with protein and fiber, they offer a satisfying crunch on the outside with a soft, cheesy center. Versatile and easy to customize with your favorite herbs, spices, or veggies, Cheesy Quinoa Bites are not only delicious but also a great way to use up leftover quinoa. Serve them warm with your favorite dipping sauce, and watch them disappear!

Ingredients:

  • 1 cup cooked quinoa (about 1/3 cup uncooked)
  • 1 cup shredded cheddar cheese (or your favorite cheese)
  • 1/2 cup grated Parmesan cheese
  • 2 large eggs
  • 1/2 cup breadcrumbs (regular or panko)
  • 1/4 cup finely chopped green onions
  • 1/2 teaspoon garlic powder
  • 1/2 teaspoon onion powder
  • 1/4 teaspoon salt
  • 1/4 teaspoon black pepper
  • 1 tablespoon chopped fresh parsley or cilantro (optional)
  • Olive oil or cooking spray (for greasing the pan)

Instructions:

  1. Preheat the Oven: Preheat your oven to 350°F (175°C). Lightly grease a mini muffin tin with olive oil or cooking spray.
  2. Prepare the Mixture: In a large mixing bowl, combine the cooked quinoa, shredded cheddar cheese, grated Parmesan cheese, eggs, breadcrumbs, green onions, garlic powder, onion powder, salt, and pepper. If using, stir in the chopped fresh parsley or cilantro. Mix until all ingredients are well combined.
  3. Shape the Bites: Using a spoon or your hands, scoop about 1 tablespoon of the mixture into each mini muffin cup, pressing down slightly to compact the mixture.
  4. Bake: Place the muffin tin in the preheated oven and bake for 15-20 minutes, or until the bites are golden brown and crispy around the edges.
  5. Cool and Serve: Allow the Cheesy Quinoa Bites to cool in the tin for a few minutes before removing them. Serve warm with your favorite dipping sauce, such as marinara, ranch, or a spicy aioli.

These Cheesy Quinoa Bites are a delicious, protein-packed snack that’s perfect for any occasion, offering a fun and tasty way to enjoy the benefits of quinoa with a cheesy twist.

POTATO AND PARNSHIP MASH

Potato and Parsnip Mash is a delicious twist on traditional mashed potatoes, bringing together the creamy texture of potatoes with the sweet, earthy flavor of parsnips. This simple yet flavorful side dish is perfect for adding depth to your meals, whether paired with a roast, grilled meats, or enjoyed on its own. The parsnips add a subtle sweetness and a rustic element that elevates the classic potato mash. Rich, buttery, and slightly nutty, this mash is sure to be a comforting favorite at any dinner table.

Ingredients:

  • 4 medium Yukon Gold or Russet potatoes, peeled and cubed
  • 3 medium parsnips, peeled and cubed
  • 1/4 cup unsalted butter
  • 1/2 cup heavy cream (or milk)
  • 2 garlic cloves, minced (optional)
  • Salt and pepper to taste
  • Fresh chopped parsley or chives for garnish (optional)

Instructions:

  1. Boil the potatoes and parsnips: Place the cubed potatoes and parsnips in a large pot and cover them with cold water. Add a pinch of salt and bring to a boil over high heat. Reduce the heat to medium and simmer for about 15-20 minutes, or until the vegetables are tender when pierced with a fork.
  2. Drain: Once tender, drain the potatoes and parsnips, and return them to the pot.
  3. Mash: Add the butter and minced garlic (if using) to the hot potatoes and parsnips. Using a potato masher, mash the mixture until smooth and well combined.
  4. Add cream: Gradually pour in the heavy cream (or milk), stirring until the mash reaches your desired creamy consistency. If needed, you can adjust the amount of cream to make the mash thinner or thicker.
  5. Season: Taste and season with salt and pepper to your preference.
  6. Serve: Transfer the mash to a serving dish and garnish with fresh parsley or chives, if desired.

This Potato and Parsnip Mash is a comforting side dish with a lovely balance of creaminess and subtle sweetness. It’s perfect for holiday meals, Sunday dinners, or whenever you want to add a bit of variety to your usual mashed potatoes!