Home Blog Page 26

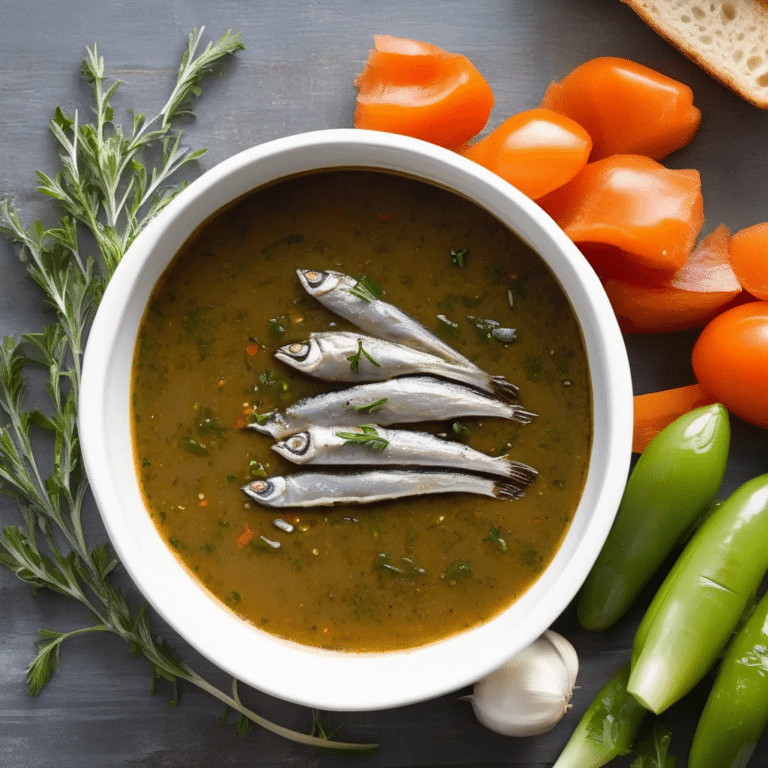
Anchoiade

0

Anchoïade is a traditional Provençal dip that is bursting with bold, savory flavors, making it a favorite in Mediterranean cuisine. This robust sauce is made primarily from anchovies, garlic, and olive oil, blended together to create a rich and intensely flavorful paste. Often enjoyed as an appetizer, Anchoïade is typically served with fresh, crunchy vegetables like carrots, celery, and radishes, or spread on crusty bread or toast. Its salty, umami-rich taste perfectly complements the freshness of the vegetables, offering a delightful contrast that’s sure to tantalize the taste buds. Whether you’re hosting a casual gathering or looking for a unique spread, Anchoïade is a delicious and versatile option that brings a taste of Provence to your table.

Ingredients:

  • 1 jar (about 2 oz) anchovy fillets, drained
  • 3-4 cloves garlic, minced
  • 1/2 cup extra-virgin olive oil
  • 1 tablespoon red wine vinegar
  • 1 teaspoon Dijon mustard (optional)
  • Freshly ground black pepper, to taste
  • Fresh vegetables for serving (e.g., carrots, celery, radishes, bell peppers)
  • Crusty bread or toast, for serving

Instructions:

  1. Prepare the Ingredients: Drain the anchovy fillets and pat them dry with paper towels. Peel and mince the garlic cloves.
  2. Blend the Anchovy Mixture: In a food processor or mortar and pestle, combine the anchovy fillets and minced garlic. Blend until you have a smooth paste.
  3. Add Olive Oil and Vinegar: With the food processor running, or while continuously stirring with the mortar and pestle, slowly drizzle in the olive oil. The mixture should emulsify and become creamy. Stir in the red wine vinegar and Dijon mustard (if using), and blend until fully incorporated.
  4. Season: Taste the Anchoïade and season with freshly ground black pepper to your liking. The anchovies are already salty, so additional salt is usually unnecessary.
  5. Serve: Transfer the Anchoïade to a serving dish. Serve with an assortment of fresh, crunchy vegetables and crusty bread or toast for dipping.

Anchoïade is a bold and flavorful dip that brings the essence of Provence to your table. Whether used as a dip, a spread, or even a condiment, it’s a versatile and delicious way to elevate any dish.
Mocha Cheesecake

0

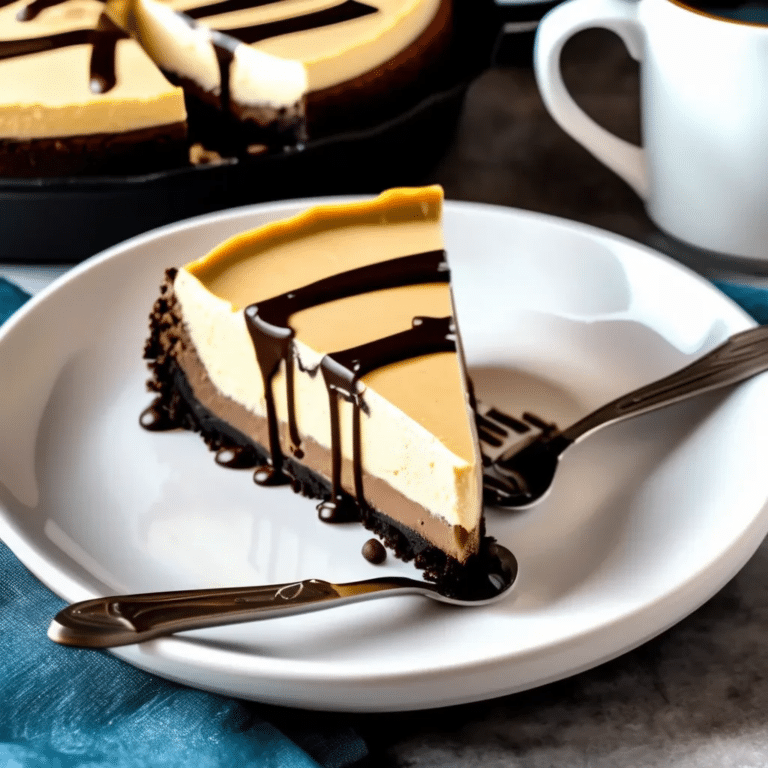
Mocha Cheesecake is a rich and indulgent dessert that combines the bold flavors of coffee and chocolate into a smooth and creamy cheesecake. With a buttery chocolate cookie crust and a luscious mocha-flavored filling, this decadent dessert is perfect for coffee lovers and chocolate enthusiasts alike. Each bite delivers a silky texture with the perfect balance of sweetness and espresso, making it a show-stopping dessert for special occasions or anytime you’re craving a slice of pure indulgence. Topped with whipped cream or a drizzle of chocolate ganache, this Mocha Cheesecake is guaranteed to impress.

Ingredients

For the crust:

  • 1 1/2 cups chocolate cookie crumbs (like Oreos)
  • 1/4 cup unsalted butter, melted

For the cheesecake filling:

  • 24 oz (3 packages) cream cheese, softened
  • 1 cup granulated sugar
  • 1/2 cup sour cream
  • 1 tbsp instant espresso powder dissolved in 1 tbsp hot water
  • 4 oz semi-sweet chocolate, melted and cooled
  • 1 tsp vanilla extract
  • 3 large eggs

For the topping (optional):

  • Whipped cream or chocolate ganache
  • Chocolate shavings (optional)

Instructions

  1. Preheat the oven: Preheat your oven to 325°F (165°C). Grease a 9-inch springform pan and wrap the outside with aluminum foil to prevent water from leaking in during baking.
  2. Make the crust: In a medium bowl, combine the chocolate cookie crumbs and melted butter. Press the mixture firmly into the bottom of the prepared pan. Bake the crust for 8-10 minutes, then set aside to cool.
  3. Make the filling: In a large bowl, beat the softened cream cheese and sugar together until smooth and creamy. Add the sour cream, dissolved espresso, melted chocolate, and vanilla extract, mixing until well combined.
  4. Add the eggs: Add the eggs one at a time, beating on low speed after each addition until just incorporated. Be careful not to overmix.
  5. Bake the cheesecake: Pour the cheesecake filling over the cooled crust. Place the springform pan in a larger roasting pan and add hot water to the roasting pan until it reaches about halfway up the sides of the springform pan. Bake for 55-65 minutes, or until the center is set but still slightly jiggly.
  6. Cool the cheesecake: Turn off the oven and leave the cheesecake in the oven with the door slightly open for 1 hour. Remove from the oven and let it cool completely, then refrigerate for at least 4 hours or overnight.
  7. Serve: Top the cheesecake with whipped cream, chocolate ganache, or chocolate shavings if desired. Slice and serve chilled.

This Mocha Cheesecake is a decadent and luxurious dessert, offering a perfect blend of chocolate and coffee flavors in every bite!

Game Pie

0

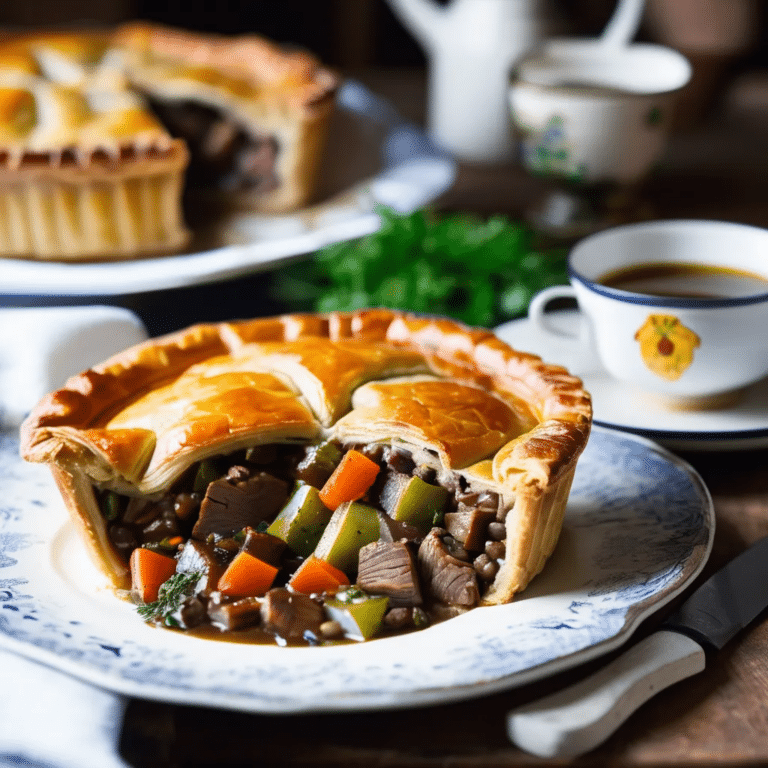
Game Pie is a rich and hearty dish that brings together a variety of game meats, such as venison, pheasant, and rabbit, slow-cooked to perfection with vegetables and aromatic herbs, all encased in a golden, flaky pastry crust. This traditional British dish is often enjoyed during the colder months, offering a warming and satisfying meal that’s perfect for special occasions or family gatherings. The deep, savory flavors of the game meats are complemented by a robust gravy, making each slice of this pie a true indulgence. Whether served with a side of roasted vegetables or creamy mashed potatoes, Game Pie is a delicious way to celebrate the flavors of the season.

Ingredients:

  • 1 lb mixed game meat (such as venison, rabbit, pheasant), cut into bite-sized pieces
  • 1/2 lb pork belly or fatty bacon, diced
  • 1 onion, finely chopped
  • 2 carrots, diced
  • 2 celery stalks, diced
  • 2 cloves garlic, minced
  • 1/2 cup red wine
  • 1 cup beef or game stock
  • 1 tablespoon tomato paste
  • 1 tablespoon Worcestershire sauce
  • 2 tablespoons flour
  • 2 teaspoons fresh thyme, chopped (or 1 teaspoon dried thyme)
  • 2 teaspoons fresh rosemary, chopped (or 1 teaspoon dried rosemary)
  • Salt and pepper, to taste
  • 1 sheet puff pastry (store-bought or homemade)
  • 1 egg, beaten (for egg wash)

Instructions:

  1. Preheat the Oven: Preheat your oven to 375°F (190°C).
  2. Brown the Meat: In a large, heavy-bottomed pot or Dutch oven, cook the diced pork belly or bacon over medium heat until the fat is rendered and the meat is browned. Remove the pork or bacon with a slotted spoon and set aside. In the same pot, brown the game meat in batches, seasoning with salt and pepper. Remove the browned game meat and set aside.
  3. Sauté the Vegetables: In the same pot, add the chopped onion, carrots, and celery. Sauté until the vegetables are softened, about 5-7 minutes. Add the minced garlic and cook for another minute.
  4. Make the Gravy: Sprinkle the flour over the sautéed vegetables and stir to combine. Cook for 1-2 minutes to remove the raw flour taste. Pour in the red wine, scraping up any browned bits from the bottom of the pot. Add the beef or game stock, tomato paste, Worcestershire sauce, thyme, and rosemary. Stir well and bring the mixture to a simmer.
  5. Combine and Simmer: Return the browned game meat and pork belly or bacon to the pot. Stir to combine everything, cover, and let the mixture simmer gently for 45 minutes to 1 hour, or until the meat is tender and the gravy has thickened. Taste and adjust the seasoning as needed.
  6. Assemble the Pie: Transfer the game meat mixture into a pie dish. Roll out the puff pastry on a lightly floured surface and place it over the filling. Trim the edges and crimp them to seal. Cut a few slits in the top of the pastry to allow steam to escape. Brush the pastry with the beaten egg for a golden finish.
  7. Bake: Bake the pie in the preheated oven for 30-35 minutes, or until the pastry is golden brown and puffed.
  8. Serve: Let the pie cool for a few minutes before slicing and serving. Serve with roasted vegetables, mashed potatoes, or a side of green beans.

This Game Pie is a hearty and flavorful dish, perfect for warming up on a cold day and celebrating the rich, robust flavors of wild game meats.

Vegetarian Ramen

0

Vegetarian ramen is a hearty, soul-warming dish that’s packed with vibrant flavors and wholesome ingredients. This plant-based version of the popular Japanese noodle soup features rich vegetable broth infused with garlic, ginger, and soy sauce, combined with a medley of fresh vegetables and traditional ramen noodles. Topped with soft-boiled eggs, mushrooms, and greens like spinach or bok choy, this ramen delivers a satisfying umami flavor while being lighter than its meat-based counterparts. It’s a perfect meal for both weeknight dinners and special occasions, offering a nourishing and delicious option for vegetarians and ramen lovers alike.

Ingredients:

  • 6 cups vegetable broth
  • 1 tablespoon sesame oil
  • 2 tablespoons soy sauce (or tamari for gluten-free)
  • 1 tablespoon miso paste
  • 3 cloves garlic, minced
  • 1 tablespoon fresh ginger, grated
  • 1 tablespoon rice vinegar
  • 2 packs ramen noodles (without seasoning)
  • 1 cup mushrooms (shiitake, cremini, or button), sliced
  • 1 cup baby spinach or bok choy
  • 1 cup carrots, julienned
  • 1 cup green onions, chopped
  • 2 soft-boiled eggs (optional for non-vegan version)
  • 1 tablespoon toasted sesame seeds (optional)
  • 1 tablespoon chili oil or sriracha (optional, for spice)

Instructions:

  1. Prepare the Broth: In a large pot, heat sesame oil over medium heat. Add minced garlic and ginger, sautéing for 1-2 minutes until fragrant. Pour in the vegetable broth, soy sauce, miso paste, and rice vinegar. Stir to combine and bring to a simmer.
  2. Cook the Noodles: In a separate pot, cook the ramen noodles according to the package instructions. Once cooked, drain and set aside.
  3. Add Vegetables: Add mushrooms, carrots, and spinach (or bok choy) to the simmering broth. Cook for 5-7 minutes until the vegetables are tender but still vibrant in color.
  4. Assemble the Ramen: Divide the cooked noodles into bowls. Ladle the hot broth and vegetables over the noodles. Top each bowl with soft-boiled eggs (if using), green onions, toasted sesame seeds, and a drizzle of chili oil or sriracha for a spicy kick.
  5. Serve and Enjoy: Serve hot and enjoy your cozy, comforting bowl of vegetarian ramen!

This recipe is easily customizable; feel free to add other favorite veggies or tofu for extra protein!

Pasta And Beans

0

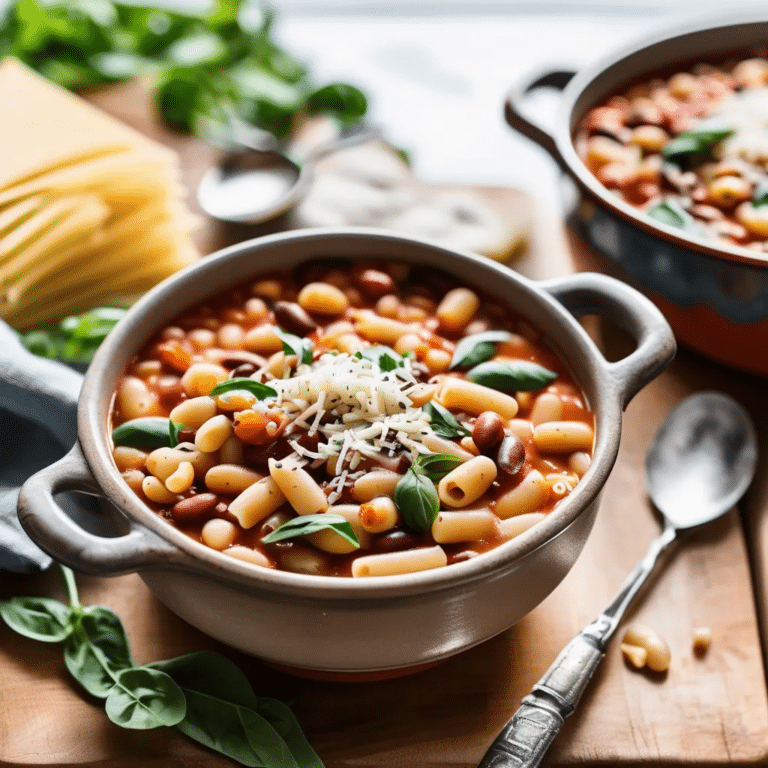
Pasta and Beans, also known as “Pasta e Fagioli,” is a classic Italian dish that combines the heartiness of beans with tender pasta in a flavorful tomato broth. This rustic, comforting meal is perfect for a cozy dinner, offering a wonderful balance of protein, fiber, and carbs. The simple ingredients—cannellini or kidney beans, small pasta, garlic, and herbs—come together to create a dish that’s both nutritious and delicious. Easy to prepare and deeply satisfying, Pasta and Beans is a versatile dish that can be enjoyed on its own or as a hearty side, making it a staple in many households.

Ingredients:

  • 1 tablespoon olive oil
  • 1 small onion, finely chopped
  • 2 cloves garlic, minced
  • 1 carrot, diced
  • 1 celery stalk, diced
  • 1 can (15 oz) cannellini beans or kidney beans, drained and rinsed
  • 1 can (14.5 oz) diced tomatoes
  • 4 cups vegetable or chicken broth
  • 1 cup ditalini, small shells, or another small pasta
  • 1 teaspoon dried oregano
  • 1 teaspoon dried basil
  • 1/4 teaspoon red pepper flakes (optional)
  • Salt and pepper, to taste
  • Fresh parsley or basil, chopped (for garnish)
  • Grated Parmesan cheese (for serving)

Instructions:

  1. Sauté the Vegetables: In a large pot, heat the olive oil over medium heat. Add the chopped onion, carrot, and celery. Sauté for about 5 minutes, or until the vegetables are softened. Add the minced garlic and cook for another 1-2 minutes until fragrant.
  2. Add the Beans and Tomatoes: Stir in the drained beans and diced tomatoes, including their juices. Cook for a couple of minutes, allowing the flavors to meld.
  3. Simmer the Soup: Pour in the broth, then add the dried oregano, basil, red pepper flakes (if using), salt, and pepper. Bring the mixture to a boil, then reduce the heat and let it simmer for about 10 minutes.
  4. Cook the Pasta: Stir in the pasta and continue to simmer for 8-10 minutes, or until the pasta is tender. If the soup becomes too thick, add a little more broth or water to reach your desired consistency.
  5. Serve: Ladle the Pasta and Beans into bowls and garnish with freshly chopped parsley or basil. Serve with grated Parmesan cheese on top and a side of crusty bread for dipping.

Pasta and Beans is a comforting, flavorful dish that’s easy to make and perfect for a satisfying, nourishing meal any day of the week.

Chicken Florentine Pasta

0

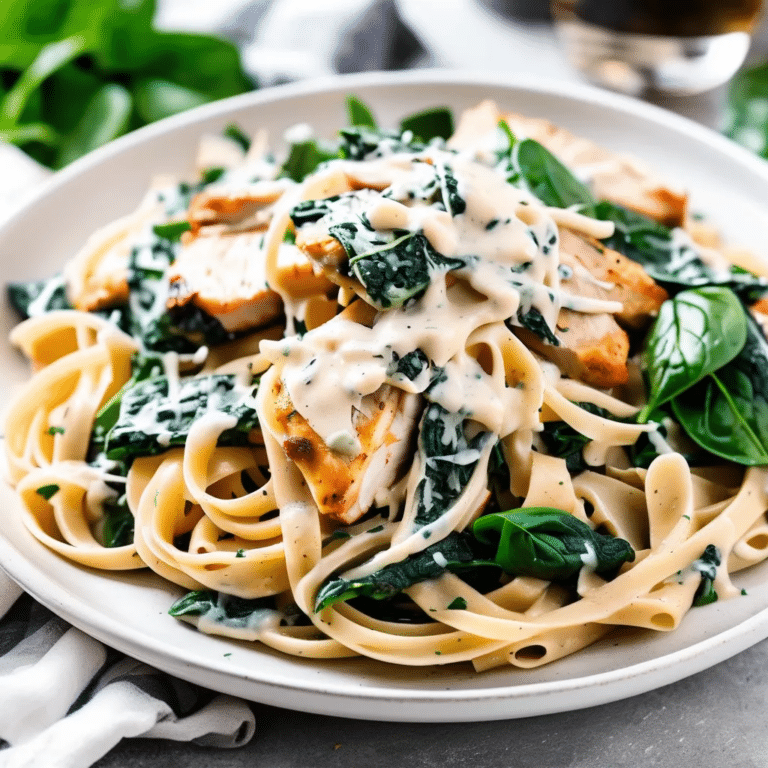
Chicken Florentine Pasta is a creamy and comforting dish that brings together tender chicken, fresh spinach, and al dente pasta in a rich, garlicky cream sauce. Inspired by the classic Italian Florentine style, which traditionally features spinach and cream, this dish is both hearty and elegant. The combination of succulent chicken and wilted spinach tossed in a luscious Parmesan sauce makes for a satisfying meal that’s perfect for weeknight dinners or special occasions. With its balanced flavors and creamy texture, Chicken Florentine Pasta is sure to become a family favorite.

Ingredients:

  • 1 lb boneless, skinless chicken breasts, cut into bite-sized pieces
  • 8 oz fettuccine or your preferred pasta
  • 2 tablespoons olive oil
  • 3 cloves garlic, minced
  • 1 small onion, finely chopped
  • 1 cup heavy cream
  • 1/2 cup chicken broth
  • 1/2 cup grated Parmesan cheese
  • 4 cups fresh spinach
  • 1 teaspoon dried Italian seasoning
  • Salt and pepper, to taste
  • Fresh parsley, chopped (for garnish)

Instructions:

  1. Cook the Pasta: Bring a large pot of salted water to a boil. Add the pasta and cook according to the package instructions until al dente. Drain and set aside.
  2. Cook the Chicken: While the pasta is cooking, heat the olive oil in a large skillet over medium-high heat. Season the chicken pieces with salt, pepper, and Italian seasoning. Add the chicken to the skillet and cook for 5-7 minutes, or until the chicken is golden brown and cooked through. Remove the chicken from the skillet and set aside.
  3. Sauté the Garlic and Onion: In the same skillet, add the chopped onion and minced garlic. Sauté for 2-3 minutes, or until the onion is softened and fragrant.
  4. Make the Sauce: Pour in the chicken broth and heavy cream, stirring to combine. Bring the mixture to a simmer and cook for about 5 minutes, allowing the sauce to thicken slightly. Stir in the grated Parmesan cheese until the sauce is smooth and creamy.
  5. Add the Spinach and Chicken: Add the fresh spinach to the sauce and cook until it wilts, about 2 minutes. Return the cooked chicken to the skillet and stir to combine everything.
  6. Combine with Pasta: Add the cooked pasta to the skillet and toss everything together until the pasta is well coated in the sauce.
  7. Serve: Serve the Chicken Florentine Pasta hot, garnished with fresh parsley and additional Parmesan cheese if desired.

This Chicken Florentine Pasta is a comforting and flavorful dish that combines creamy, savory elements with the freshness of spinach, making it a perfect meal for any night of the week.

Chia Seed Pudding

0

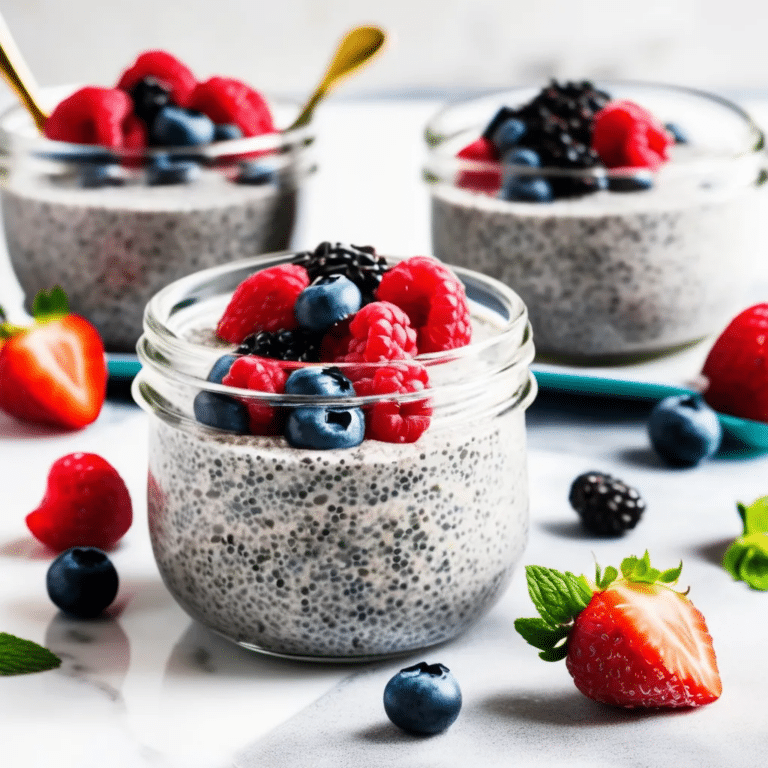
Chia Seed Pudding is a nutritious and versatile dish that’s perfect for a healthy breakfast, snack, or even dessert. Made by soaking chia seeds in milk, this pudding has a creamy, gel-like consistency that’s both satisfying and refreshing. Chia seeds are packed with fiber, omega-3 fatty acids, and antioxidants, making this pudding a powerhouse of nutrition. It’s easy to prepare and can be customized with your favorite flavors and toppings—such as fresh fruit, nuts, honey, or granola—making it a delicious way to start your day or satisfy your sweet tooth in a healthy way.

Ingredients:

  • 1/4 cup chia seeds
  • 1 cup milk (dairy, almond, coconut, or any preferred type)
  • 1-2 tablespoons sweetener (such as honey, maple syrup, or agave nectar)
  • 1/2 teaspoon vanilla extract (optional)
  • Fresh fruit, nuts, granola, or coconut flakes (for topping)

Instructions:

  1. Mix the Ingredients: In a medium-sized bowl or jar, combine the chia seeds, milk, sweetener, and vanilla extract (if using). Stir well to ensure the chia seeds are evenly distributed and not clumping together.
  2. Let It Set: Cover the bowl or jar and refrigerate for at least 4 hours, or overnight. During this time, the chia seeds will absorb the liquid and expand, creating a thick, pudding-like consistency.
  3. Stir and Serve: After the pudding has set, give it a good stir to break up any clumps. If the pudding is too thick for your liking, you can add a little more milk and stir to achieve your desired consistency.
  4. Top and Enjoy: Spoon the chia seed pudding into bowls or jars and top with your favorite fruits, nuts, granola, or a drizzle of honey.

Chia Seed Pudding is a simple, healthy, and delicious dish that you can prepare ahead of time, making it an ideal option for busy mornings or a quick snack. Customize it with your favorite flavors and toppings to make it your own!

Cheese Pastries

0

Cheese Pastries are delightful, flaky treats that are perfect for any occasion, whether served as an appetizer, snack, or part of a brunch spread. These golden pastries are filled with a rich, savory cheese mixture that melts beautifully during baking, creating a warm, gooey center wrapped in buttery puff pastry. The contrast between the crisp, airy pastry and the creamy cheese filling makes each bite irresistible. Easy to prepare yet elegant in presentation, Cheese Pastries are a crowd-pleaser that can be customized with your favorite cheeses and herbs, making them a versatile addition to your recipe collection.

Ingredients:

  • 1 sheet puff pastry, thawed
  • 1 cup shredded cheese (cheddar, mozzarella, Gruyère, or a mix)
  • 2 oz cream cheese, softened
  • 1/4 cup grated Parmesan cheese
  • 1 egg, beaten (for egg wash)
  • 1 teaspoon Dijon mustard (optional, for added flavor)
  • 1 tablespoon fresh herbs, chopped (such as parsley, chives, or thyme)
  • Salt and pepper, to taste
  • Sesame seeds or poppy seeds (optional, for garnish)

Instructions:

  1. Preheat the Oven: Preheat your oven to 400°F (200°C). Line a baking sheet with parchment paper.
  2. Prepare the Cheese Filling: In a medium bowl, mix together the shredded cheese, cream cheese, grated Parmesan, Dijon mustard (if using), chopped herbs, salt, and pepper until well combined.
  3. Prepare the Puff Pastry: On a lightly floured surface, roll out the puff pastry sheet to smooth out any creases and make it slightly thinner. Cut the pastry into squares or rectangles, depending on your desired size for the pastries.
  4. Fill the Pastries: Place a spoonful of the cheese mixture in the center of each pastry square. Fold the pastry over to form a triangle or rectangle, and press the edges together with a fork to seal. Alternatively, you can fold the edges over and twist them for a decorative effect.
  5. Egg Wash and Garnish: Brush the tops of the pastries with the beaten egg to give them a golden, shiny finish when baked. If desired, sprinkle sesame seeds or poppy seeds on top for added texture and flavor.
  6. Bake: Transfer the pastries to the prepared baking sheet and bake in the preheated oven for 15-20 minutes, or until the pastries are puffed and golden brown.
  7. Serve: Let the pastries cool slightly before serving. Enjoy them warm, straight from the oven, or at room temperature.

These Cheese Pastries are a delicious and versatile treat that’s perfect for entertaining or enjoying as a savory snack. With their flaky crust and gooey cheese filling, they’re sure to be a hit with everyone!

Honey Mustard Pork Tenderloin

0

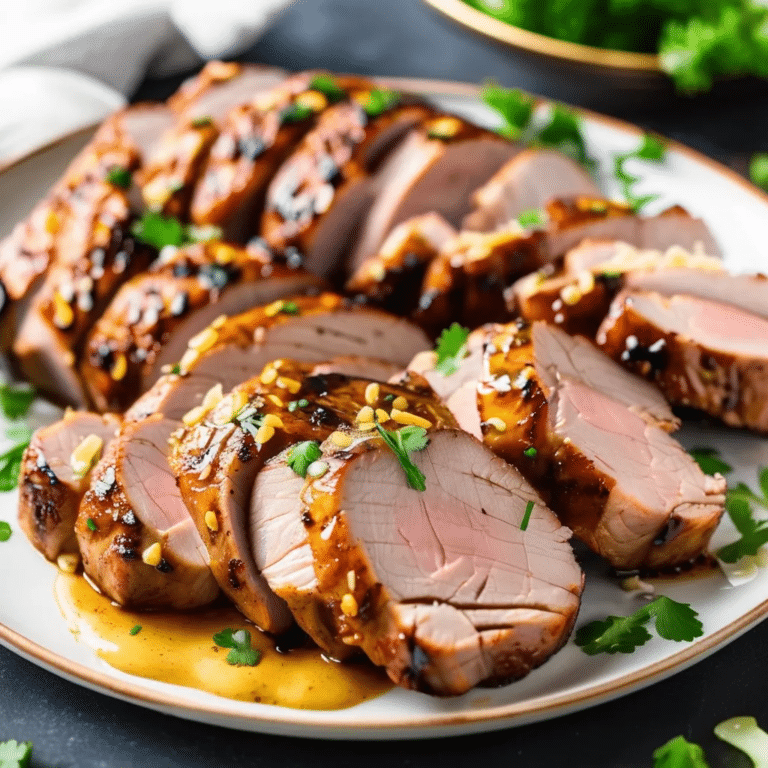
Honey Mustard Pork Tenderloin is a flavorful and tender dish that perfectly balances sweet and tangy flavors with the savory richness of pork. This dish features a juicy pork tenderloin coated in a delicious marinade made from honey, Dijon mustard, and a hint of garlic, which caramelizes beautifully as it cooks. The result is a succulent, golden-brown crust with a tender, melt-in-your-mouth interior. Easy enough for a weeknight dinner but impressive enough for guests, this Honey Mustard Pork Tenderloin is a versatile dish that pairs well with a variety of sides, from roasted vegetables to mashed potatoes.

Ingredients:

  • 1 1/2 lb pork tenderloin
  • 1/4 cup Dijon mustard
  • 2 tablespoons honey
  • 2 tablespoons olive oil
  • 3 cloves garlic, minced
  • 1 tablespoon apple cider vinegar
  • 1 teaspoon dried thyme
  • 1 teaspoon paprika
  • Salt and pepper, to taste

Instructions:

  1. Prepare the Marinade: In a small bowl, whisk together the Dijon mustard, honey, olive oil, minced garlic, apple cider vinegar, dried thyme, paprika, salt, and pepper until well combined.
  2. Marinate the Pork: Place the pork tenderloin in a resealable plastic bag or shallow dish. Pour the honey mustard marinade over the pork, making sure it’s evenly coated. Seal the bag or cover the dish, and marinate in the refrigerator for at least 1 hour, or up to overnight for the best flavor.
  3. Preheat the Oven: Preheat your oven to 375°F (190°C).
  4. Sear the Pork: Heat a large oven-safe skillet over medium-high heat. Remove the pork from the marinade (reserving the marinade) and sear the tenderloin on all sides until browned, about 2-3 minutes per side.
  5. Roast the Pork: Pour the reserved marinade over the seared pork tenderloin and transfer the skillet to the preheated oven. Roast for 15-20 minutes, or until the internal temperature of the pork reaches 145°F (63°C).
  6. Rest and Serve: Remove the pork tenderloin from the oven and let it rest for 5 minutes before slicing. This allows the juices to redistribute, ensuring a tender and juicy roast. Slice the pork into medallions and serve with your favorite sides.

This Honey Mustard Pork Tenderloin is a deliciously easy and elegant dish, perfect for both everyday meals and special occasions. The sweet and tangy glaze pairs beautifully with the succulent pork, making it a sure favorite at the dinner table.

Cheese-stuffed Burgers

0

Cheese-stuffed burgers are a delightful twist on the classic burger, perfect for those who love a gooey, melted cheese surprise with each bite. The cheese, nestled inside the patty, melts as the burger cooks, creating a juicy, flavorful experience that elevates the burger game. These burgers can be customized with your favorite cheeses like cheddar, mozzarella, or even blue cheese, and are best served with all your favorite toppings and a toasted bun. Ideal for barbecues, weekend dinners, or anytime you’re craving something indulgent yet simple to make.

Ingredients:

  • 1 ½ lbs ground beef (80/20 for juiciness)
  • 4 oz cheese of your choice (cheddar, mozzarella, or blue cheese)
  • Salt and pepper to taste
  • 1 tsp garlic powder
  • 1 tsp onion powder
  • 1 tsp smoked paprika (optional)
  • 4 burger buns
  • Toppings (lettuce, tomato, onions, pickles, ketchup, mustard, etc.)

Instructions:

  1. Prepare the patties: In a large bowl, combine the ground beef, salt, pepper, garlic powder, onion powder, and smoked paprika. Mix until just combined, being careful not to overwork the meat.
  2. Shape the patties: Divide the mixture into 8 equal portions. Flatten each portion into a thin patty.
  3. Stuff with cheese: Take your cheese of choice and divide it into four equal portions. Place a portion of cheese in the center of one patty and top it with another patty. Seal the edges carefully by pinching the meat together to fully enclose the cheese inside. Repeat with the remaining patties and cheese.
  4. Cook the burgers: Preheat your grill or skillet to medium-high heat. Cook the burgers for about 4-5 minutes on each side, or until they reach your desired doneness. Be careful not to press down on the burgers to avoid losing the melted cheese inside.
  5. Toast the buns: Lightly toast the burger buns on the grill or in a toaster for added texture.
  6. Assemble: Place the cheese-stuffed burger on the toasted bun and add your favorite toppings.
  7. Serve: Enjoy your cheesy, flavorful burger with a side of fries or a salad!