Home Blog Page 25

Buttercream Icing

0

Buttercream Icing is a classic, rich, and creamy frosting that’s perfect for decorating cakes, cupcakes, and cookies. This versatile icing is loved for its smooth texture and sweet, buttery flavor, which can be easily customized with different extracts, colors, and even textures to suit any dessert. Whether you’re spreading it on a simple cake or piping intricate designs on cupcakes, Buttercream Icing provides a delicious and elegant finish. It’s easy to make and can be tailored to any occasion, making it a go-to frosting for bakers of all levels.

Ingredients:

  • 1 cup (2 sticks) unsalted butter, softened
  • 4 cups powdered sugar, sifted
  • 2 teaspoons vanilla extract
  • 2-3 tablespoons milk or heavy cream
  • Pinch of salt
  • Food coloring (optional)

Instructions:

  1. Cream the Butter: In a large mixing bowl, beat the softened butter on medium speed using a hand mixer or stand mixer until creamy and smooth, about 2-3 minutes.
  2. Add the Sugar: Gradually add the sifted powdered sugar, 1 cup at a time, mixing on low speed until incorporated. Scrape down the sides of the bowl as needed. The mixture will be thick and crumbly at this stage.
  3. Add the Liquid Ingredients: Add the vanilla extract and 2 tablespoons of milk or heavy cream. Beat on medium speed until the icing becomes light and fluffy, about 2-3 minutes. If the icing is too thick, add an additional tablespoon of milk or cream until the desired consistency is reached.
  4. Adjust the Flavor and Texture: Taste the buttercream and add a pinch of salt if it’s too sweet. Continue to beat the icing until it’s smooth and spreadable.
  5. Color the Icing (Optional): If you want to color the buttercream, add a few drops of food coloring and mix until the color is evenly distributed.
  6. Use the Buttercream: Your Buttercream Icing is now ready to be spread or piped onto cakes, cupcakes, or cookies. If you’re not using it immediately, cover the bowl with plastic wrap to prevent it from drying out.

Buttercream Icing is a sweet, creamy delight that’s perfect for adding that finishing touch to any baked good, with endless possibilities for flavor and decoration.
Brownie Caramel Cheesecake

0

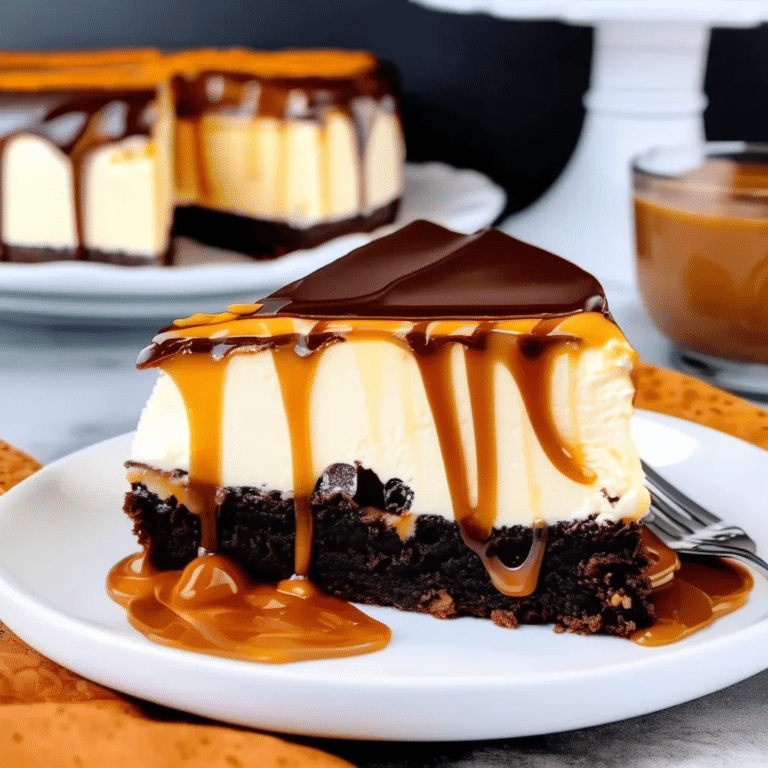
Brownie Caramel Cheesecake is a decadent, indulgent dessert that combines three irresistible treats in one: rich, fudgy brownies, creamy cheesecake, and luscious caramel. The base of this show-stopping dessert is a dense brownie layer, topped with a velvety cheesecake filling and drizzled with gooey caramel sauce. Perfect for special occasions or when you simply want to impress, this dessert offers a delightful contrast of textures and flavors that are sure to satisfy any sweet tooth. Whether served with whipped cream or an extra drizzle of caramel, Brownie Caramel Cheesecake is a dessert lover’s dream come true.

Ingredients

For the brownie layer:

  • 1/2 cup unsalted butter
  • 1 cup semi-sweet chocolate chips
  • 3/4 cup granulated sugar
  • 2 large eggs
  • 1 tsp vanilla extract
  • 3/4 cup all-purpose flour
  • 1/4 tsp salt

For the cheesecake layer:

  • 16 oz (2 packages) cream cheese, softened
  • 1/2 cup granulated sugar
  • 2 large eggs
  • 1 tsp vanilla extract
  • 1/2 cup caramel sauce (store-bought or homemade)

For topping (optional):

  • Extra caramel sauce for drizzling
  • Whipped cream or chocolate shavings

Instructions

  1. Preheat the oven: Preheat your oven to 350°F (175°C). Grease a 9-inch springform pan and line the bottom with parchment paper.
  2. Make the brownie layer: In a microwave-safe bowl, melt the butter and chocolate chips together, stirring until smooth. Let cool slightly, then whisk in the sugar, eggs, and vanilla extract. Stir in the flour and salt until just combined. Pour the brownie batter into the prepared pan and bake for 15-18 minutes, or until the edges are set but the center is still slightly soft. Set aside to cool slightly.
  3. Make the cheesecake layer: In a large bowl, beat the softened cream cheese and sugar together until smooth and creamy. Add the eggs one at a time, mixing well after each addition. Stir in the vanilla extract. Pour the cheesecake batter over the brownie layer in the pan.
  4. Swirl with caramel: Drizzle the caramel sauce over the cheesecake layer and use a knife to gently swirl it into the batter.
  5. Bake the cheesecake: Place the springform pan in a larger roasting pan and add hot water to the roasting pan, filling it halfway up the sides of the springform pan. Bake for 45-55 minutes, or until the cheesecake is set around the edges but still slightly jiggly in the center.
  6. Cool the cheesecake: Turn off the oven and leave the cheesecake in the oven with the door slightly open for 1 hour. Remove from the oven and let it cool completely before refrigerating for at least 4 hours or overnight.
  7. Serve: Drizzle extra caramel sauce over the top and garnish with whipped cream or chocolate shavings if desired. Slice and enjoy!

This Brownie Caramel Cheesecake is a rich, indulgent dessert that combines the best of brownies, cheesecake, and caramel for an unforgettable sweet treat!

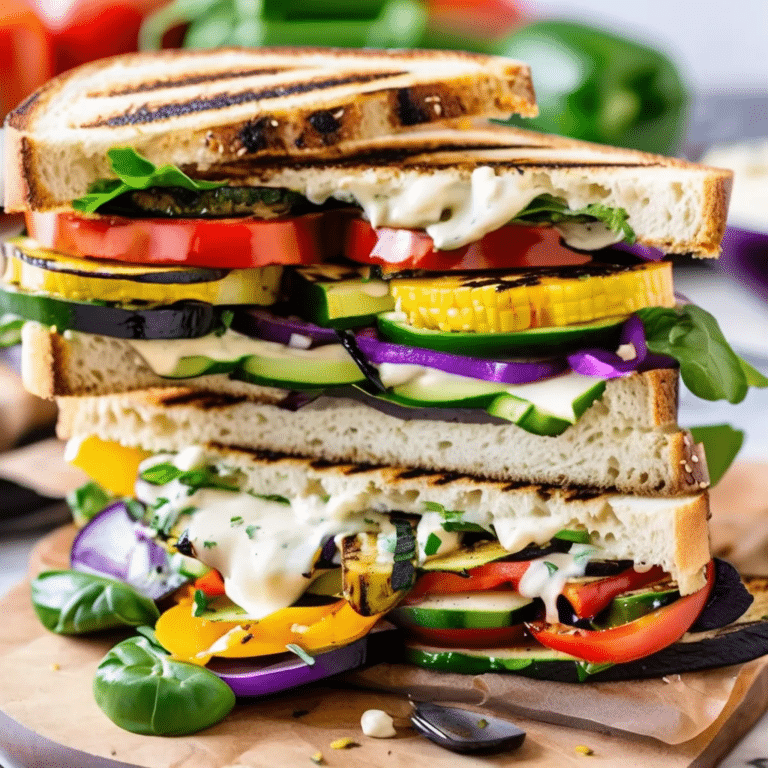
Grilled Veggie Sandwiches

0

Grilled Veggie Sandwiches are a delicious and healthy option that brings the vibrant flavors of charred vegetables together with creamy spreads and hearty bread. Perfect for lunch, dinner, or a satisfying snack, these sandwiches are packed with a variety of grilled vegetables like zucchini, bell peppers, and eggplant, all seasoned to perfection. Layered with fresh greens, tangy cheese, and perhaps a dollop of pesto or hummus, these sandwiches are as flavorful as they are nutritious. Whether you’re a vegetarian or simply looking to add more veggies to your diet, Grilled Veggie Sandwiches offer a satisfying and wholesome meal that’s easy to prepare and full of Mediterranean-inspired goodness.

Ingredients:

  • 1 zucchini, sliced lengthwise into 1/4-inch strips
  • 1 eggplant, sliced into 1/4-inch rounds
  • 1 red bell pepper, cut into large strips
  • 1 yellow bell pepper, cut into large strips
  • 1 red onion, sliced into rings
  • 2 tablespoons olive oil
  • Salt and pepper, to taste
  • 1 teaspoon dried oregano
  • 4 ciabatta rolls or slices of hearty bread
  • 4 tablespoons pesto or hummus (optional)
  • 4 slices of provolone, mozzarella, or goat cheese
  • Fresh arugula or spinach leaves
  • Balsamic glaze (optional, for drizzling)

Instructions:

  1. Preheat the Grill: Preheat your grill or grill pan over medium-high heat.
  2. Prepare the Vegetables: In a large bowl, toss the zucchini, eggplant, bell peppers, and red onion with olive oil, salt, pepper, and dried oregano until evenly coated.
  3. Grill the Vegetables: Place the vegetables on the hot grill, cooking for 3-4 minutes on each side until tender and nicely charred. Remove from the grill and set aside.
  4. Toast the Bread: If desired, lightly toast the ciabatta rolls or bread slices on the grill for 1-2 minutes, just until golden and crisp.
  5. Assemble the Sandwiches: Spread a generous layer of pesto or hummus on the bottom half of each roll or bread slice. Layer the grilled vegetables on top, followed by a slice of cheese. Add fresh arugula or spinach leaves, and drizzle with balsamic glaze if using. Top with the other half of the roll or bread slice.
  6. Serve: Serve the Grilled Veggie Sandwiches warm, or wrap them up for a picnic or lunch on the go.

These Grilled Veggie Sandwiches are a flavorful, nutritious option that’s perfect for any meal, offering a satisfying way to enjoy the natural goodness of grilled vegetables in a convenient and delicious format.

French Yogurt Cake

0

French yogurt cake is a classic, easy-to-make dessert that is perfect for any occasion. This light and moist cake is traditionally made using simple ingredients that are often found in most kitchens. What makes this cake special is that it relies on yogurt as the main ingredient, which adds a lovely tanginess and helps create a tender crumb. The beauty of a French yogurt cake is in its simplicity—it can be served plain, dusted with powdered sugar, or dressed up with fresh fruits, whipped cream, or a light glaze. The recipe is easy enough for beginner bakers and can be enjoyed for breakfast, a snack, or dessert.

Ingredients:

  • 1 cup plain yogurt (whole milk or Greek yogurt)
  • 1 cup granulated sugar
  • 1/2 cup vegetable oil
  • 3 large eggs
  • 1 1/2 cups all-purpose flour
  • 2 teaspoons baking powder
  • 1/2 teaspoon salt
  • 1 teaspoon vanilla extract
  • Zest of 1 lemon (optional)
  • Powdered sugar, for dusting (optional)

Instructions:

  1. Preheat the oven to 350°F (175°C). Grease a 9-inch round cake pan or line it with parchment paper.
  2. Mix wet ingredients: In a large bowl, whisk together the yogurt, sugar, and vegetable oil until smooth. Add the eggs one at a time, beating well after each addition. Stir in the vanilla extract and lemon zest (if using).
  3. Combine dry ingredients: In a separate bowl, sift together the flour, baking powder, and salt.
  4. Incorporate dry into wet: Gradually fold the dry ingredients into the wet mixture, stirring just until combined. Be careful not to overmix, as it can make the cake dense.
  5. Bake: Pour the batter into the prepared cake pan, smoothing the top. Bake for 30-35 minutes, or until a toothpick inserted into the center comes out clean.
  6. Cool and serve: Let the cake cool in the pan for 10 minutes before transferring it to a wire rack to cool completely. Dust with powdered sugar before serving, if desired.

Enjoy this delicious, versatile French yogurt cake as is or with your favorite toppings!

Cinnamon Banana Cake

0

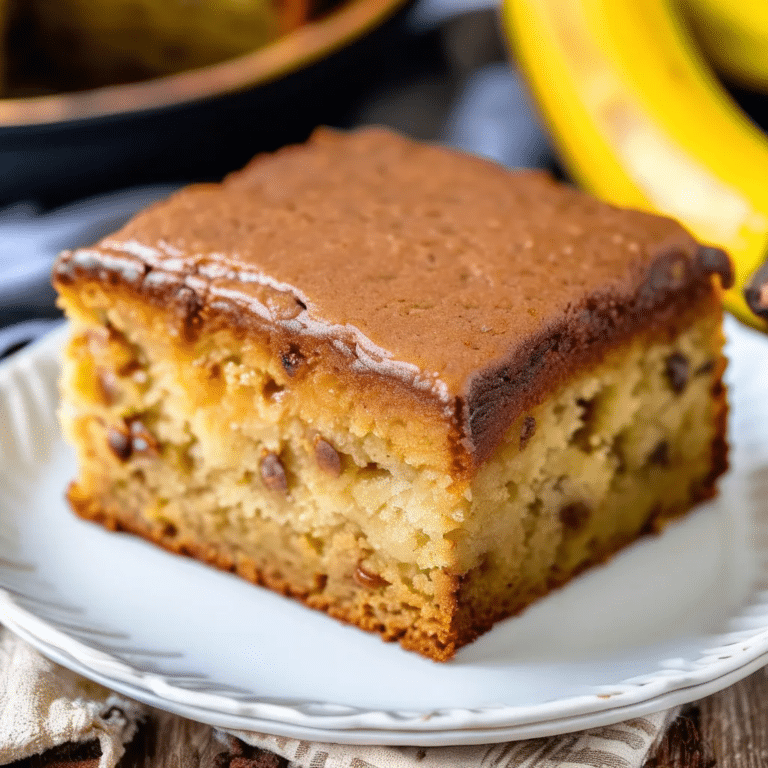
Cinnamon Banana Cake is a moist and flavorful dessert that combines the natural sweetness of ripe bananas with the warm, comforting spice of cinnamon. This cake is perfect for using up overripe bananas, transforming them into a deliciously tender treat that’s ideal for any time of day. Whether served as a delightful breakfast option, a mid-afternoon snack, or a dessert with a cup of coffee or tea, Cinnamon Banana Cake is a versatile and crowd-pleasing choice. The addition of cinnamon adds a cozy twist to the classic banana flavor, making each bite feel like a warm hug.

Ingredients:

  • 1 1/2 cups all-purpose flour
  • 1 teaspoon baking powder
  • 1/2 teaspoon baking soda
  • 1/2 teaspoon salt
  • 1 teaspoon ground cinnamon
  • 1/2 cup unsalted butter, softened
  • 3/4 cup granulated sugar
  • 2 large eggs
  • 1 teaspoon vanilla extract
  • 1 cup mashed ripe bananas (about 2 large bananas)
  • 1/2 cup sour cream or plain yogurt
  • 1/2 cup chopped walnuts or pecans (optional)
  • Powdered sugar or cream cheese frosting (optional, for topping)

Instructions:

  1. Preheat the Oven: Preheat your oven to 350°F (175°C). Grease and flour a 9-inch round or square cake pan, or line it with parchment paper.
  2. Prepare the Dry Ingredients: In a medium bowl, whisk together the flour, baking powder, baking soda, salt, and cinnamon. Set aside.
  3. Cream the Butter and Sugar: In a large mixing bowl, beat the softened butter and granulated sugar together until light and fluffy, about 3-4 minutes. Add the eggs, one at a time, beating well after each addition. Stir in the vanilla extract.
  4. Add the Bananas and Sour Cream: Mix in the mashed bananas and sour cream (or yogurt) until well combined.
  5. Combine Wet and Dry Ingredients: Gradually add the dry ingredient mixture to the wet ingredients, stirring until just combined. Be careful not to overmix. If using, fold in the chopped walnuts or pecans.
  6. Bake the Cake: Pour the batter into the prepared cake pan, spreading it evenly. Bake in the preheated oven for 30-35 minutes, or until a toothpick inserted into the center comes out clean.
  7. Cool and Serve: Allow the cake to cool in the pan for 10 minutes, then transfer it to a wire rack to cool completely. Dust with powdered sugar or top with cream cheese frosting if desired.

This Cinnamon Banana Cake is a delicious and comforting treat that brings together the sweet, familiar taste of bananas with the warm spice of cinnamon, making it a perfect addition to your recipe collection.

Prawn Cocktail

0

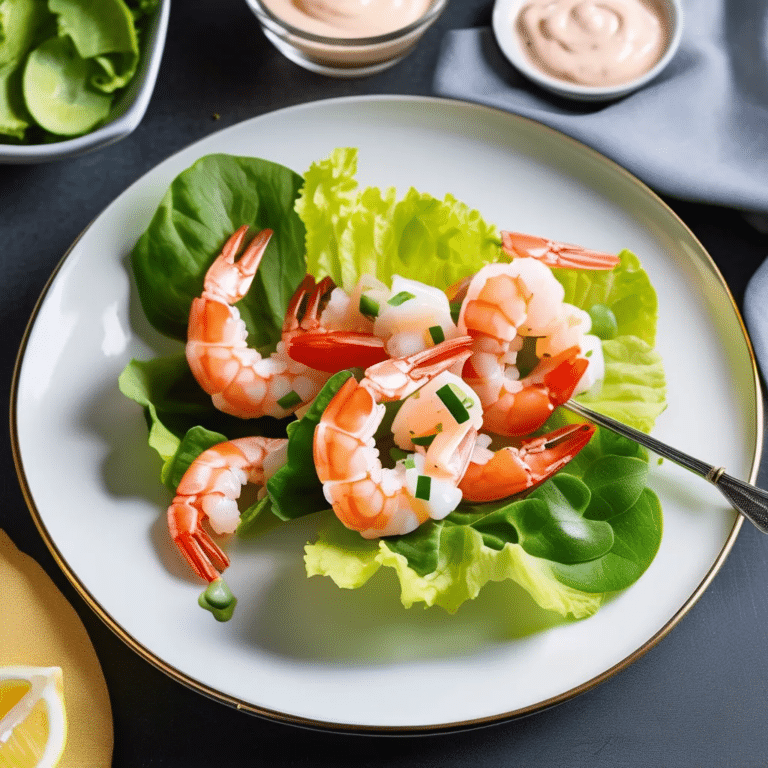
Prawn Cocktail is a classic, elegant appetizer that has stood the test of time with its refreshing flavors and simple preparation. This retro favorite features succulent prawns or shrimp served atop a bed of crisp lettuce, all drizzled with a zesty, creamy cocktail sauce made from mayonnaise, ketchup, and a touch of lemon juice. The combination of tender prawns with the tangy sauce and fresh greens creates a delightful contrast of textures and tastes, making it the perfect starter for a special meal or a festive gathering. Whether you’re hosting a dinner party or looking for a sophisticated appetizer, Prawn Cocktail is a crowd-pleasing choice that never goes out of style.

Ingredients:

  • 1 lb (450g) cooked and peeled prawns or shrimp, chilled
  • 1/2 cup mayonnaise
  • 2 tablespoons ketchup
  • 1 tablespoon lemon juice
  • 1 teaspoon Worcestershire sauce
  • 1 teaspoon horseradish sauce (optional, for extra kick)
  • Salt and pepper, to taste
  • 1 tablespoon fresh chives or dill, chopped (for garnish)
  • 4 cups shredded lettuce or mixed greens
  • Lemon wedges, for garnish

Instructions:

  1. Prepare the Cocktail Sauce: In a small bowl, whisk together the mayonnaise, ketchup, lemon juice, Worcestershire sauce, and horseradish sauce (if using). Season with salt and pepper to taste. Adjust the seasoning or acidity with more lemon juice or ketchup if needed. Chill the sauce in the refrigerator for at least 15 minutes to let the flavors meld.
  2. Assemble the Salad: In serving glasses or small bowls, place a generous layer of shredded lettuce or mixed greens at the bottom.
  3. Add the Prawns: Arrange the chilled prawns on top of the lettuce, dividing them equally among the glasses or bowls.
  4. Top with Sauce: Spoon the cocktail sauce over the prawns, ensuring each serving gets a good amount of the zesty dressing.
  5. Garnish and Serve: Garnish each Prawn Cocktail with a sprinkle of fresh chives or dill and a lemon wedge on the side. Serve immediately while the prawns are still chilled.

This Prawn Cocktail is a timeless appetizer that’s sure to impress with its combination of succulent prawns and tangy, flavorful sauce, making it an ideal choice for any elegant occasion.

Vegetarian Fried Rice

0

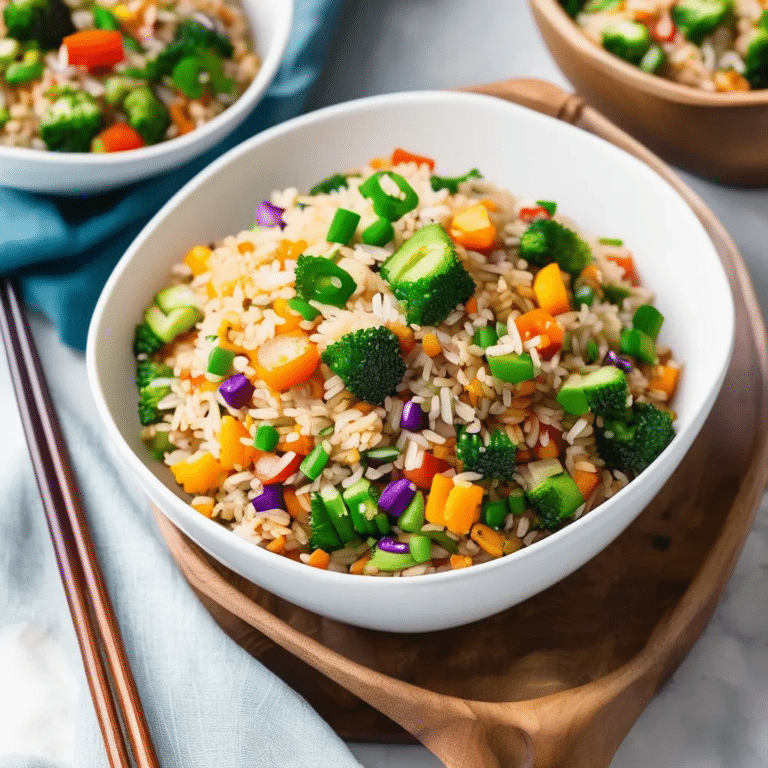
Vegetarian Fried Rice is a quick and flavorful dish that transforms simple ingredients into a satisfying meal. Packed with colorful vegetables, fluffy rice, and a savory blend of soy sauce and seasonings, this dish is a go-to for busy weeknights or when you’re looking to use up leftover rice. The vegetables add a delightful crunch and freshness, while the eggs provide a bit of protein to make this dish hearty and filling. Customizable and easy to make, Vegetarian Fried Rice is not only delicious but also a versatile base for adding your favorite veggies or plant-based proteins, making it a staple in any kitchen.

Ingredients:

  • 3 cups cooked and cooled jasmine or basmati rice
  • 2 tablespoons vegetable oil, divided
  • 3 cloves garlic, minced
  • 1 small onion, finely chopped
  • 1 cup carrots, diced
  • 1 cup bell peppers, diced (any color)
  • 1 cup frozen peas
  • 2 large eggs, lightly beaten (optional for vegan, omit)
  • 3 tablespoons soy sauce or tamari
  • 1 tablespoon sesame oil
  • 1 teaspoon grated fresh ginger
  • 1/2 teaspoon ground white pepper (optional)
  • 3 green onions, chopped
  • Fresh cilantro or sesame seeds, for garnish (optional)

Instructions:

  1. Prepare the Rice: If using freshly cooked rice, spread it out on a baking sheet and allow it to cool completely. This prevents the rice from becoming mushy when fried.
  2. Sauté the Vegetables: Heat 1 tablespoon of vegetable oil in a large skillet or wok over medium-high heat. Add the minced garlic and chopped onion, sautéing until fragrant and the onion is translucent, about 2-3 minutes. Add the diced carrots and bell peppers, and cook for another 3-4 minutes, until they begin to soften.
  3. Cook the Eggs (Optional): Push the vegetables to the side of the skillet and add the remaining tablespoon of oil to the empty space. Pour in the beaten eggs, scrambling them until fully cooked. Once the eggs are cooked, mix them in with the vegetables.
  4. Add the Rice and Peas: Add the cooled rice and frozen peas to the skillet, stirring to combine with the vegetables and eggs. Cook for 5-7 minutes, stirring frequently, until the rice is heated through and slightly crispy.
  5. Season the Fried Rice: Stir in the soy sauce or tamari, sesame oil, grated ginger, and ground white pepper (if using). Continue to cook for another 2-3 minutes, ensuring the rice is evenly coated with the seasoning.
  6. Finish and Serve: Remove the skillet from the heat and stir in the chopped green onions. Garnish with fresh cilantro or sesame seeds if desired. Serve the Vegetarian Fried Rice hot, either on its own or as a side dish.

This Vegetarian Fried Rice is a delicious and versatile dish that’s perfect for a quick meal, packed with flavor and customizable to your liking.

Pressure Cooker Pot Roast

0

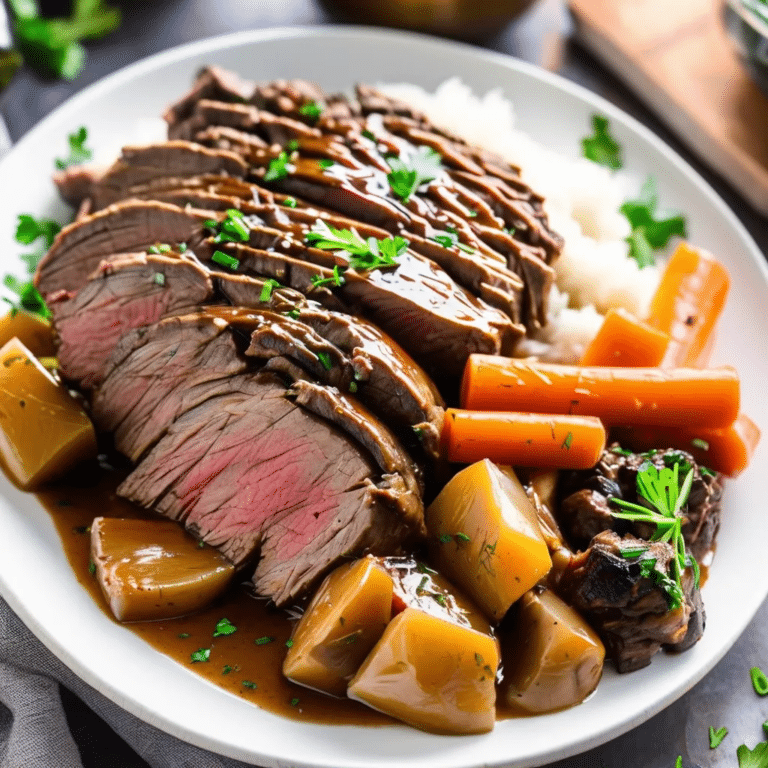
Pressure Cooker Pot Roast is the ultimate comfort food, offering tender, melt-in-your-mouth beef that’s infused with rich, savory flavors in a fraction of the time it takes to cook a traditional roast. Using a pressure cooker, you can achieve the same deep, slow-cooked taste in under an hour, making this dish perfect for weeknight dinners or special occasions when time is of the essence. The beef is seared to lock in its juices, then cooked with hearty vegetables and aromatic herbs in a flavorful broth, resulting in a perfectly cooked pot roast that’s juicy, flavorful, and satisfying. Serve it with mashed potatoes or crusty bread to soak up the delicious gravy.

Ingredients:

  • 3-4 lb chuck roast, trimmed of excess fat
  • 2 tablespoons olive oil
  • Salt and pepper, to taste
  • 1 large onion, chopped
  • 3 cloves garlic, minced
  • 4 carrots, cut into large chunks
  • 4 potatoes, cut into large chunks
  • 2 cups beef broth
  • 1/2 cup red wine (optional)
  • 2 tablespoons tomato paste
  • 2 tablespoons Worcestershire sauce
  • 1 teaspoon dried thyme
  • 1 teaspoon dried rosemary
  • 2 bay leaves
  • 1 tablespoon cornstarch (optional, for thickening)
  • 2 tablespoons cold water (optional, for thickening)

Instructions:

  1. Prepare the Roast: Pat the chuck roast dry with paper towels. Season generously with salt and pepper on all sides.
  2. Sear the Roast: Set your pressure cooker to the sauté function and heat the olive oil. Once hot, add the roast and sear on all sides until browned, about 4-5 minutes per side. Remove the roast from the pot and set aside.
  3. Sauté the Vegetables: In the same pot, add the chopped onion and garlic. Sauté for 2-3 minutes until softened and fragrant.
  4. Deglaze the Pot: Pour in the red wine (if using) and beef broth, scraping up any browned bits from the bottom of the pot. Stir in the tomato paste, Worcestershire sauce, thyme, rosemary, and bay leaves.
  5. Cook the Pot Roast: Return the seared roast to the pot. Add the carrots and potatoes around the roast. Lock the lid in place and set the pressure cooker to high pressure for 60 minutes.
  6. Release the Pressure: Once the cooking time is complete, allow the pressure to release naturally for 10 minutes, then manually release any remaining pressure.
  7. Thicken the Gravy (Optional): If you prefer a thicker gravy, remove the roast and vegetables from the pot and set them aside. Mix the cornstarch with cold water to form a slurry, then stir it into the cooking liquid. Set the pressure cooker to sauté and cook until the gravy thickens, about 2-3 minutes.
  8. Serve: Slice the pot roast and serve it with the vegetables, drizzled with the rich, flavorful gravy.

This Pressure Cooker Pot Roast delivers all the classic comfort and deep flavors of a traditional pot roast, but in a fraction of the time, making it an ideal choice for any meal that calls for a hearty, satisfying dish.

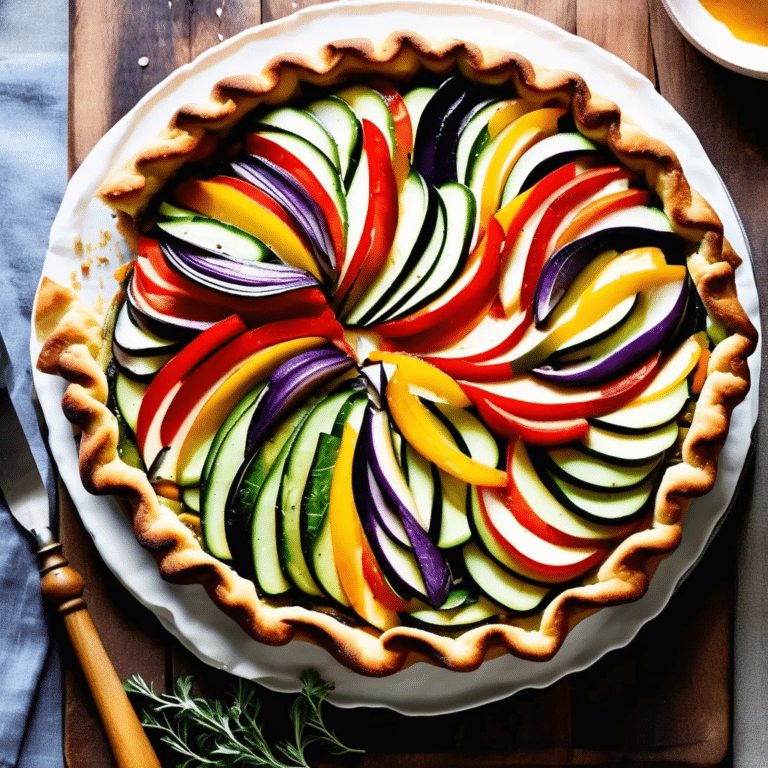
Ratatouille Tart

0

Ratatouille Tart is a beautiful and flavorful dish that combines the rustic charm of the classic Provençal vegetable stew with the elegance of a savory tart. This delightful recipe features a buttery, flaky pastry crust filled with layers of vibrant, thinly sliced vegetables—such as zucchini, eggplant, tomatoes, and bell peppers—arranged in a stunning pattern. The vegetables are roasted to perfection, allowing their natural sweetness to intensify, while a base of herbed ricotta or goat cheese adds creaminess and depth. Ideal as a light lunch, dinner, or a show-stopping appetizer, Ratatouille Tart is a celebration of fresh, seasonal produce and Mediterranean flavors.

Ingredients:

For the Crust:

  • 1 1/4 cups all-purpose flour
  • 1/2 teaspoon salt
  • 1/2 cup unsalted butter, cold and cubed
  • 3-4 tablespoons ice water

For the Filling:

  • 1/2 cup ricotta cheese (or goat cheese)
  • 1/4 cup grated Parmesan cheese
  • 1 egg
  • 1 teaspoon fresh thyme leaves (or 1/2 teaspoon dried thyme)
  • Salt and pepper, to taste
  • 1 small zucchini, thinly sliced
  • 1 small eggplant, thinly sliced
  • 1 small yellow squash, thinly sliced
  • 1-2 ripe tomatoes, thinly sliced
  • 1 small red bell pepper, thinly sliced
  • 2 tablespoons olive oil
  • Fresh basil or parsley, chopped (for garnish)

Instructions:

  1. Prepare the Crust: In a large bowl, mix the flour and salt. Cut in the cold butter using a pastry cutter or your fingers until the mixture resembles coarse crumbs. Gradually add ice water, one tablespoon at a time, and mix until the dough comes together. Form the dough into a disc, wrap it in plastic wrap, and refrigerate for at least 30 minutes.
  2. Preheat the Oven: Preheat your oven to 375°F (190°C). Roll out the chilled dough on a lightly floured surface to fit a 9-inch tart pan. Transfer the dough to the pan, pressing it into the bottom and sides. Trim any excess dough, and prick the base with a fork. Blind bake the crust for 10-12 minutes until lightly golden. Remove from the oven and let it cool slightly.
  3. Prepare the Cheese Filling: In a small bowl, combine the ricotta (or goat cheese), grated Parmesan, egg, thyme, salt, and pepper. Spread this mixture evenly over the bottom of the baked tart crust.
  4. Assemble the Tart: Arrange the sliced vegetables over the cheese filling in a circular pattern, alternating the slices to create a visually appealing design. Drizzle the vegetables with olive oil and sprinkle with additional salt and pepper.
  5. Bake the Tart: Bake the tart in the preheated oven for 30-35 minutes, or until the vegetables are tender and slightly caramelized, and the crust is golden brown.
  6. Garnish and Serve: Remove the tart from the oven and allow it to cool slightly. Garnish with freshly chopped basil or parsley before serving.

This Ratatouille Tart is not only visually stunning but also bursting with the fresh and vibrant flavors of Mediterranean vegetables. It’s a versatile dish that’s perfect for any meal or occasion!

Chicken And Kale Soup

0

This Chicken and Kale Soup is a hearty, nutrient-packed dish perfect for cooler weather or when you need a wholesome meal. Tender pieces of chicken are simmered in a flavorful broth alongside nutrient-dense kale, carrots, and onions. A touch of garlic and thyme adds warmth and depth to the soup, making it a comforting and delicious way to enjoy a bowl of nutritious goodness. Whether you’re looking for a satisfying lunch or a light dinner, this soup is easy to make, filling, and full of health benefits.

Ingredients:

  • 1 lb chicken breasts, boneless and skinless
  • 6 cups chicken broth (low sodium)
  • 1 large onion, chopped
  • 3 cloves garlic, minced
  • 3 medium carrots, peeled and sliced
  • 2 stalks celery, chopped
  • 4 cups kale, stems removed and chopped
  • 1 tbsp olive oil
  • 1 tsp dried thyme
  • 1 bay leaf
  • Salt and pepper to taste
  • Optional: fresh lemon juice for serving

Instructions:

  1. In a large pot, heat the olive oil over medium heat. Add the onion, garlic, carrots, and celery. Sauté for 5-7 minutes until the vegetables begin to soften.
  2. Season the chicken breasts with salt and pepper, then add them to the pot along with the chicken broth, thyme, and bay leaf. Bring the mixture to a boil, then reduce the heat to a simmer.
  3. Let the soup simmer for about 25-30 minutes, or until the chicken is fully cooked and tender.
  4. Remove the chicken breasts from the pot and shred them using two forks. Return the shredded chicken to the pot.
  5. Stir in the chopped kale and let the soup cook for an additional 5-10 minutes, until the kale has wilted and softened.
  6. Taste and adjust the seasoning with salt and pepper. If desired, add a splash of fresh lemon juice for brightness.
  7. Serve hot with a side of crusty bread or on its own. Enjoy!