Home Blog Page 15

Jacques Torres Chocolate Chip Cookies

0

Jacques Torres Chocolate Chip Cookies are the ultimate treat for chocolate lovers, often hailed as the best chocolate chip cookies you’ll ever taste. Crafted by the renowned chocolatier Jacques Torres, these cookies are known for their perfect balance of crispy edges, chewy centers, and rich, melty chocolate. What sets these cookies apart is the use of high-quality chocolate disks or feves, which create pockets of gooey chocolate throughout the cookie. The dough, made with a blend of bread flour and pastry flour, has a unique texture and flavor, enhanced by a touch of sea salt that beautifully complements the sweetness. Whether you’re baking for a special occasion or just indulging in a homemade treat, these cookies are sure to impress.

Ingredients:

  • 2 cups minus 2 tablespoons (8 1/2 ounces) cake flour
  • 1 2/3 cups (8 1/2 ounces) bread flour
  • 1 1/4 teaspoons baking soda
  • 1 1/2 teaspoons baking powder
  • 1 1/2 teaspoons coarse salt
  • 1 1/4 cups (2 1/2 sticks) unsalted butter, softened
  • 1 1/4 cups (10 ounces) light brown sugar, packed
  • 1 cup plus 2 tablespoons (8 ounces) granulated sugar
  • 2 large eggs
  • 2 teaspoons vanilla extract
  • 1 1/4 pounds bittersweet chocolate disks or fèves, at least 60 percent cacao content
  • Sea salt, for sprinkling

Instructions:

  1. Mix the Dry Ingredients: In a medium bowl, sift together the cake flour, bread flour, baking soda, baking powder, and coarse salt. Set aside.
  2. Cream the Butter and Sugars: In the bowl of a stand mixer fitted with the paddle attachment, cream the softened butter and both sugars together on medium speed until light and fluffy, about 5 minutes.
  3. Add Eggs and Vanilla: Add the eggs one at a time, mixing well after each addition. Stir in the vanilla extract.
  4. Combine with Dry Ingredients: Reduce the mixer speed to low and gradually add the dry ingredients, mixing until just combined. Be careful not to overmix. Gently fold in the chocolate disks or fèves by hand, ensuring they are evenly distributed throughout the dough.
  5. Chill the Dough: Cover the dough with plastic wrap and refrigerate for at least 24 hours, and up to 72 hours. This chilling time allows the flavors to develop and improves the texture of the cookies.
  6. Preheat the Oven: When ready to bake, preheat your oven to 350°F (175°C). Line a baking sheet with parchment paper.
  7. Shape the Cookies: Using a large cookie scoop, scoop 3 1/2-ounce mounds of dough (about the size of a golf ball) onto the prepared baking sheet, leaving about 3 inches between each cookie to allow for spreading. Lightly sprinkle the tops with sea salt.
  8. Bake: Bake the cookies for 18-20 minutes, or until the edges are golden brown but the centers are still soft. Rotate the baking sheet halfway through baking for even browning.
  9. Cool and Serve: Allow the cookies to cool on the baking sheet for 5 minutes before transferring them to a wire rack to cool completely. Enjoy them warm for the best experience, or store them in an airtight container for up to 3 days.

Jacques Torres Chocolate Chip Cookies are the epitome of cookie perfection, with their irresistible combination of textures and flavors that make them a standout among chocolate chip cookies. Enjoy them with a glass of cold milk or a warm cup of coffee for the ultimate treat.

STRAWBERRY RHUBARB CAKE

Strawberry Rhubarb Cake is a delightful, fruity dessert that perfectly balances the sweet juiciness of strawberries with the tartness of rhubarb. The cake itself is moist and fluffy, making it a great option for spring and summer gatherings. The combination of flavors and textures creates a dessert that’s both light and satisfying, perfect for serving with whipped cream or a scoop of ice cream.

Ingredients:

For the Cake:

  • 1 1/2 cups all-purpose flour
  • 1 teaspoon baking powder
  • 1/2 teaspoon baking soda
  • 1/4 teaspoon salt
  • 1/2 teaspoon ground cinnamon
  • 1/2 cup unsalted butter, softened
  • 3/4 cup granulated sugar
  • 2 large eggs
  • 1 teaspoon vanilla extract
  • 1/2 cup sour cream or Greek yogurt
  • 1 1/2 cups rhubarb, diced
  • 1 cup strawberries, hulled and quartered

For the Topping:

  • 1/4 cup brown sugar
  • 1/4 cup all-purpose flour
  • 1/2 teaspoon ground cinnamon
  • 2 tablespoons cold unsalted butter, cubed

Instructions:

  1. Preheat the oven: Preheat your oven to 350°F (175°C). Grease and flour a 9-inch round or square cake pan.
  2. Mix the dry ingredients: In a medium bowl, whisk together the flour, baking powder, baking soda, salt, and cinnamon. Set aside.
  3. Cream the butter and sugar: In a large bowl, beat together the softened butter and granulated sugar with an electric mixer until light and fluffy, about 3-4 minutes. Add the eggs one at a time, beating well after each addition, then stir in the vanilla extract.
  4. Add the sour cream: Mix in the sour cream (or Greek yogurt) until smooth.
  5. Combine wet and dry ingredients: Gradually add the dry ingredients to the wet mixture, stirring until just combined. Be careful not to overmix.
  6. Fold in the fruit: Gently fold in the diced rhubarb and quartered strawberries, distributing them evenly throughout the batter.
  7. Prepare the topping: In a small bowl, mix together the brown sugar, flour, and cinnamon. Add the cold butter cubes and use your fingers or a pastry cutter to mix until it forms a crumbly texture.
  8. Assemble the cake: Pour the batter into the prepared cake pan and spread it evenly. Sprinkle the crumble topping over the cake batter.
  9. Bake: Bake the cake in the preheated oven for 40-45 minutes, or until a toothpick inserted into the center comes out clean. If the top is browning too quickly, you can cover the cake loosely with foil for the last 10 minutes of baking.
  10. Cool and serve: Allow the cake to cool in the pan for 10-15 minutes before slicing. Serve warm or at room temperature with whipped cream, vanilla ice cream, or on its own.

This Strawberry Rhubarb Cake is a perfect combination of sweet and tart, with a moist cake base and a crunchy topping. It’s ideal for any spring or summer occasion!

Carrot Apple Soup

0

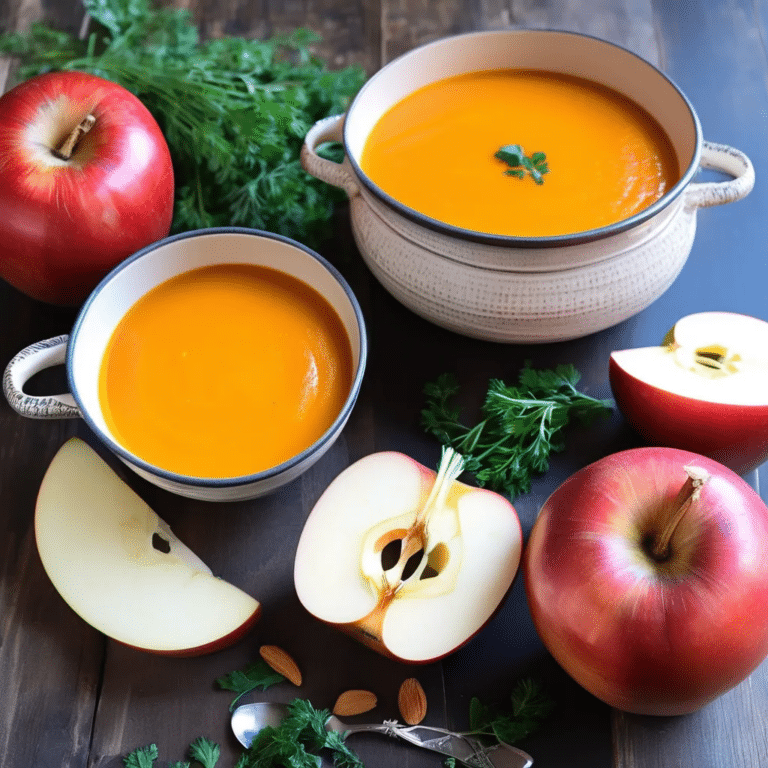
Carrot Apple Soup is a vibrant and nourishing dish that beautifully balances the natural sweetness of carrots and apples with a hint of spice. This creamy, velvety soup is perfect for cozy fall and winter days, offering a comforting warmth that’s both satisfying and healthy. The combination of carrots and apples creates a delicate sweetness, while onions, garlic, and a touch of ginger add depth and complexity to the flavor. Whether served as a light starter or a wholesome meal on its own, Carrot Apple Soup is a delicious way to enjoy the seasonal bounty of fresh produce.

Ingredients:

  • 2 tablespoons olive oil
  • 1 large onion, chopped
  • 2 cloves garlic, minced
  • 1-inch piece of fresh ginger, minced
  • 1 1/2 lbs carrots, peeled and chopped
  • 2 medium apples, peeled, cored, and chopped (such as Granny Smith or Honeycrisp)
  • 4 cups vegetable broth
  • 1 teaspoon ground cumin
  • 1/2 teaspoon ground cinnamon
  • Salt and pepper, to taste
  • 1/2 cup coconut milk or heavy cream (optional, for added creaminess)
  • Fresh parsley or chives, chopped (for garnish)
  • Crusty bread, for serving (optional)

Instructions:

  1. Sauté the Aromatics: In a large pot, heat the olive oil over medium heat. Add the chopped onion and sauté for about 5 minutes, until soft and translucent. Add the minced garlic and ginger, and cook for another 1-2 minutes until fragrant.
  2. Cook the Vegetables: Stir in the chopped carrots and apples, and cook for 5 minutes, allowing the flavors to meld.
  3. Add the Spices and Broth: Sprinkle the cumin and cinnamon over the vegetables, stirring to coat them evenly. Pour in the vegetable broth, bringing the mixture to a boil. Once boiling, reduce the heat to low, cover the pot, and let it simmer for 20-25 minutes, or until the carrots and apples are tender.
  4. Blend the Soup: Using an immersion blender, carefully blend the soup until smooth and creamy. Alternatively, you can transfer the soup in batches to a blender and blend until smooth. If the soup is too thick, add a little more broth or water to reach your desired consistency.
  5. Add Creaminess (Optional): For a richer texture, stir in the coconut milk or heavy cream. Season with salt and pepper to taste.
  6. Serve: Ladle the soup into bowls and garnish with fresh parsley or chives. Serve with crusty bread on the side if desired.

Carrot Apple Soup is a delightful and comforting dish that highlights the natural sweetness of fresh carrots and apples, making it a perfect choice for a cozy meal that’s both nourishing and delicious.

Angel Wings

0

Angel Wings, also known as Chruściki in Polish, are a delicate and crispy pastry treat that’s perfect for special occasions or as a sweet indulgence with a cup of tea or coffee. These light, airy pastries are made by rolling out a simple dough, cutting it into strips, twisting them into shapes, and then frying them to golden perfection. Dusted with a generous amount of powdered sugar, Angel Wings have a delightful crunch and a subtle sweetness that makes them irresistible. Often enjoyed during holidays and celebrations, these traditional pastries are a delightful nod to European culinary heritage and a treat that’s sure to please everyone.

Ingredients:

  • 2 large eggs
  • 1 tablespoon sugar
  • 1/4 teaspoon salt
  • 1 teaspoon vanilla extract
  • 2 tablespoons sour cream or heavy cream
  • 1 tablespoon vodka or rum (optional, for extra crispiness)
  • 1 1/4 cups all-purpose flour (plus more for rolling)
  • Vegetable oil, for frying
  • Powdered sugar, for dusting

Instructions:

  1. Prepare the Dough: In a large mixing bowl, whisk together the eggs, sugar, salt, vanilla extract, sour cream (or heavy cream), and vodka or rum (if using) until smooth. Gradually add the flour, mixing until a soft dough forms. The dough should be smooth and slightly sticky but firm enough to roll out. Add more flour if necessary.
  2. Knead and Rest: Turn the dough out onto a lightly floured surface and knead it for 5-7 minutes until it becomes elastic and smooth. Cover the dough with a clean kitchen towel and let it rest for about 30 minutes.
  3. Roll Out the Dough: After resting, divide the dough into two portions. Roll out one portion of the dough on a floured surface as thinly as possible, almost paper-thin. Use a pastry wheel or knife to cut the dough into strips about 1 inch wide and 3-4 inches long. Make a slit in the center of each strip and gently pull one end through the slit to form a twist.
  4. Heat the Oil: In a deep frying pan or pot, heat about 2 inches of vegetable oil over medium-high heat until it reaches 350°F (175°C). You can test the oil by dropping in a small piece of dough; it should sizzle and rise to the surface.
  5. Fry the Pastries: Fry the dough twists in batches, being careful not to overcrowd the pan. Fry for 1-2 minutes on each side or until they are golden brown and crispy. Use a slotted spoon to transfer the fried pastries to a paper towel-lined plate to drain excess oil.
  6. Dust with Powdered Sugar: Once the Angel Wings have cooled slightly, generously dust them with powdered sugar.
  7. Serve: Serve the Angel Wings immediately, or store them in an airtight container for up to a few days. They are best enjoyed fresh with a light, crispy texture.

Angel Wings are a light, airy, and crispy delight that’s perfect for any festive occasion, offering a sweet taste of tradition that’s sure to be a hit with family and friends.

PALEO CHOCOLATE MOUSSE

0

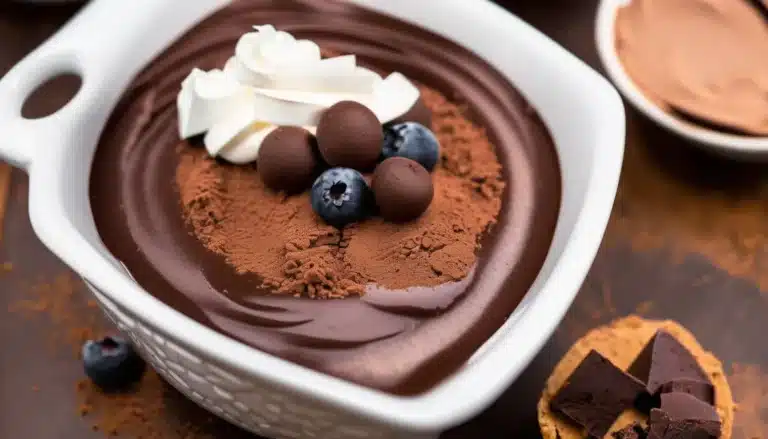
Paleo Chocolate Mousse is a rich, creamy, and indulgent dessert that’s dairy-free, refined sugar-free, and perfect for those following a paleo lifestyle. This mousse gets its decadent texture from coconut milk and is naturally sweetened with a touch of maple syrup or honey. It’s simple to make, yet it feels luxurious, making it ideal for special occasions or whenever you want a guilt-free treat.

Ingredients:

  • 1 can (13.5 oz) full-fat coconut milk or coconut cream (refrigerated overnight)
  • 1/2 cup unsweetened cocoa powder
  • 1/4 cup maple syrup or raw honey (adjust to taste)
  • 1 teaspoon vanilla extract
  • Pinch of sea salt
  • Optional toppings: fresh berries, shredded coconut, chopped nuts, or paleo chocolate chips

Instructions:

  1. Chill the coconut milk: Refrigerate the can of coconut milk or coconut cream overnight to allow the cream to separate from the liquid. When you’re ready to make the mousse, scoop out only the thick coconut cream from the top, discarding the watery part or saving it for smoothies.
  2. Whip the coconut cream: In a large mixing bowl, use an electric mixer to whip the chilled coconut cream for about 2-3 minutes until light and fluffy.
  3. Add the cocoa and sweetener: Sift in the cocoa powder to avoid lumps, then add the maple syrup (or honey), vanilla extract, and a pinch of sea salt. Continue to whip until the mixture is smooth, creamy, and fully combined. Taste and adjust the sweetness if needed.
  4. Chill the mousse: Transfer the mousse to individual serving bowls or glasses. Refrigerate for at least 30 minutes to firm up and allow the flavors to meld.
  5. Serve and garnish: Once chilled, top the mousse with fresh berries, shredded coconut, chopped nuts, or paleo chocolate chips if desired. Serve cold.

This Paleo Chocolate Mousse is silky, rich, and indulgent, yet light and healthy enough to enjoy any time. It’s perfect for a quick dessert that satisfies your chocolate cravings while sticking to a paleo diet!

Lentil Spaghetti Bolognese

0

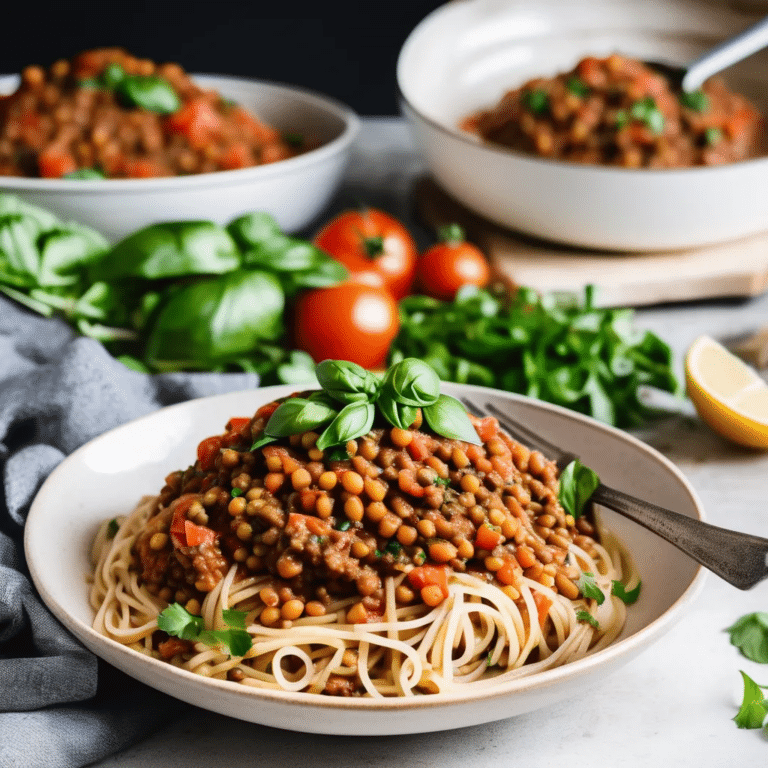
Lentil Spaghetti Bolognese is a hearty and satisfying plant-based twist on the classic Italian dish. This version swaps out the traditional ground meat for protein-packed lentils, creating a rich, flavorful sauce that’s just as comforting and delicious as the original. Simmered with tomatoes, garlic, onions, and a blend of Italian herbs, the lentils absorb all the robust flavors, making them a perfect match for al dente spaghetti. Whether you’re a seasoned vegetarian or simply looking to incorporate more plant-based meals into your diet, Lentil Spaghetti Bolognese is a nutritious and delicious option that will please everyone at the table.

Ingredients:

  • 1 cup dried brown or green lentils, rinsed and drained
  • 2 tablespoons olive oil
  • 1 onion, finely chopped
  • 2 cloves garlic, minced
  • 1 carrot, finely chopped
  • 1 celery stalk, finely chopped
  • 1 can (28 oz) crushed tomatoes
  • 2 tablespoons tomato paste
  • 1 teaspoon dried oregano
  • 1 teaspoon dried basil
  • 1/2 teaspoon dried thyme
  • 1/2 teaspoon smoked paprika
  • 1/4 teaspoon red pepper flakes (optional)
  • 3 cups vegetable broth or water
  • Salt and pepper, to taste
  • 12 oz spaghetti (whole wheat or gluten-free if desired)
  • Fresh basil or parsley, chopped (for garnish)
  • Grated Parmesan or vegan cheese (optional, for serving)

Instructions:

  1. Cook the Lentils: In a medium saucepan, combine the lentils with 3 cups of water or vegetable broth. Bring to a boil, then reduce the heat to a simmer. Cook for 20-25 minutes, or until the lentils are tender but not mushy. Drain any excess liquid and set the lentils aside.
  2. Sauté the Vegetables: In a large skillet or saucepan, heat the olive oil over medium heat. Add the chopped onion, carrot, and celery, and sauté for 5-7 minutes, or until the vegetables are softened and beginning to brown. Add the minced garlic and cook for another 1-2 minutes until fragrant.
  3. Add the Tomatoes and Seasoning: Stir in the tomato paste, crushed tomatoes, oregano, basil, thyme, smoked paprika, and red pepper flakes (if using). Cook for 5 minutes, allowing the flavors to meld together.
  4. Simmer the Sauce: Add the cooked lentils to the skillet and pour in 1 cup of vegetable broth or water. Stir to combine, then bring the mixture to a simmer. Reduce the heat to low, cover, and let the sauce simmer for 20-30 minutes, stirring occasionally. If the sauce becomes too thick, add a little more broth or water as needed. Season with salt and pepper to taste.
  5. Cook the Spaghetti: While the sauce is simmering, bring a large pot of salted water to a boil. Add the spaghetti and cook according to the package instructions until al dente. Drain the pasta and set aside.
  6. Combine and Serve: Toss the cooked spaghetti with the lentil Bolognese sauce until well coated. Serve hot, garnished with fresh basil or parsley and grated Parmesan or vegan cheese if desired.

Lentil Spaghetti Bolognese is a flavorful and nutritious alternative to the traditional meat-based sauce, offering a delicious way to enjoy a classic comfort food while keeping it plant-based and wholesome.

GLUTEN FREE GRANOLA

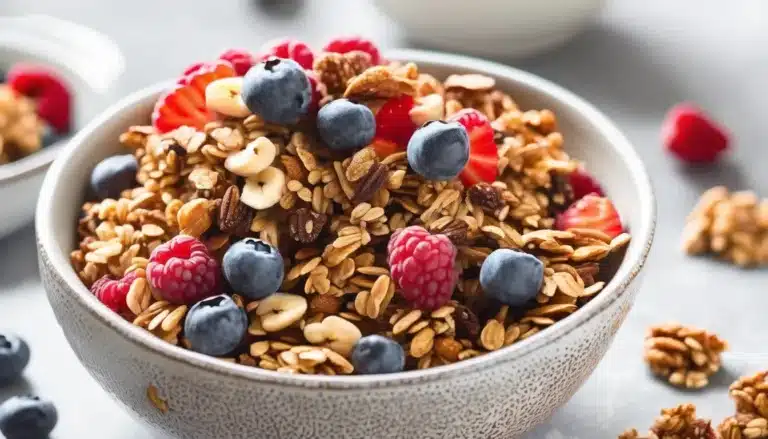
This Gluten-Free Granola is a crunchy, wholesome, and delicious snack or breakfast option. Packed with oats, nuts, seeds, and sweetened with maple syrup or honey, it’s a versatile treat you can enjoy on its own, sprinkled over yogurt, or with milk. Best of all, it’s customizable and naturally gluten-free, making it perfect for those with gluten sensitivities or anyone looking for a healthy, easy-to-make granola recipe.

Ingredients:

  • 3 cups certified gluten-free rolled oats
  • 1 cup nuts (almonds, walnuts, or pecans), roughly chopped
  • 1/2 cup seeds (pumpkin seeds, sunflower seeds, or flaxseeds)
  • 1/2 cup shredded unsweetened coconut (optional)
  • 1/4 cup chia seeds or ground flaxseeds (optional for extra nutrition)
  • 1 teaspoon ground cinnamon
  • 1/4 teaspoon salt
  • 1/3 cup melted coconut oil (or olive oil)
  • 1/3 cup maple syrup or honey
  • 1 teaspoon vanilla extract
  • 1/2 cup dried fruit (raisins, cranberries, or chopped apricots)

Instructions:

  1. Preheat the oven: Preheat your oven to 325°F (165°C) and line a large baking sheet with parchment paper.
  2. Mix dry ingredients: In a large mixing bowl, combine the gluten-free oats, chopped nuts, seeds, shredded coconut, cinnamon, and salt.
  3. Mix wet ingredients: In a separate small bowl, whisk together the melted coconut oil, maple syrup (or honey), and vanilla extract.
  4. Combine: Pour the wet ingredients over the dry ingredients, stirring well to coat everything evenly.
  5. Bake: Spread the granola mixture in an even layer on the prepared baking sheet. Bake for 20-25 minutes, stirring halfway through to ensure even browning. The granola is done when it turns a light golden brown (be careful not to let it burn).
  6. Add dried fruit: After removing the granola from the oven, stir in the dried fruit while the granola is still warm.
  7. Cool and store: Allow the granola to cool completely on the baking sheet before transferring it to an airtight container. The granola will continue to crisp up as it cools.

Optional Add-Ins:

  • For extra crunch: Add 1/4 cup of cacao nibs or dark chocolate chips after the granola cools.
  • For sweetness: Drizzle with more maple syrup or honey before serving.

This Gluten-Free Granola is the perfect balance of crunchy, nutty, and sweet. It’s a great snack on its own or a healthy addition to breakfast, whether sprinkled on yogurt, smoothie bowls, or served with your favorite milk. Enjoy!

Blueberry Dutch Baby

0

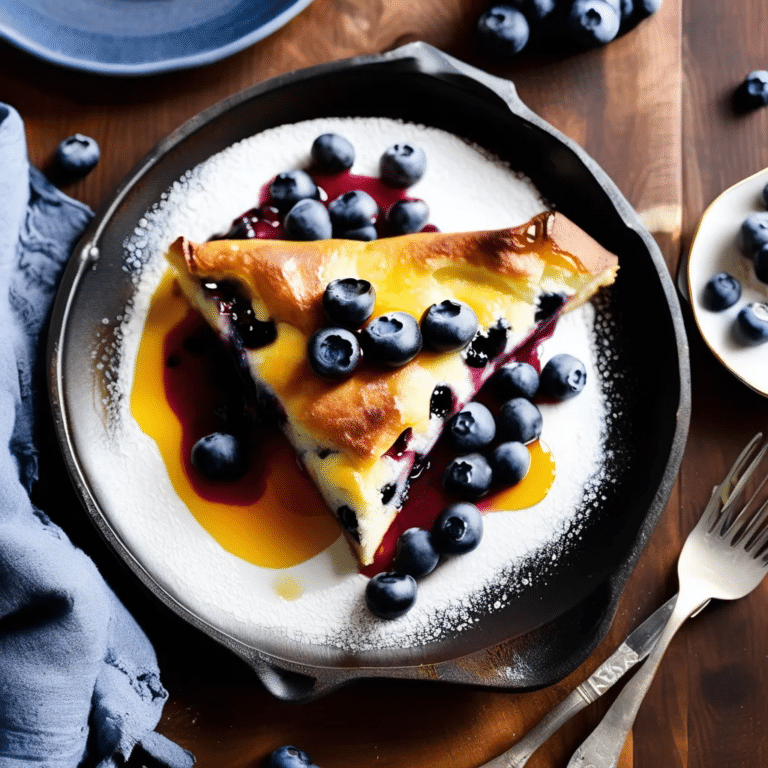
Blueberry Dutch Baby is a delightful and visually stunning breakfast dish that’s perfect for a weekend brunch or a special morning treat. This puffy, golden-brown pancake is baked in the oven and rises dramatically, creating a light and airy texture with crispy edges. Bursting with fresh blueberries, the Dutch Baby is sweet, slightly tart, and irresistibly delicious. It’s incredibly easy to make, requiring just a few simple ingredients and minimal prep time. Once out of the oven, it’s dusted with powdered sugar and served warm, making it a show-stopping dish that will impress family and friends alike.

Ingredients:

  • 3 large eggs
  • 1/2 cup all-purpose flour
  • 1/2 cup milk (dairy or plant-based)
  • 1 tablespoon granulated sugar
  • 1/2 teaspoon vanilla extract
  • 1/4 teaspoon salt
  • 3 tablespoons unsalted butter
  • 1 cup fresh blueberries
  • Powdered sugar, for dusting
  • Lemon wedges, for serving (optional)
  • Maple syrup, for serving (optional)

Instructions:

  1. Preheat the Oven: Preheat your oven to 425°F (220°C). Place a 10-inch cast-iron skillet or ovenproof pan in the oven to heat while you prepare the batter.
  2. Make the Batter: In a blender, combine the eggs, flour, milk, granulated sugar, vanilla extract, and salt. Blend until the mixture is smooth and frothy, about 20-30 seconds. Alternatively, you can whisk the ingredients together in a mixing bowl until fully combined and smooth.
  3. Add the Butter: Carefully remove the hot skillet from the oven and add the unsalted butter, swirling it around the pan until fully melted and the pan is well-coated.
  4. Pour the Batter: Pour the prepared batter into the hot, buttered skillet. Immediately scatter the fresh blueberries over the top of the batter.
  5. Bake: Place the skillet back in the oven and bake for 20-25 minutes, or until the Dutch Baby is puffed up and golden brown around the edges. The center will be slightly custardy.
  6. Serve: Remove the Dutch Baby from the oven and dust generously with powdered sugar. Serve immediately with lemon wedges for a burst of brightness or drizzle with maple syrup for added sweetness.

Blueberry Dutch Baby is a delightful and easy-to-make dish that offers a perfect balance of flavors and textures, making it a wonderful centerpiece for any breakfast or brunch spread.

PUMPKIN SPICE COFFEE CAKE

Pumpkin Spice Coffee Cake is the perfect treat for fall, combining the warm, cozy flavors of pumpkin and cinnamon with a buttery, crumbly streusel topping. The cake is moist, lightly spiced, and makes for a delicious breakfast, afternoon snack, or dessert. Serve it with a hot cup of coffee or tea, and enjoy the essence of autumn in every bite.

Ingredients:

For the Cake:

  • 1 1/2 cups all-purpose flour
  • 1 teaspoon baking powder
  • 1/2 teaspoon baking soda
  • 1/4 teaspoon salt
  • 1 teaspoon ground cinnamon
  • 1/2 teaspoon ground ginger
  • 1/4 teaspoon ground nutmeg
  • 1/4 teaspoon ground cloves
  • 1/2 cup unsalted butter, softened
  • 3/4 cup granulated sugar
  • 2 large eggs
  • 1 cup pumpkin puree (not pumpkin pie filling)
  • 1 teaspoon vanilla extract
  • 1/2 cup sour cream or Greek yogurt

For the Streusel Topping:

  • 1/2 cup all-purpose flour
  • 1/3 cup brown sugar
  • 1 teaspoon ground cinnamon
  • 1/4 cup unsalted butter, cold and cubed
  • 1/4 cup chopped pecans or walnuts (optional)

Instructions:

  1. Preheat the oven: Preheat your oven to 350°F (175°C). Grease and flour an 8×8-inch baking pan or line it with parchment paper.
  2. Mix the dry ingredients: In a medium bowl, whisk together the flour, baking powder, baking soda, salt, cinnamon, ginger, nutmeg, and cloves. Set aside.
  3. Cream the butter and sugar: In a large bowl, cream together the softened butter and granulated sugar using an electric mixer until light and fluffy, about 3-4 minutes. Beat in the eggs one at a time, then add the vanilla extract and pumpkin puree. Mix until well combined.
  4. Add the dry ingredients: Gradually add the dry ingredients to the wet ingredients, alternating with the sour cream or Greek yogurt, beginning and ending with the dry ingredients. Mix until just combined—be careful not to overmix.
  5. Prepare the streusel topping: In a small bowl, combine the flour, brown sugar, and cinnamon. Add the cold, cubed butter and use a pastry cutter or your fingers to mix until the mixture resembles coarse crumbs. Stir in the chopped nuts (if using).
  6. Assemble the cake: Pour the batter into the prepared baking pan, spreading it evenly. Sprinkle the streusel topping generously over the cake batter.
  7. Bake: Bake the cake in the preheated oven for 35-40 minutes, or until a toothpick inserted into the center comes out clean. If the top starts to brown too quickly, cover the cake loosely with foil during the last 10 minutes of baking.
  8. Cool and serve: Allow the coffee cake to cool in the pan for about 10 minutes before slicing and serving.

This Pumpkin Spice Coffee Cake is moist, spiced with warm fall flavors, and topped with a crumbly streusel that adds the perfect touch of sweetness. Enjoy with your favorite coffee or tea!

Champagne Risotto

0

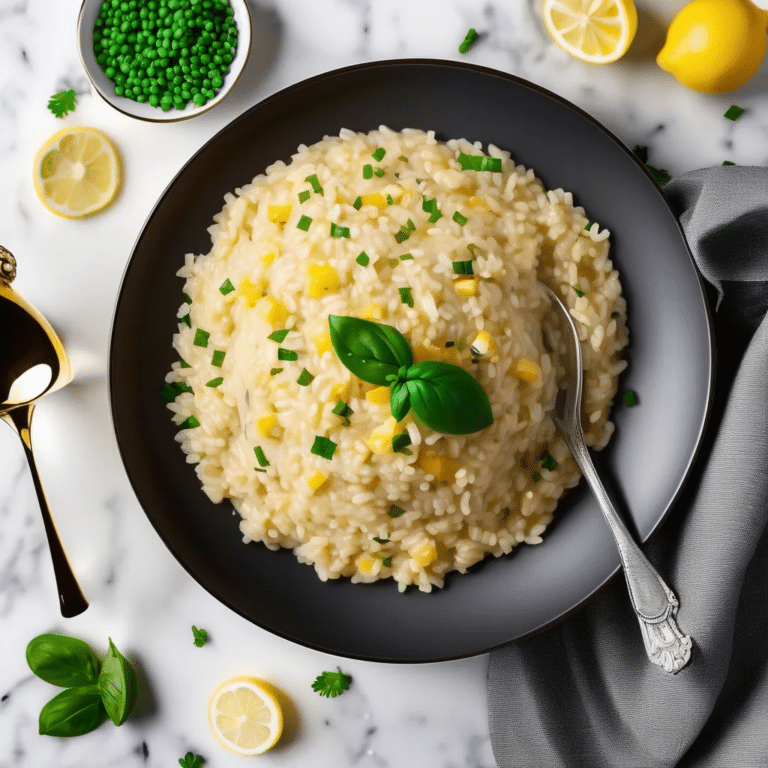
Champagne Risotto is an elegant and luxurious twist on the classic Italian dish, perfect for special occasions or whenever you want to treat yourself to something truly indulgent. The subtle, effervescent flavor of champagne adds a refined touch to the creamy, rich texture of the risotto, while Parmesan cheese and a hint of lemon zest bring balance and depth. This dish is both sophisticated and comforting, making it a wonderful choice for a romantic dinner, holiday celebration, or dinner party. Paired with a crisp salad and a glass of the remaining champagne, this risotto is sure to impress.

Ingredients:

  • 1 cup Arborio rice
  • 1 shallot, finely chopped
  • 2 tablespoons unsalted butter
  • 1/2 cup champagne or sparkling wine
  • 4 cups chicken or vegetable broth, kept warm
  • 1/2 cup grated Parmesan cheese
  • 1/4 cup heavy cream (optional for extra creaminess)
  • 1 teaspoon lemon zest
  • Salt and pepper, to taste
  • 2 tablespoons fresh chives or parsley, chopped (for garnish)
  • Extra virgin olive oil, for drizzling (optional)

Instructions:

  1. Sauté the Shallot: In a large saucepan, melt 1 tablespoon of butter over medium heat. Add the finely chopped shallot and sauté for 2-3 minutes, until softened and translucent.
  2. Toast the Rice: Add the Arborio rice to the saucepan and stir to coat the grains in the butter and shallot mixture. Cook for 2-3 minutes, stirring constantly, until the rice is lightly toasted and slightly translucent around the edges.
  3. Deglaze with Champagne: Pour in the champagne and stir continuously until the liquid is mostly absorbed by the rice. This should take about 2-3 minutes.
  4. Cook the Risotto: Begin adding the warm broth to the rice, one ladleful at a time, stirring frequently. Allow each addition of broth to be absorbed before adding the next. Continue this process until the rice is creamy and cooked to al dente, about 18-20 minutes.
  5. Finish with Cheese and Cream: Once the rice is cooked, stir in the remaining 1 tablespoon of butter, grated Parmesan cheese, and heavy cream (if using). Add the lemon zest and season with salt and pepper to taste. Stir until everything is well combined and the risotto is creamy.
  6. Serve: Spoon the Champagne Risotto onto plates or into bowls. Garnish with fresh chives or parsley and a drizzle of extra virgin olive oil if desired. Serve immediately.

Champagne Risotto is a delightful and decadent dish that perfectly marries the creamy richness of risotto with the light, bubbly essence of champagne, making it a standout choice for any special meal.