Home Blog Page 14

PANDAN CHIFFON CAKE

Pandan Chiffon Cake is a light, airy, and beautifully fragrant cake that’s a popular dessert in Southeast Asia. The delicate flavor of pandan leaves (often compared to vanilla with a grassy, coconut-like note) combined with the soft, fluffy texture makes this cake a unique and delicious treat. The vibrant green color from pandan extract makes it even more eye-catching.

Ingredients:

For the Cake:

  • 1 1/4 cups cake flour
  • 1 1/2 teaspoons baking powder
  • 1/4 teaspoon salt
  • 6 large eggs, separated
  • 1 cup granulated sugar, divided
  • 1/4 cup vegetable oil
  • 1/2 cup coconut milk
  • 1 teaspoon vanilla extract
  • 2 tablespoons pandan juice (made by blending pandan leaves with water and straining) or 1 teaspoon pandan extract
  • 1/2 teaspoon cream of tartar (for whipping egg whites)

Instructions:

  1. Preheat the oven: Preheat your oven to 325°F (165°C). Do not grease the pan, as the cake needs to cling to the sides to rise properly. A 9-inch tube pan or chiffon pan works best for this recipe.
  2. Prepare dry ingredients: In a medium bowl, sift together the cake flour, baking powder, and salt. Set aside.
  3. Mix wet ingredients: In a large bowl, whisk the egg yolks, 1/2 cup of sugar, vegetable oil, coconut milk, vanilla extract, and pandan juice or extract until smooth and well combined.
  4. Combine dry and wet ingredients: Gradually sift the flour mixture into the wet ingredients, stirring gently until smooth and lump-free. Be careful not to overmix.
  5. Whip the egg whites: In a separate large bowl, use an electric mixer to beat the egg whites on medium speed until frothy. Add the cream of tartar and continue beating until soft peaks form. Gradually add the remaining 1/2 cup of sugar while beating, and whip until stiff peaks form, but be careful not to overbeat.
  6. Fold the egg whites: Gently fold one-third of the whipped egg whites into the pandan batter to lighten it. Then, carefully fold in the remaining egg whites, being cautious not to deflate the mixture. The goal is to maintain the airy texture.
  7. Bake the cake: Pour the batter into the ungreased tube pan, smoothing the top with a spatula. Bake for 50-60 minutes, or until a toothpick inserted into the center comes out clean and the top is golden.
  8. Cool the cake: Once done, immediately invert the pan (you can place it on a bottle or use the pan’s legs, if available) and allow the cake to cool completely upside down. This prevents the cake from collapsing.
  9. Remove from the pan: Once cooled, run a knife around the edges of the pan to release the cake. Remove the cake from the pan and slice.

Optional:

  • Dust with powdered sugar or serve with whipped cream and fresh fruit for extra indulgence.

This Pandan Chiffon Cake is delightfully light and aromatic, with a beautiful green hue that adds a touch of elegance to any occasion. It’s perfect for serving with tea or coffee!


Whole Wheat Chocolate Chip Cookies

0

Whole Wheat Chocolate Chip Cookies are a wholesome twist on the classic treat, offering all the rich, buttery goodness of traditional chocolate chip cookies with the added benefits of whole grain. The nutty flavor of whole wheat flour adds depth and complexity to these cookies, while still delivering that perfect balance of crispy edges and chewy centers. Studded with generous amounts of chocolate chips, these cookies are not only delicious but also slightly more nutritious, making them a guilt-free indulgence. Whether you’re baking for a crowd or just satisfying a sweet tooth, Whole Wheat Chocolate Chip Cookies are sure to become a new favorite.

Ingredients:

  • 1 cup (2 sticks) unsalted butter, softened
  • 1 cup brown sugar, packed
  • 1/2 cup granulated sugar
  • 2 large eggs
  • 2 teaspoons vanilla extract
  • 2 1/4 cups whole wheat flour
  • 1 teaspoon baking soda
  • 1/2 teaspoon baking powder
  • 1/2 teaspoon salt
  • 2 cups semi-sweet chocolate chips
  • 1 cup chopped nuts (optional)

Instructions:

  1. Preheat the Oven: Preheat your oven to 350°F (175°C). Line two baking sheets with parchment paper or silicone baking mats.
  2. Cream the Butter and Sugars: In a large mixing bowl, cream together the softened butter, brown sugar, and granulated sugar until light and fluffy, about 3-4 minutes.
  3. Add the Eggs and Vanilla: Beat in the eggs, one at a time, mixing well after each addition. Stir in the vanilla extract.
  4. Mix the Dry Ingredients: In a separate bowl, whisk together the whole wheat flour, baking soda, baking powder, and salt.
  5. Combine Wet and Dry Ingredients: Gradually add the dry ingredients to the wet ingredients, mixing until just combined. Be careful not to overmix the dough.
  6. Fold in the Chocolate Chips and Nuts: Stir in the chocolate chips and chopped nuts (if using) until evenly distributed throughout the dough.
  7. Shape the Cookies: Using a cookie scoop or tablespoon, drop rounded balls of dough onto the prepared baking sheets, spacing them about 2 inches apart.
  8. Bake the Cookies: Bake in the preheated oven for 10-12 minutes, or until the edges are lightly golden and the centers are set. The cookies may look slightly underbaked in the center, but they will firm up as they cool.
  9. Cool and Serve: Allow the cookies to cool on the baking sheet for 5 minutes before transferring them to a wire rack to cool completely.

Whole Wheat Chocolate Chip Cookies are a delightful treat that combines the comforting taste of classic chocolate chip cookies with the added goodness of whole wheat flour, making them a perfect balance of indulgence and nutrition. Enjoy them fresh from the oven with a glass of cold milk or pack them as a satisfying snack on the go.

PUMPKIN SPICE DONUT HOLES

Pumpkin Spice Donut Holes are the perfect bite-sized fall treat, featuring the warm flavors of pumpkin, cinnamon, nutmeg, and cloves. These soft, tender, and sweet donut holes are easy to make, whether baked or fried, and coated with cinnamon sugar for an irresistible finish. Ideal for breakfast, a snack, or a dessert, these donuts are sure to become a seasonal favorite!

Ingredients:

For the Donut Holes:

  • 1 1/2 cups all-purpose flour
  • 1 teaspoon baking powder
  • 1/2 teaspoon baking soda
  • 1/2 teaspoon salt
  • 1 teaspoon ground cinnamon
  • 1/2 teaspoon ground nutmeg
  • 1/4 teaspoon ground cloves
  • 1/4 teaspoon ground ginger
  • 1/2 cup pumpkin puree (not pumpkin pie filling)
  • 1/3 cup brown sugar
  • 1/3 cup granulated sugar
  • 1/4 cup milk
  • 1 large egg
  • 2 tablespoons unsalted butter, melted
  • 1 teaspoon vanilla extract

For the Cinnamon Sugar Coating:

  • 1/2 cup granulated sugar
  • 1 tablespoon ground cinnamon
  • 4 tablespoons melted butter (for dipping)

Instructions:

Baking Method:

  1. Preheat the oven: Preheat your oven to 350°F (175°C) and lightly grease a mini muffin tin or donut hole pan.
  2. Mix dry ingredients: In a medium bowl, whisk together the flour, baking powder, baking soda, salt, cinnamon, nutmeg, cloves, and ginger. Set aside.
  3. Mix wet ingredients: In a separate large bowl, whisk together the pumpkin puree, brown sugar, granulated sugar, milk, egg, melted butter, and vanilla extract until smooth and well combined.
  4. Combine wet and dry: Gradually add the dry ingredients to the wet ingredients, mixing gently until just combined. Be careful not to overmix.
  5. Fill the pan: Spoon the batter into the prepared mini muffin tin, filling each well about 3/4 full.
  6. Bake: Bake for 10-12 minutes, or until a toothpick inserted into the center of a donut hole comes out clean. Let the donut holes cool in the pan for a few minutes before transferring them to a wire rack.

For the Cinnamon Sugar Coating:

  1. Melt the butter: While the donut holes are still warm, melt the butter in a small bowl.
  2. Mix cinnamon and sugar: In a separate shallow dish, combine the granulated sugar and ground cinnamon.
  3. Coat the donut holes: Dip each donut hole into the melted butter, then roll it in the cinnamon sugar mixture until fully coated. Place the coated donut holes on a plate or wire rack to set.

Frying Method (Optional):

  1. Heat the oil: In a deep fryer or heavy-bottomed pot, heat 2-3 inches of vegetable oil to 350°F (175°C).
  2. Fry the donut holes: Using a cookie scoop or spoon, carefully drop spoonfuls of dough into the hot oil, frying in batches. Cook for about 2-3 minutes per side, until golden brown and cooked through.
  3. Drain and coat: Use a slotted spoon to remove the donut holes and drain them on paper towels. While warm, dip in melted butter and coat with cinnamon sugar.

These Pumpkin Spice Donut Holes are soft, sweet, and packed with autumn flavor. Whether baked or fried, they are perfect for cozy mornings or holiday gatherings!

Cinnamon Roll French Toast Casserole

0

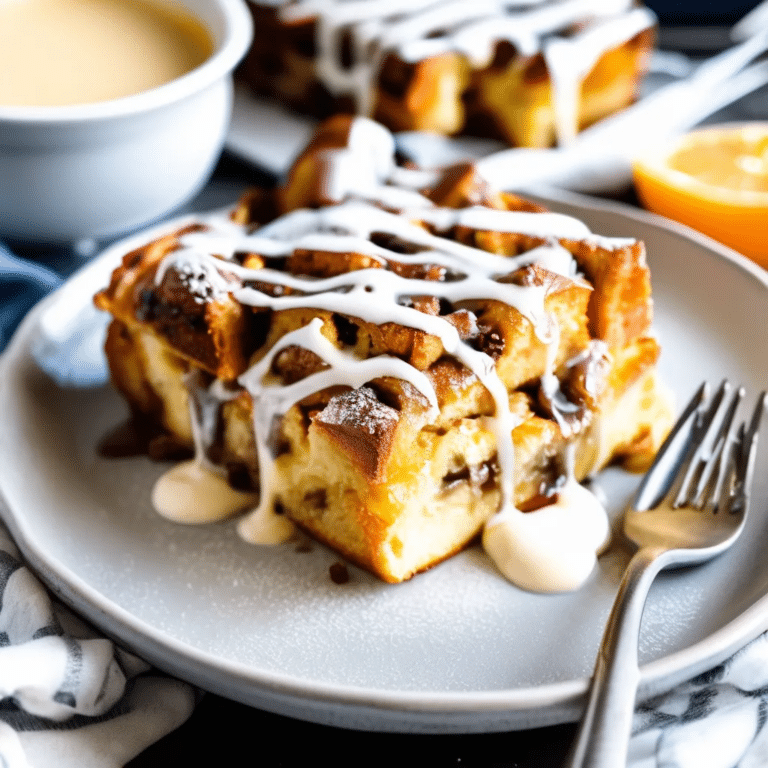
Cinnamon Roll French Toast Casserole is the ultimate breakfast indulgence, combining the gooey sweetness of cinnamon rolls with the comforting warmth of French toast. This decadent casserole is perfect for brunch or holiday mornings, where you want to serve something special with minimal effort. Made with layers of cinnamon roll pieces soaked in a rich custard and topped with a luscious cream cheese glaze, this dish is a sweet, spiced delight that will make everyone ask for seconds. It’s easy to prepare the night before and bake fresh in the morning, making it both convenient and irresistible.

Ingredients:

  • 2 cans (12.4 oz each) refrigerated cinnamon rolls with icing
  • 6 large eggs
  • 1/2 cup heavy cream
  • 1/2 cup milk (dairy or plant-based)
  • 1/4 cup granulated sugar
  • 1 tablespoon vanilla extract
  • 1 teaspoon ground cinnamon
  • 1/2 teaspoon ground nutmeg (optional)
  • 1/4 cup melted butter
  • 1/2 cup chopped pecans or walnuts (optional, for added crunch)

For the Glaze:

  • Icing from cinnamon rolls
  • 4 oz cream cheese, softened
  • 1/4 cup powdered sugar
  • 1-2 tablespoons milk

Instructions:

  1. Preheat the Oven: Preheat your oven to 350°F (175°C). Grease a 9×13-inch baking dish with butter or non-stick spray.
  2. Prepare the Cinnamon Rolls: Open the cans of cinnamon rolls and set the icing aside. Cut each cinnamon roll into quarters and spread them evenly in the prepared baking dish.
  3. Make the Custard: In a large mixing bowl, whisk together the eggs, heavy cream, milk, granulated sugar, vanilla extract, ground cinnamon, and ground nutmeg (if using) until well combined.
  4. Assemble the Casserole: Pour the egg mixture evenly over the cinnamon roll pieces, making sure they are well coated. Drizzle the melted butter over the top, and sprinkle with chopped pecans or walnuts if desired.
  5. Bake the Casserole: Bake in the preheated oven for 35-40 minutes, or until the top is golden brown and the casserole is set in the center. If it starts to brown too quickly, you can cover it with foil for the last 10 minutes of baking.
  6. Prepare the Glaze: While the casserole is baking, prepare the glaze by combining the reserved icing from the cinnamon rolls, softened cream cheese, powdered sugar, and 1-2 tablespoons of milk in a medium bowl. Whisk until smooth and pourable.
  7. Serve: Once the casserole is done baking, remove it from the oven and let it cool for a few minutes. Drizzle the cream cheese glaze over the top of the casserole.

Cinnamon Roll French Toast Casserole is best served warm, allowing you to enjoy the gooey cinnamon rolls and rich custard with every bite. Perfect for a cozy morning or a festive brunch, this dish is sure to become a family favorite.

CAPRESE CHICKEN PASTA

Caprese Chicken Pasta combines all the fresh flavors of a classic Caprese salad—tomatoes, mozzarella, and basil—with juicy chicken and tender pasta, creating a satisfying and colorful dish. This easy-to-make recipe is perfect for a light yet filling dinner, and it comes together quickly, making it ideal for weeknight meals. The combination of garlic, olive oil, and balsamic glaze ties the dish together with vibrant, summery flavors.

Ingredients:

  • 12 oz pasta (penne, fusilli, or your choice)
  • 2 tablespoons olive oil
  • 2 boneless, skinless chicken breasts, cut into bite-sized pieces
  • Salt and pepper, to taste
  • 2 cloves garlic, minced
  • 1 pint cherry tomatoes, halved
  • 8 oz fresh mozzarella, cut into small cubes or use mini mozzarella balls
  • 1/4 cup fresh basil leaves, torn or chopped
  • 2 tablespoons balsamic glaze (or reduction)
  • Optional: Red pepper flakes, for heat

Instructions:

  1. Cook the pasta: Bring a large pot of salted water to a boil. Cook the pasta according to the package instructions until al dente. Drain and set aside, reserving 1/2 cup of pasta water.
  2. Cook the chicken: While the pasta cooks, heat 1 tablespoon of olive oil in a large skillet over medium heat. Season the chicken with salt and pepper, and cook for 5-7 minutes, stirring occasionally, until the chicken is browned and cooked through. Remove the chicken from the skillet and set aside.
  3. Sauté the garlic and tomatoes: In the same skillet, add the remaining tablespoon of olive oil and minced garlic. Sauté for 1 minute until fragrant, being careful not to burn the garlic. Add the cherry tomatoes and cook for 3-4 minutes, just until the tomatoes soften slightly and release some of their juices.
  4. Combine pasta and chicken: Add the cooked pasta and chicken back into the skillet with the tomatoes and garlic. Stir everything together, adding a splash of reserved pasta water if needed to loosen the sauce. Season with additional salt, pepper, and red pepper flakes (if using).
  5. Add the mozzarella and basil: Remove the skillet from heat and gently fold in the fresh mozzarella cubes and torn basil. The mozzarella will soften slightly, adding a creamy texture to the dish.
  6. Drizzle with balsamic glaze: Transfer the pasta to serving plates and drizzle each portion with balsamic glaze for a touch of sweetness and acidity.
  7. Serve: Garnish with extra basil leaves and serve immediately while the mozzarella is still melty.

This Caprese Chicken Pasta is light, fresh, and bursting with summery flavors. It’s perfect for a quick dinner that feels both healthy and indulgent at the same time. Enjoy!

Lamb And Spinach Curry

0

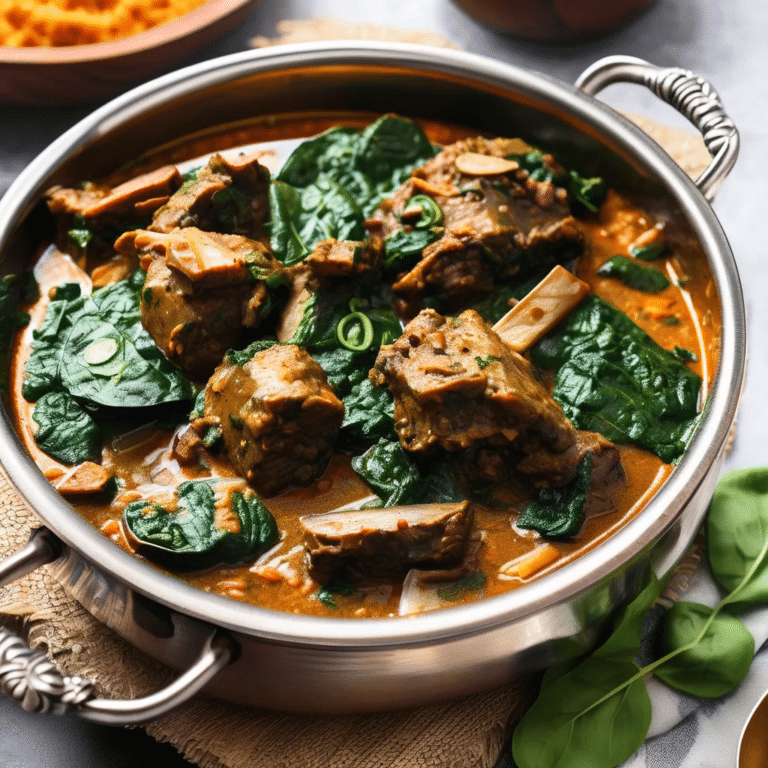
Lamb and Spinach Curry, also known as Saag Gosht, is a rich and flavorful dish that brings together tender lamb, vibrant spinach, and aromatic spices in a luscious, warming curry. This dish is a beautiful balance of earthy spinach and the robust taste of slow-cooked lamb, all simmered in a fragrant sauce made with onions, garlic, ginger, and a blend of traditional Indian spices. Perfect for a cozy dinner, this curry is best served with warm naan or steamed basmati rice, allowing the deep, complex flavors to truly shine. Whether you’re looking to impress at a dinner party or simply enjoy a comforting homemade meal, Lamb and Spinach Curry is a satisfying choice.

Ingredients:

  • 1 1/2 lbs lamb shoulder or leg, cut into bite-sized pieces
  • 2 tablespoons vegetable oil or ghee
  • 1 large onion, finely chopped
  • 3 cloves garlic, minced
  • 1-inch piece of ginger, minced
  • 2 teaspoons ground cumin
  • 2 teaspoons ground coriander
  • 1 teaspoon turmeric powder
  • 1 teaspoon garam masala
  • 1/2 teaspoon chili powder (optional, for heat)
  • 1 can (14.5 oz) diced tomatoes
  • 1/2 cup plain yogurt
  • 4 cups fresh spinach, chopped (or 1 package frozen spinach, thawed and drained)
  • 1 cup water or beef broth
  • Salt and pepper, to taste
  • Fresh cilantro, chopped (for garnish)
  • Naan or basmati rice, for serving

Instructions:

  1. Brown the Lamb: In a large pot or Dutch oven, heat the vegetable oil or ghee over medium-high heat. Add the lamb pieces and brown them on all sides, about 5-7 minutes. Remove the lamb with a slotted spoon and set aside.
  2. Sauté the Aromatics: In the same pot, add the chopped onion and sauté until golden and softened, about 5 minutes. Add the minced garlic and ginger, and cook for another 2 minutes until fragrant.
  3. Add the Spices: Stir in the ground cumin, coriander, turmeric, garam masala, and chili powder (if using). Cook the spices with the onion mixture for 1-2 minutes, stirring constantly, to release their flavors.
  4. Cook the Tomatoes: Add the diced tomatoes to the pot, stirring to combine with the spices and onions. Cook for 5 minutes, allowing the tomatoes to break down slightly.
  5. Return the Lamb: Return the browned lamb to the pot, stirring to coat the meat in the tomato and spice mixture. Reduce the heat to low, cover, and let it simmer for 20 minutes, allowing the flavors to meld.
  6. Add the Spinach and Yogurt: Stir in the chopped spinach and cook until wilted, about 5 minutes. If using frozen spinach, ensure it’s well-drained before adding. Stir in the yogurt, then add the water or beef broth to the pot. Season with salt and pepper to taste.
  7. Simmer the Curry: Cover the pot again and let the curry simmer gently for another 30-40 minutes, or until the lamb is tender and the sauce has thickened to your desired consistency. Stir occasionally to prevent sticking.
  8. Serve: Garnish the Lamb and Spinach Curry with freshly chopped cilantro and serve hot with warm naan or steamed basmati rice.

Lamb and Spinach Curry is a hearty, aromatic dish that brings the comforting flavors of Indian cuisine to your table, offering a perfect blend of tender lamb and vibrant spinach in a deeply flavorful sauce.

BARBECUED SHORT RIBS

Barbecued short ribs are tender, juicy, and packed with smoky, sweet, and savory flavors. Slowly cooked until the meat falls off the bone, these ribs are perfect for backyard gatherings or a special family meal. Whether cooked on the grill or slowly braised in the oven, the result is mouthwatering ribs that are sure to impress.

Ingredients:

  • 4-5 pounds beef short ribs
  • Salt and black pepper to taste
  • 2 tablespoons olive oil (for searing)

For the BBQ Sauce:

  • 1 1/2 cups ketchup
  • 1/4 cup apple cider vinegar
  • 1/4 cup brown sugar
  • 2 tablespoons Worcestershire sauce
  • 2 tablespoons Dijon mustard
  • 2 teaspoons smoked paprika
  • 1 teaspoon garlic powder
  • 1 teaspoon onion powder
  • 1/2 teaspoon cayenne pepper (optional, for heat)
  • 1/2 cup water
  • Salt and pepper to taste

Instructions:

On the Grill (Low and Slow Method):

  1. Prepare the ribs: Pat the short ribs dry with paper towels and season them generously with salt and pepper.
  2. Preheat the grill: Preheat your grill to 275°F (135°C) for indirect cooking. If using a charcoal grill, place coals on one side and leave the other side free for indirect cooking. For a gas grill, turn on half the burners and leave the other side off.
  3. Sear the ribs: Heat olive oil in a skillet or grill pan over medium-high heat. Sear the ribs on all sides until they’re browned, about 2-3 minutes per side. This step adds flavor and locks in moisture.
  4. Make the BBQ sauce: In a medium saucepan, combine the ketchup, apple cider vinegar, brown sugar, Worcestershire sauce, mustard, smoked paprika, garlic powder, onion powder, cayenne pepper (if using), water, and salt and pepper. Stir and bring the mixture to a simmer. Let the sauce cook for about 10 minutes, stirring occasionally, until slightly thickened.
  5. Cook the ribs: Place the seared ribs on the cool side of the grill (indirect heat). Brush the ribs generously with the BBQ sauce. Close the grill lid and cook for 3-4 hours, basting with more sauce every 45 minutes, until the meat is tender and pulling away from the bone.
  6. Finish and serve: Once the ribs are tender, brush them with a final layer of BBQ sauce and cook for an additional 10 minutes to caramelize the sauce. Remove the ribs from the grill, let them rest for 10 minutes, then serve hot with extra sauce on the side.

In the Oven:

  1. Prepare the ribs: Follow the same steps for seasoning and searing the ribs.
  2. Preheat the oven: Preheat your oven to 300°F (150°C).
  3. Bake the ribs: After searing, place the ribs in a roasting pan. Pour half of the BBQ sauce over the ribs, then cover the pan with foil. Bake for 2 1/2 to 3 hours, or until the ribs are tender and the meat is falling off the bone.
  4. Finish under the broiler: Once the ribs are tender, remove the foil and brush them with the remaining BBQ sauce. Place the ribs under the broiler for 3-5 minutes to caramelize the sauce.
  5. Serve: Remove the ribs from the oven, let them rest for a few minutes, then serve with additional sauce.

These Barbecued Short Ribs are smoky, sweet, and fall-apart tender. Serve them with coleslaw, cornbread, or your favorite BBQ sides for a delicious meal!

Slow Cooker Chicken Tacos

0

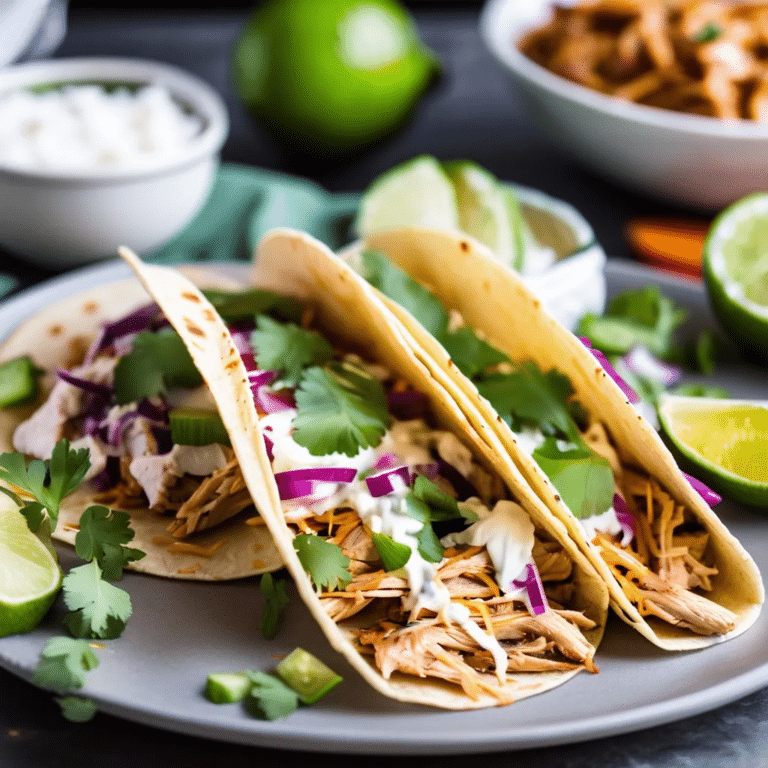
Slow Cooker Chicken Tacos are a delicious and effortless way to enjoy flavorful, tender chicken tacos with minimal effort. Perfect for busy weeknights or laid-back weekends, this recipe lets the slow cooker do all the work, infusing the chicken with a blend of spices, garlic, and zesty lime juice. The result is juicy, shredded chicken that’s packed with flavor and ready to be piled high in warm tortillas with your favorite toppings. Whether you prefer your tacos with a simple garnish of cilantro and onion or loaded with cheese, avocado, and salsa, these Slow Cooker Chicken Tacos are sure to become a family favorite.

Ingredients:

  • 2 lbs boneless, skinless chicken breasts or thighs
  • 1 medium onion, finely chopped
  • 3 cloves garlic, minced
  • 1 can (14.5 oz) diced tomatoes (with green chilies for extra flavor)
  • 1 packet taco seasoning mix (or homemade blend)
  • 1 teaspoon ground cumin
  • 1 teaspoon smoked paprika
  • 1/2 teaspoon chili powder
  • 1/2 teaspoon salt
  • 1/4 teaspoon black pepper
  • Juice of 1 lime
  • 1/2 cup chicken broth
  • Tortillas, for serving
  • Optional toppings: shredded lettuce, diced tomatoes, chopped cilantro, sliced avocado, shredded cheese, sour cream, salsa, lime wedges

Instructions:

  1. Prepare the Chicken: Place the chicken breasts or thighs in the bottom of your slow cooker. Sprinkle the chopped onion and minced garlic over the chicken.
  2. Add the Seasoning: In a small bowl, mix together the taco seasoning, ground cumin, smoked paprika, chili powder, salt, and black pepper. Sprinkle the seasoning mixture evenly over the chicken.
  3. Add the Tomatoes and Broth: Pour the diced tomatoes (with their juices) over the seasoned chicken. Squeeze the juice of one lime over the top, then pour in the chicken broth.
  4. Cook the Chicken: Cover the slow cooker and cook on low for 6-7 hours, or on high for 3-4 hours, until the chicken is fully cooked and tender.
  5. Shred the Chicken: Once cooked, use two forks to shred the chicken directly in the slow cooker. Stir the shredded chicken to coat it in the sauce, and let it sit on warm for an additional 10-15 minutes to absorb even more flavor.
  6. Serve: Serve the shredded chicken in warm tortillas with your choice of toppings. Squeeze fresh lime juice over the top for an extra burst of flavor.

These Slow Cooker Chicken Tacos are a simple, flavorful, and customizable dish that’s perfect for any taco night, offering tender, juicy chicken with minimal effort and maximum taste.

GLUTEN FREE CHOCOLATE COOKIES

These Gluten-Free Chocolate Cookies are rich, chewy, and incredibly satisfying, perfect for anyone with gluten sensitivities or those just looking for a delicious treat. Made with a mix of gluten-free flour and rich cocoa powder, these cookies are fudgy on the inside with a slightly crisp exterior. They’re easy to make and can be customized with add-ins like chocolate chips, nuts, or dried fruit for added texture and flavor.

Ingredients:

  • 1 cup gluten-free all-purpose flour (with xanthan gum)
  • 1/2 cup cocoa powder (unsweetened)
  • 1 teaspoon baking soda
  • 1/4 teaspoon salt
  • 1/2 cup unsalted butter, softened
  • 1/2 cup granulated sugar
  • 1/2 cup brown sugar
  • 1 large egg
  • 1 teaspoon vanilla extract
  • 1 cup chocolate chips (dairy-free if needed)
  • Optional add-ins: chopped nuts, shredded coconut, or dried fruit

Instructions:

  1. Preheat the oven: Preheat your oven to 350°F (175°C) and line a baking sheet with parchment paper.
  2. Mix the dry ingredients: In a medium bowl, whisk together the gluten-free flour, cocoa powder, baking soda, and salt. Set aside.
  3. Cream the butter and sugars: In a large mixing bowl, beat the softened butter, granulated sugar, and brown sugar with an electric mixer on medium speed until light and fluffy, about 2-3 minutes. Add the egg and vanilla extract, beating until well combined.
  4. Combine the wet and dry ingredients: Gradually add the dry ingredients to the wet mixture, mixing on low speed until a dough forms. Be careful not to overmix. Stir in the chocolate chips and any optional add-ins you like.
  5. Scoop the dough: Using a tablespoon or small cookie scoop, drop rounded balls of dough onto the prepared baking sheet, spacing them about 2 inches apart.
  6. Bake: Bake the cookies in the preheated oven for 10-12 minutes, or until the edges are set but the centers are still slightly soft. The cookies will firm up as they cool.
  7. Cool and serve: Allow the cookies to cool on the baking sheet for 5 minutes before transferring them to a wire rack to cool completely.

These gluten-free chocolate cookies are rich, fudgy, and sure to satisfy your chocolate cravings. Enjoy them with a cold glass of milk or as a sweet treat on their own!

CHICKEN BROCCOLI ALFREDO STUFFED SHELLS

Chicken Broccoli Alfredo Stuffed Shells are a rich, creamy, and comforting dish perfect for family dinners or special occasions. Tender pasta shells are filled with a delicious mixture of shredded chicken, steamed broccoli, and creamy Alfredo sauce, then baked to bubbly perfection. This hearty dish brings together all the best flavors of chicken Alfredo, with the added texture of stuffed pasta shells.

Ingredients:

For the Stuffed Shells:

  • 20-24 jumbo pasta shells
  • 2 cups cooked chicken, shredded (rotisserie chicken works great)
  • 2 cups broccoli florets, steamed and chopped
  • 1 1/2 cups ricotta cheese
  • 1/2 cup grated Parmesan cheese
  • 1 large egg
  • 1 teaspoon garlic powder
  • 1 teaspoon Italian seasoning
  • Salt and pepper, to taste

For the Alfredo Sauce:

  • 2 tablespoons unsalted butter
  • 3 cloves garlic, minced
  • 1 1/2 cups heavy cream
  • 1 cup grated Parmesan cheese
  • 1/4 teaspoon ground nutmeg (optional)
  • Salt and pepper, to taste

Topping:

  • 1 cup shredded mozzarella cheese
  • Fresh parsley, chopped (for garnish)

Instructions:

  1. Preheat the oven: Preheat your oven to 350°F (175°C). Lightly grease a 9×13-inch baking dish.
  2. Cook the pasta shells: Bring a large pot of salted water to a boil and cook the jumbo pasta shells according to the package instructions, until al dente. Drain and set aside to cool.
  3. Make the filling: In a large mixing bowl, combine the shredded chicken, steamed broccoli, ricotta cheese, Parmesan cheese, egg, garlic powder, Italian seasoning, salt, and pepper. Mix until well combined.
  4. Prepare the Alfredo sauce: In a medium saucepan, melt the butter over medium heat. Add the minced garlic and sauté for about 1 minute, until fragrant. Pour in the heavy cream and bring to a gentle simmer, stirring occasionally. Gradually whisk in the Parmesan cheese and continue to cook for 3-4 minutes, until the sauce thickens slightly. Add salt, pepper, and a pinch of nutmeg (if using). Remove from heat.
  5. Assemble the stuffed shells: Spread about 1/2 cup of the Alfredo sauce on the bottom of the prepared baking dish. Stuff each cooked pasta shell with a generous spoonful of the chicken and broccoli filling and place them in the baking dish in a single layer.
  6. Pour the sauce: Once all the shells are stuffed and arranged in the baking dish, pour the remaining Alfredo sauce evenly over the top of the shells.
  7. Add the cheese topping: Sprinkle the shredded mozzarella cheese evenly over the stuffed shells.
  8. Bake: Cover the dish with foil and bake in the preheated oven for 25 minutes. Remove the foil and bake for an additional 10-15 minutes, until the cheese is melted and bubbly, and the top is lightly golden.
  9. Garnish and serve: Remove from the oven and let the dish cool for a few minutes before serving. Garnish with fresh parsley for a pop of color.

These Chicken Broccoli Alfredo Stuffed Shells are creamy, cheesy, and packed with flavor, making them a delicious and comforting meal that everyone will love!