Home Blog Page 40

CARAMEL STUFFED CHOCOLATE CHIP COOKIES

Caramel Stuffed Chocolate Chip Cookies take the classic chocolate chip cookie to the next level by adding a gooey, melty caramel center. These cookies are soft and chewy on the outside with a sweet, buttery surprise inside. Perfect for when you’re craving something indulgent, these cookies will quickly become a favorite treat!

Ingredients:

  • 2 1/4 cups all-purpose flour
  • 1/2 teaspoon baking soda
  • 1/2 teaspoon baking powder
  • 1/2 teaspoon salt
  • 3/4 cup unsalted butter, softened
  • 1 cup brown sugar, packed
  • 1/4 cup granulated sugar
  • 1 large egg
  • 1 egg yolk
  • 2 teaspoons vanilla extract
  • 1 1/2 cups semisweet or dark chocolate chips
  • 16-20 soft caramel candies (like Kraft caramels or homemade)

Instructions:

  1. Preheat the oven: Preheat your oven to 350°F (175°C). Line two baking sheets with parchment paper.
  2. Mix the dry ingredients: In a medium bowl, whisk together the flour, baking soda, baking powder, and salt. Set aside.
  3. Cream the butter and sugars: In a large mixing bowl, beat the softened butter, brown sugar, and granulated sugar together until light and fluffy, about 3-4 minutes. Add the egg, egg yolk, and vanilla extract, and beat until combined.
  4. Add the dry ingredients: Gradually add the dry ingredients to the wet ingredients, mixing until just combined. Be careful not to overmix.
  5. Fold in the chocolate chips: Gently fold the chocolate chips into the cookie dough until evenly distributed.
  6. Prepare the caramel filling: Unwrap the caramel candies. If the candies are large, cut them in half so they can fit comfortably inside the cookie dough balls.
  7. Shape the cookies: Scoop about 2 tablespoons of cookie dough and flatten it slightly in your palm. Place a caramel candy in the center of the dough, then wrap the dough around the caramel, sealing the edges so the caramel is fully enclosed. Gently roll the dough into a ball and place it on the prepared baking sheet. Repeat with the remaining dough, spacing the cookies about 2 inches apart.
  8. Bake the cookies: Bake in the preheated oven for 10-12 minutes, or until the edges are golden brown but the centers are still soft. The cookies will continue to set as they cool.
  9. Cool and serve: Let the cookies cool on the baking sheet for 5 minutes before transferring them to a wire rack to cool completely. Serve warm for an extra gooey caramel center!

These Caramel Stuffed Chocolate Chip Cookies are the perfect mix of crispy, chewy, and gooey—ideal for any time you want to treat yourself or impress guests with a sweet, homemade dessert!
Sausage And Apple Stuffing

0

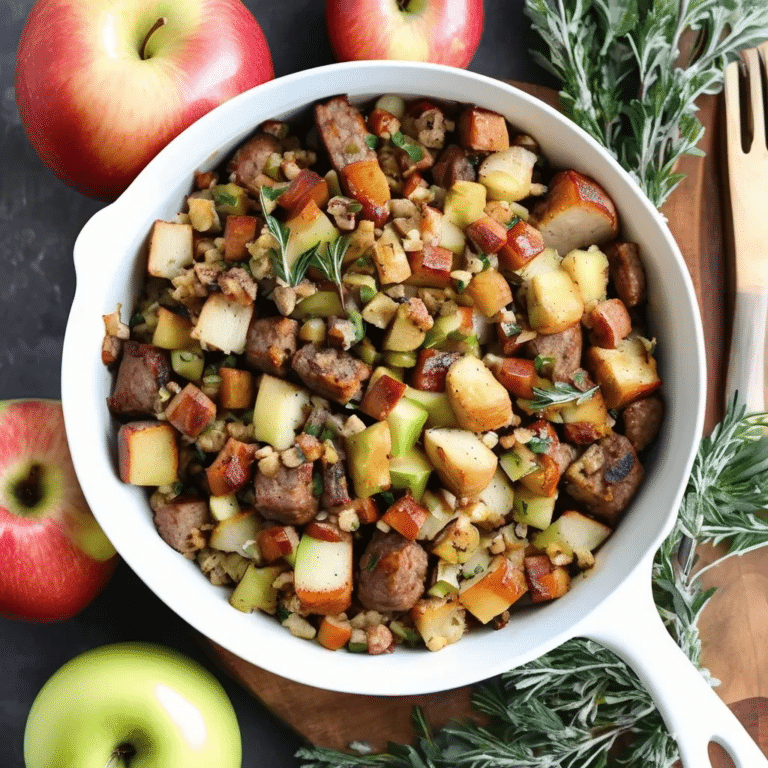
Sausage and Apple Stuffing is a delicious and savory dish that brings together the rich, hearty flavors of seasoned sausage with the natural sweetness of apples. This classic side dish is perfect for holiday gatherings, offering a wonderful blend of textures and tastes—from the crispy, golden bread cubes to the juicy apples and flavorful sausage. Aromatic herbs like sage and thyme enhance the stuffing, making it a warm and comforting addition to any festive meal. Whether served alongside roast turkey or as a standalone dish, Sausage and Apple Stuffing is sure to be a crowd-pleaser.

Ingredients

  • 1 lb ground sausage (Italian or breakfast sausage)
  • 1 large onion, diced
  • 3 celery stalks, diced
  • 2 apples, peeled and diced (Granny Smith or Honeycrisp work well)
  • 1/4 cup unsalted butter
  • 10 cups cubed bread (preferably day-old or toasted)
  • 1 tbsp fresh sage, chopped (or 1 tsp dried sage)
  • 1 tsp fresh thyme (or 1/2 tsp dried thyme)
  • 1/2 tsp ground black pepper
  • 1/2 tsp salt
  • 2 cups chicken or vegetable broth
  • 1/4 cup fresh parsley, chopped
  • 2 eggs, lightly beaten

Instructions

  1. Preheat the oven: Preheat your oven to 350°F (175°C) and lightly grease a large baking dish.
  2. Cook the sausage: In a large skillet over medium heat, cook the sausage until browned and fully cooked, breaking it up into small pieces as it cooks. Remove the sausage from the skillet and set aside.
  3. Sauté the vegetables and apples: In the same skillet, melt the butter and add the diced onion, celery, and apples. Cook for 5-7 minutes until softened. Stir in the sage, thyme, salt, and pepper.
  4. Mix the stuffing: In a large bowl, combine the bread cubes, cooked sausage, sautéed vegetables, and apples. Pour in the chicken or vegetable broth, stirring until the bread is moist but not soggy. Stir in the beaten eggs and chopped parsley.
  5. Bake: Transfer the mixture to the prepared baking dish, cover with foil, and bake for 30 minutes. Remove the foil and bake for an additional 15-20 minutes, until the top is golden and crispy.
  6. Serve: Let the stuffing cool slightly before serving. Garnish with extra parsley if desired.

This Sausage and Apple Stuffing is a perfect combination of savory and sweet, making it a comforting and flavorful addition to your holiday table!

Salmon Tartare

0

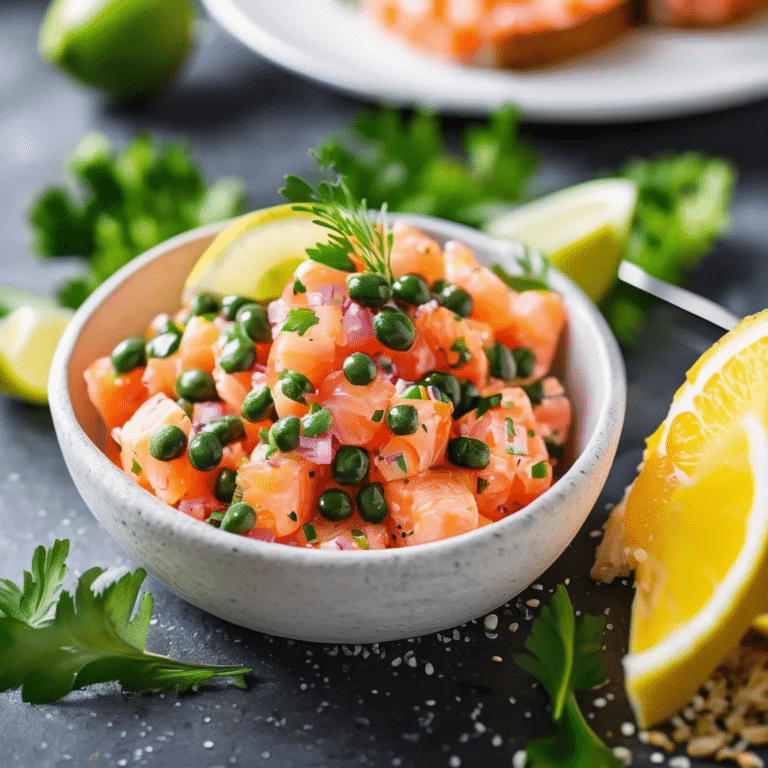
Salmon Tartare is a sophisticated and refreshing dish that highlights the delicate, buttery texture of fresh salmon. This no-cook appetizer is made by finely dicing the freshest salmon and mixing it with a combination of bright, zesty ingredients like lemon juice, capers, and fresh herbs. The result is a vibrant, flavorful tartare that is both light and satisfying, perfect for special occasions or a refined dinner party. Serve it with crispy toasts or crackers, and you’ll have an elegant dish that’s sure to impress with its simplicity and depth of flavor.

Ingredients:

  • 1/2 lb (225g) fresh sushi-grade salmon, skin removed, finely diced
  • 1 tablespoon shallot, finely minced
  • 1 tablespoon capers, drained and chopped
  • 1 tablespoon fresh chives, finely chopped
  • 1 tablespoon fresh dill, finely chopped
  • 1 tablespoon extra-virgin olive oil
  • 1 tablespoon lemon juice
  • 1 teaspoon Dijon mustard
  • 1 teaspoon soy sauce
  • Salt and freshly ground black pepper, to taste
  • Lemon zest, for garnish (optional)
  • Microgreens, for garnish (optional)
  • Toasted baguette slices or crackers, for serving

Instructions:

  1. Prepare the Salmon: Ensure your salmon is very fresh and of sushi-grade quality. Use a sharp knife to finely dice the salmon into small, even pieces. Place the diced salmon in a mixing bowl.
  2. Mix the Tartare: Add the minced shallot, chopped capers, chives, dill, olive oil, lemon juice, Dijon mustard, and soy sauce to the bowl with the salmon. Gently mix everything together until well combined, being careful not to overmix, which could break down the salmon’s texture.
  3. Season: Taste the tartare mixture and season with salt and freshly ground black pepper to your liking.
  4. Chill (Optional): If time allows, cover the tartare with plastic wrap and refrigerate for about 15-20 minutes to let the flavors meld.
  5. Serve: Serve the salmon tartare immediately on chilled plates. You can mold the tartare into a round shape using a ring mold for a more elegant presentation. Garnish with lemon zest and microgreens, if desired. Serve alongside toasted baguette slices or crackers.

Enjoy this light and flavorful Salmon Tartare, perfect for a refined appetizer or a light meal!

CHOCOLATE CARAMEL POPCORN

Chocolate Caramel Popcorn is a deliciously addictive treat that combines the sweet, buttery flavor of caramel with rich chocolate drizzles, all over crunchy popcorn. Perfect for parties, movie nights, or as an edible gift, this snack is both easy to make and hard to resist. The combination of sweet caramel and chocolate with the crispy texture of popcorn makes for an irresistible indulgence.

Ingredients:

  • 10 cups popped popcorn (about 1/2 cup unpopped kernels)
  • 1 cup unsalted butter
  • 1 cup brown sugar, packed
  • 1/4 cup light corn syrup
  • 1/2 teaspoon salt
  • 1/2 teaspoon baking soda
  • 1 teaspoon vanilla extract
  • 1/2 cup semisweet or dark chocolate chips, melted

Instructions:

  1. Preheat the oven: Preheat your oven to 250°F (120°C). Line a large baking sheet with parchment paper or a silicone baking mat.
  2. Pop the popcorn: Pop your popcorn using your preferred method (stovetop or air-popper). Remove any unpopped kernels and place the popcorn in a large bowl.
  3. Make the caramel sauce: In a medium saucepan, melt the butter over medium heat. Stir in the brown sugar, corn syrup, and salt. Bring the mixture to a boil, stirring constantly. Once it reaches a boil, let it cook without stirring for 4-5 minutes, or until it turns a deep golden brown.
  4. Add baking soda and vanilla: Remove the caramel from the heat and carefully stir in the baking soda and vanilla extract. The mixture will foam up—this is normal and helps create a light, crispy coating.
  5. Coat the popcorn: Pour the caramel sauce over the popcorn, tossing gently to coat all the popcorn evenly. You can use a spatula or wooden spoon to help distribute the caramel.
  6. Bake the popcorn: Spread the caramel-coated popcorn onto the prepared baking sheet in an even layer. Bake in the preheated oven for 45-60 minutes, stirring every 15 minutes to ensure even coating and crispness.
  7. Add the chocolate: Once the popcorn is done baking, remove it from the oven and let it cool slightly. Drizzle the melted chocolate over the popcorn, using a spoon or piping bag to create thin, even lines.
  8. Cool and serve: Let the popcorn cool completely, allowing the caramel and chocolate to harden. Once cooled, break the popcorn into clusters and serve.

This Chocolate Caramel Popcorn is the perfect combination of crunchy, sweet, and chocolatey, making it an irresistible treat for any occasion. Store any leftovers in an airtight container for up to a week (if it lasts that long!).

CAULIFLOWER CAKE

Cauliflower Cake is a savory, vegetable-packed dish that’s perfect for lunch, dinner, or even as a unique side dish. It’s a combination of roasted cauliflower, eggs, and cheese, baked into a beautifully golden, flavorful cake that’s both satisfying and healthy. It can be enjoyed warm or at room temperature, making it ideal for gatherings, picnics, or a quick meal.

Ingredients:

  • 1 medium head of cauliflower, cut into small florets
  • 1 medium red onion, thinly sliced
  • 1/2 cup all-purpose flour (or almond flour for gluten-free)
  • 5 large eggs
  • 1 1/2 cups grated Parmesan cheese (or a mix of your favorite cheeses)
  • 1/2 teaspoon ground turmeric (for color and flavor)
  • 1 teaspoon baking powder
  • 1 tablespoon olive oil (for sautéing the onion)
  • 1/4 cup fresh parsley or chives, chopped
  • Salt and pepper, to taste
  • 1/4 teaspoon ground cumin (optional)
  • 2 tablespoons sesame seeds or nigella seeds (for sprinkling on top)
  • 1 tablespoon olive oil or butter (for greasing the pan)

Instructions:

  1. Preheat the oven: Preheat your oven to 400°F (200°C). Grease a 9-inch springform pan or cake pan with olive oil or butter, and sprinkle the bottom with sesame seeds or nigella seeds.
  2. Cook the cauliflower: Bring a large pot of salted water to a boil. Add the cauliflower florets and cook for 5-7 minutes until tender but not mushy. Drain the cauliflower and let it cool slightly.
  3. Sauté the onion: In a skillet, heat 1 tablespoon of olive oil over medium heat. Add the sliced red onion and sauté for 5-7 minutes until soft and lightly caramelized. Remove from heat and set aside.
  4. Prepare the batter: In a large bowl, whisk together the eggs, flour, baking powder, turmeric, cumin (if using), salt, and pepper. Stir in the grated cheese, sautéed onions, and chopped parsley or chives.
  5. Combine the cauliflower: Gently fold the cooked cauliflower florets into the batter, making sure to coat them evenly without breaking them apart too much.
  6. Assemble the cake: Pour the cauliflower batter into the prepared pan, spreading it out evenly.
  7. Bake the cake: Bake in the preheated oven for 35-40 minutes, or until the top is golden brown and the cake is firm to the touch. A toothpick inserted into the center should come out clean.
  8. Cool and serve: Allow the cauliflower cake to cool for about 10 minutes before removing it from the pan. Slice and serve warm or at room temperature.

This Cauliflower Cake is packed with flavor, making it a delicious and healthy option for any meal. Enjoy it with a side salad, or serve it as a savory main dish for a light lunch or dinner!

Mexican Chicken Lasagna

0

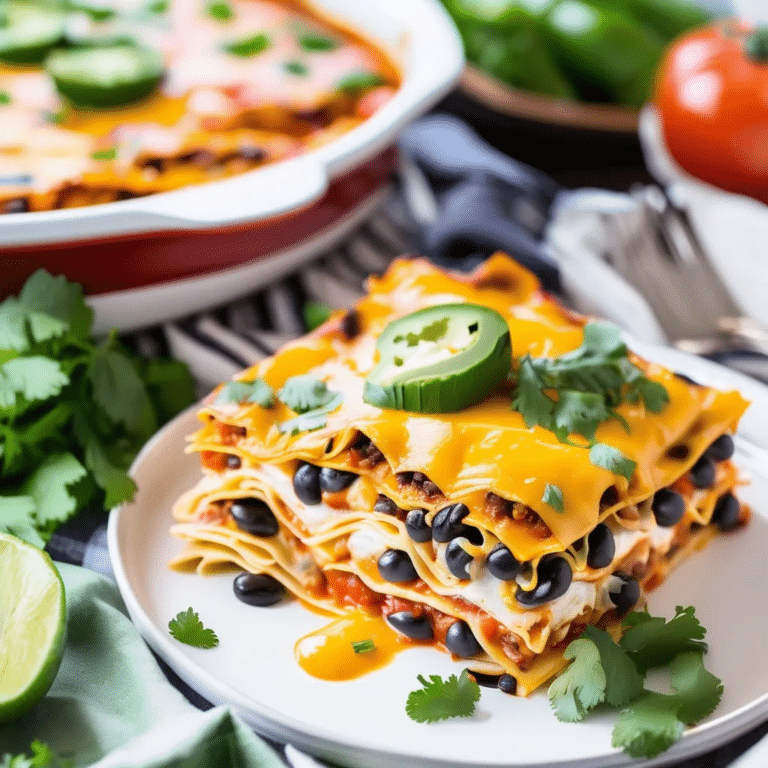
Mexican Chicken Lasagna is a flavorful fusion dish that combines the comfort of traditional lasagna with the bold, zesty flavors of Mexican cuisine. Layers of tender shredded chicken, black beans, corn, and rich, spicy tomato sauce are nestled between soft tortillas, all topped with gooey melted cheese. This dish is perfect for a family dinner or a festive gathering, offering a satisfying, crowd-pleasing meal that’s both familiar and excitingly different. With each bite, you’ll enjoy a delightful blend of textures and tastes, from the creamy cheese to the savory chicken and the tangy kick of salsa.

Ingredients:

For the Chicken Filling:

  • 2 cups cooked, shredded chicken
  • 1 can (15 oz) black beans, drained and rinsed
  • 1 cup frozen corn, thawed
  • 1 can (10 oz) diced tomatoes with green chilies, drained
  • 1 small onion, finely chopped
  • 2 cloves garlic, minced
  • 1 teaspoon ground cumin
  • 1 teaspoon chili powder
  • 1/2 teaspoon paprika
  • Salt and pepper to taste
  • 2 cups salsa
  • 1/4 cup fresh cilantro, chopped (optional)

For the Lasagna:

  • 8 large flour or corn tortillas
  • 2 cups shredded Mexican blend cheese
  • 1 cup sour cream
  • 1 cup shredded lettuce (for garnish)
  • Sliced jalapeños, for garnish (optional)
  • Chopped green onions, for garnish (optional)

Instructions:

  1. Prepare the Chicken Filling: In a large skillet, heat a little oil over medium heat. Add the chopped onion and garlic, and sauté until softened, about 3-4 minutes. Stir in the shredded chicken, black beans, corn, diced tomatoes with green chilies, cumin, chili powder, paprika, salt, and pepper. Cook for 5-7 minutes until heated through and well combined. Stir in the salsa and fresh cilantro, if using, and remove from heat.
  2. Assemble the Lasagna: Preheat your oven to 375°F (190°C). In a 9×13-inch baking dish, spread a thin layer of the chicken mixture to prevent sticking. Place two tortillas over the mixture, slightly overlapping to cover the bottom of the dish. Add a layer of the chicken filling over the tortillas, followed by a sprinkle of shredded cheese. Repeat the layers, ending with a final layer of tortillas and a generous amount of cheese on top.
  3. Bake: Cover the dish with foil and bake for 20 minutes. Remove the foil and bake for an additional 10-15 minutes, or until the cheese is melted and bubbly.
  4. Serve: Let the lasagna cool for a few minutes before slicing. Serve each piece with a dollop of sour cream, shredded lettuce, sliced jalapeños, and chopped green onions.

This Mexican Chicken Lasagna is a delicious, comforting dish with a fun twist that will have everyone coming back for seconds!

KIMCHI JJIGAE (KIMCHI STEW)

Kimchi Jjigae is a hearty, flavorful Korean stew made with aged kimchi, tofu, pork (or other proteins), and vegetables simmered in a rich broth. This spicy and tangy stew is a staple in Korean cuisine, perfect for cold days or when you’re craving a comforting and savory meal. The longer the kimchi has fermented, the deeper the flavor, which gives the stew its signature bold taste.

Ingredients:

  • 1 1/2 cups aged kimchi, chopped
  • 1/2 lb pork belly or pork shoulder, sliced thinly (or substitute with beef, chicken, or tofu)
  • 1/2 block firm tofu, cut into cubes
  • 1 small onion, sliced
  • 2 green onions, chopped
  • 1 tablespoon vegetable oil or sesame oil
  • 1 tablespoon gochujang (Korean chili paste)
  • 1 teaspoon gochugaru (Korean red chili flakes) (optional, for extra heat)
  • 2-3 cups water or anchovy broth (for a richer flavor)
  • 1 tablespoon soy sauce
  • 1 teaspoon sugar (optional, to balance the acidity)
  • 1 teaspoon minced garlic
  • 1/2 teaspoon sesame oil (for drizzling at the end)
  • Salt and pepper, to taste

Instructions:

  1. Sauté the pork and onions: In a large pot, heat the vegetable oil or sesame oil over medium heat. Add the sliced pork belly (or other protein) and sliced onions. Sauté for 3-4 minutes, until the pork begins to brown and the onions soften.
  2. Add the kimchi: Stir in the chopped kimchi and cook for another 3-4 minutes, allowing the flavors to meld. This step intensifies the flavor of the kimchi by slightly caramelizing it with the pork.
  3. Add the seasonings and broth: Stir in the gochujang, gochugaru (if using), soy sauce, and minced garlic. Pour in the water or anchovy broth to cover the kimchi and pork. Bring the mixture to a boil, then reduce the heat and let it simmer for 15-20 minutes.
  4. Add the tofu and green onions: Gently stir in the cubed tofu and chopped green onions. Simmer for an additional 5-7 minutes, until the tofu is heated through.
  5. Finish the stew: Taste the stew and adjust the seasoning with salt, pepper, or sugar if needed. Drizzle with a little sesame oil for added richness.
  6. Serve: Ladle the Kimchi Jjigae into bowls and serve hot with steamed rice and additional side dishes (banchan) for a complete meal.

Kimchi Jjigae is a spicy, tangy, and deeply flavorful stew that’s a comforting and satisfying dish for any time of year. Enjoy the bold, warming flavors of this traditional Korean stew!

Chicken Shawarma

0

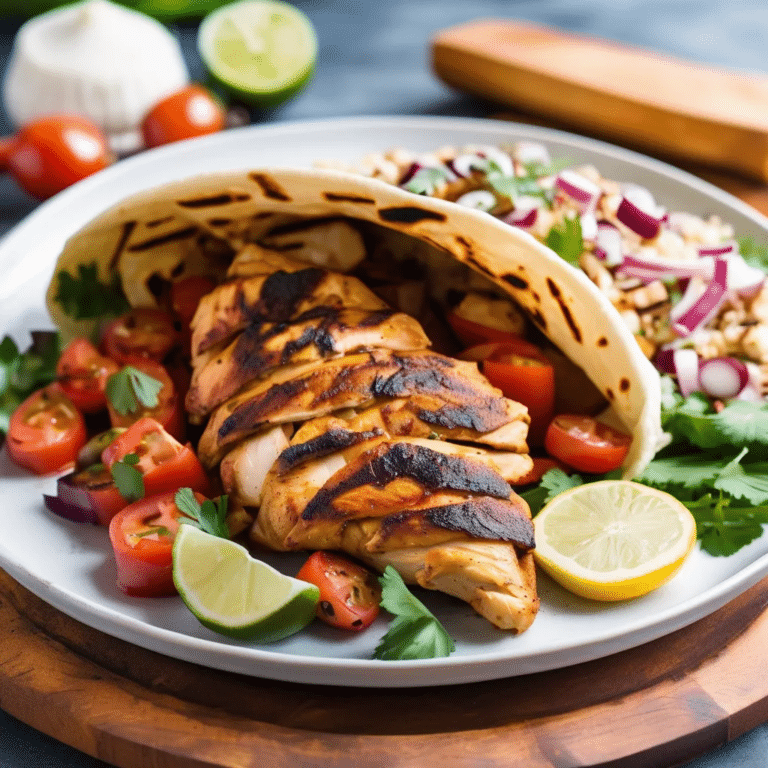
Chicken Shawarma is a popular Middle Eastern dish known for its rich, aromatic flavors and succulent texture. Marinated in a blend of warm spices, garlic, and lemon juice, the chicken is traditionally cooked on a vertical rotisserie, but it can easily be made at home using your oven or grill. The marinated chicken is slow-roasted until juicy and tender, then sliced and served in warm pita bread with fresh vegetables and a drizzle of tangy yogurt or tahini sauce. Whether you’re making it for a family dinner or a casual get-together, Chicken Shawarma offers a delicious, flavorful experience that brings the vibrant tastes of the Middle East to your table.

Ingredients:

For the Chicken Marinade:

  • 2 lbs boneless, skinless chicken thighs or breasts
  • 1/4 cup olive oil
  • 3 tablespoons lemon juice
  • 4 cloves garlic, minced
  • 1 tablespoon ground cumin
  • 1 tablespoon ground coriander
  • 1 tablespoon ground paprika
  • 1 teaspoon ground turmeric
  • 1 teaspoon ground cinnamon
  • 1/2 teaspoon ground black pepper
  • 1/2 teaspoon cayenne pepper (optional, for extra heat)
  • 1 teaspoon salt

For Serving:

  • Warm pita bread or flatbreads
  • Sliced tomatoes
  • Sliced cucumbers
  • Sliced red onions
  • Chopped lettuce
  • Fresh parsley, chopped
  • Yogurt sauce or tahini sauce

Instructions:

  1. Marinate the Chicken: In a large bowl, whisk together the olive oil, lemon juice, minced garlic, and all the spices. Add the chicken thighs or breasts, ensuring they are fully coated with the marinade. Cover the bowl and refrigerate for at least 2 hours, preferably overnight, to allow the flavors to penetrate the meat.
  2. Cook the Chicken:
    • Oven Method: Preheat your oven to 400°F (200°C). Place the marinated chicken on a baking sheet lined with parchment paper or in a baking dish. Bake for 25-30 minutes, or until the chicken is cooked through and slightly charred around the edges. If you prefer a more grilled effect, you can broil the chicken for the last 3-5 minutes.
    • Grill Method: Preheat your grill to medium-high heat. Grill the chicken for about 6-8 minutes per side, or until the internal temperature reaches 165°F (74°C) and the chicken is nicely charred.
  3. Rest and Slice: Once cooked, let the chicken rest for 5 minutes to retain its juices. Slice the chicken thinly against the grain.
  4. Assemble the Shawarma: Warm the pita bread or flatbreads. Place a generous portion of the sliced chicken in the center of each pita. Top with sliced tomatoes, cucumbers, red onions, and chopped lettuce. Drizzle with yogurt sauce or tahini sauce, and sprinkle with fresh parsley.
  5. Serve: Wrap the pita around the filling and serve immediately. Enjoy the rich, flavorful Chicken Shawarma with a side of extra sauce and a fresh salad.

This Chicken Shawarma is a flavorful, satisfying dish that brings the taste of the Middle East right into your home kitchen.

CHICKEN TOMATILLO SOUP

Chicken Tomatillo Soup is a zesty and flavorful dish that combines the bright, tangy flavor of tomatillos with tender chicken and a savory broth. This comforting soup is perfect for any time of the year and is a great way to enjoy Mexican-inspired flavors. The combination of roasted tomatillos, garlic, onions, and spices creates a rich and vibrant broth that pairs beautifully with shredded chicken. Serve it with toppings like avocado, tortilla chips, or fresh cilantro for an added touch of freshness and crunch.

Ingredients:

  • 1 lb tomatillos, husked and rinsed
  • 1 lb boneless, skinless chicken breasts or thighs
  • 1 tablespoon olive oil
  • 1 medium onion, chopped
  • 4 garlic cloves, minced
  • 2 jalapeños, seeded and chopped (optional, for heat)
  • 4 cups chicken broth
  • 1 teaspoon ground cumin
  • 1 teaspoon ground coriander
  • 1/2 teaspoon dried oregano
  • Salt and pepper, to taste
  • 1/4 cup fresh cilantro, chopped
  • 1 lime, juiced

Toppings (optional):

  • Sliced avocado
  • Tortilla chips or strips
  • Fresh cilantro
  • Shredded cheese (cheddar, queso fresco, or Monterey Jack)
  • Sour cream
  • Lime wedges

Instructions:

  1. Roast the tomatillos: Preheat your oven to 425°F (220°C). Place the tomatillos on a baking sheet and roast for 15-20 minutes, until they are softened and slightly charred. Set aside to cool slightly, then blend or pulse the tomatillos in a blender or food processor until smooth. Set aside.
  2. Cook the chicken: In a large pot, heat the olive oil over medium heat. Add the chicken breasts or thighs and cook for 6-8 minutes per side, or until fully cooked. Remove the chicken from the pot and set aside. Once cooled, shred the chicken with two forks.
  3. Sauté the onions and garlic: In the same pot, add the chopped onion and sauté for about 5 minutes, until softened. Add the minced garlic and chopped jalapeños (if using), and cook for another minute until fragrant.
  4. Make the soup base: Stir in the ground cumin, coriander, oregano, salt, and pepper. Add the blended tomatillos and chicken broth. Bring the mixture to a simmer and cook for 10-15 minutes to let the flavors meld.
  5. Add the shredded chicken: Stir the shredded chicken into the soup and cook for an additional 5 minutes to heat through.
  6. Finish the soup: Stir in the chopped fresh cilantro and lime juice. Taste and adjust seasoning as needed with more salt, pepper, or lime juice.
  7. Serve: Ladle the Chicken Tomatillo Soup into bowls and top with your favorite garnishes, such as avocado, tortilla chips, shredded cheese, or sour cream.

This Chicken Tomatillo Soup is bursting with tangy, fresh flavors, making it a perfect dish for a cozy dinner or a light, flavorful lunch. Enjoy it with all your favorite toppings for a delicious, customizable meal!

White Hot Chocolate

0

White Hot Chocolate is a rich, creamy, and indulgent beverage that’s perfect for cozying up on a chilly day. Unlike traditional hot chocolate, this version is made with smooth white chocolate, which lends a delicate sweetness and a velvety texture to each sip. Infused with a hint of vanilla, this luxurious drink is as comforting as it is decadent. Whether you’re looking for a special treat to enjoy by the fireplace or a delightful drink to serve at holiday gatherings, White Hot Chocolate is sure to warm you up from the inside out.

Ingredients:

  • 2 cups whole milk
  • 1 cup half-and-half or heavy cream
  • 1 cup white chocolate chips or chopped white chocolate
  • 1 teaspoon vanilla extract
  • Pinch of salt
  • Whipped cream, for topping (optional)
  • White chocolate shavings or sprinkles, for garnish (optional)

Instructions:

  1. Heat the Milk and Cream: In a medium saucepan, combine the whole milk and half-and-half (or heavy cream). Heat over medium-low heat, stirring occasionally, until the mixture is hot but not boiling.
  2. Add the White Chocolate: Once the milk mixture is hot, reduce the heat to low and add the white chocolate chips or chopped white chocolate. Stir continuously until the chocolate is completely melted and the mixture is smooth.
  3. Flavor the Hot Chocolate: Stir in the vanilla extract and a pinch of salt. Continue to heat the mixture, stirring occasionally, until it is hot and steamy. Be careful not to let it boil.
  4. Serve: Pour the White Hot Chocolate into mugs. Top with whipped cream and garnish with white chocolate shavings or sprinkles if desired.

Enjoy this creamy, luxurious White Hot Chocolate, perfect for warming up on a cold day or adding a touch of sweetness to your evening!