Home Blog Page 30

Apple Blackberry Crisp

0

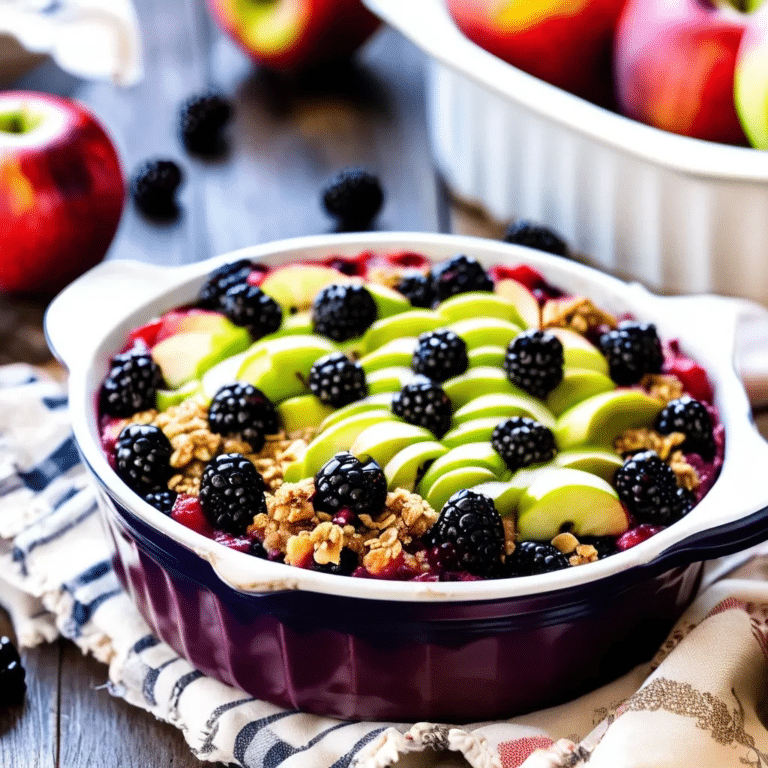
Apple Blackberry Crisp is a warm, comforting dessert that combines the sweet-tart flavors of juicy apples and blackberries with a buttery, crunchy oat topping. The fruit bakes down into a bubbling, delicious filling, while the crisp topping adds a perfect contrast of texture. This easy-to-make dessert is perfect for autumn, but can be enjoyed any time of the year. Serve it with a scoop of vanilla ice cream or a dollop of whipped cream, and you have a delightful dessert that’s both rustic and refined, making it a crowd-pleaser for any gathering.

Ingredients

For the filling:

  • 4 medium apples, peeled, cored, and sliced
  • 2 cups fresh or frozen blackberries
  • 1/2 cup granulated sugar
  • 1 tbsp lemon juice
  • 1 tsp ground cinnamon
  • 1 tbsp cornstarch (optional, for thickening)

For the crisp topping:

  • 1 cup old-fashioned oats
  • 1/2 cup all-purpose flour
  • 1/2 cup brown sugar, packed
  • 1/2 tsp ground cinnamon
  • 1/4 tsp salt
  • 1/2 cup unsalted butter, melted

Instructions

  1. Preheat the oven: Preheat your oven to 350°F (175°C) and lightly grease a 9×9-inch baking dish.
  2. Prepare the filling: In a large bowl, combine the sliced apples, blackberries, sugar, lemon juice, cinnamon, and cornstarch (if using). Toss gently to coat the fruit evenly. Pour the mixture into the prepared baking dish.
  3. Make the crisp topping: In a separate bowl, mix together the oats, flour, brown sugar, cinnamon, and salt. Stir in the melted butter until the mixture is crumbly.
  4. Assemble the crisp: Sprinkle the oat topping evenly over the fruit filling, covering it completely.
  5. Bake: Bake for 35-40 minutes, or until the topping is golden brown and the fruit is bubbly and tender.
  6. Serve: Let the crisp cool slightly before serving. Serve warm with vanilla ice cream or whipped cream for an extra indulgent treat.

This Apple Blackberry Crisp is a delightful dessert that brings together the best of seasonal fruits with a rich, buttery topping, making it a perfect comfort food any time of year!
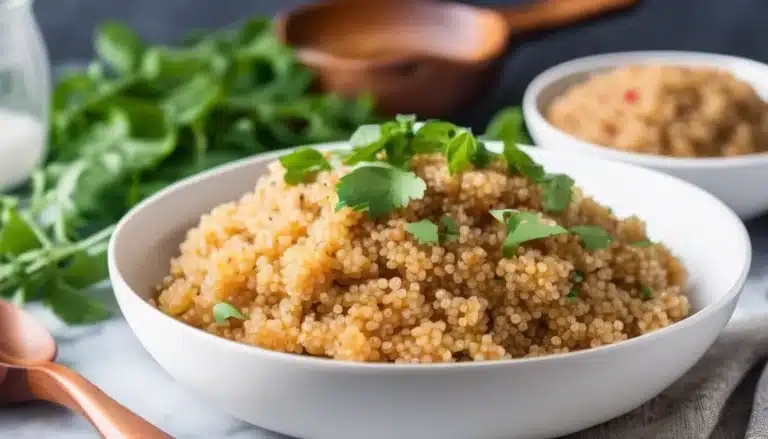

Instant Pot Quinoa

0

Quinoa is a versatile and nutritious grain that can easily become a staple in your kitchen. Cooking quinoa in an Instant Pot not only saves time but also guarantees perfectly fluffy results every time. This method ensures the quinoa absorbs just the right amount of liquid, resulting in a light, fluffy texture. Whether you’re using it as a base for a hearty salad, pairing it with vegetables, or as a healthy side dish, Instant Pot quinoa is simple, convenient, and always delicious.

Ingredients:

  • 1 cup quinoa (white, red, or tri-color)
  • 1 ½ cups water or broth (for extra flavor)
  • 1 tablespoon olive oil (optional)
  • Pinch of salt

Instructions:

  1. Rinse the quinoa: Place the quinoa in a fine mesh strainer and rinse under cold water for about 30 seconds. This step helps remove the natural bitterness.
  2. Add to the Instant Pot: Transfer the rinsed quinoa to the Instant Pot. Add water or broth, olive oil (if using), and a pinch of salt.
  3. Set the Instant Pot: Close the lid, and make sure the pressure valve is set to “Sealing.” Select the “Pressure Cook” or “Manual” setting and set the timer for 1 minute on high pressure.
  4. Natural release: Once the cooking time is complete, allow the Instant Pot to release pressure naturally for 10 minutes. After that, carefully switch the pressure valve to “Venting” to release any remaining pressure.
  5. Fluff and serve: Open the lid, fluff the quinoa with a fork, and serve as desired. Enjoy as a side dish, in salads, or as part of your favorite meals!

This recipe is flexible and can be easily adapted with additional seasonings or mix-ins depending on your flavor preferences.

Power Balls

0

Power Balls are a perfect on-the-go snack packed with energy and nutrients. These bite-sized treats are made from wholesome ingredients like oats, nut butter, and seeds, providing a good balance of protein, healthy fats, and fiber. Whether you need a quick snack before a workout, a midday pick-me-up, or a treat that satisfies your sweet tooth without the guilt, these no-bake Power Balls are both delicious and nutritious. They can be customized with your favorite add-ins like dried fruits, chocolate chips, or superfood powders to fit your tastes and dietary needs.

Ingredients:

  • 1 cup old-fashioned oats
  • 1/2 cup peanut butter (or any nut butter of choice)
  • 1/4 cup honey or maple syrup
  • 1/4 cup ground flaxseeds
  • 1/4 cup chia seeds
  • 1/4 cup mini chocolate chips (optional)
  • 1/4 cup dried cranberries or raisins
  • 1/2 teaspoon vanilla extract
  • Pinch of salt

Instructions:

  1. Mix Ingredients: In a large bowl, combine the oats, peanut butter, honey, ground flaxseeds, chia seeds, chocolate chips (if using), dried cranberries, vanilla extract, and a pinch of salt. Stir until everything is well incorporated.
  2. Form Balls: Using your hands or a small cookie scoop, roll the mixture into bite-sized balls, about 1 inch in diameter.
  3. Chill: Place the balls on a baking sheet lined with parchment paper and refrigerate for 20-30 minutes until they firm up.
  4. Store: Once set, store the Power Balls in an airtight container in the refrigerator for up to 1 week, or in the freezer for longer storage.

Enjoy your Power Balls as a convenient, healthy snack anytime you need an energy boost!

Strawberry Champagne Cupcakes

0

Strawberry Champagne Cupcakes are the perfect blend of elegance and sweetness, making them ideal for celebrations and special occasions. These light and fluffy cupcakes are infused with the delicate flavor of champagne and topped with a luscious strawberry buttercream, creating a treat that’s both refreshing and indulgent. The champagne adds a subtle effervescence to the cupcakes, while the strawberry frosting gives a fruity, vibrant finish. Whether for a wedding, anniversary, or a festive gathering, these cupcakes are sure to impress with their sophisticated flavor and beautiful presentation.

Ingredients

For the cupcakes:

  • 1 1/2 cups all-purpose flour
  • 1 1/2 tsp baking powder
  • 1/4 tsp salt
  • 1/2 cup unsalted butter, softened
  • 1 cup granulated sugar
  • 2 large eggs
  • 1 tsp vanilla extract
  • 1/2 cup champagne (or sparkling wine)
  • 1/4 cup milk

For the strawberry buttercream:

  • 1/2 cup unsalted butter, softened
  • 2 cups powdered sugar
  • 1/4 cup fresh strawberries, pureed
  • 1 tsp vanilla extract
  • A pinch of salt

Instructions

  1. Preheat the oven: Preheat your oven to 350°F (175°C) and line a cupcake tin with 12 cupcake liners.
  2. Prepare the cupcake batter: In a medium bowl, whisk together the flour, baking powder, and salt. In a separate large bowl, beat the softened butter and granulated sugar together until light and fluffy. Add the eggs, one at a time, and mix in the vanilla extract.
  3. Add champagne and flour: Slowly add the dry ingredients to the butter mixture, alternating with the champagne and milk. Mix until just combined, being careful not to overmix.
  4. Bake the cupcakes: Divide the batter evenly among the cupcake liners, filling each about 2/3 full. Bake for 18-20 minutes, or until a toothpick inserted into the center comes out clean. Let the cupcakes cool completely on a wire rack.
  5. Make the strawberry buttercream: In a large bowl, beat the softened butter until creamy. Gradually add the powdered sugar, mixing until smooth. Stir in the strawberry puree, vanilla extract, and a pinch of salt, and beat until light and fluffy.
  6. Frost the cupcakes: Once the cupcakes are cooled, pipe or spread the strawberry buttercream on top of each cupcake. Garnish with fresh strawberries or sprinkles if desired.

These Strawberry Champagne Cupcakes are a delightful, celebratory dessert with a perfect balance of sweet champagne and fresh strawberry flavor, perfect for any special occasion!

Adobo Sauce

0

Adobo Sauce is a rich and flavorful Mexican condiment made with dried chilies, spices, and vinegar. It has a deep, smoky heat balanced by tangy and earthy notes, perfect for adding complexity to a variety of dishes. This sauce is commonly used as a marinade for meats, a seasoning for stews, or even as a base for enchiladas. It’s versatile and can be made ahead of time, allowing the flavors to meld beautifully over time. Whether you’re enhancing the taste of tacos, spicing up a dip, or creating a new layer of flavor in soups, adobo sauce will add that authentic touch to your meals.

Ingredients:

  • 4 dried guajillo chilies
  • 4 dried ancho chilies
  • 1 chipotle pepper in adobo sauce
  • 1 cup water
  • 1/4 cup apple cider vinegar
  • 4 cloves garlic, peeled
  • 1 teaspoon ground cumin
  • 1 teaspoon dried oregano
  • 1 teaspoon smoked paprika
  • 1/2 teaspoon ground cinnamon
  • 1/4 teaspoon ground cloves
  • 1 tablespoon brown sugar
  • Salt and pepper to taste

Instructions:

  1. Prepare the chilies: Remove the stems and seeds from the guajillo and ancho chilies. Place them in a bowl and cover them with boiling water. Let them soak for 15 minutes until softened.
  2. Blend the sauce: Drain the chilies and add them to a blender along with the chipotle pepper, garlic, cumin, oregano, paprika, cinnamon, cloves, brown sugar, and vinegar. Pour in 1 cup of water and blend until smooth.
  3. Cook the sauce: Transfer the blended mixture to a saucepan and bring it to a simmer over medium heat. Cook for 10-15 minutes, stirring occasionally, until the sauce thickens slightly. Season with salt and pepper to taste.
  4. Store: Let the sauce cool and transfer it to a jar or airtight container. Store in the refrigerator for up to two weeks.

Adobo sauce can be used immediately, but the flavors will deepen after sitting for a day or two. Enjoy it as a marinade, in sauces, or even drizzled over roasted vegetables!

Beef And Stout Stew

0

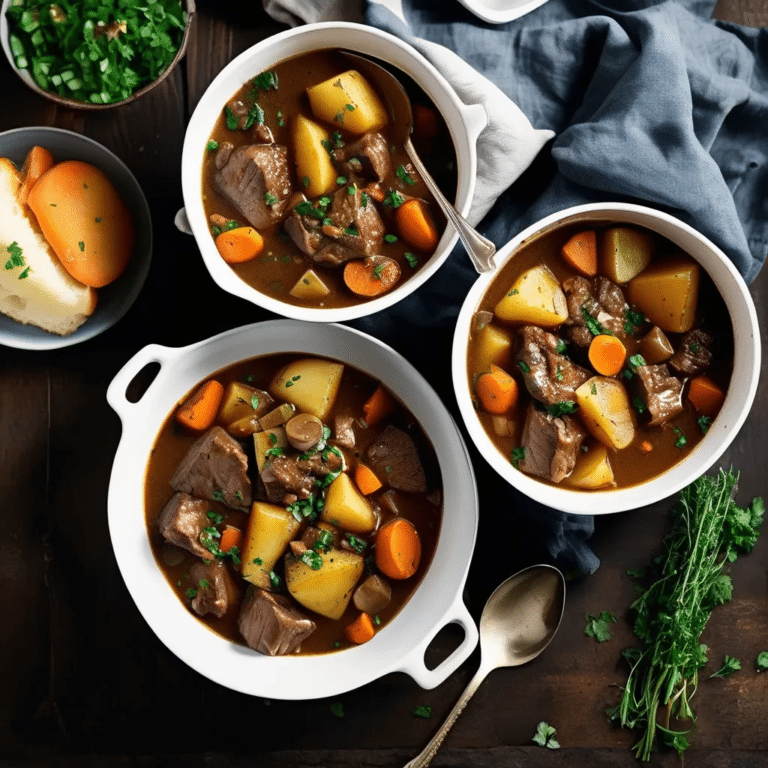
Beef and Stout Stew is a rich, hearty dish perfect for chilly days when you crave something warm and comforting. Tender chunks of beef are slow-cooked in a robust stout beer, creating a deep, flavorful broth that’s both savory and slightly malty. With the addition of carrots, potatoes, and aromatic herbs, this stew becomes a complete, one-pot meal that’s satisfying and nourishing. The stout adds a unique depth of flavor, balancing the sweetness of the vegetables with the richness of the beef. Serve it with crusty bread for soaking up the delicious sauce, and you’ve got a cozy meal that’s perfect for family dinners or gatherings.

Ingredients

  • 2 lbs beef chuck, cut into bite-sized pieces
  • 2 tbsp olive oil
  • 1 onion, diced
  • 3 cloves garlic, minced
  • 2 tbsp flour
  • 2 cups stout beer
  • 4 cups beef broth
  • 3 carrots, peeled and cut into chunks
  • 4 potatoes, peeled and cut into chunks
  • 2 tsp fresh thyme (or 1 tsp dried thyme)
  • 1 bay leaf
  • Salt and pepper to taste
  • Fresh parsley for garnish (optional)

Instructions

  1. Brown the beef: In a large pot or Dutch oven, heat the olive oil over medium-high heat. Season the beef with salt and pepper. Working in batches, sear the beef on all sides until browned, about 5-7 minutes. Remove the beef and set aside.
  2. Sauté the onions and garlic: In the same pot, add the diced onion and cook for 4-5 minutes until softened. Stir in the garlic and cook for another minute.
  3. Add the flour: Sprinkle the flour over the onions and garlic, stirring constantly for 1-2 minutes to create a roux.
  4. Deglaze with stout: Slowly pour in the stout beer, scraping up any browned bits from the bottom of the pot. Let it simmer for a couple of minutes to allow the alcohol to cook off.
  5. Simmer the stew: Return the beef to the pot and add the beef broth, carrots, potatoes, thyme, and bay leaf. Bring the stew to a boil, then reduce the heat to low, cover, and simmer for 2-2.5 hours, or until the beef is tender and the broth has thickened.
  6. Season and serve: Taste and adjust seasoning with salt and pepper as needed. Garnish with fresh parsley if desired, and serve hot with crusty bread.

This Beef and Stout Stew is a hearty, comforting dish full of rich flavors, perfect for a cozy dinner that’s both filling and flavorful.

Sweet Potato Maple Brown Butter Gnocchi

0

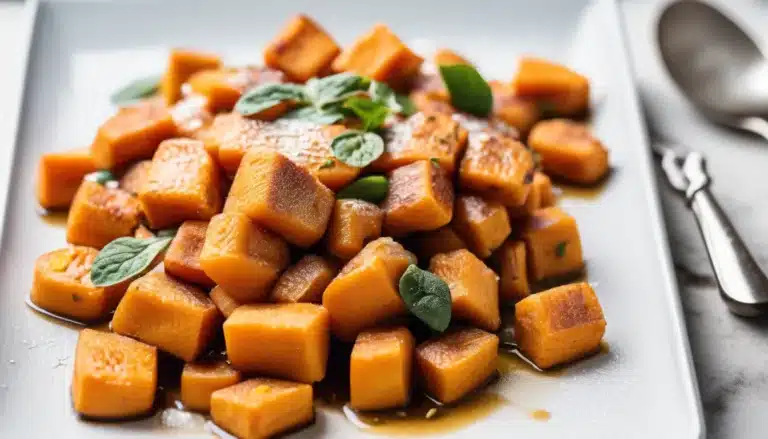
Sweet Potato Maple Brown Butter Gnocchi is a delightful twist on traditional gnocchi, bringing together the natural sweetness of roasted sweet potatoes, the nutty richness of brown butter, and the warm sweetness of maple syrup. This dish is perfect for a cozy autumn meal, balancing hearty textures with delicate flavors. The homemade sweet potato gnocchi are light and pillowy, while the brown butter adds depth and complexity, accented by the subtle sweetness of maple syrup. Topped with a sprinkle of fresh herbs or Parmesan cheese, this dish is a perfect blend of comfort and sophistication.

Ingredients:

  • 2 large sweet potatoes
  • 1 egg, lightly beaten
  • 1 1/2 cups all-purpose flour (plus extra for dusting)
  • 1/2 teaspoon salt
  • 1/2 teaspoon ground nutmeg
  • 4 tablespoons unsalted butter
  • 2 tablespoons pure maple syrup
  • Fresh sage or thyme for garnish (optional)
  • Grated Parmesan cheese for serving (optional)

Instructions:

  1. Roast the Sweet Potatoes: Preheat your oven to 400°F (200°C). Pierce the sweet potatoes with a fork and place them on a baking sheet. Roast for about 45 minutes, or until tender. Once cool enough to handle, peel and mash the sweet potatoes until smooth.
  2. Make the Gnocchi Dough: In a large bowl, combine the mashed sweet potatoes, beaten egg, salt, and nutmeg. Gradually add the flour, about 1/2 cup at a time, until a soft dough forms. Be careful not to overwork the dough, as this will make the gnocchi tough.
  3. Shape the Gnocchi: On a floured surface, divide the dough into small portions and roll each into a long rope, about 3/4 inch thick. Cut the rope into 1-inch pieces. You can leave them as-is or roll them over the back of a fork to create ridges.
  4. Cook the Gnocchi: Bring a large pot of salted water to a boil. Cook the gnocchi in batches, gently adding them to the water. Once they float to the surface, cook for another 1-2 minutes, then remove them with a slotted spoon and set aside.
  5. Prepare the Maple Brown Butter: In a large skillet, melt the butter over medium heat, stirring constantly, until it turns golden brown and smells nutty (about 4-5 minutes). Remove from heat and stir in the maple syrup.
  6. Combine and Serve: Toss the cooked gnocchi in the maple brown butter sauce until evenly coated. Garnish with fresh herbs or grated Parmesan, if desired. Serve immediately and enjoy the sweet, savory flavors.

This dish pairs wonderfully with a light green salad or roasted vegetables for a complete meal!

Almond Crescents

0

These delicate and buttery Almond Crescents are a classic holiday treat with a rich, nutty flavor and a melt-in-your-mouth texture. Perfect for pairing with a cup of coffee or tea, these cookies are shaped into delicate crescents and dusted with powdered sugar, adding an elegant touch to any dessert spread. With a subtle hint of almond and vanilla, they offer a delightful balance of sweetness and nuttiness, making them an irresistible favorite for cookie lovers. Best of all, they’re simple to make, yet impressive to serve!

Ingredients:

  • 1 cup unsalted butter, softened
  • 1/2 cup granulated sugar
  • 1 teaspoon vanilla extract
  • 1 teaspoon almond extract
  • 2 cups all-purpose flour
  • 1 cup finely ground almonds (almond flour)
  • Powdered sugar, for dusting

Instructions:

  1. Preheat the oven to 350°F (175°C). Line a baking sheet with parchment paper.
  2. Cream the butter and sugar together in a large bowl until light and fluffy. Add the vanilla and almond extracts, and mix well.
  3. Gradually add the flour and ground almonds to the butter mixture, mixing until a soft dough forms.
  4. Shape the dough into small balls, then roll them between your hands into logs. Gently bend each log into a crescent shape and place them on the prepared baking sheet.
  5. Bake in the preheated oven for 12-15 minutes, or until the edges are lightly golden. Be careful not to over-bake.
  6. Allow the cookies to cool for a few minutes on the baking sheet before transferring them to a wire rack to cool completely.
  7. Once cooled, dust the cookies generously with powdered sugar.

Enjoy your almond crescents with a warm beverage or gift them as a thoughtful homemade treat!

Halloween Candy Bark

0

Halloween Candy Bark is a fun and festive treat that’s perfect for using up leftover Halloween candy or adding a spooky touch to your party table. This customizable dessert combines smooth melted chocolate with an assortment of your favorite candy pieces for a sweet and crunchy texture. The colorful candy makes it visually stunning, and it’s incredibly easy to make—just melt, mix, and chill. Whether you’re making it with kids or creating a quick, no-bake dessert for a gathering, Halloween Candy Bark is sure to be a hit with its playful appearance and irresistible flavors.

Ingredients:

  • 12 oz semi-sweet or dark chocolate chips
  • 6 oz white chocolate chips
  • 1 cup candy corn
  • 1/2 cup mini pretzels, broken into pieces
  • 1/2 cup M&M’s (Halloween colors preferred)
  • 1/4 cup mini marshmallows
  • 1/4 cup sprinkles (Halloween-themed)

Instructions:

  1. Prepare the baking sheet: Line a large baking sheet with parchment paper or a silicone baking mat.
  2. Melt the chocolate: In a microwave-safe bowl, melt the semi-sweet or dark chocolate chips in 20-second intervals, stirring in between, until smooth. Repeat the process for the white chocolate chips in a separate bowl.
  3. Spread the chocolate: Pour the melted dark or semi-sweet chocolate onto the prepared baking sheet, spreading it out evenly with a spatula until it’s about 1/4-inch thick.
  4. Create swirls: Drizzle the melted white chocolate over the top of the dark chocolate, then use a toothpick or a knife to create swirls and patterns.
  5. Add toppings: While the chocolate is still soft, sprinkle the candy corn, broken pretzels, M&M’s, mini marshmallows, and Halloween-themed sprinkles evenly over the top.
  6. Chill: Place the baking sheet in the refrigerator and allow the bark to set for about 30 minutes, or until the chocolate is completely firm.
  7. Break into pieces: Once fully set, break the bark into large chunks.
  8. Serve and enjoy: Enjoy immediately, or store the bark in an airtight container for up to a week.

This Halloween Candy Bark makes for an eye-catching treat that’s just as fun to make as it is to eat!

Chilled Cucumber Yogurt Soup

0

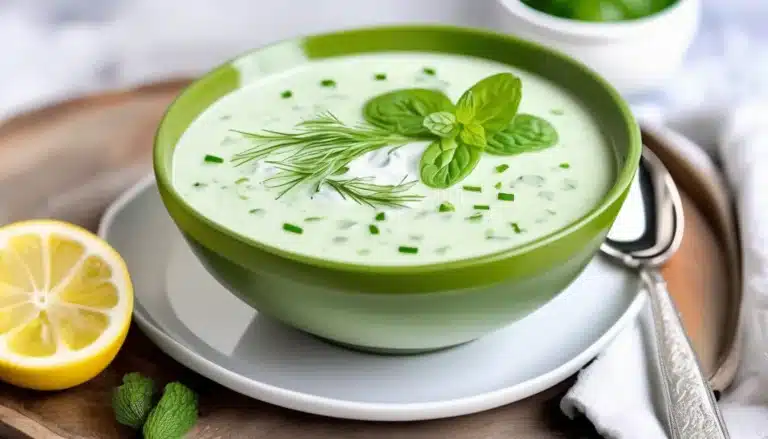
This refreshing chilled cucumber yogurt soup is the perfect dish for hot summer days. Light, creamy, and tangy, it combines the cooling effect of cucumber with the richness of Greek yogurt, creating a velvety texture with bursts of fresh flavor from dill, mint, and lemon. A perfect appetizer or light lunch, this soup is not only delicious but also packed with probiotics and hydration, making it a healthy choice. Whether you’re serving it as part of a Mediterranean spread or enjoying it on its own, this soup is sure to impress with its simplicity and delightful taste.

Ingredients:

  • 2 large cucumbers, peeled and roughly chopped
  • 2 cups plain Greek yogurt
  • 1 clove garlic, minced
  • 2 tablespoons fresh dill, chopped
  • 2 tablespoons fresh mint, chopped
  • 1 tablespoon fresh lemon juice
  • 1 tablespoon olive oil
  • Salt and pepper to taste
  • 1/4 cup water (optional, for desired consistency)
  • Lemon zest (optional, for garnish)
  • Extra fresh dill or mint (for garnish)

Instructions:

  1. In a blender or food processor, add the chopped cucumbers, Greek yogurt, garlic, dill, mint, lemon juice, and olive oil. Blend until smooth and creamy.
  2. If the soup is too thick for your liking, add a little water to reach the desired consistency.
  3. Taste and season with salt and pepper as needed.
  4. Chill the soup in the refrigerator for at least 1 hour before serving to let the flavors meld together.
  5. When ready to serve, garnish with lemon zest and extra fresh dill or mint for added flavor and presentation.
  6. Enjoy chilled as a refreshing appetizer or light meal!