Home Blog Page 29

Hot And Sour Soup

0

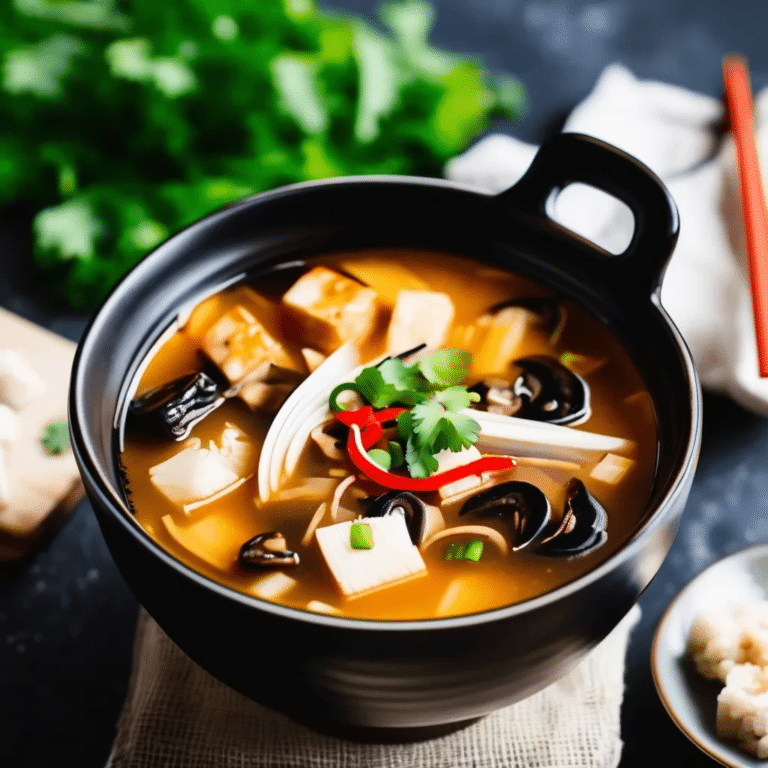
Hot and Sour Soup is a flavorful, tangy, and slightly spicy soup that’s a staple in Chinese cuisine. With its perfectly balanced combination of vinegar’s sourness and the heat from white pepper, this soup is a bold and comforting dish that’s perfect for chilly days or when you’re craving something with a kick. Made with ingredients like tofu, mushrooms, bamboo shoots, and egg ribbons, Hot and Sour Soup is packed with texture and nutrition. Whether enjoyed as a starter or a light meal, this soup is easy to prepare at home and brings the authentic taste of a Chinese restaurant right to your table.

Ingredients

  • 4 cups chicken or vegetable broth
  • 1 cup sliced mushrooms (shiitake or wood ear mushrooms)
  • 1/2 cup bamboo shoots, sliced
  • 1/2 cup firm tofu, cut into cubes
  • 1/4 cup rice vinegar
  • 2 tbsp soy sauce
  • 1 tbsp chili garlic sauce (or to taste)
  • 1/2 tsp ground white pepper
  • 1 tbsp cornstarch mixed with 2 tbsp water (for thickening)
  • 1 egg, lightly beaten
  • 2 green onions, thinly sliced
  • 1 tsp sesame oil
  • Fresh cilantro for garnish (optional)

Instructions

  1. Heat the broth: In a large pot, bring the chicken or vegetable broth to a simmer over medium heat. Add the mushrooms, bamboo shoots, and tofu, and simmer for 5 minutes.
  2. Season the soup: Stir in the rice vinegar, soy sauce, chili garlic sauce, and white pepper. Taste and adjust the seasoning according to your preference for sourness and heat.
  3. Thicken the soup: Slowly stir in the cornstarch slurry and let the soup simmer for another 2-3 minutes, or until it begins to thicken.
  4. Add the egg: While stirring the soup in a circular motion, slowly drizzle in the beaten egg to create silky egg ribbons.
  5. Finish the soup: Stir in the sesame oil and half of the green onions. Remove from heat and ladle the soup into bowls.
  6. Serve: Garnish with the remaining green onions and fresh cilantro if desired. Serve hot.

This Hot and Sour Soup is a bold, tangy, and spicy dish that’s easy to make and perfect for warming up on a chilly day, bringing a delicious balance of flavors to your table!

Chili Cheese Sweet Potato Casserole

0

This Chili Cheese Sweet Potato Casserole combines the rich, savory flavors of chili with the natural sweetness of roasted sweet potatoes, all smothered in gooey melted cheese. It’s a hearty and nutritious twist on the classic chili cheese bake, offering a perfect balance between comfort food and wholesome ingredients. Whether you’re serving it as a main dish or a side, this casserole is sure to please a crowd with its layers of flavor and satisfying textures. It’s also easily adaptable for vegetarians by substituting the ground beef with plant-based protein or extra beans.

Ingredients:

  • 4 large sweet potatoes, peeled and cubed
  • 1 tablespoon olive oil
  • Salt and pepper, to taste
  • 1 pound ground beef (or plant-based protein for a vegetarian option)
  • 1 small onion, diced
  • 2 garlic cloves, minced
  • 1 (15 oz) can black beans, drained and rinsed
  • 1 (14.5 oz) can diced tomatoes
  • 1 (4 oz) can diced green chilies
  • 2 tablespoons chili powder
  • 1 teaspoon cumin
  • 1 teaspoon smoked paprika
  • 1/2 teaspoon ground cayenne pepper (optional)
  • 1 1/2 cups shredded cheddar cheese (or a mix of cheddar and Monterey Jack)
  • 1/4 cup sour cream (optional for topping)
  • Fresh cilantro, chopped (for garnish)

Instructions:

  1. Prepare the sweet potatoes: Preheat your oven to 400°F (200°C). Toss the cubed sweet potatoes with olive oil, salt, and pepper. Spread them in a single layer on a baking sheet and roast for 25-30 minutes, or until tender and slightly caramelized. Set aside.
  2. Make the chili: While the sweet potatoes are roasting, heat a large skillet over medium heat. Add the ground beef and cook until browned, breaking it apart with a spoon. Drain any excess fat. Add the diced onion and garlic, cooking until softened, about 3-5 minutes. Stir in the black beans, diced tomatoes, green chilies, chili powder, cumin, smoked paprika, and cayenne pepper (if using). Simmer the chili for 10-15 minutes to let the flavors meld.
  3. Assemble the casserole: In a greased 9×13-inch casserole dish, layer the roasted sweet potatoes evenly across the bottom. Pour the chili mixture over the sweet potatoes and spread it out evenly. Sprinkle the shredded cheese generously over the top.
  4. Bake: Place the casserole in the oven and bake at 400°F (200°C) for 15-20 minutes, or until the cheese is melted and bubbly.
  5. Serve: Let the casserole cool slightly before serving. Garnish with fresh cilantro and a dollop of sour cream, if desired. Enjoy!

This dish is perfect for a comforting weeknight meal or for potlucks. It’s flavorful, filling, and packed with nutrients!

Hazelnut Truffles

0

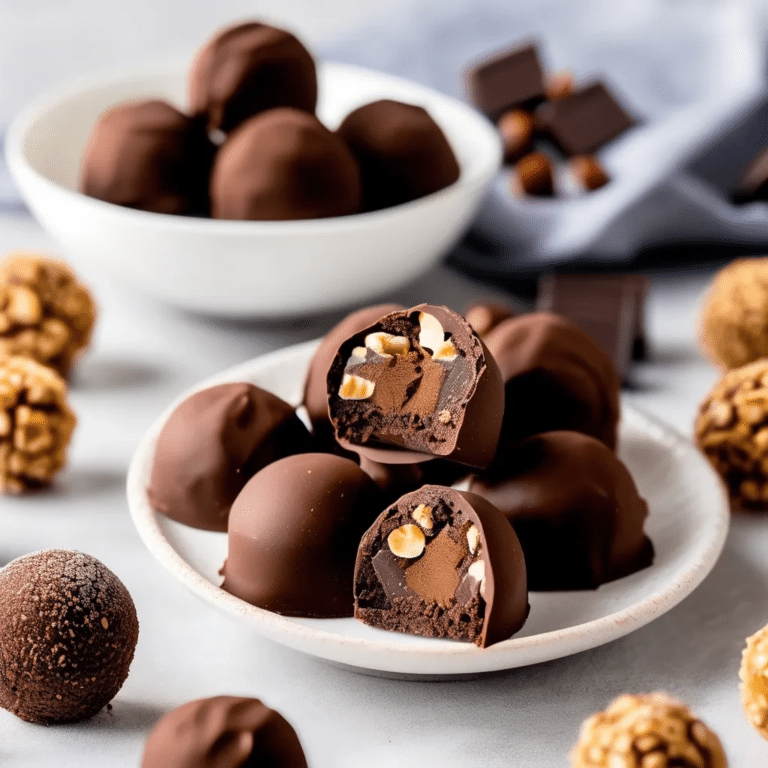
Hazelnut Truffles are an indulgent and decadent treat, combining the rich flavors of dark chocolate and roasted hazelnuts for a bite-sized dessert that’s both elegant and irresistible. These smooth and creamy truffles are made with a silky ganache base, rolled in crunchy chopped hazelnuts, and dusted with cocoa powder for a final touch of luxury. Perfect for special occasions, homemade gifts, or simply to satisfy your chocolate cravings, these truffles are easy to make and deliver a delightful combination of textures and flavors in every bite.

Ingredients

  • 8 oz dark chocolate (60-70% cocoa), chopped
  • 1/2 cup heavy cream
  • 2 tbsp unsalted butter
  • 1/2 tsp vanilla extract
  • 1/2 cup roasted hazelnuts, finely chopped
  • 1/4 cup unsweetened cocoa powder
  • Whole hazelnuts (optional, for filling)

Instructions

  1. Make the ganache: Place the chopped chocolate in a heatproof bowl. In a small saucepan, heat the heavy cream and butter over medium heat until it just begins to simmer. Pour the hot cream mixture over the chocolate and let it sit for 2-3 minutes to melt the chocolate. Stir until the mixture is smooth and glossy. Stir in the vanilla extract.
  2. Chill the ganache: Cover the bowl with plastic wrap and refrigerate the ganache for about 1-2 hours, or until firm enough to scoop.
  3. Form the truffles: Once the ganache has chilled, use a small spoon or melon baller to scoop out portions of the mixture. Roll each portion into a ball, and if desired, place a whole hazelnut in the center of each truffle. Roll the truffles between your palms to smooth them out.
  4. Coat the truffles: Roll each truffle in the finely chopped hazelnuts, then dust lightly with cocoa powder to finish.
  5. Chill and serve: Refrigerate the truffles for 30 minutes to set before serving. Store any leftovers in an airtight container in the refrigerator.

These Hazelnut Truffles are rich, velvety, and packed with nutty goodness, making them the perfect homemade treat for chocolate and hazelnut lovers!

Prawn Noodle Salad

0

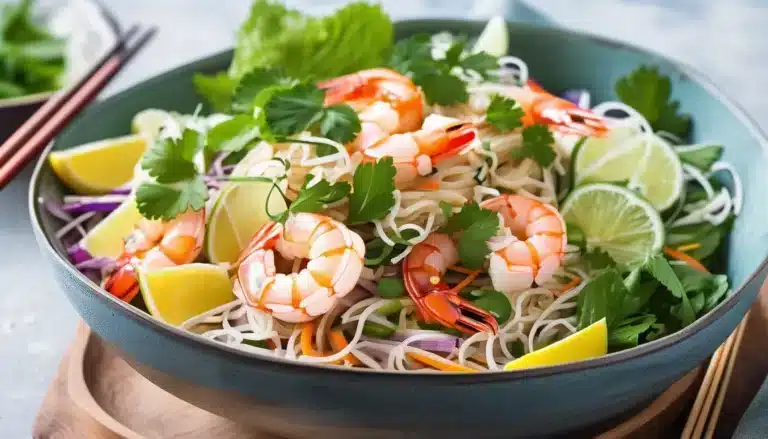
This refreshing Prawn Noodle Salad is a delightful combination of vibrant flavors and textures, perfect for a light lunch or a side dish. The tender prawns are the star of the dish, complemented by soft rice noodles, fresh crunchy vegetables, and a zesty, tangy dressing that ties it all together. The addition of herbs like cilantro and mint brings a bright, fragrant note, while a touch of chili adds just the right amount of heat. It’s a simple yet elegant dish that feels fresh and satisfying, making it ideal for warm days or when you crave something quick but flavorful.

Ingredients:

  • 200g rice noodles
  • 300g cooked prawns, peeled and deveined
  • 1 cucumber, thinly sliced
  • 1 carrot, julienned
  • 1 red bell pepper, thinly sliced
  • 2 spring onions, sliced
  • 1 handful fresh cilantro leaves
  • 1 handful fresh mint leaves
  • 1 small red chili, thinly sliced (optional)

Dressing:

  • 3 tbsp fish sauce
  • 2 tbsp lime juice
  • 1 tbsp soy sauce
  • 1 tbsp sugar or honey
  • 1 tsp sesame oil
  • 1 garlic clove, minced

Instructions:

  1. Cook the noodles: Prepare the rice noodles according to the package instructions. Drain and rinse them under cold water to prevent sticking. Set aside.
  2. Prepare the dressing: In a small bowl, whisk together fish sauce, lime juice, soy sauce, sugar (or honey), sesame oil, and minced garlic until well combined.
  3. Assemble the salad: In a large bowl, toss together the cooked noodles, prawns, cucumber, carrot, bell pepper, spring onions, cilantro, and mint.
  4. Dress the salad: Pour the dressing over the noodle and prawn mixture, and gently toss to combine. Add the sliced chili for a spicy kick if desired.
  5. Serve: Let the salad sit for 10 minutes to allow the flavors to meld, then serve chilled or at room temperature. Enjoy!

This light and zesty Prawn Noodle Salad pairs well with a crisp white wine or refreshing iced tea for a balanced meal.

Red, White And Blue Potato Salad

0

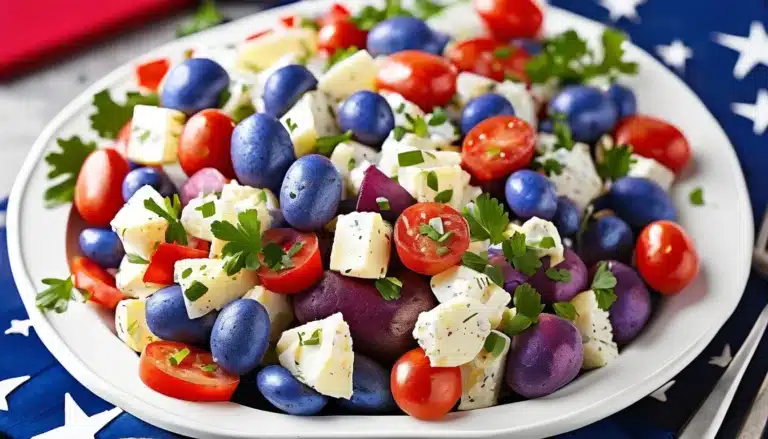
This vibrant and festive Red, White, and Blue Potato Salad is perfect for patriotic holidays or any occasion that calls for a colorful side dish. The combination of red, white, and blue potatoes creates a stunning visual appeal while adding a variety of textures and flavors. Red potatoes bring a waxy firmness, while white potatoes offer a creamy softness, and blue potatoes provide an earthy, slightly nutty taste. Dressed with a tangy Dijon mustard vinaigrette and accented with fresh herbs, this salad is a refreshing, healthier alternative to traditional mayonnaise-based potato salads.

Ingredients:

  • 1 lb red potatoes, quartered
  • 1 lb white potatoes, quartered
  • 1 lb blue potatoes, quartered
  • 2 tbsp Dijon mustard
  • 1 tbsp red wine vinegar
  • 3 tbsp olive oil
  • 2 green onions, thinly sliced
  • 1 tbsp fresh dill, chopped
  • 1 tbsp fresh parsley, chopped
  • Salt and pepper to taste
  • Optional: crumbled feta or goat cheese for garnish

Instructions:

  1. Boil the potatoes: Place the red, white, and blue potatoes in separate pots and cover with water. Bring to a boil and cook until fork-tender, about 12-15 minutes. Drain and let cool slightly.
  2. Prepare the dressing: In a small bowl, whisk together the Dijon mustard, red wine vinegar, olive oil, salt, and pepper until smooth and emulsified.
  3. Combine the salad: In a large mixing bowl, gently toss the cooled potatoes with the dressing until well coated.
  4. Add herbs: Fold in the green onions, fresh dill, and parsley.
  5. Serve: Garnish with crumbled feta or goat cheese if desired. Serve warm, at room temperature, or chilled.

Enjoy this colorful and flavorful dish as a side for your next barbecue, picnic, or family gathering!

Pumpkin Cream Cheese Bundt Cake

0

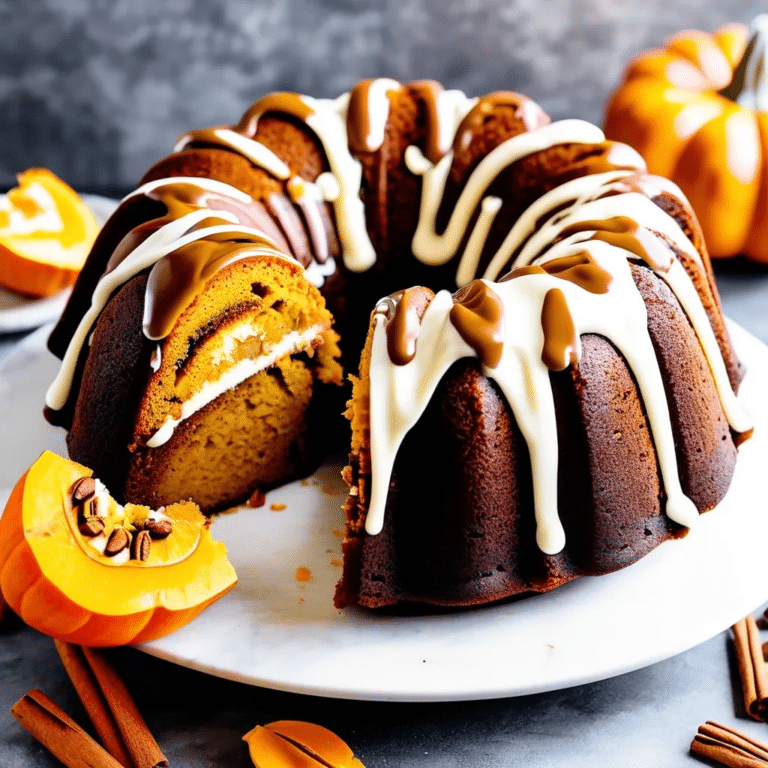
Pumpkin Cream Cheese Bundt Cake is a decadent and moist fall dessert that combines the warm, spiced flavors of pumpkin with a rich, tangy cream cheese filling. This show-stopping cake is perfect for holiday gatherings, cozy autumn afternoons, or any special occasion. The bundt cake is infused with cinnamon, nutmeg, and cloves, while the hidden layer of cream cheese adds a delightful surprise in every bite. Topped with a simple glaze or dusted with powdered sugar, this pumpkin cake is a festive and delicious way to celebrate the season.

Ingredients

For the pumpkin cake:

  • 2 1/2 cups all-purpose flour
  • 2 tsp baking powder
  • 1 tsp baking soda
  • 1 tsp ground cinnamon
  • 1/2 tsp ground nutmeg
  • 1/4 tsp ground cloves
  • 1/2 tsp salt
  • 1 cup canned pumpkin puree
  • 1 cup granulated sugar
  • 1/2 cup brown sugar, packed
  • 1 cup vegetable oil
  • 4 large eggs
  • 1 tsp vanilla extract

For the cream cheese filling:

  • 8 oz cream cheese, softened
  • 1/4 cup granulated sugar
  • 1 large egg
  • 1 tsp vanilla extract

For the glaze (optional):

  • 1 cup powdered sugar
  • 2 tbsp milk
  • 1/2 tsp vanilla extract

Instructions

  1. Preheat the oven: Preheat your oven to 350°F (175°C). Grease and flour a bundt pan to prevent sticking.
  2. Make the cake batter: In a medium bowl, whisk together the flour, baking powder, baking soda, cinnamon, nutmeg, cloves, and salt. In a large bowl, whisk together the pumpkin puree, granulated sugar, brown sugar, vegetable oil, eggs, and vanilla extract. Gradually add the dry ingredients to the wet ingredients and mix until just combined.
  3. Make the cream cheese filling: In a separate bowl, beat together the softened cream cheese, sugar, egg, and vanilla extract until smooth and creamy.
  4. Assemble the cake: Pour about half of the pumpkin cake batter into the prepared bundt pan. Spoon the cream cheese mixture evenly over the batter, being careful not to touch the edges of the pan. Pour the remaining pumpkin batter over the cream cheese layer, smoothing the top.
  5. Bake: Bake for 50-60 minutes, or until a toothpick inserted into the center of the cake comes out clean. Let the cake cool in the pan for 10-15 minutes before inverting onto a wire rack to cool completely.
  6. Make the glaze: In a small bowl, whisk together the powdered sugar, milk, and vanilla extract until smooth. Drizzle the glaze over the cooled cake, or simply dust the cake with powdered sugar for a simpler finish.

This Pumpkin Cream Cheese Bundt Cake is a deliciously spiced, creamy dessert that brings the warmth of fall flavors to every bite, making it a perfect centerpiece for any autumn or holiday celebration!

Chocolate Peanut Butter Banana Smoothie

0

This deliciously creamy smoothie is the perfect blend of rich chocolate, creamy peanut butter, and naturally sweet banana, making it a healthy yet indulgent treat. Whether you need a quick breakfast, a post-workout recovery drink, or a satisfying snack, this smoothie delivers a great balance of protein, healthy fats, and natural sweetness. Plus, it’s super easy to customize with add-ins like spinach, oats, or protein powder for an extra nutritional boost!

Ingredients:

  • 1 ripe banana, frozen
  • 1 tablespoon peanut butter
  • 1 tablespoon unsweetened cocoa powder
  • 1/2 cup milk (or almond milk, oat milk, etc.)
  • 1/4 cup Greek yogurt (optional for added creaminess and protein)
  • 1 teaspoon honey or maple syrup (optional for extra sweetness)
  • A handful of ice cubes (optional)
  • 1/2 teaspoon vanilla extract (optional)

Instructions:

  1. Add the frozen banana, peanut butter, cocoa powder, milk, Greek yogurt (if using), honey or maple syrup, ice cubes, and vanilla extract (if using) to a blender.
  2. Blend on high until smooth and creamy.
  3. Taste and adjust the sweetness or thickness by adding more milk or honey as needed.
  4. Pour into a glass and enjoy immediately!

Feel free to add a scoop of protein powder or a handful of spinach for extra nutrition, or swap out the milk for a dairy-free option!

Fishcakes

0

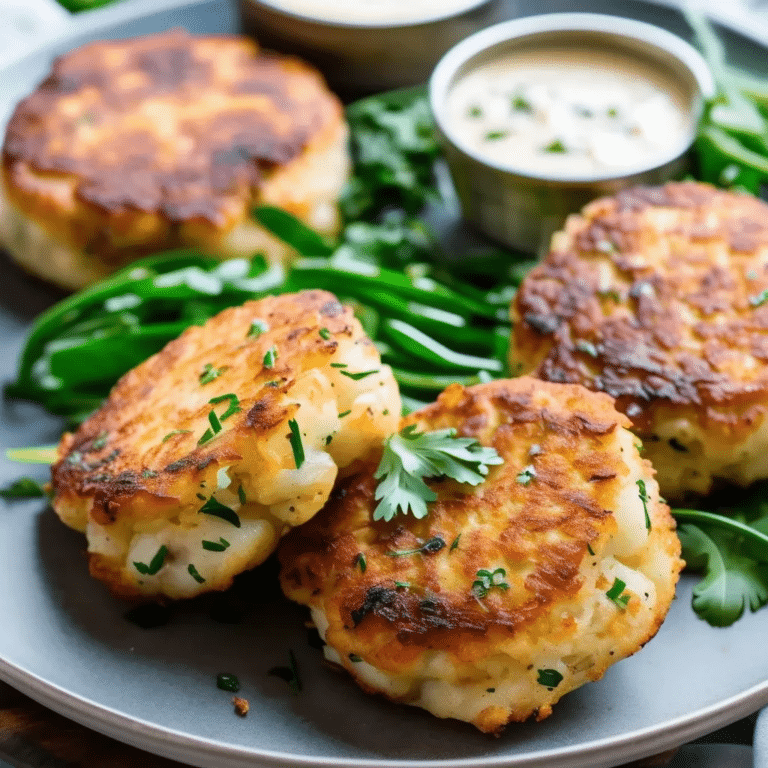
Fishcakes are a delicious, versatile dish made with flaky white fish, potatoes, and a blend of fresh herbs and spices. These crispy-on-the-outside, tender-on-the-inside patties are perfect for a quick dinner, appetizer, or lunch. Fishcakes can be served with a variety of accompaniments such as tartar sauce, a squeeze of lemon, or a side salad, making them a great option for any meal. With their golden-brown crust and flavorful filling, these fishcakes are a satisfying and easy way to enjoy seafood at home.

Ingredients

  • 1 lb white fish fillets (such as cod, haddock, or tilapia)
  • 2 large potatoes, peeled and diced
  • 1 small onion, finely chopped
  • 1 clove garlic, minced
  • 1 tbsp fresh parsley, chopped
  • 1 tsp Dijon mustard
  • 1 egg, beaten
  • 1 cup breadcrumbs (divided)
  • Salt and pepper to taste
  • 2 tbsp olive oil or vegetable oil for frying
  • Lemon wedges for serving (optional)

Instructions

  1. Cook the fish and potatoes: Boil the potatoes in salted water until tender, about 10-12 minutes. Drain and mash them, then set aside. Meanwhile, poach the fish fillets in lightly simmering water for about 5-7 minutes until fully cooked. Drain and flake the fish with a fork.
  2. Mix the fishcake filling: In a large bowl, combine the mashed potatoes, flaked fish, onion, garlic, parsley, Dijon mustard, egg, and half of the breadcrumbs. Season with salt and pepper to taste. Mix until all ingredients are well combined.
  3. Shape the fishcakes: Form the mixture into small patties, about 1/2 inch thick. Coat each patty in the remaining breadcrumbs, pressing gently to help the crumbs adhere.
  4. Fry the fishcakes: Heat the olive oil in a large skillet over medium heat. Fry the fishcakes for 3-4 minutes on each side, or until golden brown and crispy.
  5. Serve: Serve the fishcakes hot with lemon wedges and your favorite dipping sauce, such as tartar sauce or aioli.

These crispy, flavorful fishcakes are an easy and delicious way to enjoy fresh seafood, perfect for a light meal or as a satisfying appetizer!

Cider Glazed Chicken Thighs

0

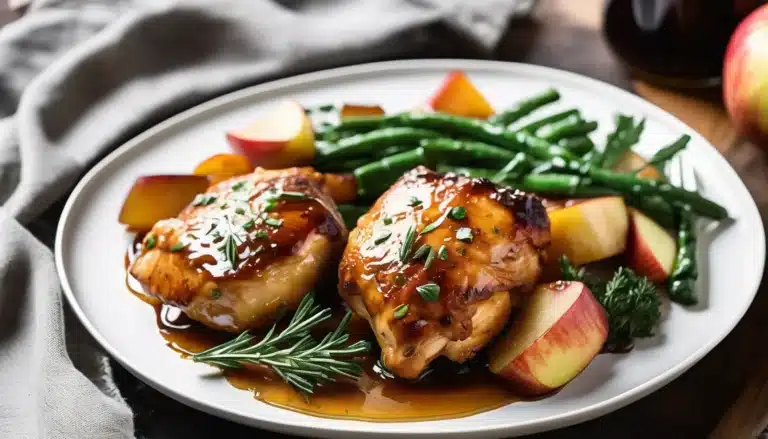
These cider-glazed chicken thighs are a perfect balance of sweet and savory, with a rich apple cider reduction that enhances the natural flavors of the tender chicken. The glaze, made from a combination of apple cider, Dijon mustard, honey, and fresh herbs, creates a caramelized coating that adds depth to the dish. Perfect for a cozy weeknight meal or a special autumn gathering, this recipe pairs well with roasted vegetables or mashed potatoes for a complete, comforting meal.

Ingredients:

  • 6 bone-in, skin-on chicken thighs
  • 1 cup apple cider
  • 2 tablespoons Dijon mustard
  • 2 tablespoons honey
  • 2 garlic cloves, minced
  • 1 tablespoon fresh thyme leaves (or 1 teaspoon dried thyme)
  • 1 tablespoon apple cider vinegar
  • 1 tablespoon olive oil
  • Salt and pepper, to taste
  • Fresh parsley for garnish (optional)

Instructions:

  1. Prepare the Chicken: Preheat your oven to 375°F (190°C). Pat the chicken thighs dry with paper towels and season generously with salt and pepper.
  2. Sear the Chicken: Heat the olive oil in a large oven-safe skillet over medium-high heat. Place the chicken thighs skin-side down and sear for 5-7 minutes, until the skin is golden brown and crispy. Flip the thighs and cook for another 3 minutes. Remove the chicken from the skillet and set aside.
  3. Make the Cider Glaze: In the same skillet, reduce the heat to medium and add the minced garlic. Sauté for about 30 seconds until fragrant. Stir in the apple cider, Dijon mustard, honey, thyme, and apple cider vinegar. Bring the mixture to a simmer and cook for 5-7 minutes, until the glaze reduces and thickens slightly.
  4. Glaze and Bake: Return the chicken thighs to the skillet, skin-side up, and spoon some of the glaze over each piece. Transfer the skillet to the preheated oven and bake for 25-30 minutes, or until the chicken is cooked through and reaches an internal temperature of 165°F (74°C).
  5. Serve: Remove the chicken from the oven and let it rest for a few minutes. Garnish with fresh parsley if desired, and serve with extra glaze spooned over the top.

Enjoy your delicious cider-glazed chicken thighs with your favorite side dishes!

Snickers Cupcakes

0

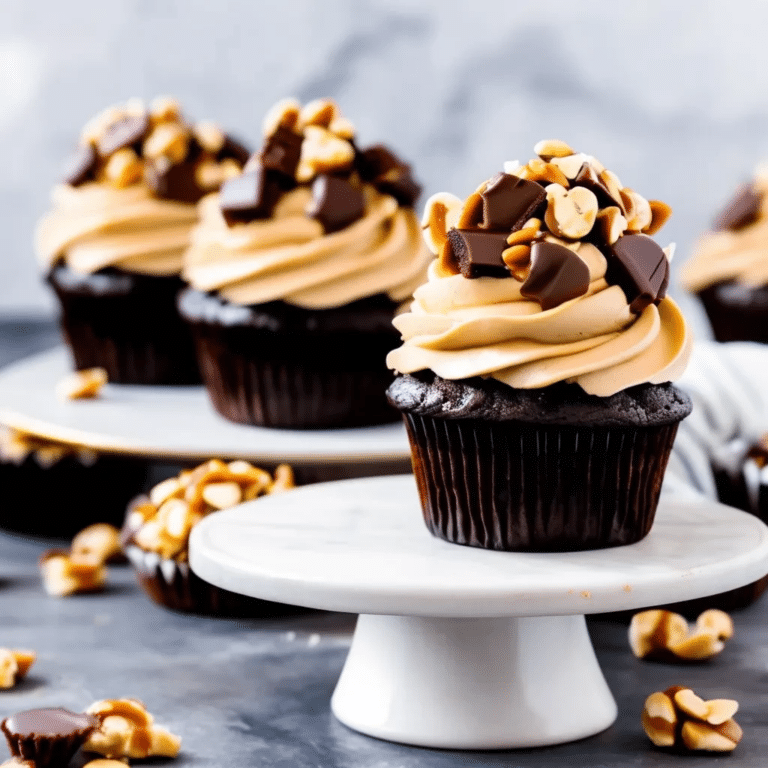
Snickers Cupcakes are a decadent treat that combines the beloved flavors of the classic candy bar into a delightful dessert. These indulgent cupcakes feature a rich chocolate base filled with gooey caramel and crunchy peanuts, then topped with a smooth, creamy peanut butter frosting. Each bite offers a balance of sweetness, crunch, and a touch of saltiness, making these cupcakes irresistible for Snickers lovers. Perfect for parties, special occasions, or when you’re craving something truly indulgent, these Snickers Cupcakes will be a crowd-pleaser for sure!

Ingredients

For the cupcakes:

  • 1 1/2 cups all-purpose flour
  • 1/2 cup unsweetened cocoa powder
  • 1 tsp baking soda
  • 1/4 tsp salt
  • 1/2 cup unsalted butter, softened
  • 1 cup granulated sugar
  • 2 large eggs
  • 1 tsp vanilla extract
  • 1/2 cup whole milk
  • 1/2 cup hot water

For the filling:

  • 1/2 cup caramel sauce
  • 1/2 cup salted peanuts, chopped

For the frosting:

  • 1/2 cup unsalted butter, softened
  • 1 cup creamy peanut butter
  • 2 cups powdered sugar
  • 2-3 tbsp milk
  • 1 tsp vanilla extract

For topping (optional):

  • Mini Snickers bars, chopped
  • Extra caramel drizzle

Instructions

  1. Preheat the oven: Preheat your oven to 350°F (175°C) and line a cupcake tin with 12 cupcake liners.
  2. Make the cupcake batter: In a medium bowl, whisk together the flour, cocoa powder, baking soda, and salt. In a large bowl, cream the butter and sugar until light and fluffy. Add the eggs one at a time, mixing well, and stir in the vanilla extract. Alternate adding the dry ingredients and milk to the butter mixture, beginning and ending with the dry ingredients. Finally, mix in the hot water until the batter is smooth.
  3. Bake the cupcakes: Fill the cupcake liners about 2/3 full with batter and bake for 18-20 minutes, or until a toothpick inserted into the center comes out clean. Allow the cupcakes to cool completely.
  4. Prepare the filling: Once the cupcakes have cooled, use a knife or cupcake corer to remove the center of each cupcake. Fill each hole with a teaspoon of caramel sauce and a sprinkle of chopped peanuts.
  5. Make the frosting: In a large bowl, beat the butter and peanut butter until smooth. Gradually add the powdered sugar, followed by the milk and vanilla, beating until the frosting is light and fluffy.
  6. Frost the cupcakes: Frost the filled cupcakes using a piping bag or spatula. Top each cupcake with chopped mini Snickers bars and a drizzle of caramel sauce for extra indulgence.

These Snickers Cupcakes are a fun and delicious twist on a classic candy bar, offering layers of rich chocolate, caramel, and peanut butter in every decadent bite!