Home Blog Page 18

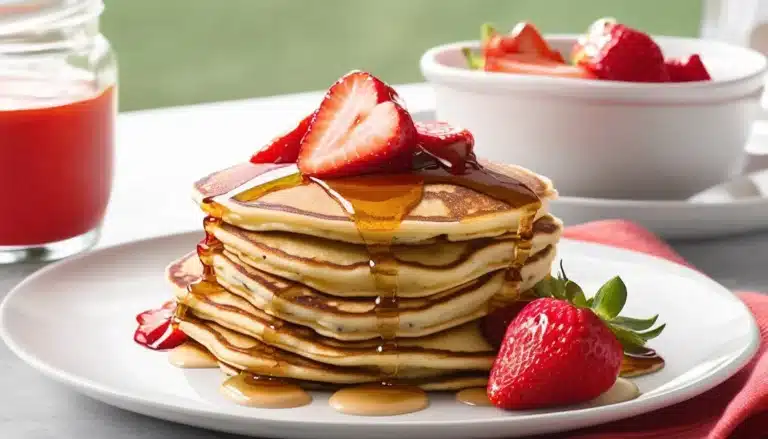
STRAWBERRY BUTTERMILK PANCAKES

Strawberry Buttermilk Pancakes are a delicious twist on the classic pancake, filled with juicy bursts of fresh strawberries and the subtle tanginess of buttermilk. The buttermilk makes the pancakes extra fluffy, while the strawberries add a sweet, fruity flavor to each bite. These pancakes are perfect for a weekend breakfast or brunch, and they pair beautifully with a drizzle of maple syrup or a dollop of whipped cream. Easy to make and always a hit, they bring a bright, summery feel to your morning meal.

Ingredients:

  • 1 1/2 cups all-purpose flour
  • 2 tablespoons granulated sugar
  • 1 teaspoon baking powder
  • 1/2 teaspoon baking soda
  • 1/4 teaspoon salt
  • 1 1/4 cups buttermilk
  • 1 large egg
  • 2 tablespoons unsalted butter, melted
  • 1 teaspoon vanilla extract
  • 1 cup fresh strawberries, hulled and diced
  • Butter or oil for cooking
  • Maple syrup or whipped cream for serving (optional)

Instructions:

  1. Mix the dry ingredients: In a large bowl, whisk together the flour, sugar, baking powder, baking soda, and salt.
  2. Whisk the wet ingredients: In a separate bowl, whisk together the buttermilk, egg, melted butter, and vanilla extract until smooth and well combined.
  3. Combine the wet and dry ingredients: Pour the wet ingredients into the dry ingredients and stir until just combined. Be careful not to overmix the batter; it’s okay if there are a few lumps.
  4. Fold in the strawberries: Gently fold the diced strawberries into the batter, ensuring they are evenly distributed.
  5. Heat the skillet: Heat a large skillet or griddle over medium heat. Lightly grease it with butter or oil.
  6. Cook the pancakes: Pour about 1/4 cup of batter onto the skillet for each pancake. Cook for 2-3 minutes, or until bubbles form on the surface and the edges look set. Flip the pancakes and cook for another 2-3 minutes, until golden brown and cooked through. Repeat with the remaining batter.
  7. Serve: Serve the pancakes warm with maple syrup, whipped cream, or extra strawberries on top.

These Strawberry Buttermilk Pancakes are light, fluffy, and bursting with fresh berry flavor. Perfect for a special breakfast or weekend treat!

Butternut Squash Casserole

0

This Butternut Squash Casserole is a comforting and creamy dish that’s perfect for a cozy dinner or a holiday side. The natural sweetness of the squash is complemented by a buttery crumb topping, adding a delightful texture to each bite. With a hint of cinnamon and a touch of nutmeg, this casserole brings warm autumnal flavors to the table, making it a seasonal favorite. It’s a great way to celebrate the richness of butternut squash, and its easy preparation makes it a go-to dish for any gathering.

Ingredients:

  • 1 large butternut squash (about 2-3 lbs), peeled, seeded, and cubed
  • 2 tablespoons butter
  • 1/4 cup brown sugar
  • 1/2 teaspoon ground cinnamon
  • 1/4 teaspoon ground nutmeg
  • 1/4 teaspoon salt
  • 1/2 cup milk
  • 2 eggs, lightly beaten

For the topping:

  • 1/2 cup crushed crackers (such as Ritz)
  • 2 tablespoons butter, melted
  • 1/4 cup chopped pecans (optional)

Instructions:

  1. Prepare the squash: Preheat the oven to 350°F (175°C). Steam or boil the cubed butternut squash until tender, about 10-15 minutes. Drain and mash the squash until smooth.
  2. Combine ingredients: In a large bowl, mix the mashed squash with butter, brown sugar, cinnamon, nutmeg, salt, milk, and beaten eggs. Stir until all ingredients are well combined.
  3. Prepare the casserole: Transfer the squash mixture into a greased 9×13-inch baking dish.
  4. Make the topping: In a small bowl, mix the crushed crackers with melted butter and chopped pecans, if using. Sprinkle the topping evenly over the squash mixture.
  5. Bake: Place the dish in the oven and bake for 30-35 minutes, or until the casserole is set and the topping is golden brown.
  6. Serve: Let cool slightly before serving. Enjoy this dish warm as a side to your favorite mains!

Mushroom Stuffing

0

Mushroom stuffing is a hearty, flavorful side dish perfect for holiday dinners or special gatherings. Earthy mushrooms pair wonderfully with herbs, onions, and celery, creating a rich and savory stuffing that’s both delicious and comforting. Whether you serve it with roast turkey, chicken, or enjoy it as a vegetarian dish, this mushroom stuffing is sure to be a hit at the table. The combination of sautéed mushrooms and a medley of aromatic herbs adds depth to the dish, making it a satisfying and wholesome option.

Ingredients:

  • 1 loaf of crusty bread (about 8 cups, cubed)
  • 1/2 cup butter
  • 1 large onion, diced
  • 2 celery stalks, diced
  • 1 pound mushrooms (button, cremini, or a mix), sliced
  • 3 cloves garlic, minced
  • 2 teaspoons fresh thyme leaves
  • 1 tablespoon fresh sage, chopped
  • 1/4 cup fresh parsley, chopped
  • 2 cups vegetable or chicken broth
  • 2 large eggs, beaten
  • Salt and pepper, to taste

Instructions:

  1. Prepare the bread: Preheat your oven to 350°F (175°C). Spread the bread cubes on a baking sheet and toast in the oven for 10-12 minutes until golden and slightly crispy. Remove and set aside.
  2. Sauté the vegetables: In a large skillet, melt the butter over medium heat. Add the onions and celery, and cook until softened, about 5 minutes. Stir in the garlic and mushrooms, and sauté for another 8-10 minutes until the mushrooms are browned and have released their moisture.
  3. Add the herbs: Stir in the thyme, sage, and parsley. Season with salt and pepper. Cook for an additional 2-3 minutes until fragrant.
  4. Mix with bread: In a large mixing bowl, combine the toasted bread cubes and the mushroom mixture. Pour the broth over the mixture and toss to combine. Add the beaten eggs and stir until everything is evenly coated and slightly moistened.
  5. Bake the stuffing: Transfer the mixture to a greased 9×13-inch baking dish. Cover with foil and bake for 30 minutes. Remove the foil and bake for another 15-20 minutes, until the top is golden and crispy.
  6. Serve and enjoy: Let the stuffing cool slightly before serving.

This mushroom stuffing is the perfect balance of savory flavors and textures, making it an ideal side dish for any occasion.

Basic Egg Pasta

0

Making fresh egg pasta from scratch is a rewarding and delicious way to elevate any Italian dish. This simple dough is rich in flavor, thanks to the addition of eggs, which give the pasta a beautiful golden hue and a tender texture. With just a few basic ingredients and a little kneading, you can create homemade pasta that’s perfect for cutting into fettuccine, tagliatelle, or shaping into your favorite stuffed pasta like ravioli. Whether you’re serving it with a light butter sauce or a robust tomato ragu, this basic egg pasta will be a versatile staple in your kitchen.

Ingredients:

  • 2 cups all-purpose flour (plus extra for dusting)
  • 3 large eggs
  • 1/2 teaspoon salt
  • 1 tablespoon olive oil (optional, for added elasticity)

Instructions:

  1. Prepare the dough: On a clean surface, mound the flour and make a well in the center. Crack the eggs into the well and add the salt and olive oil (if using). Using a fork, gently beat the eggs, gradually incorporating the flour from the edges into the eggs until a sticky dough begins to form.
  2. Knead the dough: Once the mixture is too thick to mix with a fork, start using your hands to gather the dough together. Knead the dough for about 8-10 minutes, until it becomes smooth, elastic, and slightly springy to the touch. If the dough is too sticky, sprinkle a little more flour on the surface; if too dry, add a small amount of water, a teaspoon at a time.
  3. Rest the dough: Wrap the dough tightly in plastic wrap or cover it with a damp kitchen towel. Let it rest for at least 30 minutes at room temperature. This relaxes the gluten and makes rolling easier.
  4. Roll out the dough: Divide the dough into smaller portions and roll it out using a pasta machine or a rolling pin. Roll the dough until it reaches your desired thickness (usually about 1/16 inch for most pasta types).
  5. Cut and shape the pasta: Cut the rolled dough into your preferred pasta shapes, such as fettuccine, pappardelle, or even hand-cut ribbons. Alternatively, use the dough to make stuffed pastas like ravioli.
  6. Cook the pasta: Bring a large pot of salted water to a boil. Cook the fresh pasta for 2-3 minutes, or until al dente, and serve immediately with your sauce of choice.

Enjoy your homemade egg pasta!

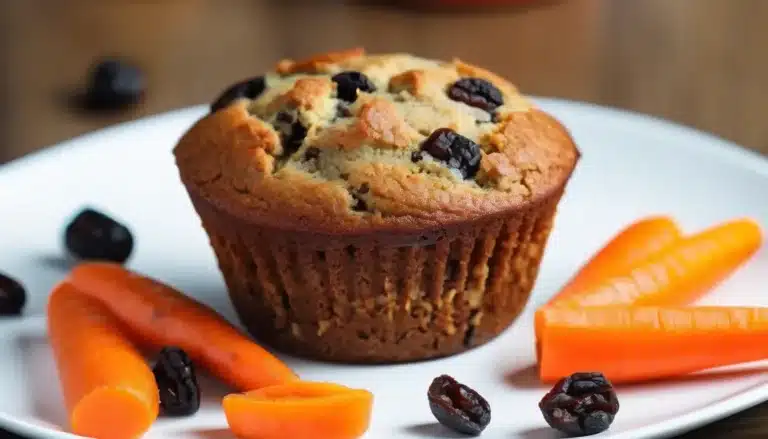
CARROT RAISIN MUFFINS

Carrot Raisin Muffins are a delightful, wholesome treat that combines the natural sweetness of carrots and raisins with warm spices like cinnamon and nutmeg. These muffins are moist, flavorful, and perfect for breakfast, snacks, or a light dessert. They’re easy to make and pack a lot of nutritious ingredients, making them a great way to sneak in some veggies and fiber. You can also customize them with nuts or seeds for added crunch!

Ingredients:

  • 1 1/2 cups all-purpose flour
  • 1 teaspoon baking powder
  • 1/2 teaspoon baking soda
  • 1/2 teaspoon salt
  • 1 teaspoon ground cinnamon
  • 1/4 teaspoon ground nutmeg
  • 1/4 teaspoon ground ginger (optional)
  • 2/3 cup granulated sugar or brown sugar
  • 2 large eggs
  • 1/3 cup vegetable oil or melted coconut oil
  • 1/2 cup unsweetened applesauce
  • 1 teaspoon vanilla extract
  • 1 1/2 cups finely grated carrots (about 2-3 medium carrots)
  • 1/2 cup raisins (soaked in warm water for 10 minutes and drained)
  • 1/2 cup chopped walnuts or pecans (optional)

Instructions:

  1. Preheat the oven to 350°F (175°C). Line a 12-cup muffin tin with paper liners or grease it lightly.
  2. Mix dry ingredients: In a medium bowl, whisk together the flour, baking powder, baking soda, salt, cinnamon, nutmeg, and ginger (if using).
  3. Whisk wet ingredients: In a separate large bowl, whisk together the sugar, eggs, vegetable oil, applesauce, and vanilla extract until well combined.
  4. Combine: Gradually stir the dry ingredients into the wet ingredients, mixing until just combined. Be careful not to overmix the batter.
  5. Add carrots and raisins: Fold in the grated carrots and raisins (and chopped nuts if using) until evenly distributed throughout the batter.
  6. Fill the muffin cups: Spoon the batter into the prepared muffin tin, filling each cup about two-thirds full.
  7. Bake: Bake for 18-20 minutes, or until a toothpick inserted into the center of a muffin comes out clean. Allow the muffins to cool in the pan for 5 minutes, then transfer them to a wire rack to cool completely.
  8. Serve: Enjoy your Carrot Raisin Muffins warm or at room temperature. They can be stored in an airtight container for 2-3 days or frozen for longer storage.

These Carrot Raisin Muffins are naturally sweet, moist, and perfect for a quick grab-and-go snack or a cozy breakfast with coffee or tea!

MANGO CHICKEN CURRY

Mango Chicken Curry is a vibrant, flavorful dish that blends the sweetness of ripe mangoes with the warm spices of a traditional curry. The juicy chicken simmers in a creamy sauce infused with coconut milk, curry spices, and the tropical brightness of mango, creating a perfect balance of sweet and savory. This dish is great for when you want something a little different from classic curries and is especially enjoyable when served over basmati rice or with naan bread.

Ingredients:

  • 1 1/2 lbs (700g) boneless, skinless chicken breasts or thighs, cut into bite-sized pieces
  • 1 tablespoon olive oil or coconut oil
  • 1 medium onion, finely chopped
  • 3 garlic cloves, minced
  • 1 tablespoon fresh ginger, minced
  • 2 tablespoons curry powder
  • 1 teaspoon ground cumin
  • 1/2 teaspoon ground turmeric
  • 1/2 teaspoon chili powder (optional, for heat)
  • 1 (14-ounce) can coconut milk
  • 1 large ripe mango, peeled and cubed
  • 1/2 cup chicken broth
  • 1 tablespoon tomato paste
  • Salt and pepper, to taste
  • Juice of 1 lime
  • Fresh cilantro, chopped, for garnish

Instructions:

  1. Sear the chicken: Heat the olive or coconut oil in a large skillet over medium-high heat. Add the chicken pieces, season with salt and pepper, and cook for 4-5 minutes until browned on all sides. Remove the chicken from the skillet and set aside.
  2. Sauté the aromatics: In the same skillet, reduce the heat to medium and add the chopped onion. Sauté for 3-4 minutes until softened. Add the minced garlic and ginger, cooking for another minute until fragrant.
  3. Add the spices: Stir in the curry powder, cumin, turmeric, and chili powder (if using). Cook the spices for 1-2 minutes to release their flavors.
  4. Prepare the sauce: Pour in the coconut milk, chicken broth, and tomato paste, stirring to combine. Bring the mixture to a simmer, then return the browned chicken to the skillet. Stir in the mango cubes and let the curry simmer for 15-20 minutes, or until the chicken is fully cooked and the sauce has thickened.
  5. Add lime juice: Once the curry is done, stir in the lime juice for a touch of acidity and brightness. Taste and adjust seasoning with more salt or pepper if needed.
  6. Garnish and serve: Garnish the curry with freshly chopped cilantro and serve over steamed basmati rice or alongside naan bread.

This Mango Chicken Curry is a delicious fusion of tropical sweetness and aromatic spices, perfect for an exciting twist on your regular curry night!

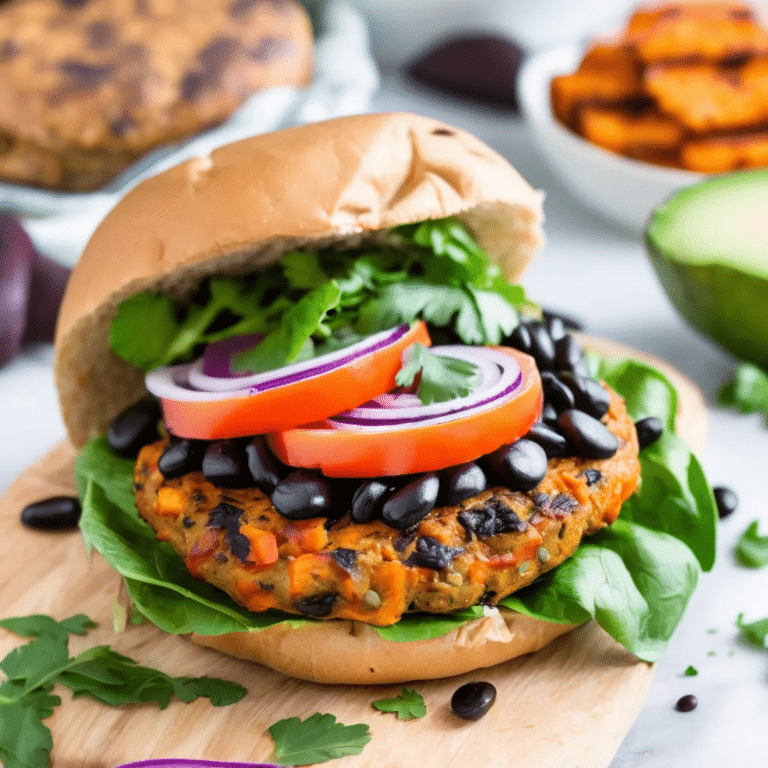
Sweet Potato & Black Bean Veggie Burgers

0

Sweet Potato & Black Bean Veggie Burgers are a delicious and wholesome alternative to traditional meat burgers, offering a perfect balance of flavor, texture, and nutrition. These burgers combine the natural sweetness of roasted sweet potatoes with the hearty, protein-packed goodness of black beans, all enhanced with a blend of spices and herbs. The result is a satisfying, slightly crispy patty that’s full of flavor and can hold its own in any bun. Whether you’re a vegetarian, looking to reduce your meat intake, or just in the mood for a lighter yet filling meal, these veggie burgers are sure to hit the spot. Serve them with your favorite toppings and a side of crispy fries or a fresh salad for a meal that’s both delicious and nourishing.

Ingredients:

  • 1 large sweet potato, peeled and cubed
  • 1 can (15 oz) black beans, drained and rinsed
  • 1/2 cup breadcrumbs (regular or panko)
  • 1/2 cup rolled oats
  • 1/4 cup chopped fresh cilantro or parsley
  • 1 small onion, finely chopped
  • 2 cloves garlic, minced
  • 1 teaspoon ground cumin
  • 1 teaspoon smoked paprika
  • 1/2 teaspoon chili powder
  • 1/2 teaspoon ground coriander
  • Salt and pepper, to taste
  • 1 egg (or flax egg for a vegan option)
  • 2 tablespoons olive oil (plus extra for cooking)
  • Whole wheat buns, for serving
  • Optional toppings: avocado, lettuce, tomato, red onion, pickles, or your favorite condiments

Instructions:

  1. Roast the Sweet Potato: Preheat your oven to 400°F (200°C). Toss the cubed sweet potato with 1 tablespoon of olive oil, salt, and pepper, then spread it out on a baking sheet. Roast for 20-25 minutes, or until the sweet potatoes are tender and slightly caramelized. Let them cool slightly.
  2. Mash the Base: In a large mixing bowl, mash the roasted sweet potatoes and black beans together with a fork or potato masher until mostly smooth, leaving a few chunks for texture.
  3. Add the Flavorings: Stir in the chopped onion, minced garlic, cilantro or parsley, cumin, smoked paprika, chili powder, coriander, breadcrumbs, oats, and the egg. Mix everything until well combined. The mixture should be moist but hold together when formed into a patty. If it’s too wet, add a bit more breadcrumbs.
  4. Form the Patties: Divide the mixture into 4-6 equal portions and shape each into a patty, about 1/2-inch thick. Place the patties on a plate and refrigerate for at least 20 minutes to help them firm up.
  5. Cook the Burgers: Heat 1-2 tablespoons of olive oil in a large skillet over medium heat. Add the patties and cook for 4-5 minutes on each side, or until golden brown and heated through.
  6. Assemble the Burgers: Toast the buns if desired, then assemble the burgers with your choice of toppings.

Sweet Potato & Black Bean Veggie Burgers are a flavorful and hearty option that’s perfect for a satisfying meal, offering a nutritious and delicious alternative to traditional burgers that everyone will love.

Orange Poppyseed Cake

0

This Orange Poppyseed Cake is a delightful balance of bright citrus flavor and subtle nuttiness from the poppy seeds. It’s a moist and fluffy cake, infused with the zest and juice of fresh oranges, giving it a naturally sweet and tangy flavor that pairs perfectly with the delicate crunch of poppy seeds. Whether you enjoy it with a cup of tea in the afternoon or serve it as a dessert at a special gathering, this cake is sure to impress with its refreshing and light taste. A simple orange glaze tops it off, adding a touch of sweetness and enhancing the citrusy goodness of the cake.

Ingredients:

  • 1 1/2 cups all-purpose flour
  • 1 1/2 teaspoons baking powder
  • 1/4 teaspoon salt
  • 1/2 cup unsalted butter, softened
  • 3/4 cup granulated sugar
  • 2 large eggs
  • 1 tablespoon orange zest (about 1 large orange)
  • 1/4 cup fresh orange juice
  • 1/2 cup milk
  • 2 tablespoons poppy seeds
  • 1 teaspoon vanilla extract

Orange Glaze:

  • 1/2 cup powdered sugar
  • 1-2 tablespoons fresh orange juice

Instructions:

  1. Preheat your oven to 350°F (175°C). Grease and flour a 9-inch round cake pan or a loaf pan.
  2. In a medium bowl, whisk together the flour, baking powder, and salt. Set aside.
  3. In a large bowl, cream the butter and sugar together until light and fluffy, about 3-4 minutes.
  4. Add the eggs one at a time, beating well after each addition. Mix in the orange zest, orange juice, and vanilla extract.
  5. Gradually add the flour mixture to the wet ingredients, alternating with the milk. Begin and end with the flour mixture. Stir in the poppy seeds until just combined.
  6. Pour the batter into the prepared pan and smooth the top with a spatula.
  7. Bake for 30-35 minutes, or until a toothpick inserted into the center comes out clean. Let the cake cool in the pan for 10 minutes, then transfer it to a wire rack to cool completely.
  8. For the glaze, whisk the powdered sugar and orange juice together until smooth. Drizzle over the cooled cake.

Enjoy your delicious Orange Poppyseed Cake!

CHRISTMAS YULE LOG

A Christmas Yule Log, or Bûche de Noël, is a classic holiday dessert originating from France. This festive cake is designed to resemble a wooden log and is traditionally served at Christmas. The Yule Log consists of a light, fluffy sponge cake rolled with a decadent filling like chocolate buttercream, then frosted to look like tree bark. It’s a fun, show-stopping dessert that’s as delicious as it is beautiful, and perfect for bringing holiday cheer to your table.

Ingredients:

For the Sponge Cake:

  • 4 large eggs, room temperature
  • 1/2 cup granulated sugar
  • 1/2 cup all-purpose flour
  • 1/4 cup unsweetened cocoa powder
  • 1 teaspoon vanilla extract
  • 1/4 teaspoon salt
  • Powdered sugar for dusting

For the Chocolate Buttercream Filling:

  • 1/2 cup unsalted butter, room temperature
  • 1 1/2 cups powdered sugar
  • 1/4 cup unsweetened cocoa powder
  • 1 teaspoon vanilla extract
  • 2-3 tablespoons heavy cream

For the Chocolate Ganache Frosting:

  • 1/2 cup heavy cream
  • 1 cup semi-sweet or dark chocolate chips

Optional Garnishes:

  • Powdered sugar (for a snowy effect)
  • Fresh berries, sprigs of rosemary, or edible decorations
  • Meringue mushrooms or chocolate shavings

Instructions:

Make the Sponge Cake:

  1. Preheat the oven to 350°F (175°C). Grease a 10×15-inch jelly roll pan and line it with parchment paper. Grease the parchment paper as well.
  2. Prepare the cake batter: In a large bowl, beat the eggs and sugar together using an electric mixer on high speed until the mixture is pale and fluffy, about 5 minutes. Add the vanilla extract.
  3. Sift dry ingredients: In a separate bowl, sift together the flour, cocoa powder, and salt. Gently fold the dry ingredients into the egg mixture, being careful not to deflate the batter.
  4. Bake: Pour the batter evenly into the prepared jelly roll pan, spreading it into the corners. Bake for 10-12 minutes, or until the cake springs back when gently pressed and a toothpick inserted in the center comes out clean.
  5. Roll the cake: While the cake is still warm, carefully invert it onto a clean kitchen towel dusted with powdered sugar. Gently peel off the parchment paper, then roll the cake (starting from the short end) with the towel inside. Let it cool completely while rolled, which helps it keep its shape.

Make the Chocolate Buttercream Filling:

  1. Beat the butter: In a medium bowl, beat the butter until creamy. Sift in the powdered sugar and cocoa powder, and beat until smooth. Add vanilla extract and 2-3 tablespoons of cream, beating until the filling is light and fluffy.

Assemble the Yule Log:

  1. Unroll the cake: Once the cake is completely cooled, carefully unroll it. Spread the chocolate buttercream filling evenly over the surface, then gently re-roll the cake without the towel.
  2. Prepare the ganache frosting: Heat the heavy cream in a small saucepan over medium heat until it begins to simmer. Pour the hot cream over the chocolate chips in a bowl, letting it sit for 2-3 minutes. Stir until smooth and glossy, then let it cool slightly until it thickens.
  3. Frost the cake: Spread the cooled ganache over the outside of the rolled cake, using a spatula or knife to create bark-like lines and textures. You can also use a fork to add more realistic wood patterns.

Garnish:

  1. Decorate: Dust the Yule Log with powdered sugar for a snowy effect, and garnish with berries, rosemary sprigs, or edible decorations like meringue mushrooms.
  2. Serve: Let the Yule Log chill for at least 1 hour before serving to allow the ganache to set.

This Christmas Yule Log is a stunning and delicious centerpiece for your holiday celebrations!

Creamy Pumpkin Vodka Sauce

0

This rich and flavorful sauce combines the earthy sweetness of pumpkin with the slight tang of tomato and the warmth of vodka. The addition of cream brings a luscious texture, making it perfect for a cozy pasta dish during the fall season. The pumpkin adds depth and a hint of sweetness, while the vodka helps to intensify the flavors. Serve it over your favorite pasta, and top with freshly grated Parmesan for a comforting and indulgent meal that’s sure to impress.

Ingredients:

  • 1 tablespoon olive oil
  • 1 small onion, finely chopped
  • 3 cloves garlic, minced
  • 1/2 cup vodka
  • 1/2 cup pumpkin purée (unsweetened)
  • 1/2 cup tomato sauce
  • 1 teaspoon dried oregano
  • 1/2 teaspoon crushed red pepper flakes (optional, for a little heat)
  • 1 cup heavy cream
  • Salt and black pepper to taste
  • 1/4 cup grated Parmesan cheese (plus extra for serving)
  • Fresh basil or parsley, for garnish
  • Cooked pasta of your choice

Instructions:

  1. Sauté the aromatics: In a large skillet, heat olive oil over medium heat. Add the chopped onion and cook until soft and translucent, about 5 minutes. Stir in the garlic and cook for another minute until fragrant.
  2. Deglaze with vodka: Pour in the vodka and allow it to cook down for about 2-3 minutes, reducing slightly.
  3. Add pumpkin and tomato: Stir in the pumpkin purée and tomato sauce, mixing well. Add the oregano and red pepper flakes if using. Simmer for about 5 minutes, allowing the flavors to meld together.
  4. Incorporate the cream: Reduce the heat to low and slowly stir in the heavy cream. Let the sauce simmer gently for another 5-7 minutes, stirring occasionally, until it thickens slightly.
  5. Season and finish: Season the sauce with salt and pepper to taste. Stir in the grated Parmesan cheese until melted and well combined.
  6. Serve: Toss the sauce with your favorite cooked pasta, garnish with fresh basil or parsley, and serve with extra Parmesan on the side.

Enjoy this creamy and comforting pumpkin vodka sauce with your favorite pasta for a delightful seasonal twist!