Home Blog Page 791

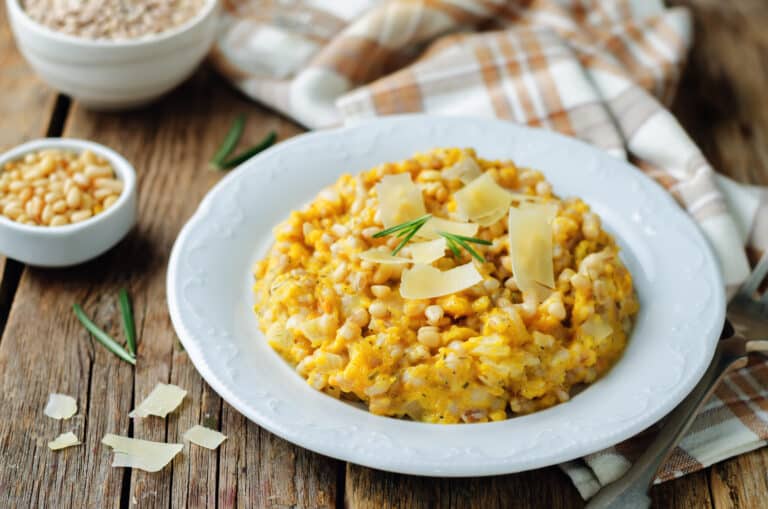
ROASTED PUMPKIN BARLEY RISOTTO

Roasted Pumpkin Barley Risotto is a hearty and flavorful twist on the classic risotto, featuring the nutty, chewy texture of barley paired with sweet, caramelized pumpkin. This dish combines the comforting warmth of roasted pumpkin with aromatic herbs and the earthy richness of barley, resulting in a perfect fall or winter meal. As the barley slowly cooks, it absorbs the flavors of vegetable broth, wine, and herbs, creating a creamy, satisfying texture without the need for constant stirring. Finished with a touch of Parmesan cheese and fresh herbs, this risotto is a delicious way to celebrate seasonal produce and enjoy a cozy, nutritious meal.

Ingredients

  • 2 cups pumpkin, peeled and cubed
  • 2 tablespoons olive oil, divided
  • Salt and pepper, to taste
  • 1 cup pearl barley
  • 1 onion, finely chopped
  • 2 cloves garlic, minced
  • 1 teaspoon fresh thyme leaves (or 1/2 teaspoon dried thyme)
  • 1/2 cup white wine
  • 4 cups vegetable broth, warmed
  • 1/2 cup Parmesan cheese, grated
  • 2 tablespoons butter
  • 2 tablespoons fresh parsley, chopped (for garnish)

Instructions

  1. Preheat the oven: Preheat your oven to 400°F (200°C).
  2. Roast the pumpkin: Toss the pumpkin cubes with 1 tablespoon of olive oil, salt, and pepper. Spread them on a baking sheet and roast for 20-25 minutes, or until tender and slightly caramelized. Set aside.
  3. Sauté the aromatics: In a large saucepan, heat the remaining 1 tablespoon of olive oil over medium heat. Add the onion and garlic, and sauté until the onion is translucent, about 5 minutes. Add the thyme and cook for another minute.
  4. Cook the barley: Add the barley to the saucepan and stir to coat the grains with oil. Pour in the white wine and cook until it is mostly absorbed.
  5. Add the broth: Gradually add the warm vegetable broth, one ladleful at a time, stirring occasionally. Allow each addition of broth to be absorbed before adding the next. Continue until the barley is tender and creamy, about 35-40 minutes.
  6. Combine and finish: Stir in the roasted pumpkin, Parmesan cheese, and butter. Season with salt and pepper to taste.
  7. Serve: Transfer the risotto to serving plates and garnish with chopped parsley.

Enjoy your Roasted Pumpkin Barley Risotto as a deliciously creamy and comforting dish that showcases the rich flavors of fall and the satisfying texture of barley.

CLAM AND CHORIZO PIZZA WITH ARUGALA SALAD

Clam and Chorizo Pizza with Arugula Salad is a gourmet twist on traditional pizza, combining the rich and savory flavors of clams and spicy chorizo with the freshness of a simple arugula salad. The briny sweetness of clams pairs beautifully with the robust, smoky taste of chorizo, while a sprinkle of mozzarella and Parmesan cheeses adds creamy richness. Topped with a fresh, peppery arugula salad tossed in a light lemon vinaigrette, this pizza is an exciting mix of flavors and textures, perfect for a special dinner or to impress guests at your next gathering.

Ingredients

For the Pizza:

  • 1 pizza dough (store-bought or homemade)
  • 1 tablespoon olive oil
  • 2 cloves garlic, minced
  • 4 ounces chorizo, sliced or crumbled
  • 1 cup fresh clams, shucked and chopped
  • 1 cup mozzarella cheese, shredded
  • 1/4 cup Parmesan cheese, grated
  • 1/2 teaspoon red pepper flakes (optional)
  • Salt and pepper, to taste
  • Cornmeal, for dusting

For the Arugula Salad:

  • 2 cups arugula
  • 1 tablespoon lemon juice
  • 2 tablespoons olive oil
  • Salt and pepper, to taste

Instructions

  1. Preheat the oven: Preheat your oven to 475°F (245°C). If using a pizza stone, place it in the oven to heat.
  2. Prepare the dough: On a lightly floured surface, roll out the pizza dough into a 12-inch circle. Transfer the dough to a pizza peel dusted with cornmeal to prevent sticking.
  3. Cook the chorizo: In a skillet over medium heat, cook the chorizo until browned and slightly crispy. Remove from heat and set aside.
  4. Assemble the pizza:
    • Brush the rolled-out dough with olive oil and sprinkle with minced garlic.
    • Evenly distribute the cooked chorizo and chopped clams over the dough.
    • Sprinkle the mozzarella and Parmesan cheeses over the top.
    • Season with red pepper flakes, salt, and pepper.
  5. Bake the pizza: Transfer the pizza to the preheated oven or onto the hot pizza stone. Bake for 10-12 minutes, or until the crust is golden brown and the cheese is melted and bubbly.
  6. Prepare the salad: In a large bowl, toss the arugula with lemon juice, olive oil, salt, and pepper.
  7. Finish and serve: Once the pizza is done, remove it from the oven and let it cool for a minute. Top with the arugula salad just before serving.

Enjoy your Clam and Chorizo Pizza with Arugula Salad as a sophisticated and flavorful dish that perfectly balances savory and fresh elements, ideal for a unique pizza night experience.

BBQ Drumsticks with Slaw

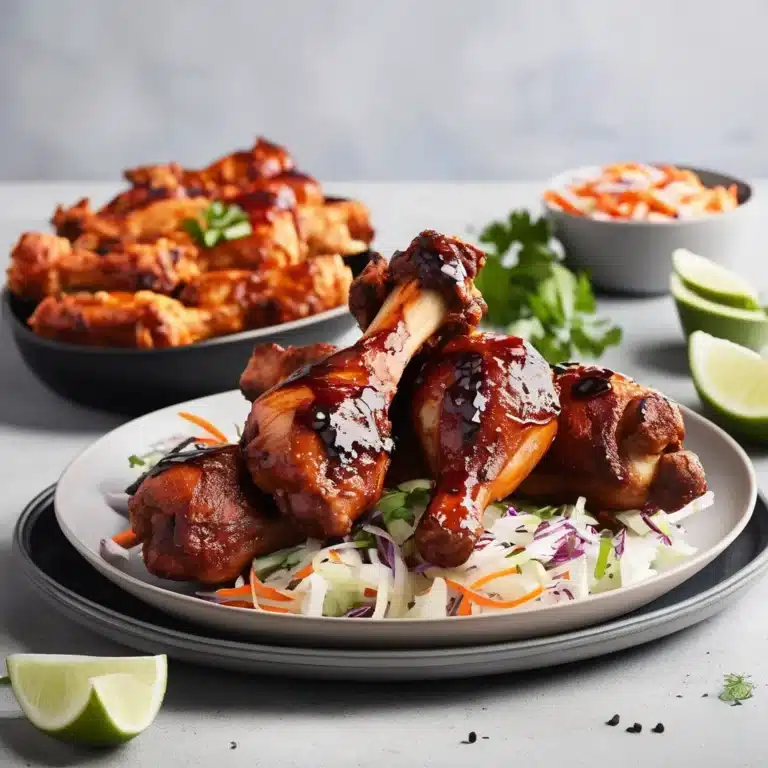
BBQ Drumsticks with Slaw is a mouthwatering dish that perfectly combines the smoky, tangy flavors of grilled chicken with a refreshing and crunchy slaw. This recipe is ideal for summer barbecues or any time you crave a delicious and satisfying meal. The drumsticks are marinated in a homemade barbecue sauce that caramelizes beautifully on the grill, creating a sticky, flavorful glaze. Paired with a crisp coleslaw made from fresh cabbage and carrots, dressed in a tangy vinaigrette, this dish offers a delightful contrast of flavors and textures that will have everyone coming back for more.

Ingredients:

  • For the BBQ Drumsticks:
    • 10 chicken drumsticks
    • 1 cup barbecue sauce (store-bought or homemade)
    • 2 tablespoons honey
    • 1 tablespoon soy sauce
    • 1 teaspoon smoked paprika
    • 1 teaspoon garlic powder
    • Salt and pepper to taste
  • For the Slaw:
    • 4 cups green cabbage, thinly sliced
    • 1 cup red cabbage, thinly sliced
    • 1 cup carrots, grated
    • 1/2 red onion, thinly sliced
    • 1/4 cup mayonnaise
    • 2 tablespoons apple cider vinegar
    • 1 tablespoon honey
    • 1 teaspoon Dijon mustard
    • Salt and pepper to taste

Instructions:

  1. Marinate the Drumsticks:
    • In a large bowl, combine the barbecue sauce, honey, soy sauce, smoked paprika, garlic powder, salt, and pepper. Mix well.
    • Add the chicken drumsticks to the bowl and toss to coat them evenly with the marinade. Cover and refrigerate for at least 1 hour or overnight for more flavor.
  2. Prepare the Slaw:
    • In a large mixing bowl, combine the green cabbage, red cabbage, carrots, and red onion.
    • In a separate small bowl, whisk together the mayonnaise, apple cider vinegar, honey, Dijon mustard, salt, and pepper until smooth.
    • Pour the dressing over the cabbage mixture and toss well to combine. Refrigerate the slaw for at least 30 minutes to allow the flavors to meld.
  3. Grill the Drumsticks:
    • Preheat the grill to medium-high heat. Lightly oil the grill grates.
    • Remove the drumsticks from the marinade and place them on the grill. Cook for about 25-30 minutes, turning occasionally, until the chicken is cooked through and has a nice char, with an internal temperature of 165°F (74°C).
    • Brush the drumsticks with additional barbecue sauce during the last few minutes of grilling for extra flavor.
  4. Serve:
    • Serve the BBQ drumsticks hot off the grill alongside the chilled slaw.
    • Garnish with fresh herbs like parsley or cilantro if desired.

Enjoy your BBQ Drumsticks with Slaw, a delightful combination of smoky, savory chicken and refreshing, crunchy vegetables!

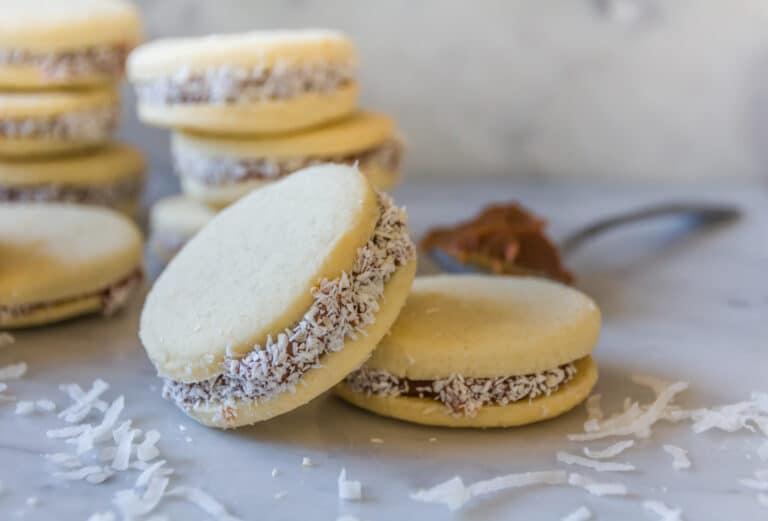
ALFAJORES

Alfajores are delightful, melt-in-your-mouth cookies that hail from South America, particularly popular in countries like Argentina and Peru. These delicate treats consist of two soft, buttery cookies sandwiching a luscious layer of dulce de leche, a rich caramel-like filling made from sweetened condensed milk. Often dusted with powdered sugar or rolled in coconut, alfajores offer a perfect balance of sweetness and texture, making them an irresistible indulgence. Ideal for special occasions or as a sweet afternoon snack with coffee or tea, these cookies are sure to captivate your taste buds with their exquisite flavor and tender crumb.

Ingredients

For the Cookies:

  • 1 cup unsalted butter, softened
  • 1/2 cup granulated sugar
  • 2 cups all-purpose flour
  • 1 cup cornstarch
  • 1 teaspoon baking powder
  • 1/4 teaspoon salt
  • 2 teaspoons vanilla extract
  • Zest of 1 lemon

For the Filling:

  • 1 cup dulce de leche (store-bought or homemade)

For Garnish:

  • Powdered sugar, for dusting
  • 1 cup shredded coconut (optional)

Instructions

  1. Make the cookie dough: In a large bowl, cream together the softened butter and granulated sugar until light and fluffy. Add the vanilla extract and lemon zest, mixing well.
  2. Combine dry ingredients: In a separate bowl, whisk together the flour, cornstarch, baking powder, and salt. Gradually add the dry ingredients to the butter mixture, mixing until a soft dough forms.
  3. Chill the dough: Divide the dough in half, wrap each half in plastic wrap, and refrigerate for at least 1 hour or until firm.
  4. Preheat the oven: Preheat your oven to 350°F (175°C). Line baking sheets with parchment paper.
  5. Roll and cut the cookies: On a lightly floured surface, roll out one portion of dough to about 1/4-inch thickness. Use a round cookie cutter (about 2 inches in diameter) to cut out cookies. Place them on the prepared baking sheets, spacing them about 1 inch apart. Repeat with the remaining dough.
  6. Bake the cookies: Bake the cookies for 8-10 minutes, or until they are just set and lightly golden around the edges. Allow them to cool on the baking sheets for a few minutes before transferring them to a wire rack to cool completely.
  7. Assemble the alfajores: Once the cookies are completely cool, spread a generous amount of dulce de leche onto the bottom of one cookie, then top with another cookie to create a sandwich. If desired, roll the edges in shredded coconut.
  8. Garnish: Dust the assembled alfajores with powdered sugar.

Enjoy your Alfajores as a delightful and indulgent treat that brings the taste of South America to your home, perfect for sharing with friends and family.

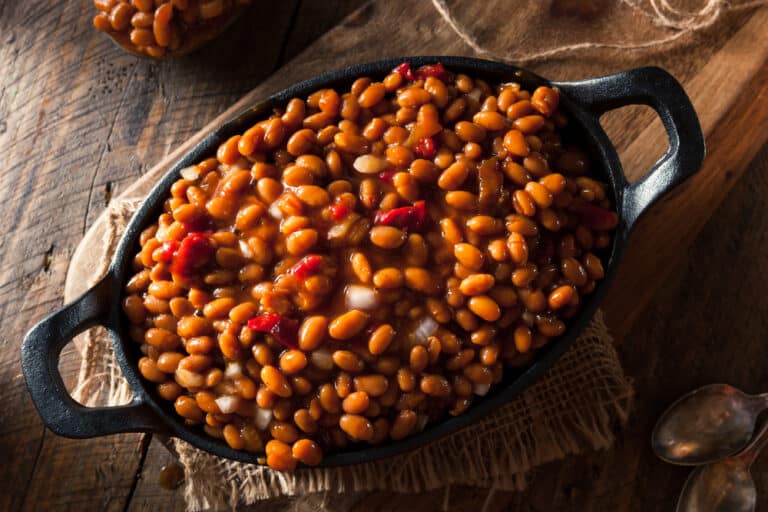
Smoky Pork & Boston Beans One-Pot

Smoky Pork & Boston Beans One-Pot is a comforting and flavorful dish that combines tender pork with rich, savory beans cooked in a luscious, smoky sauce. This hearty meal is perfect for cool evenings when you crave something warm and satisfying. The blend of spices and smoky bacon adds depth to the dish, while the beans provide a creamy texture and richness. It’s an easy, fuss-free recipe made in one pot, allowing the flavors to meld together beautifully as it simmers. Serve this dish with crusty bread or over rice for a complete meal that’s sure to please everyone at the table.

Ingredients:

  • 1 lb pork shoulder or pork belly, cut into bite-sized pieces
  • 4 slices of smoked bacon, chopped
  • 1 large onion, finely chopped
  • 2 cloves garlic, minced
  • 1 teaspoon smoked paprika
  • 1 teaspoon ground cumin
  • 1 teaspoon dried thyme
  • 1/2 teaspoon cayenne pepper (optional)
  • 1 can (14 oz) chopped tomatoes
  • 2 cans (15 oz each) cannellini beans or navy beans, drained and rinsed
  • 1/4 cup molasses
  • 2 tablespoons brown sugar
  • 1 tablespoon apple cider vinegar
  • 1 cup chicken broth
  • Salt and pepper to taste
  • Fresh parsley, chopped (for garnish)

Instructions:

  1. Cook the Bacon and Pork:
    • In a large, heavy-bottomed pot or Dutch oven, cook the chopped bacon over medium heat until it becomes crispy. Remove the bacon with a slotted spoon and set aside.
    • In the same pot, add the pork pieces and brown them on all sides, about 5-7 minutes. Remove the pork and set aside with the bacon.
  2. Sauté the Aromatics:
    • Add the chopped onion to the pot and cook until softened, about 5 minutes.
    • Stir in the minced garlic, smoked paprika, ground cumin, dried thyme, and cayenne pepper (if using). Cook for another minute until the spices are fragrant.
  3. Combine Ingredients:
    • Return the browned pork and bacon to the pot.
    • Add the chopped tomatoes, drained beans, molasses, brown sugar, apple cider vinegar, and chicken broth.
    • Stir well to combine all the ingredients and bring the mixture to a simmer.
  4. Simmer the One-Pot:
    • Reduce the heat to low, cover the pot, and let it simmer for about 1 to 1.5 hours, stirring occasionally, until the pork is tender and the flavors have melded together. Add more broth if needed to maintain a thick stew-like consistency.
    • Season with salt and pepper to taste.
  5. Serve:
    • Remove from heat and garnish with freshly chopped parsley.
    • Serve the smoky pork and beans hot, with crusty bread or over rice.

Enjoy your Smoky Pork & Boston Beans One-Pot, a robust and flavorful dish perfect for any occasion!

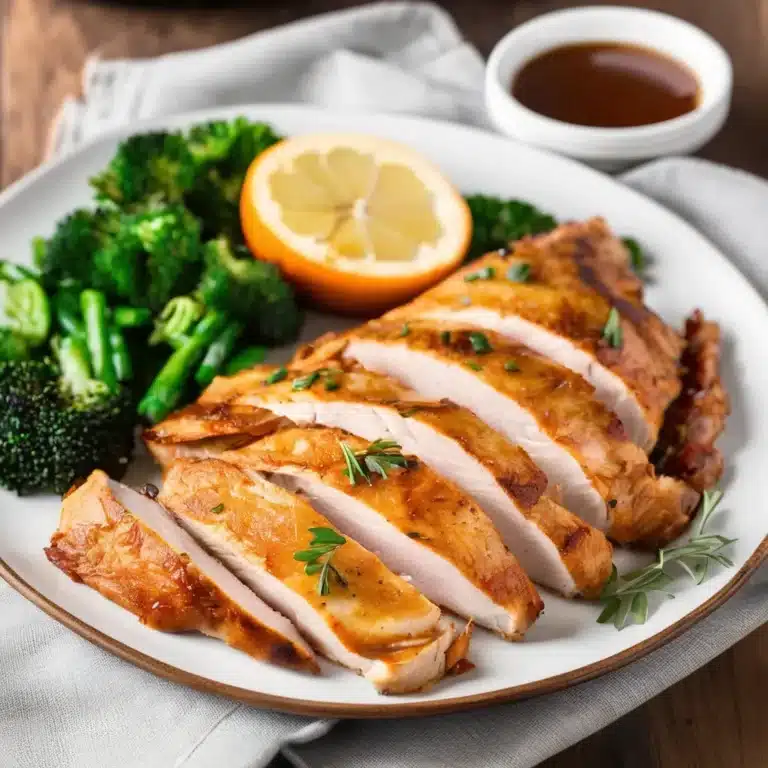
AIR FRYER TURKEY TENDERLOINS

Air Fryer Turkey Tenderloins are a simple and delicious way to enjoy juicy turkey with a crispy exterior, all in a fraction of the time it takes to roast in the oven. This recipe uses a flavorful marinade of olive oil, garlic, lemon, and herbs to infuse the tenderloins with savory goodness. The air fryer method ensures the turkey remains moist while developing a beautifully browned crust. Perfect for a quick weeknight dinner or a healthy meal prep option, these turkey tenderloins pair wonderfully with roasted vegetables or a fresh salad.

Ingredients

  • 2 turkey tenderloins (about 1 to 1.5 pounds total)
  • 2 tablespoons olive oil
  • 3 cloves garlic, minced
  • 1 tablespoon lemon juice
  • 1 teaspoon dried thyme
  • 1 teaspoon dried rosemary
  • 1 teaspoon paprika
  • Salt and pepper, to taste
  • Lemon wedges (for serving)

Instructions

  1. Prepare the marinade: In a small bowl, combine the olive oil, minced garlic, lemon juice, dried thyme, dried rosemary, paprika, salt, and pepper.
  2. Marinate the turkey: Place the turkey tenderloins in a resealable plastic bag or shallow dish. Pour the marinade over the turkey, ensuring it is well coated. Seal the bag or cover the dish and refrigerate for at least 30 minutes, or up to 2 hours for more flavor.
  3. Preheat the air fryer: Preheat your air fryer to 375°F (190°C) for about 5 minutes.
  4. Air fry the turkey: Remove the turkey from the marinade and place it in the air fryer basket. Cook for 18-20 minutes, flipping halfway through, until the internal temperature reaches 165°F (74°C) and the turkey is golden brown.
  5. Rest and serve: Let the turkey rest for a few minutes before slicing. Serve with lemon wedges on the side.

Enjoy your Air Fryer Turkey Tenderloins as a quick and flavorful dish that’s perfect for any occasion, bringing a healthy and tasty option to your table.

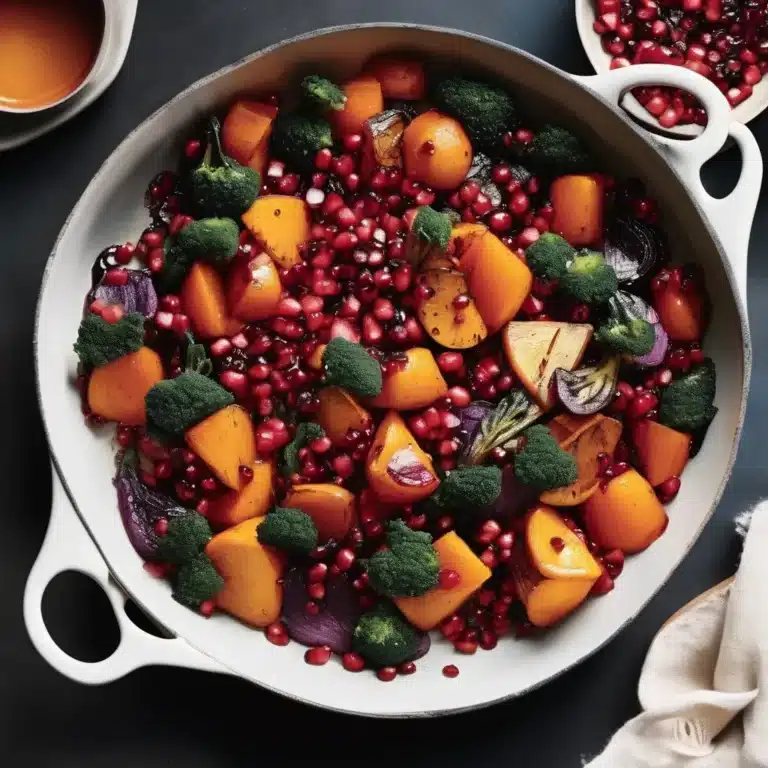
POMEGRANATE GLAZED WINTER VEGETABLES

Pomegranate Glazed Winter Vegetables is a vibrant and flavorful dish that beautifully highlights the bounty of seasonal produce. This recipe combines a medley of root vegetables, such as carrots, parsnips, and Brussels sprouts, all roasted to perfection and tossed in a tangy and sweet pomegranate glaze. The glaze, made with pomegranate molasses and a hint of honey, adds a luscious, sticky coating that enhances the natural sweetness of the vegetables. The result is a visually stunning and delicious side dish that pairs well with roasted meats or can stand alone as a vegetarian main. Ideal for holiday feasts or cozy winter dinners, these glazed vegetables bring a burst of color and flavor to your table.

Ingredients

  • 2 cups Brussels sprouts, halved
  • 2 large carrots, peeled and cut into sticks
  • 2 parsnips, peeled and cut into sticks
  • 1 red onion, cut into wedges
  • 2 tablespoons olive oil
  • Salt and pepper, to taste
  • 1/4 cup pomegranate molasses
  • 2 tablespoons honey
  • 1 tablespoon balsamic vinegar
  • 1 teaspoon Dijon mustard
  • 1/2 teaspoon ground cumin
  • 1/4 cup pomegranate seeds
  • 2 tablespoons fresh parsley, chopped

Instructions

  1. Preheat the oven: Preheat your oven to 400°F (200°C). Line a baking sheet with parchment paper.
  2. Prepare the vegetables: In a large bowl, toss the Brussels sprouts, carrots, parsnips, and red onion with olive oil, salt, and pepper until well coated.
  3. Roast the vegetables: Spread the vegetables in a single layer on the prepared baking sheet. Roast in the preheated oven for 25-30 minutes, or until they are tender and lightly caramelized, stirring halfway through.
  4. Make the pomegranate glaze: While the vegetables are roasting, combine the pomegranate molasses, honey, balsamic vinegar, Dijon mustard, and cumin in a small saucepan. Cook over medium heat, stirring occasionally, until the mixture thickens slightly, about 5 minutes. Remove from heat.
  5. Glaze the vegetables: Once the vegetables are done roasting, transfer them to a large serving bowl. Drizzle the pomegranate glaze over the top and toss gently to coat the vegetables evenly.
  6. Garnish and serve: Sprinkle the glazed vegetables with pomegranate seeds and chopped parsley before serving.

Enjoy your Pomegranate Glazed Winter Vegetables as a delicious and colorful side dish that brings a touch of elegance and seasonal flavor to any meal.

Philly-Style Cheese Dogs

Philly-Style Cheese Dogs are a delicious twist on the classic hot dog, inspired by the famous Philadelphia cheesesteak. This recipe takes juicy hot dogs and tops them with sautéed onions, bell peppers, and melted provolone cheese, all nestled in a soft hoagie roll. The combination of savory flavors and gooey cheese makes these dogs a perfect choice for game day or a fun family dinner. Easy to make and incredibly satisfying, Philly-Style Cheese Dogs bring a taste of Philadelphia street food to your backyard cookout or kitchen table.

Ingredients:

  • 8 hot dogs
  • 8 hoagie rolls or hot dog buns
  • 1 tablespoon olive oil
  • 1 large onion, thinly sliced
  • 1 green bell pepper, thinly sliced
  • 1 red bell pepper, thinly sliced
  • Salt and pepper to taste
  • 8 slices provolone cheese
  • Yellow mustard (optional)
  • Ketchup (optional)

Instructions:

  1. Sauté the Vegetables:
    • In a large skillet, heat the olive oil over medium heat.
    • Add the sliced onion and bell peppers. Season with salt and pepper.
    • Sauté the vegetables until they are soft and caramelized, about 10-12 minutes. Stir occasionally to prevent burning.
  2. Cook the Hot Dogs:
    • While the vegetables are cooking, grill or pan-fry the hot dogs over medium heat until they are cooked through and have a nice char, about 6-8 minutes.
  3. Assemble the Cheese Dogs:
    • Preheat your broiler.
    • Place the cooked hot dogs in the hoagie rolls. Top each hot dog with a generous portion of the sautéed onions and peppers.
    • Lay a slice of provolone cheese over the top of each hot dog.
  4. Melt the Cheese:
    • Place the assembled cheese dogs on a baking sheet and broil for 1-2 minutes, or until the cheese is melted and bubbly.
  5. Serve:
    • Serve the Philly-Style Cheese Dogs hot, with mustard and ketchup on the side for optional condiments.

Enjoy these Philly-Style Cheese Dogs as a fun and flavorful meal that captures the essence of a classic Philly cheesesteak in every bite!

FIG AND PROSCIUTTO FLATBREAD

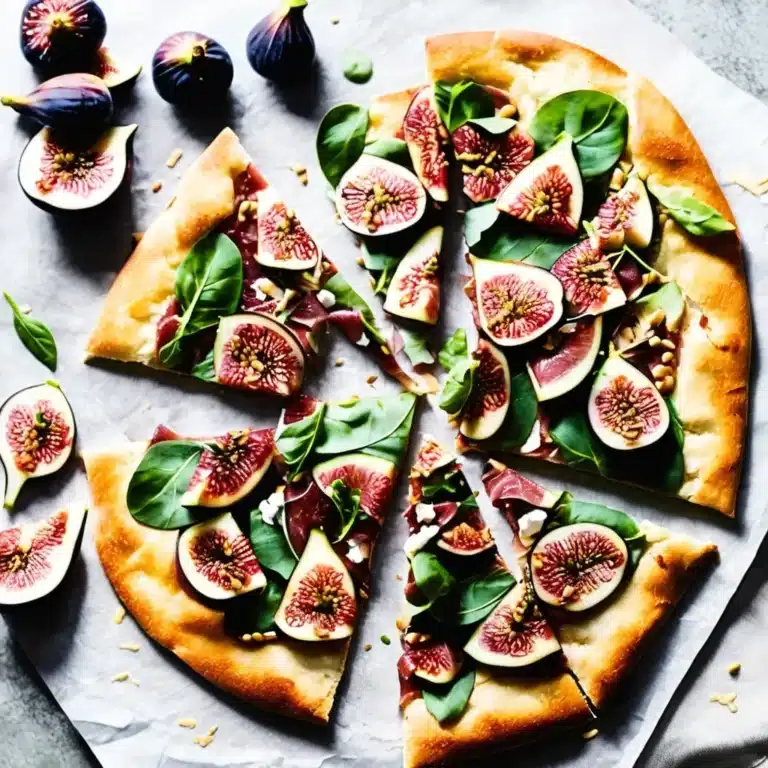
Fig and Prosciutto Flatbread is a sophisticated yet simple dish that beautifully marries the sweet and savory elements of ripe figs and salty prosciutto. This flatbread is perfect for a quick lunch, an elegant appetizer, or a light dinner. The creamy goat cheese base adds a tangy richness that complements the figs, while the prosciutto brings a savory depth. Finished with a drizzle of balsamic glaze and a sprinkle of fresh arugula, this flatbread offers a harmonious balance of flavors and textures that will impress your taste buds and guests alike.

Ingredients

  • 2 flatbreads or naan
  • 1 cup fresh figs, sliced
  • 4 ounces prosciutto, thinly sliced
  • 4 ounces goat cheese, softened
  • 1/2 cup shredded mozzarella cheese
  • 2 tablespoons olive oil
  • 1 tablespoon honey
  • Salt and pepper, to taste
  • 1 cup fresh arugula
  • Balsamic glaze, for drizzling

Instructions

  1. Preheat the oven: Preheat your oven to 400°F (200°C).
  2. Prepare the flatbreads: Place the flatbreads on a baking sheet. Brush each flatbread with olive oil, ensuring the edges are well-coated for a crispy crust.
  3. Add the cheese: Spread the softened goat cheese evenly over each flatbread. Sprinkle with shredded mozzarella cheese for added creaminess and melt.
  4. Assemble the toppings: Arrange the sliced figs evenly over the cheese-covered flatbreads. Tear the prosciutto into smaller pieces and distribute them evenly over the figs.
  5. Season and bake: Drizzle the flatbreads with honey and season with salt and pepper to taste. Bake in the preheated oven for 12-15 minutes, or until the cheese is melted and the edges are golden brown.
  6. Garnish: Remove the flatbreads from the oven and let them cool slightly. Top with fresh arugula and drizzle with balsamic glaze for added sweetness and tang.
  7. Serve: Slice the flatbreads into pieces and serve warm as an appetizer, light meal, or alongside a fresh salad.

Enjoy your Fig and Prosciutto Flatbread as a deliciously elegant dish that showcases a perfect blend of sweet and savory flavors, ideal for any gathering or meal.

VANILLA NO- CHURN ICE CREAM

Vanilla No-Churn Ice Cream is a creamy, dreamy dessert that’s incredibly easy to make at home without the need for an ice cream machine. This recipe combines rich, sweetened condensed milk with heavy whipping cream and fragrant vanilla extract, resulting in a silky-smooth texture and pure vanilla flavor. The beauty of this recipe is its simplicity and versatility, allowing you to enjoy a classic vanilla ice cream on its own or use it as a base for your favorite mix-ins, like chocolate chips or fruit. Perfect for satisfying your ice cream cravings with minimal effort, this no-churn method delivers a deliciously smooth treat that everyone will love.

Ingredients

  • 2 cups heavy whipping cream, chilled
  • 1 can (14 ounces) sweetened condensed milk
  • 2 teaspoons pure vanilla extract
  • Pinch of salt

Instructions

  1. Whip the cream: In a large mixing bowl, use an electric mixer to whip the chilled heavy cream until stiff peaks form. This should take about 3-4 minutes on medium-high speed.
  2. Prepare the ice cream base: In another bowl, combine the sweetened condensed milk, vanilla extract, and a pinch of salt. Mix well until smooth and combined.
  3. Fold the ingredients together: Gently fold the whipped cream into the sweetened condensed milk mixture. Use a spatula to fold the ingredients together carefully, ensuring not to deflate the whipped cream. The mixture should be smooth and well combined.
  4. Freeze the ice cream: Transfer the mixture into a 9×5-inch loaf pan or an airtight container. Smooth the top with a spatula, and cover with plastic wrap or a lid. Freeze for at least 6 hours or overnight until the ice cream is firm.
  5. Serve: Once frozen, scoop the vanilla no-churn ice cream into bowls or cones. Enjoy it plain or with your favorite toppings.

Indulge in your homemade Vanilla No-Churn Ice Cream as a classic and refreshing treat, perfect for any occasion or as a sweet ending to your day.