Home Blog Page 792

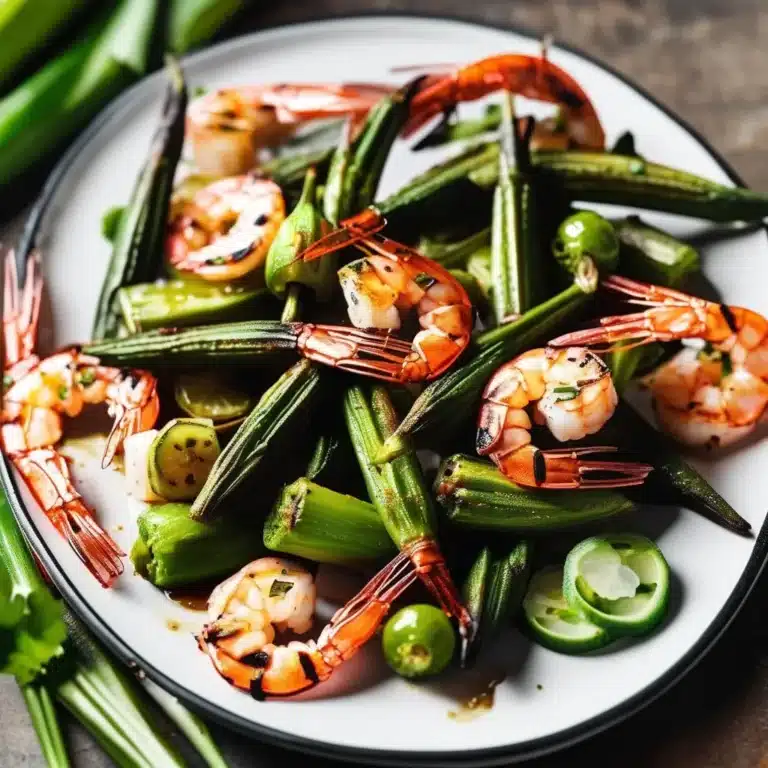
CHARRED OKRA AND SHRIMP

Charred Okra and Shrimp is a delightful dish that showcases the best of Southern cuisine with a touch of smoky, coastal flair. This recipe brings together the unique, slightly sweet flavor of okra with succulent shrimp, all seasoned and charred to perfection. The high-heat cooking method ensures the okra is tender with a slight crispness, while the shrimp remains juicy and flavorful. A simple seasoning of garlic, paprika, and lemon juice enhances the natural flavors of the ingredients, making it a delicious and easy-to-prepare meal. Perfect as a main course or a hearty appetizer, this dish is a great way to enjoy the vibrant tastes of summer.

Ingredients

  • 1 pound fresh okra, trimmed and cut in half lengthwise
  • 1 pound large shrimp, peeled and deveined
  • 3 tablespoons olive oil
  • 3 cloves garlic, minced
  • 1 teaspoon smoked paprika
  • 1/2 teaspoon cayenne pepper (optional)
  • Salt and pepper, to taste
  • Juice of 1 lemon
  • 2 tablespoons fresh parsley, chopped (for garnish)

Instructions

  1. Prepare the ingredients: In a large bowl, combine the okra and shrimp. Add olive oil, minced garlic, smoked paprika, cayenne pepper (if using), salt, and pepper. Toss until the okra and shrimp are evenly coated with the oil and spices.
  2. Preheat the skillet or grill: Heat a large cast-iron skillet or grill pan over high heat until very hot.
  3. Char the okra: Add the okra to the hot skillet in a single layer, cut side down. Cook for 3-4 minutes without stirring, until the okra is charred on one side. Flip the okra and cook for another 2-3 minutes until tender. Remove the okra from the skillet and set aside.
  4. Cook the shrimp: In the same skillet, add the shrimp in a single layer. Cook for 2-3 minutes on each side until the shrimp are opaque and charred.
  5. Combine and finish: Return the charred okra to the skillet with the shrimp. Squeeze the lemon juice over the top and toss everything together until well combined.
  6. Serve: Transfer the charred okra and shrimp to a serving platter. Garnish with fresh parsley and serve immediately.

Enjoy your Charred Okra and Shrimp as a flavorful and healthy dish that brings a taste of Southern and coastal cuisine to your table.

NEW MEXICO HATCH CHILE ENCHILADAS

New Mexico Hatch Chile Enchiladas are a flavorful and comforting dish that highlights the unique taste of Hatch chiles, known for their distinct balance of heat and sweetness. These enchiladas capture the essence of New Mexican cuisine, featuring corn tortillas filled with a blend of cheese and your choice of meat, smothered in a rich and spicy Hatch chile sauce. Roasted Hatch chiles provide a depth of flavor that is both earthy and slightly smoky, making these enchiladas a true southwestern delight. Perfect for family gatherings or a cozy dinner at home, this dish brings a taste of the Southwest to your table.

Ingredients

For the Hatch Chile Sauce:

  • 8 Hatch chiles, roasted, peeled, and chopped
  • 2 tablespoons vegetable oil
  • 1 onion, chopped
  • 3 cloves garlic, minced
  • 2 tablespoons flour
  • 2 cups chicken or vegetable broth
  • 1 teaspoon cumin
  • 1 teaspoon oregano
  • Salt and pepper, to taste

For the Enchiladas:

  • 12 corn tortillas
  • 2 cups shredded cheese (cheddar, Monterey Jack, or a blend)
  • 2 cups cooked chicken, beef, or pork (optional)
  • Vegetable oil, for frying
  • Fresh cilantro, chopped (for garnish)
  • Sour cream (for serving)

Instructions

  1. Prepare the Hatch Chile Sauce:
    • Heat the vegetable oil in a saucepan over medium heat. Add the chopped onion and garlic and sauté until the onion is translucent, about 3-4 minutes.
    • Stir in the flour and cook for 1 minute. Gradually add the chicken or vegetable broth, whisking to prevent lumps.
    • Add the chopped Hatch chiles, cumin, oregano, salt, and pepper. Simmer for 10-15 minutes until the sauce thickens. Use an immersion blender to puree the sauce until smooth, if desired.
  2. Prepare the Enchiladas:
    • Preheat your oven to 350°F (175°C). Lightly grease a 9×13-inch baking dish.
    • In a small skillet, heat a little vegetable oil over medium heat. Briefly fry each corn tortilla for about 10 seconds per side until pliable. Drain on paper towels.
    • Dip each tortilla in the Hatch chile sauce to coat. Fill with a few tablespoons of cheese and meat (if using), then roll up and place seam-side down in the baking dish.
  3. Assemble and Bake:
    • Pour the remaining sauce over the enchiladas and sprinkle with any remaining cheese.
    • Cover with foil and bake for 20 minutes. Remove the foil and bake for an additional 10 minutes until the cheese is melted and bubbly.
  4. Serve:
    • Garnish with fresh cilantro and serve with sour cream.

Enjoy your New Mexico Hatch Chile Enchiladas as a deliciously spicy and comforting dish that brings the authentic flavors of the Southwest to your kitchen.

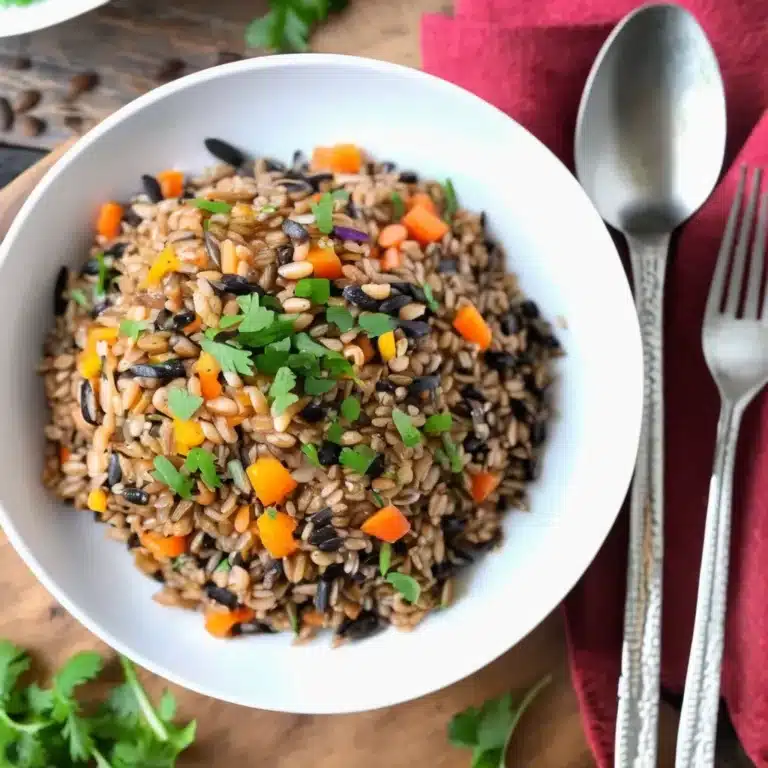
INSTANT POT FARRO AND WILD RICE PILAF

0

Instant Pot Farro and Wild Rice Pilaf is a hearty and nutritious side dish that combines the nutty flavors of farro and the earthy taste of wild rice. Cooking these grains together in the Instant Pot saves time and ensures perfectly cooked, tender grains every time. The pilaf is enhanced with aromatic vegetables, herbs, and a hint of lemon, creating a dish that’s both flavorful and satisfying. Perfect as a side for roasted meats or as a vegetarian main course, this pilaf adds a wholesome touch to any meal with its rich textures and vibrant flavors.

Ingredients

  • 1 cup farro
  • 1 cup wild rice
  • 2 tablespoons olive oil
  • 1 onion, finely chopped
  • 2 cloves garlic, minced
  • 2 carrots, diced
  • 2 celery stalks, diced
  • 4 cups vegetable or chicken broth
  • 1 teaspoon dried thyme
  • 1 teaspoon salt
  • 1/2 teaspoon black pepper
  • 1 bay leaf
  • 1/4 cup fresh parsley, chopped
  • 1 tablespoon lemon juice
  • 1/4 cup toasted almonds or pecans (optional)

Instructions

  1. Rinse the grains: Rinse the farro and wild rice under cold water until the water runs clear. Drain and set aside.
  2. Sauté the vegetables: Set the Instant Pot to “Sauté” mode and heat the olive oil. Add the chopped onion, garlic, carrots, and celery. Sauté for 3-4 minutes until the vegetables are soft and the onion is translucent.
  3. Add the grains and broth: Stir in the rinsed farro and wild rice, ensuring they are well mixed with the vegetables. Add the broth, dried thyme, salt, pepper, and bay leaf. Stir to combine.
  4. Pressure cook: Secure the lid on the Instant Pot and set the valve to the sealing position. Select “Pressure Cook” or “Manual” and set the timer for 22 minutes.
  5. Natural release: Once the cooking cycle is complete, allow the pressure to release naturally for 10 minutes, then carefully switch the valve to the venting position to release any remaining pressure.
  6. Finish the pilaf: Remove the lid and discard the bay leaf. Stir in the fresh parsley and lemon juice. Adjust seasoning to taste.
  7. Serve: Transfer the pilaf to a serving bowl and garnish with toasted almonds or pecans, if desired.

Enjoy your Instant Pot Farro and Wild Rice Pilaf as a wholesome and flavorful dish that complements any meal, offering a satisfying mix of textures and tastes.

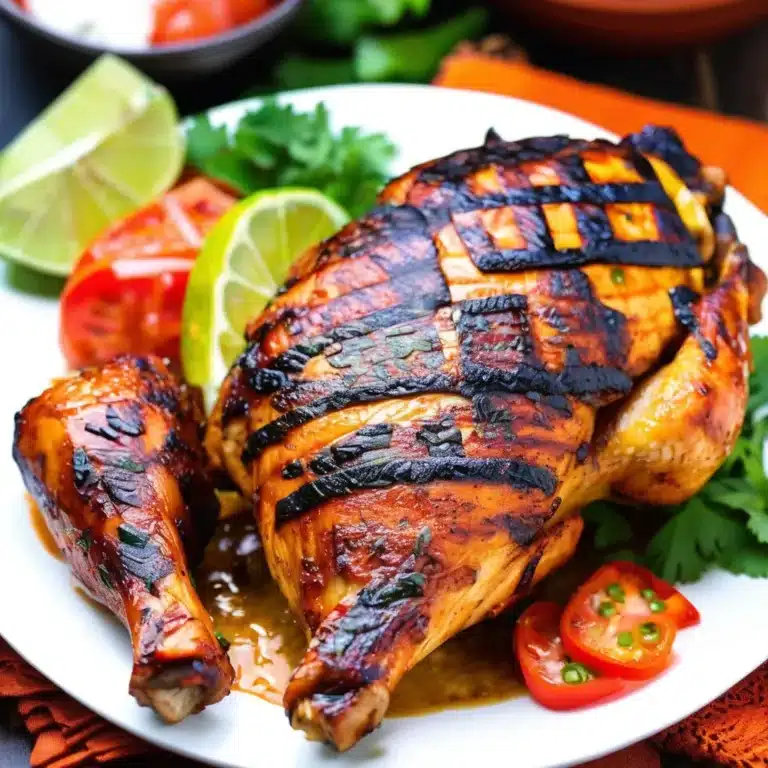
GRILLED TAJIN CHICKEN

Grilled Tajín Chicken is a zesty and flavorful dish that combines the vibrant taste of citrus with the smoky heat of chili peppers, thanks to the popular Mexican seasoning, Tajín. This seasoning blend of chili peppers, lime, and salt gives the chicken a tantalizing kick, making it an excellent choice for a summer barbecue or any time you crave bold flavors. The marinade infuses the chicken with a delicious tanginess, while grilling imparts a smoky char that enhances the overall taste. Serve this dish with a side of grilled vegetables or a fresh salad for a complete and satisfying meal that’s sure to impress your guests.

Ingredients

  • 4 boneless, skinless chicken breasts
  • 2 tablespoons olive oil
  • 2 tablespoons Tajín seasoning
  • 1 tablespoon lime juice
  • 1 tablespoon orange juice
  • 2 cloves garlic, minced
  • 1 teaspoon honey
  • Salt and pepper, to taste
  • Lime wedges (for serving)
  • Fresh cilantro, chopped (for garnish)

Instructions

  1. Prepare the marinade: In a small bowl, whisk together the olive oil, Tajín seasoning, lime juice, orange juice, minced garlic, honey, salt, and pepper until well combined.
  2. Marinate the chicken: Place the chicken breasts in a resealable plastic bag or a shallow dish. Pour the marinade over the chicken, ensuring each piece is well coated. Seal the bag or cover the dish and refrigerate for at least 30 minutes or up to 2 hours for maximum flavor.
  3. Preheat the grill: Preheat your grill to medium-high heat. Lightly oil the grill grates to prevent sticking.
  4. Grill the chicken: Remove the chicken from the marinade and place it on the preheated grill. Cook for 6-7 minutes per side, or until the internal temperature reaches 165°F (74°C) and the chicken is cooked through with grill marks.
  5. Rest the chicken: Transfer the grilled chicken to a cutting board and let it rest for 5 minutes to allow the juices to redistribute.
  6. Serve: Slice the chicken and garnish with fresh cilantro. Serve with lime wedges on the side.

Enjoy your Grilled Tajín Chicken as a deliciously tangy and spicy dish that brings a taste of Mexico to your table, perfect for any occasion!

SPICY ROASTED HONEYNUT SQUASH

Spicy Roasted Honeynut Squash is a delectable dish that highlights the natural sweetness and nutty flavor of honeynut squash, enhanced with a touch of heat and spice. This smaller cousin of the butternut squash offers a rich, caramelized flavor when roasted, making it the perfect base for a bold and spicy seasoning mix. The combination of sweet and spicy flavors creates a delightful contrast, while the roasting process brings out the squash’s natural sugars, giving it a crispy, caramelized exterior and a soft, tender interior. This dish is perfect as a side for roasted meats or as a delicious vegetarian main course, adding warmth and depth to any meal.

Ingredients

  • 2 honeynut squash, halved and seeds removed
  • 2 tablespoons olive oil
  • 1 tablespoon honey
  • 1 teaspoon smoked paprika
  • 1/2 teaspoon cayenne pepper (adjust to taste)
  • 1/2 teaspoon ground cumin
  • 1/2 teaspoon garlic powder
  • Salt and pepper, to taste
  • 1 tablespoon fresh parsley, chopped (for garnish)
  • Lemon wedges (for serving)

Instructions

  1. Preheat the oven: Preheat your oven to 400°F (200°C). Line a baking sheet with parchment paper for easy cleanup.
  2. Prepare the squash: Slice the honeynut squash halves into wedges, about 1 inch thick. Place the wedges in a large mixing bowl.
  3. Season the squash: In a small bowl, whisk together the olive oil, honey, smoked paprika, cayenne pepper, cumin, garlic powder, salt, and pepper. Pour the mixture over the squash wedges and toss to coat evenly.
  4. Roast the squash: Arrange the seasoned squash wedges in a single layer on the prepared baking sheet. Roast in the preheated oven for 25-30 minutes, flipping halfway through, until the squash is tender and the edges are caramelized.
  5. Garnish and serve: Remove the squash from the oven and transfer to a serving platter. Garnish with chopped parsley and serve with lemon wedges for a burst of freshness.

Enjoy your Spicy Roasted Honeynut Squash as a flavorful and satisfying dish that beautifully balances sweetness and spice, perfect for adding a touch of warmth to your autumn or winter meals.

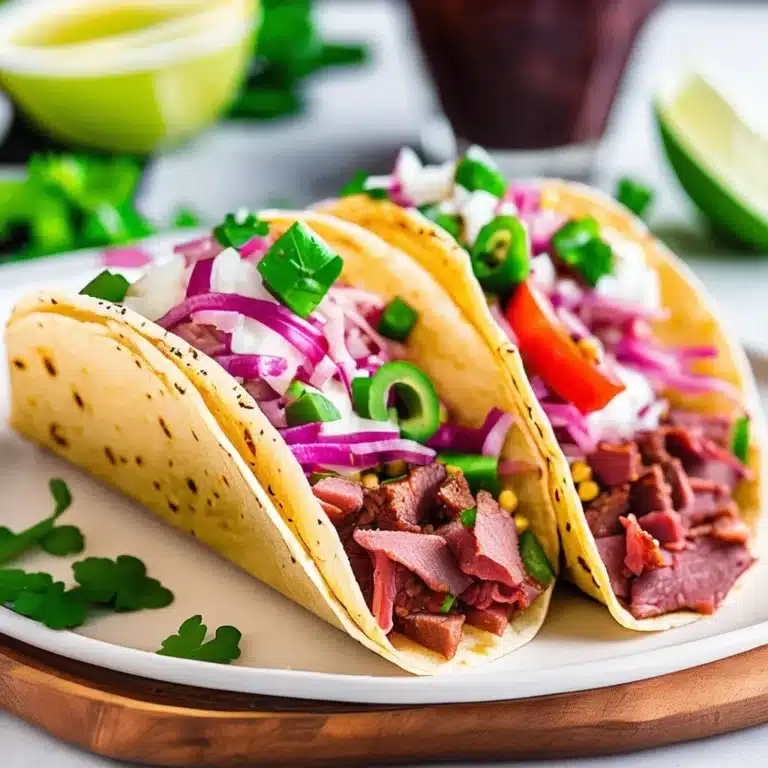
IRISH TACOS WITH CORNED BEEF

Irish Tacos with Corned Beef are a creative fusion dish that combines the savory flavors of traditional Irish corned beef with the fun and customizable nature of tacos. This dish features tender, seasoned corned beef, which is shredded and piled onto soft tortillas, then topped with tangy cabbage slaw and drizzled with a creamy horseradish sauce. Perfect for using up leftover corned beef or as a festive treat for St. Patrick’s Day, these tacos offer a unique way to enjoy classic Irish flavors in a modern, handheld form. Serve them with a side of crispy potatoes or your favorite Irish beer for a complete and satisfying meal.

Ingredients

For the Corned Beef:

  • 1 1/2 to 2 pounds cooked corned beef, shredded
  • 1 tablespoon vegetable oil
  • 1 teaspoon garlic powder
  • 1 teaspoon onion powder
  • 1 teaspoon smoked paprika
  • Salt and pepper, to taste

For the Cabbage Slaw:

  • 2 cups green cabbage, thinly sliced
  • 1/2 cup carrots, grated
  • 1/4 cup red onion, thinly sliced
  • 2 tablespoons apple cider vinegar
  • 1 tablespoon olive oil
  • Salt and pepper, to taste

For the Horseradish Sauce:

  • 1/2 cup sour cream
  • 2 tablespoons prepared horseradish
  • 1 tablespoon lemon juice
  • Salt and pepper, to taste

For Serving:

  • 8 small flour or corn tortillas, warmed
  • Fresh cilantro or parsley, chopped (for garnish)

Instructions

  1. Prepare the corned beef: In a large skillet, heat the vegetable oil over medium heat. Add the shredded corned beef and sprinkle with garlic powder, onion powder, smoked paprika, salt, and pepper. Cook for 5-7 minutes, stirring occasionally, until the beef is heated through and slightly crispy on the edges.
  2. Make the cabbage slaw: In a medium bowl, combine the cabbage, carrots, and red onion. Drizzle with apple cider vinegar and olive oil, then toss to coat. Season with salt and pepper to taste. Set aside to marinate while preparing the other components.
  3. Prepare the horseradish sauce: In a small bowl, whisk together the sour cream, prepared horseradish, lemon juice, salt, and pepper until smooth. Adjust seasoning to taste.
  4. Assemble the tacos: Divide the corned beef evenly among the warmed tortillas. Top with a generous portion of cabbage slaw and a drizzle of horseradish sauce.
  5. Garnish and serve: Garnish the tacos with chopped cilantro or parsley. Serve immediately.

Enjoy your Irish Tacos with Corned Beef as a flavorful and fun dish that brings a new twist to traditional Irish cuisine, perfect for any occasion!

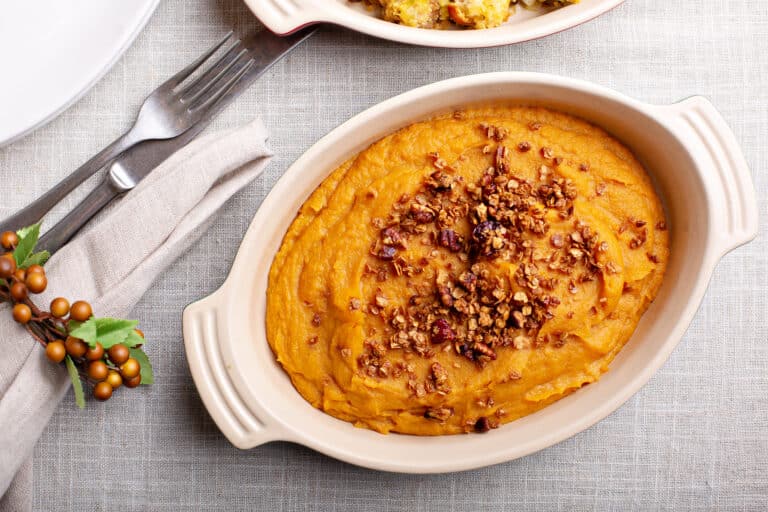
SPICY SAVORY MASHED SWEET POTATO

Spicy Savory Mashed Sweet Potatoes are a delightful twist on the classic sweet potato side dish, combining the natural sweetness of the potatoes with savory spices and a hint of heat. This dish is perfect for those who enjoy a balance of flavors, offering a creamy and smooth texture with a spicy kick. Ideal for holiday dinners, potlucks, or weeknight meals, these mashed sweet potatoes pair beautifully with roasted meats or can be enjoyed as a standalone dish. The combination of garlic, cayenne, and smoked paprika adds depth and complexity, making these potatoes a memorable and delicious addition to any meal.

Ingredients

  • 4 large sweet potatoes, peeled and cubed
  • 2 tablespoons butter
  • 2 tablespoons olive oil
  • 3 cloves garlic, minced
  • 1 teaspoon smoked paprika
  • 1/2 teaspoon cayenne pepper (adjust to taste)
  • 1/2 teaspoon ground cumin
  • Salt and pepper, to taste
  • 1/4 cup heavy cream or coconut milk (optional, for creaminess)
  • 2 tablespoons fresh chives or parsley, chopped (for garnish)

Instructions

  1. Cook the sweet potatoes: Place the sweet potato cubes in a large pot and cover with cold water. Bring to a boil over high heat, then reduce the heat to medium and simmer for 15-20 minutes, or until the potatoes are tender and easily pierced with a fork. Drain the potatoes and return them to the pot.
  2. Sauté the garlic: In a small skillet, heat the butter and olive oil over medium heat. Add the minced garlic and sauté for 1-2 minutes until fragrant and lightly golden. Remove from heat.
  3. Mash the potatoes: Add the sautéed garlic and oil mixture, smoked paprika, cayenne pepper, cumin, salt, and pepper to the pot with the drained sweet potatoes. Mash the potatoes using a potato masher or hand mixer until smooth and well combined. For a creamier texture, stir in the heavy cream or coconut milk.
  4. Adjust seasoning: Taste the mashed sweet potatoes and adjust the seasoning if needed, adding more salt, pepper, or cayenne to taste.
  5. Serve: Transfer the mashed sweet potatoes to a serving bowl and garnish with chopped chives or parsley.

Enjoy your Spicy Savory Mashed Sweet Potatoes as a deliciously flavorful side dish that adds a touch of spice and warmth to any meal.

VEGETABLE PAKORAS

Vegetable Pakoras are a beloved Indian snack known for their crispy exterior and flavorful, spiced interior. Made by coating a mix of vegetables in a seasoned chickpea flour batter, these golden fritters are deep-fried to perfection, creating a delightful contrast of textures. Common vegetables used in pakoras include potatoes, onions, spinach, and cauliflower, each contributing its unique taste and texture to the dish. Perfect for serving as an appetizer or a tea-time snack, Vegetable Pakoras are often accompanied by tangy chutneys or sauces, adding a burst of flavor that enhances every bite. This dish is a perfect example of how simple ingredients can be transformed into something incredibly satisfying and delicious.

Ingredients

  • 1 cup chickpea flour (besan)
  • 1 teaspoon cumin seeds
  • 1 teaspoon coriander powder
  • 1/2 teaspoon turmeric powder
  • 1/2 teaspoon red chili powder
  • Salt, to taste
  • Water, as needed
  • 1 potato, thinly sliced
  • 1 onion, thinly sliced
  • 1 cup spinach leaves, chopped
  • 1/2 cup cauliflower florets, chopped
  • 2 green chilies, finely chopped (optional)
  • Vegetable oil, for frying

Instructions

  1. Prepare the batter: In a large mixing bowl, combine chickpea flour, cumin seeds, coriander powder, turmeric powder, red chili powder, and salt. Gradually add water, whisking continuously, until you achieve a smooth, thick batter.
  2. Prepare the vegetables: Add the potato slices, onion slices, spinach, cauliflower, and green chilies (if using) to the batter. Mix well to ensure the vegetables are evenly coated with the batter.
  3. Heat the oil: In a deep frying pan or wok, heat vegetable oil over medium-high heat until it reaches 350°F (175°C).
  4. Fry the pakoras: Carefully drop spoonfuls of the vegetable batter into the hot oil, frying in batches to avoid overcrowding. Fry each batch for 4-5 minutes, turning occasionally, until the pakoras are golden brown and crispy.
  5. Drain and serve: Remove the pakoras from the oil using a slotted spoon and drain on paper towels to remove excess oil.
  6. Serve: Serve the Vegetable Pakoras hot with mint chutney, tamarind chutney, or ketchup.

Enjoy your Vegetable Pakoras as a flavorful and crispy snack that captures the essence of Indian street food, perfect for sharing with friends and family.

SAVORY KUMQUAT CHICKEN

Savory Kumquat Chicken is a deliciously unique dish that brings together the vibrant citrus flavor of kumquats with tender, juicy chicken. Kumquats, with their sweet yet tart taste, create a delightful contrast when combined with soy sauce, ginger, and garlic in a savory glaze. This dish offers a perfect balance of sweet, tangy, and savory notes, making it an exciting addition to your dinner repertoire. Quick and easy to prepare, Savory Kumquat Chicken is perfect for weeknight meals or special occasions, providing a burst of freshness and flavor that pairs beautifully with rice or a side of steamed vegetables.

Ingredients

  • 4 boneless, skinless chicken breasts
  • Salt and pepper, to taste
  • 2 tablespoons olive oil
  • 1 cup kumquats, sliced and seeds removed
  • 3 cloves garlic, minced
  • 1 tablespoon fresh ginger, minced
  • 1/4 cup soy sauce
  • 2 tablespoons honey
  • 1 tablespoon rice vinegar
  • 1 tablespoon sesame oil
  • 1 tablespoon cornstarch mixed with 2 tablespoons water (optional, for thickening)
  • 2 green onions, sliced (for garnish)
  • 1 tablespoon sesame seeds (for garnish)

Instructions

  1. Season and sear the chicken: Season the chicken breasts with salt and pepper. Heat olive oil in a large skillet over medium-high heat. Add the chicken breasts and sear for 5-6 minutes on each side, or until golden brown and cooked through. Remove the chicken from the skillet and set aside.
  2. Prepare the sauce: In the same skillet, add the sliced kumquats, garlic, and ginger. Sauté for 2-3 minutes until the kumquats start to soften.
  3. Make the glaze: Stir in the soy sauce, honey, rice vinegar, and sesame oil. Bring the mixture to a simmer, allowing the flavors to meld for about 5 minutes. If a thicker sauce is desired, add the cornstarch slurry and stir until the sauce thickens.
  4. Coat the chicken: Return the chicken to the skillet, spooning the kumquat sauce over the chicken to coat it thoroughly. Simmer for an additional 2-3 minutes to heat the chicken through and allow the flavors to infuse.
  5. Serve: Transfer the chicken to a serving platter, garnish with sliced green onions and sesame seeds.

Enjoy your Savory Kumquat Chicken as a flavorful and aromatic dish that highlights the bright and tangy taste of kumquats, perfect for any occasion.

HOT WATER CORNBREAD

Hot Water Cornbread is a classic Southern dish known for its simplicity and rich, comforting flavor. This quick and easy recipe uses a few basic ingredients to create golden, crispy cornbread patties with a soft and tender interior. The cornbread is made by combining cornmeal with boiling water, resulting in a unique texture and flavor that sets it apart from traditional cornbread. Perfect as a side dish for collard greens, fried chicken, or chili, Hot Water Cornbread brings a taste of the South to your table, offering warmth and nostalgia with every bite.

Ingredients

  • 1 cup cornmeal (yellow or white)
  • 1 teaspoon salt
  • 1 teaspoon sugar (optional)
  • 1 cup boiling water
  • 2 tablespoons butter or bacon grease
  • Vegetable oil, for frying

Instructions

  1. Prepare the cornmeal mixture: In a large bowl, combine the cornmeal, salt, and sugar (if using). Gradually stir in the boiling water until the mixture is smooth and thick.
  2. Add fat: Stir in the butter or bacon grease until fully incorporated. Let the mixture sit for 5-10 minutes to thicken slightly.
  3. Heat the oil: Heat about 1/4 inch of vegetable oil in a large skillet over medium-high heat until shimmering.
  4. Form the patties: Using a spoon or your hands, scoop about 2 tablespoons of the cornmeal mixture and shape it into a small patty. Repeat with the remaining mixture.
  5. Fry the cornbread: Carefully place the patties in the hot oil, a few at a time, and fry for 3-4 minutes per side, or until golden brown and crispy. Drain on paper towels.
  6. Serve: Serve the Hot Water Cornbread warm with your favorite Southern dishes.

Enjoy your Hot Water Cornbread as a delicious and traditional Southern side dish that adds a comforting touch to any meal.