Home Blog Page 790

VEGETARIAN HATCH GREEN CHILE

Vegetarian Hatch Green Chile Enchiladas are a delicious, hearty, and satisfying dish that brings the robust flavors of Hatch green chiles to your table. These enchiladas are filled with a savory mixture of black beans, corn, and sautéed vegetables, all wrapped in corn tortillas and smothered in a creamy Hatch green chile sauce. Topped with melted cheese and baked to perfection, these enchiladas offer a delightful combination of spicy, tangy, and cheesy goodness. Perfect for a weeknight dinner or a festive occasion, these enchiladas will please both vegetarians and meat-lovers alike with their rich flavors and satisfying textures.

Ingredients

For the Green Chile Sauce:

  • 1 tablespoon olive oil
  • 1 small onion, chopped
  • 2 cloves garlic, minced
  • 1 1/2 cups roasted Hatch green chiles, chopped
  • 1 cup vegetable broth
  • 1/2 cup sour cream or Greek yogurt
  • 1 teaspoon ground cumin
  • Salt and pepper, to taste

For the Enchiladas:

  • 2 tablespoons olive oil
  • 1 small onion, chopped
  • 1 red bell pepper, chopped
  • 2 cups fresh spinach, chopped
  • 1 can (15 ounces) black beans, rinsed and drained
  • 1 cup corn kernels (fresh, frozen, or canned)
  • 1 teaspoon chili powder
  • Salt and pepper, to taste
  • 8-10 corn tortillas
  • 1 1/2 cups shredded cheese (such as Monterey Jack or cheddar)
  • Fresh cilantro, chopped (for garnish)

Instructions

  1. Make the green chile sauce:
    • Heat olive oil in a saucepan over medium heat. Add the chopped onion and garlic, and sauté until the onion is soft and translucent, about 5 minutes.
    • Stir in the chopped Hatch green chiles, vegetable broth, cumin, salt, and pepper. Simmer for 10 minutes, then remove from heat.
    • Stir in the sour cream or Greek yogurt until smooth. Use an immersion blender to blend the sauce until smooth if desired.
  2. Prepare the filling:
    • In a large skillet, heat olive oil over medium heat. Add the chopped onion and bell pepper, and sauté until softened, about 5 minutes.
    • Add the chopped spinach, black beans, corn, chili powder, salt, and pepper. Cook for another 5 minutes until the spinach is wilted and the mixture is well combined. Remove from heat.
  3. Assemble the enchiladas:
    • Preheat your oven to 375°F (190°C). Lightly grease a 9×13-inch baking dish.
    • Spread a thin layer of the green chile sauce on the bottom of the baking dish.
    • Warm the tortillas in the microwave or on a skillet to make them pliable. Place a few spoonfuls of the filling in each tortilla, roll them up, and place them seam-side down in the baking dish.
    • Pour the remaining green chile sauce over the enchiladas and sprinkle with shredded cheese.
  4. Bake:
    • Cover the dish with foil and bake for 20 minutes. Remove the foil and bake for an additional 10 minutes, or until the cheese is melted and bubbly.
  5. Serve:
    • Garnish with chopped cilantro before serving.

Enjoy your Vegetarian Hatch Green Chile Enchiladas as a comforting and flavorful dish that celebrates the unique taste of Hatch chiles, perfect for any occasion!
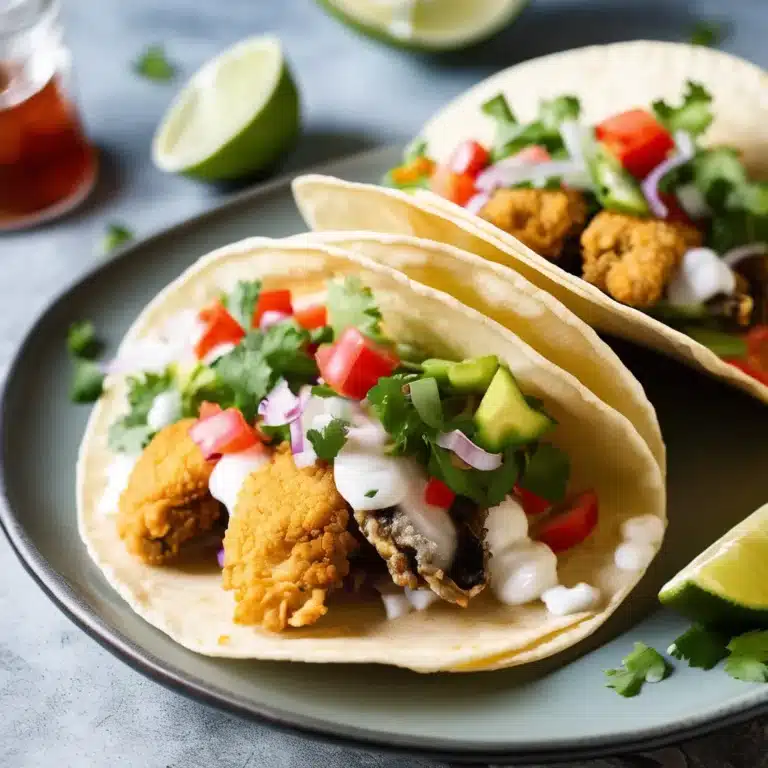

FRIED OYSTER TACOS

Fried Oyster Tacos are a delectable fusion of Southern and Mexican flavors, combining crispy, golden-brown oysters with fresh and vibrant toppings, all wrapped in a warm tortilla. The oysters are lightly coated in a seasoned cornmeal mixture, giving them a crunchy texture that pairs perfectly with the soft tortilla. Topped with a zesty slaw, spicy aioli, and a squeeze of fresh lime juice, these tacos are a delightful treat for seafood lovers. Perfect for a casual dinner or a festive gathering, Fried Oyster Tacos offer a unique and delicious twist on traditional tacos, sure to impress your family and friends.

Ingredients

For the Fried Oysters:

  • 1 pint shucked oysters, drained
  • 1 cup buttermilk
  • 1 cup cornmeal
  • 1/2 cup all-purpose flour
  • 1 teaspoon paprika
  • 1 teaspoon garlic powder
  • 1 teaspoon cayenne pepper
  • Salt and pepper, to taste
  • Vegetable oil, for frying

For the Slaw:

  • 2 cups cabbage, finely shredded
  • 1/4 cup red onion, thinly sliced
  • 1/4 cup fresh cilantro, chopped
  • 2 tablespoons lime juice
  • Salt and pepper, to taste

For the Spicy Aioli:

  • 1/2 cup mayonnaise
  • 1 tablespoon hot sauce (such as sriracha or your choice)
  • 1 tablespoon lime juice
  • 1 clove garlic, minced

For Serving:

  • 8 small corn or flour tortillas, warmed
  • Lime wedges

Instructions

  1. Prepare the slaw: In a bowl, combine the shredded cabbage, red onion, cilantro, lime juice, salt, and pepper. Toss well and set aside to allow the flavors to meld.
  2. Make the spicy aioli: In a small bowl, mix together the mayonnaise, hot sauce, lime juice, and minced garlic until smooth. Set aside.
  3. Bread the oysters: In a shallow dish, combine the cornmeal, flour, paprika, garlic powder, cayenne pepper, salt, and pepper. Dip each oyster in the buttermilk, then dredge in the cornmeal mixture, ensuring a full and even coating.
  4. Fry the oysters: Heat about 1/2 inch of vegetable oil in a large skillet over medium-high heat. Once hot, add the oysters in batches and fry for 2-3 minutes per side, or until golden brown and crispy. Remove with a slotted spoon and drain on paper towels.
  5. Assemble the tacos: Place a few fried oysters on each warmed tortilla. Top with a generous amount of slaw and drizzle with spicy aioli.
  6. Serve: Serve immediately with lime wedges on the side for squeezing over the tacos.

Enjoy your Fried Oyster Tacos as a tasty and unique twist on taco night, bringing together the best of crispy seafood and fresh, vibrant flavors.

MEXICAN FRIED GREEN TOMATOES

Mexican Fried Green Tomatoes are a delightful twist on the Southern classic, combining the tangy taste of green tomatoes with the bold, vibrant flavors of Mexican cuisine. The tomatoes are sliced and coated in a crispy cornmeal and spice mixture, then fried to golden perfection. The addition of spices such as cumin and chili powder brings a zesty kick, while a topping of fresh pico de gallo adds brightness and freshness to the dish. Perfect as an appetizer or a unique side dish, these Mexican Fried Green Tomatoes are sure to impress with their crisp texture and flavorful twist.

Ingredients

  • 4 large green tomatoes, sliced 1/4 inch thick
  • 1 cup all-purpose flour
  • 1 cup cornmeal
  • 1 teaspoon chili powder
  • 1 teaspoon ground cumin
  • 1 teaspoon paprika
  • 1/2 teaspoon garlic powder
  • Salt and pepper, to taste
  • 2 large eggs
  • 1/4 cup milk
  • Vegetable oil, for frying

For the Pico de Gallo:

  • 1 cup cherry tomatoes, diced
  • 1/4 cup red onion, finely chopped
  • 1 jalapeño, seeded and minced
  • 1/4 cup fresh cilantro, chopped
  • Juice of 1 lime
  • Salt and pepper, to taste

Instructions

  1. Prepare the pico de gallo: In a small bowl, combine the cherry tomatoes, red onion, jalapeño, cilantro, lime juice, salt, and pepper. Mix well and set aside to allow the flavors to meld.
  2. Set up the breading station: In one shallow dish, place the all-purpose flour. In a second shallow dish, whisk together the eggs and milk. In a third shallow dish, combine the cornmeal, chili powder, cumin, paprika, garlic powder, salt, and pepper.
  3. Bread the tomatoes: Dip each tomato slice first into the flour, shaking off any excess, then into the egg mixture, and finally into the cornmeal mixture, pressing lightly to ensure an even coating.
  4. Heat the oil: In a large skillet, heat about 1/2 inch of vegetable oil over medium-high heat until shimmering.
  5. Fry the tomatoes: Working in batches, carefully place the breaded tomato slices in the hot oil. Fry for 2-3 minutes per side, or until golden brown and crispy. Remove the tomatoes with a slotted spoon and drain on paper towels.
  6. Serve: Arrange the fried green tomatoes on a serving platter and top with a generous amount of pico de gallo.

Enjoy your Mexican Fried Green Tomatoes as a flavorful appetizer or side dish that offers a delightful combination of textures and zesty flavors.

BISON AND LEAN TACOS

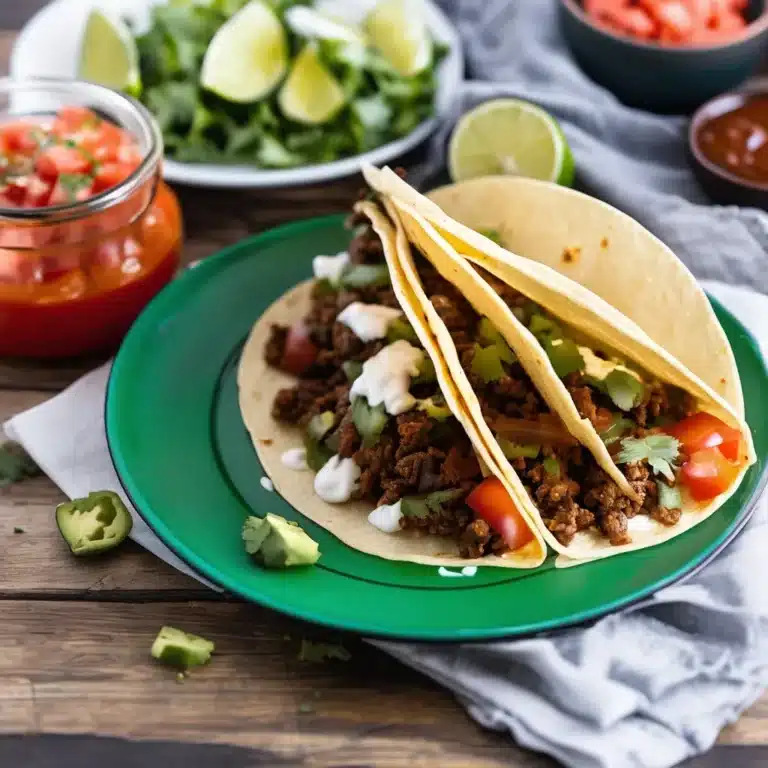
Bison and Lean Tacos are a healthier twist on classic beef tacos, offering a leaner and equally flavorful option for taco night. Bison meat, known for its rich taste and lower fat content compared to beef, pairs beautifully with spices like cumin, chili powder, and smoked paprika. These tacos are topped with fresh and vibrant ingredients such as avocado, tomatoes, and cilantro, providing a delicious balance of flavors and textures. Perfect for a quick weeknight meal or a fun gathering with friends, these tacos are both nutritious and satisfying, delivering all the taco goodness with fewer calories and less fat.

Ingredients

  • 1 pound ground bison
  • 1 tablespoon olive oil
  • 1 small onion, chopped
  • 2 cloves garlic, minced
  • 1 teaspoon ground cumin
  • 1 teaspoon chili powder
  • 1/2 teaspoon smoked paprika
  • Salt and pepper, to taste
  • 8 corn or flour tortillas

For the Toppings:

  • 1 avocado, sliced
  • 1 cup cherry tomatoes, halved
  • 1/4 cup red onion, finely chopped
  • 1/4 cup fresh cilantro, chopped
  • 1 lime, cut into wedges
  • 1/4 cup crumbled feta cheese (optional)

Instructions

  1. Cook the bison: Heat olive oil in a large skillet over medium heat. Add the chopped onion and cook until translucent, about 3-4 minutes. Add the garlic and cook for another minute until fragrant.
  2. Add the spices: Add the ground bison to the skillet, breaking it up with a spoon as it cooks. Stir in the cumin, chili powder, smoked paprika, salt, and pepper. Cook for about 5-7 minutes, or until the bison is browned and cooked through.
  3. Warm the tortillas: While the bison is cooking, warm the tortillas in a dry skillet or microwave until pliable.
  4. Assemble the tacos: Divide the cooked bison mixture evenly among the warm tortillas. Top with slices of avocado, cherry tomatoes, red onion, and cilantro. Sprinkle with crumbled feta cheese if desired.
  5. Serve: Serve the tacos with lime wedges on the side for squeezing over the top.

Enjoy your Bison and Lean Tacos as a delicious and healthy alternative to traditional beef tacos, offering a satisfying meal with rich flavors and fresh toppings.

Southern Tomato Sandwich

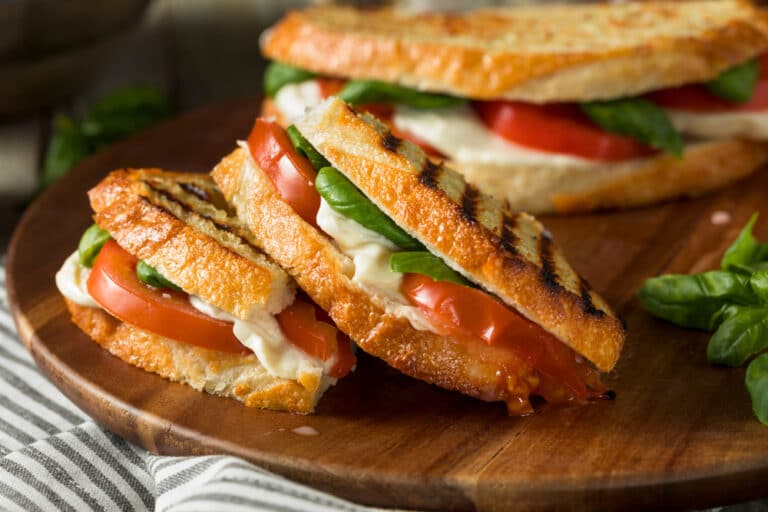
The Southern Tomato Sandwich is a simple yet delightful staple of Southern cuisine that highlights the fresh flavors of summer. This humble sandwich is all about the perfect combination of juicy, ripe tomatoes, creamy mayonnaise, and soft white bread. It’s a celebration of the tomato’s peak season, offering a burst of flavor with each bite. The key to this sandwich’s success is using the best-quality ingredients, allowing the tomatoes to shine as the star of the dish. Perfect for a quick lunch or a light snack, the Southern Tomato Sandwich is a refreshing taste of the South that is both satisfying and easy to make.

Ingredients:

  • 2 slices of white bread
  • 1 large ripe tomato, preferably heirloom or beefsteak
  • 2 tablespoons mayonnaise
  • Salt, preferably sea salt or kosher salt
  • Freshly ground black pepper
  • Fresh basil leaves or lettuce (optional)

Instructions:

  1. Prepare the Tomato:
    • Slice the tomato into thick slices, about 1/4 to 1/2 inch thick. Aim for uniform slices to ensure even coverage on the sandwich.
  2. Prepare the Bread:
    • Spread a generous amount of mayonnaise on one side of each slice of bread. The mayonnaise acts as a barrier to prevent the bread from becoming soggy from the tomato juices.
  3. Assemble the Sandwich:
    • Arrange the tomato slices evenly over one slice of bread, covering the entire surface. Season generously with salt and freshly ground black pepper.
    • Add fresh basil leaves or lettuce if using, to add an extra layer of flavor and texture.
  4. Finish the Sandwich:
    • Top with the second slice of bread, mayonnaise side down. Press gently to secure the sandwich.
  5. Serve:
    • Slice the sandwich in half diagonally and serve immediately. The sandwich is best enjoyed fresh to savor the juicy tomatoes and soft bread.

Enjoy your Southern Tomato Sandwich, a quick and delicious tribute to the flavors of summer!

OVEN BAKED TANDOORI CHICKEN

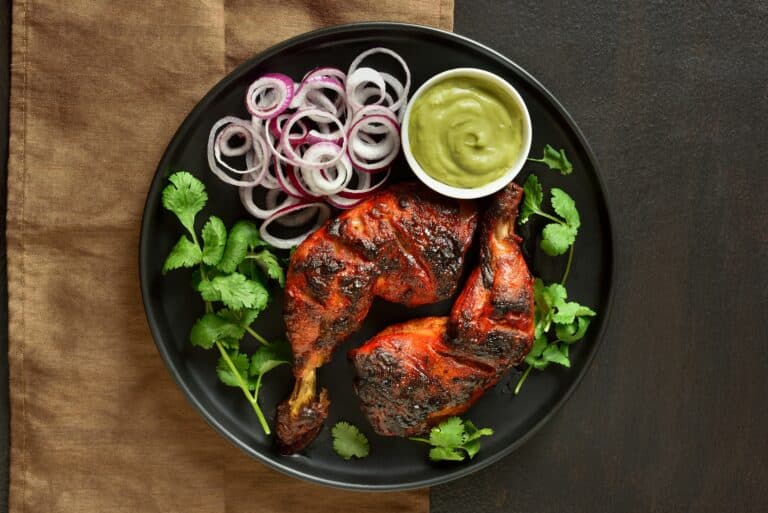
Oven Baked Tandoori Chicken is a flavorful and aromatic dish that brings the vibrant taste of Indian cuisine right to your kitchen. Traditionally cooked in a tandoor oven, this version uses a conventional oven to achieve a similar effect, producing tender, juicy chicken with a beautifully charred exterior. The chicken is marinated in a mixture of yogurt and spices, including cumin, coriander, and garam masala, which infuse the meat with a depth of flavor and a signature bright red color from the addition of turmeric and paprika. This dish is perfect for a family dinner or a special occasion, served with naan, rice, or a fresh salad.

Ingredients

  • 4 chicken thighs and 4 drumsticks (skin on or off, as preferred)
  • 1 cup plain yogurt
  • 2 tablespoons lemon juice
  • 2 tablespoons vegetable oil
  • 3 cloves garlic, minced
  • 1 tablespoon fresh ginger, grated
  • 1 tablespoon ground cumin
  • 1 tablespoon ground coriander
  • 2 teaspoons paprika
  • 1 teaspoon turmeric
  • 1 teaspoon garam masala
  • 1 teaspoon cayenne pepper (optional, for heat)
  • 1 teaspoon salt
  • Lemon wedges and fresh cilantro, for serving

Instructions

  1. Prepare the marinade: In a large bowl, combine the yogurt, lemon juice, vegetable oil, garlic, ginger, cumin, coriander, paprika, turmeric, garam masala, cayenne pepper (if using), and salt. Mix well to create a smooth marinade.
  2. Marinate the chicken: Add the chicken pieces to the marinade, ensuring each piece is thoroughly coated. Cover the bowl with plastic wrap and refrigerate for at least 2 hours, preferably overnight, to allow the flavors to penetrate the meat.
  3. Preheat the oven: Preheat your oven to 400°F (200°C). Line a baking sheet with aluminum foil and place a wire rack on top.
  4. Bake the chicken: Arrange the marinated chicken pieces on the wire rack, allowing space between each piece for even cooking. Bake in the preheated oven for 30-35 minutes, or until the chicken is cooked through and the juices run clear. For extra char and flavor, switch the oven to broil and cook for an additional 3-5 minutes, watching closely to avoid burning.
  5. Serve: Remove the chicken from the oven and let it rest for a few minutes. Serve with lemon wedges and garnish with fresh cilantro.

Enjoy your Oven Baked Tandoori Chicken as a delicious and aromatic meal that captures the essence of traditional Indian flavors in a convenient and easy-to-make dish.

Chicken Satay Salad

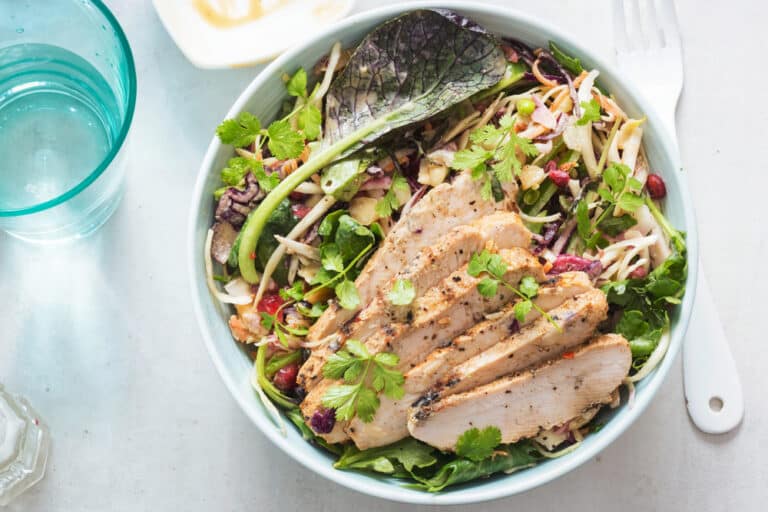
Chicken Satay Salad is a refreshing and flavorful dish that combines the savory goodness of grilled chicken satay with a vibrant medley of fresh vegetables. This salad is inspired by the traditional flavors of Southeast Asian cuisine, featuring marinated chicken skewers with a rich, creamy peanut dressing that adds a delicious nutty depth to every bite. Crisp lettuce, crunchy vegetables, and aromatic herbs come together to create a light yet satisfying meal that is perfect for lunch or dinner. Easy to prepare and full of flavor, this Chicken Satay Salad will delight your taste buds and transport you to the tropics.

Ingredients:

  • For the Chicken Satay:
    • 1 lb boneless, skinless chicken breasts, cut into thin strips
    • 2 tablespoons soy sauce
    • 1 tablespoon fish sauce
    • 1 tablespoon lime juice
    • 1 tablespoon brown sugar
    • 1 teaspoon ground coriander
    • 1 teaspoon turmeric
    • 1/2 teaspoon ground cumin
    • 2 cloves garlic, minced
    • 1 tablespoon vegetable oil
    • Skewers (soaked in water if wooden)
  • For the Salad:
    • 4 cups mixed salad greens (such as romaine, arugula, or spinach)
    • 1 cup cucumber, sliced
    • 1 cup cherry tomatoes, halved
    • 1/2 cup red bell pepper, thinly sliced
    • 1/4 cup red onion, thinly sliced
    • 1/4 cup fresh cilantro leaves
    • 1/4 cup roasted peanuts, chopped
  • For the Peanut Dressing:
    • 1/4 cup creamy peanut butter
    • 2 tablespoons soy sauce
    • 2 tablespoons lime juice
    • 1 tablespoon honey
    • 1 tablespoon rice vinegar
    • 1 teaspoon sesame oil
    • 2 tablespoons water (to thin the dressing)
    • 1 clove garlic, minced
    • 1 teaspoon ginger, grated

Instructions:

  1. Marinate the Chicken:
    • In a bowl, combine the soy sauce, fish sauce, lime juice, brown sugar, coriander, turmeric, cumin, minced garlic, and vegetable oil. Mix well.
    • Add the chicken strips to the marinade, tossing to coat. Cover and refrigerate for at least 30 minutes or up to 2 hours.
  2. Prepare the Peanut Dressing:
    • In a small bowl, whisk together the peanut butter, soy sauce, lime juice, honey, rice vinegar, sesame oil, water, minced garlic, and grated ginger until smooth. Adjust the consistency with more water if needed.
  3. Grill the Chicken:
    • Preheat a grill or grill pan over medium-high heat.
    • Thread the marinated chicken strips onto the skewers.
    • Grill the chicken skewers for about 3-4 minutes per side, or until cooked through and lightly charred. Remove from the grill and let rest for a few minutes.
  4. Assemble the Salad:
    • In a large salad bowl, combine the mixed salad greens, cucumber, cherry tomatoes, red bell pepper, red onion, and fresh cilantro leaves.
    • Top the salad with the grilled chicken skewers and drizzle with the peanut dressing.
    • Garnish with chopped roasted peanuts.
  5. Serve:
    • Serve the Chicken Satay Salad immediately, allowing each guest to toss the salad with the dressing and enjoy the combination of flavors and textures.

Enjoy your Chicken Satay Salad, a delightful and refreshing dish that brings the taste of Southeast Asia to your table!

PAN- SEARED MEXICAN FISH

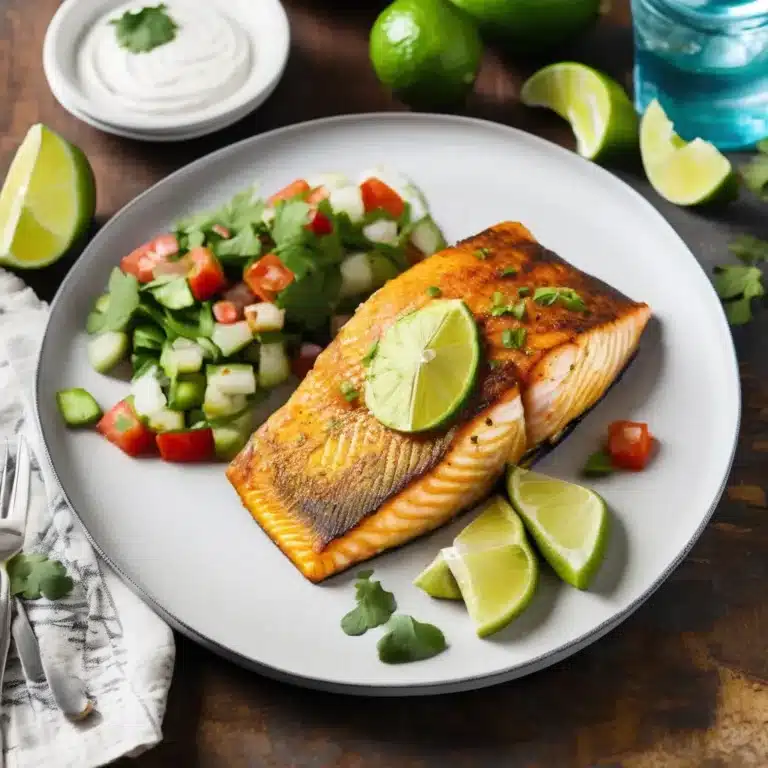
Pan-Seared Mexican Fish is a quick and flavorful dish that brings the vibrant tastes of Mexican cuisine to your table. Featuring fresh fish fillets seasoned with a blend of chili powder, cumin, and lime, this dish offers a perfect balance of smoky, tangy, and spicy flavors. The fish is seared to perfection, creating a crispy exterior while maintaining a moist and tender interior. Topped with a refreshing salsa of tomatoes, cilantro, and onions, this meal is both delicious and healthy. Serve it with rice, tortillas, or a simple salad for a delightful weeknight dinner or a special weekend meal.

Ingredients

  • 4 fish fillets (such as tilapia, snapper, or cod)
  • 2 tablespoons olive oil
  • 2 teaspoons chili powder
  • 1 teaspoon ground cumin
  • 1 teaspoon garlic powder
  • Salt and pepper, to taste
  • Juice of 1 lime

For the Salsa:

  • 2 tomatoes, diced
  • 1/2 red onion, finely chopped
  • 1 jalapeño, seeded and minced
  • 1/4 cup fresh cilantro, chopped
  • Juice of 1 lime
  • Salt and pepper, to taste

Instructions

  1. Prepare the salsa: In a medium bowl, combine the diced tomatoes, red onion, jalapeño, and cilantro. Add lime juice, salt, and pepper. Toss well and set aside to allow the flavors to meld.
  2. Season the fish: In a small bowl, mix the chili powder, cumin, garlic powder, salt, and pepper. Pat the fish fillets dry with paper towels and rub the spice mixture over both sides of each fillet. Drizzle with lime juice.
  3. Heat the skillet: Heat olive oil in a large skillet over medium-high heat.
  4. Sear the fish: Add the seasoned fish fillets to the skillet, cooking for 3-4 minutes per side, or until the fish is opaque and flakes easily with a fork. Be careful not to overcook.
  5. Serve: Transfer the fish to serving plates and top with the fresh salsa.

Enjoy your Pan-Seared Mexican Fish as a flavorful and vibrant dish that is perfect for any occasion, offering a taste of Mexico with every bite.

Ginger Chicken & Green Bean Noodles

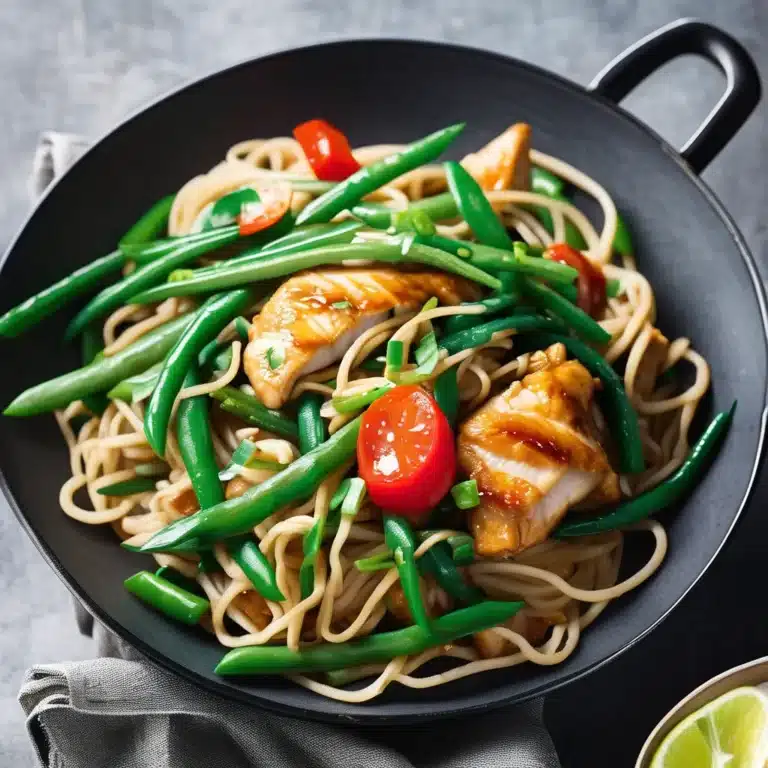
Ginger Chicken & Green Bean Noodles is a quick and flavorful dish that combines the aromatic spiciness of ginger with tender chicken and crisp green beans. This Asian-inspired meal is perfect for busy weeknights, offering a balance of protein and vegetables in a savory soy and ginger sauce. The dish is light yet satisfying, with noodles that soak up the delicious flavors, making every bite a delight. With minimal preparation and cook time, this recipe is a fantastic way to enjoy a nutritious and delicious meal without spending hours in the kitchen.

Ingredients:

  • 8 oz rice noodles or thin spaghetti
  • 1 lb boneless, skinless chicken breasts, sliced into thin strips
  • 2 tablespoons vegetable oil
  • 2 cloves garlic, minced
  • 1 tablespoon fresh ginger, grated
  • 1/4 teaspoon red pepper flakes (optional)
  • 8 oz green beans, trimmed and cut into 2-inch pieces
  • 1 red bell pepper, thinly sliced
  • 3 tablespoons soy sauce
  • 2 tablespoons oyster sauce
  • 1 tablespoon rice vinegar
  • 1 teaspoon sesame oil
  • 2 green onions, sliced (for garnish)
  • Sesame seeds (for garnish)

Instructions:

  1. Cook the Noodles:
    • Bring a large pot of salted water to a boil. Add the noodles and cook according to the package instructions until al dente. Drain and rinse under cold water. Set aside.
  2. Cook the Chicken:
    • In a large skillet or wok, heat 1 tablespoon of vegetable oil over medium-high heat. Add the chicken strips and cook until browned and cooked through, about 5-7 minutes. Remove the chicken from the skillet and set aside.
  3. Cook the Vegetables:
    • In the same skillet, add the remaining tablespoon of vegetable oil. Add the minced garlic, grated ginger, and red pepper flakes (if using), and stir-fry for about 30 seconds until fragrant.
    • Add the green beans and red bell pepper, stir-frying for about 3-4 minutes until the vegetables are tender-crisp.
  4. Combine the Ingredients:
    • Return the cooked chicken to the skillet with the vegetables. Add the cooked noodles and toss everything together.
  5. Make the Sauce:
    • In a small bowl, mix together the soy sauce, oyster sauce, rice vinegar, and sesame oil. Pour the sauce over the noodle mixture and toss to combine, ensuring everything is well coated.
  6. Serve:
    • Divide the noodles into bowls and garnish with sliced green onions and sesame seeds.

Enjoy your Ginger Chicken & Green Bean Noodles, a delightful and easy-to-make meal that’s perfect for any night of the week!

Best Cajun Chicken

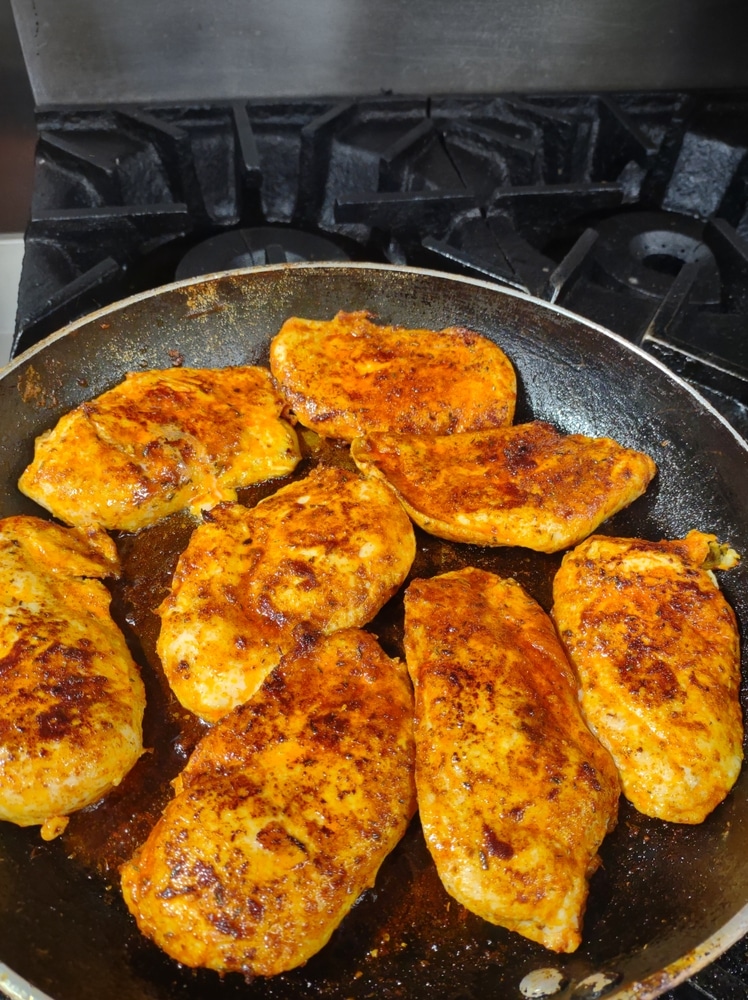
This Best Cajun Chicken recipe brings the bold and spicy flavors of the Deep South right to your kitchen. The secret to this dish lies in the Cajun spice blend, which combines paprika, cayenne pepper, garlic powder, and other spices for a delicious kick. The chicken is marinated in this robust blend and then cooked to perfection, resulting in juicy and tender meat with a beautifully charred crust. Perfect for a weeknight dinner or a weekend barbecue, this Cajun chicken pairs wonderfully with rice, veggies, or a fresh salad, delivering a satisfying meal full of flavor and warmth.

Ingredients:

  • 4 boneless, skinless chicken breasts
  • 2 tablespoons olive oil
  • 2 tablespoons Cajun seasoning (store-bought or homemade, see below)
  • 1 teaspoon garlic powder
  • 1 teaspoon onion powder
  • 1/2 teaspoon smoked paprika
  • 1/2 teaspoon cayenne pepper (adjust for spice preference)
  • Salt and pepper to taste
  • 1 lemon, juiced
  • 2 tablespoons chopped fresh parsley (for garnish)

Homemade Cajun Seasoning (optional):

  • 2 teaspoons paprika
  • 1 teaspoon garlic powder
  • 1 teaspoon onion powder
  • 1 teaspoon dried thyme
  • 1 teaspoon dried oregano
  • 1/2 teaspoon cayenne pepper
  • 1/2 teaspoon black pepper
  • 1/2 teaspoon salt

Instructions:

  1. Prepare the Chicken:
    • In a small bowl, combine the Cajun seasoning, garlic powder, onion powder, smoked paprika, cayenne pepper, salt, and pepper.
    • Rub the chicken breasts with olive oil and then coat them evenly with the spice mixture. Make sure to cover both sides of the chicken.
  2. Marinate:
    • Place the seasoned chicken in a resealable plastic bag or a shallow dish. Add the lemon juice and seal the bag or cover the dish.
    • Let the chicken marinate in the refrigerator for at least 30 minutes, or up to 2 hours for more intense flavor.
  3. Cook the Chicken:
    • Preheat your grill or a skillet over medium-high heat. If using a skillet, add a bit of olive oil to prevent sticking.
    • Grill or cook the chicken for about 6-7 minutes on each side, or until the internal temperature reaches 165°F (74°C) and the chicken is cooked through with a nice char on the outside.
  4. Serve:
    • Transfer the cooked chicken to a serving platter and let it rest for a few minutes.
    • Garnish with freshly chopped parsley before serving.

Enjoy your Best Cajun Chicken with your favorite sides, such as rice, roasted vegetables, or a fresh salad, for a delicious and satisfying meal!