Home Blog Page 41

OLIVE GARDEN ZUPPA TOSCANA

Zuppa Toscana is a creamy, hearty soup made famous by Olive Garden, filled with Italian sausage, tender potatoes, kale, and a flavorful broth. It’s a comforting dish that’s perfect for chilly nights, combining rich flavors with a satisfying creaminess. This easy-to-make recipe brings the taste of your favorite restaurant home and can be served with crusty bread for dipping or alongside a fresh salad.

Ingredients:

  • 1 lb Italian sausage (mild or spicy)
  • 1 tablespoon olive oil
  • 1 small onion, diced
  • 3 garlic cloves, minced
  • 4-5 medium russet potatoes, sliced thinly or diced
  • 4 cups chicken broth
  • 2 cups water
  • 1 teaspoon crushed red pepper flakes (optional, for heat)
  • 1 bunch kale, stems removed, chopped
  • 1 cup heavy cream
  • Salt and pepper, to taste
  • Grated Parmesan cheese (optional, for garnish)
  • Crumbled bacon (optional, for garnish)

Instructions:

  1. Cook the sausage: In a large pot or Dutch oven, heat the olive oil over medium heat. Add the Italian sausage, breaking it up with a spoon as it cooks. Cook for 5-7 minutes, until browned and fully cooked through. Remove the sausage from the pot and set aside, leaving a small amount of fat in the pot.
  2. Sauté the onion and garlic: In the same pot, add the diced onion and sauté for 4-5 minutes until softened. Add the minced garlic and cook for an additional 1 minute until fragrant.
  3. Add the potatoes and broth: Add the sliced or diced potatoes to the pot along with the chicken broth, water, and red pepper flakes (if using). Bring the mixture to a boil, then reduce the heat and simmer for 15-20 minutes, or until the potatoes are tender.
  4. Add the kale and sausage: Once the potatoes are cooked, stir the chopped kale and browned sausage into the soup. Simmer for an additional 5-7 minutes, until the kale is wilted and tender.
  5. Add the cream: Stir in the heavy cream, season with salt and pepper to taste, and simmer for another 2-3 minutes to heat through.
  6. Serve: Ladle the Zuppa Toscana into bowls and top with grated Parmesan cheese and crumbled bacon if desired. Serve hot with crusty bread for dipping.

This Olive Garden Zuppa Toscana is a warm, creamy, and comforting soup that’s perfect for a cozy meal at home. Enjoy the rich flavors and hearty ingredients in this easy-to-make recipe!
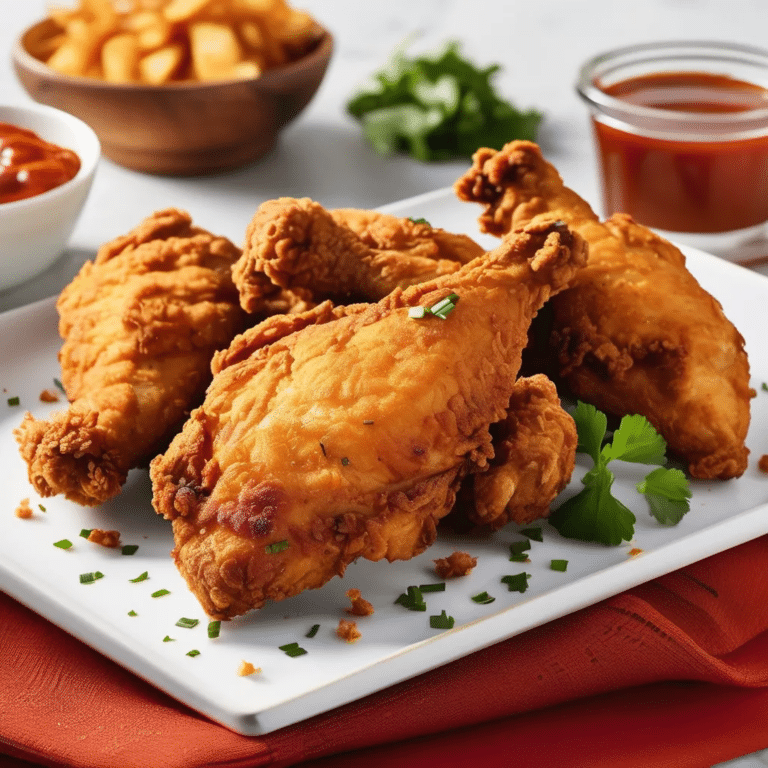
Spicy Fried Chicken

0

Spicy Fried Chicken is the ultimate comfort food for those who love a kick of heat with their crispy, golden-brown chicken. This dish features juicy chicken pieces marinated in a flavorful blend of spices and buttermilk, then coated in a seasoned flour mixture before being deep-fried to perfection. The result is a crunchy, spicy crust that gives way to tender, flavorful meat inside. Whether you’re serving it up for a family dinner, a weekend gathering, or just because you’re craving something indulgent, Spicy Fried Chicken is sure to be a hit with anyone who enjoys bold flavors and satisfying crunch.

Ingredients:

For the Marinade:

  • 1 whole chicken, cut into pieces (or 8 bone-in chicken thighs/drumsticks)
  • 2 cups buttermilk
  • 1 tablespoon hot sauce
  • 1 teaspoon garlic powder
  • 1 teaspoon onion powder
  • 1 teaspoon paprika
  • 1/2 teaspoon cayenne pepper (adjust to taste)
  • 1 teaspoon salt
  • 1/2 teaspoon ground black pepper

For the Coating:

  • 2 cups all-purpose flour
  • 1/2 cup cornstarch
  • 1 tablespoon paprika
  • 1 teaspoon cayenne pepper (adjust to taste)
  • 1 teaspoon garlic powder
  • 1 teaspoon onion powder
  • 1 teaspoon salt
  • 1/2 teaspoon ground black pepper

For Frying:

  • Vegetable oil, for frying

Instructions:

  1. Marinate the Chicken: In a large bowl, whisk together the buttermilk, hot sauce, garlic powder, onion powder, paprika, cayenne pepper, salt, and black pepper. Add the chicken pieces to the marinade, making sure they are fully submerged. Cover and refrigerate for at least 4 hours, or overnight for the best flavor.
  2. Prepare the Coating: In a large, shallow dish, combine the flour, cornstarch, paprika, cayenne pepper, garlic powder, onion powder, salt, and black pepper. Mix well to ensure the spices are evenly distributed.
  3. Coat the Chicken: Remove the chicken from the marinade, allowing any excess to drip off. Dredge each piece in the flour mixture, pressing lightly to ensure the coating sticks well. Place the coated chicken pieces on a wire rack and let them rest for 15 minutes to allow the coating to set.
  4. Heat the Oil: In a large, heavy-bottomed pot or deep fryer, heat the vegetable oil to 350°F (175°C). The oil should be deep enough to fully submerge the chicken pieces.
  5. Fry the Chicken: Carefully place the chicken pieces into the hot oil, being sure not to overcrowd the pot. Fry in batches if necessary. Cook the chicken for about 12-15 minutes, turning occasionally, until the coating is golden brown and the internal temperature reaches 165°F (74°C). Transfer the fried chicken to a wire rack or paper towels to drain any excess oil.
  6. Serve: Allow the chicken to rest for a few minutes before serving to ensure the juices redistribute. Serve hot with your favorite sides, such as coleslaw, biscuits, or mashed potatoes.

Enjoy this Spicy Fried Chicken, where every bite offers a satisfying crunch followed by a burst of heat and flavor!

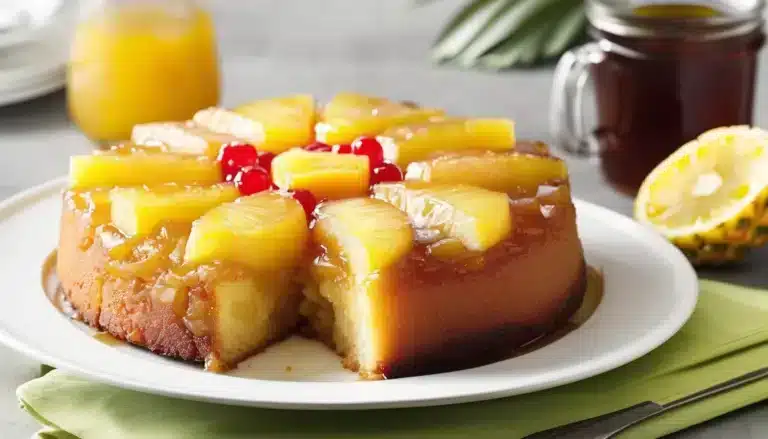
FRESH PINEAPPLE UPSIDE-DOWN CAKE

Fresh Pineapple Upside-Down Cake is a classic dessert featuring sweet and juicy slices of fresh pineapple caramelized in a buttery brown sugar topping. The cake itself is moist and tender, and when flipped, the golden pineapple and sticky caramel topping create a beautiful, delicious presentation. This dessert is perfect for special occasions or anytime you’re craving a tropical-inspired treat.

Ingredients:

For the topping:

  • 1/4 cup unsalted butter, melted
  • 1/2 cup brown sugar, packed
  • Fresh pineapple slices (about 1 small pineapple, cored and sliced)
  • Maraschino cherries (optional, for garnish)

For the cake:

  • 1 1/2 cups all-purpose flour
  • 1 teaspoon baking powder
  • 1/2 teaspoon baking soda
  • 1/4 teaspoon salt
  • 1/2 cup unsalted butter, softened
  • 3/4 cup granulated sugar
  • 2 large eggs
  • 1 teaspoon vanilla extract
  • 1/2 cup milk or buttermilk
  • 1/4 cup pineapple juice (fresh or canned)

Instructions:

  1. Preheat the oven: Preheat your oven to 350°F (175°C). Grease a 9-inch round cake pan or a cast iron skillet.
  2. Prepare the topping: Pour the melted butter into the bottom of the cake pan. Sprinkle the brown sugar evenly over the butter. Arrange the fresh pineapple slices in a single layer over the brown sugar. Place a maraschino cherry in the center of each pineapple ring if using.
  3. Prepare the dry ingredients: In a medium bowl, whisk together the flour, baking powder, baking soda, and salt. Set aside.
  4. Make the batter: In a large mixing bowl, cream together the softened butter and granulated sugar until light and fluffy, about 3-4 minutes. Add the eggs one at a time, beating well after each addition. Mix in the vanilla extract.
  5. Alternate dry ingredients and liquids: Gradually add the flour mixture to the creamed butter mixture in three additions, alternating with the milk and pineapple juice. Begin and end with the dry ingredients, mixing until just combined. Be careful not to overmix.
  6. Pour the batter: Gently pour the cake batter over the arranged pineapple slices, spreading it evenly with a spatula.
  7. Bake the cake: Bake for 35-40 minutes, or until a toothpick inserted into the center of the cake comes out clean. The top should be golden brown and the cake should spring back when lightly touched.
  8. Cool and invert: Let the cake cool in the pan for 10-15 minutes. Run a knife around the edges to loosen the cake. Carefully invert the cake onto a serving platter, revealing the caramelized pineapple on top.
  9. Serve: Allow the cake to cool slightly before serving. This Fresh Pineapple Upside-Down Cake is delicious on its own or with a dollop of whipped cream or a scoop of vanilla ice cream.

Enjoy the fresh, tropical flavors of this classic Pineapple Upside-Down Cake made with real pineapple for an extra juicy and flavorful dessert!

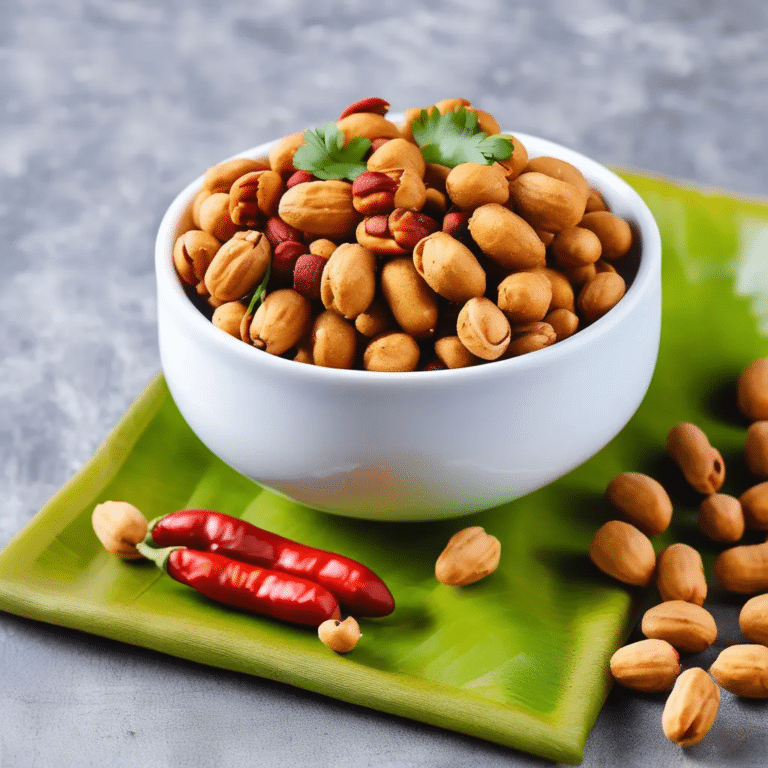
Masala Peanuts

0

Masala Peanuts are a popular and addictive Indian snack that combines the crunch of roasted peanuts with a spicy, tangy coating of aromatic spices. Perfect for serving at parties, as an appetizer, or even as a quick snack with your evening tea, these flavorful peanuts are sure to satisfy your cravings for something savory and spicy. The peanuts are coated in a mixture of gram flour (besan), rice flour, and a blend of spices like chili powder, turmeric, and chaat masala, then roasted or fried to golden perfection. Each bite is a burst of flavor and crunch, making Masala Peanuts an irresistible treat that’s easy to prepare and enjoy.

Ingredients:

  • 2 cups raw peanuts
  • 1/2 cup gram flour (besan)
  • 2 tablespoons rice flour
  • 1 teaspoon red chili powder (adjust to taste)
  • 1/2 teaspoon turmeric powder
  • 1/2 teaspoon cumin powder
  • 1/2 teaspoon coriander powder
  • 1/2 teaspoon garam masala
  • 1/2 teaspoon chaat masala (optional)
  • Salt to taste
  • 1 tablespoon oil
  • 1-2 tablespoons water (as needed)
  • Oil for deep frying (if frying)

Instructions:

  1. Prepare the Masala Coating: In a large mixing bowl, combine the gram flour, rice flour, red chili powder, turmeric powder, cumin powder, coriander powder, garam masala, chaat masala (if using), and salt. Mix well to ensure the spices are evenly distributed.
  2. Coat the Peanuts: Add the raw peanuts to the bowl and mix until they are well coated with the spice mixture. Drizzle the oil over the peanuts and mix again. Gradually add water, a little at a time, until the peanuts are lightly coated with a thick, spiced batter.
  3. Cook the Peanuts:
    • For Deep Frying: Heat oil in a deep pan over medium heat. Once the oil is hot, carefully drop in the coated peanuts in small batches. Fry until they turn golden brown and crispy, about 3-4 minutes. Use a slotted spoon to remove the peanuts and drain them on paper towels to remove excess oil.
    • For Baking: Preheat your oven to 350°F (175°C). Spread the coated peanuts evenly on a baking sheet lined with parchment paper. Bake for 20-25 minutes, stirring halfway through, until the peanuts are golden and crispy.
  4. Cool and Serve: Allow the Masala Peanuts to cool completely before serving. Once cooled, they can be stored in an airtight container for up to a week.

Enjoy these crunchy, spicy Masala Peanuts as a perfect snack any time of the day!

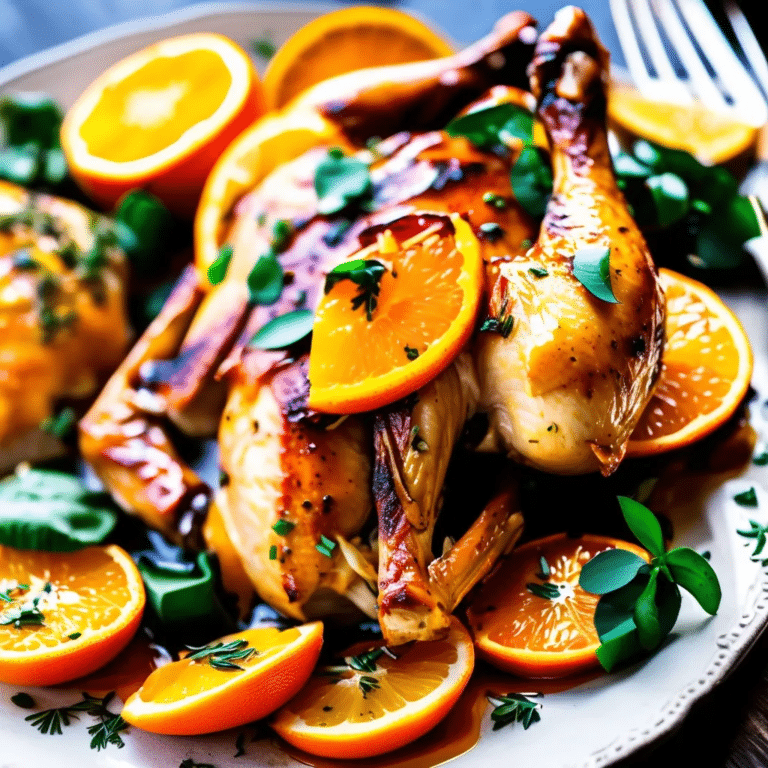
Orange Roasted Chicken

0

Orange Roasted Chicken is a succulent and flavorful dish that combines the juicy tenderness of roasted chicken with the bright, citrusy notes of fresh oranges. This dish is perfect for special occasions or a comforting family dinner, as it fills your kitchen with an irresistible aroma while it cooks. The chicken is marinated in a mixture of orange juice, zest, garlic, and herbs, then roasted to golden perfection. As it roasts, the orange flavor deeply infuses the meat, creating a beautifully caramelized exterior and juicy, tender interior. Serve this delightful dish with roasted vegetables or a side of rice to soak up the zesty pan juices, and you’ll have a meal that’s sure to impress.

Ingredients:

  • 1 whole chicken (about 4-5 pounds)
  • 2 large oranges, zested and juiced
  • 4 cloves garlic, minced
  • 1 tablespoon olive oil
  • 1 tablespoon fresh thyme leaves (or 1 teaspoon dried thyme)
  • 1 tablespoon fresh rosemary leaves (or 1 teaspoon dried rosemary)
  • 1 teaspoon salt
  • 1/2 teaspoon ground black pepper
  • 1/2 cup chicken broth
  • 1 tablespoon honey
  • Extra orange slices for garnish

Instructions:

  1. Prepare the Marinade: In a small bowl, combine the orange zest, orange juice, minced garlic, olive oil, thyme, rosemary, salt, and pepper. Mix well to create a marinade.
  2. Marinate the Chicken: Place the whole chicken in a large resealable plastic bag or a large dish. Pour the marinade over the chicken, making sure it’s well-coated inside and out. Seal the bag or cover the dish with plastic wrap and refrigerate for at least 2 hours, preferably overnight, to allow the flavors to penetrate the meat.
  3. Preheat the Oven: Preheat your oven to 375°F (190°C).
  4. Roast the Chicken: Remove the chicken from the marinade and place it in a roasting pan. Pour the chicken broth into the bottom of the pan to keep the chicken moist while roasting. If desired, place a few orange slices inside the cavity of the chicken for extra flavor. Brush the outside of the chicken with honey for a beautiful glaze.
  5. Bake: Roast the chicken in the preheated oven for about 1 1/2 to 2 hours, or until the internal temperature reaches 165°F (74°C) when measured at the thickest part of the thigh. Baste the chicken occasionally with the pan juices to keep it moist and flavorful.
  6. Rest and Serve: Once the chicken is fully cooked, remove it from the oven and let it rest for 10 minutes before carving. Garnish with extra orange slices and fresh herbs if desired. Serve the orange roasted chicken with your favorite sides and enjoy!

This Orange Roasted Chicken offers a delightful blend of citrusy sweetness and savory goodness, making it a standout dish for any occasion.

CHICKEN VEGGIE STIR FRY

Chicken Veggie Stir Fry is a quick, healthy, and delicious meal that combines tender chicken with a medley of vibrant vegetables, all tossed in a savory sauce. This dish comes together in under 30 minutes, making it perfect for busy weeknights. Serve it over rice or noodles for a satisfying and balanced meal. The great thing about stir fry is its versatility—you can use whatever veggies you have on hand and adjust the sauce to your taste.

Ingredients:

  • 1 lb boneless, skinless chicken breast or thighs, sliced into thin strips
  • 2 tablespoons soy sauce (for marinating the chicken)
  • 1 tablespoon cornstarch
  • 2 tablespoons vegetable oil (divided)
  • 1 red bell pepper, sliced
  • 1 yellow bell pepper, sliced
  • 1 medium carrot, thinly sliced
  • 1 zucchini, sliced
  • 1 cup broccoli florets
  • 1 onion, sliced
  • 3 garlic cloves, minced
  • 1 tablespoon ginger, minced

For the sauce:

  • 1/4 cup soy sauce
  • 1 tablespoon oyster sauce (optional)
  • 1 tablespoon hoisin sauce (optional)
  • 2 tablespoons rice vinegar or lime juice
  • 1 tablespoon honey or brown sugar
  • 1 teaspoon sesame oil (optional, for added flavor)
  • 1/4 cup chicken broth or water
  • 1 tablespoon cornstarch (to thicken)

Instructions:

  1. Marinate the chicken: In a bowl, combine the chicken strips with 2 tablespoons of soy sauce and 1 tablespoon of cornstarch. Let the chicken marinate for 10-15 minutes while you prep the vegetables.
  2. Make the sauce: In a small bowl, whisk together the soy sauce, oyster sauce, hoisin sauce, rice vinegar, honey, sesame oil, chicken broth, and cornstarch. Set aside.
  3. Cook the chicken: Heat 1 tablespoon of vegetable oil in a large skillet or wok over medium-high heat. Add the marinated chicken and cook for 4-5 minutes, stirring frequently, until the chicken is browned and cooked through. Remove the chicken from the skillet and set aside.
  4. Cook the vegetables: In the same skillet, add the remaining 1 tablespoon of oil. Add the garlic and ginger, and sauté for about 1 minute until fragrant. Add the onions, carrots, and bell peppers, and stir-fry for 3-4 minutes until slightly tender. Add the broccoli and zucchini and cook for another 2-3 minutes until the vegetables are crisp-tender.
  5. Combine chicken and sauce: Return the cooked chicken to the skillet with the vegetables. Give the sauce a quick stir (to ensure the cornstarch is mixed) and pour it over the chicken and veggies. Stir everything together and cook for another 2-3 minutes, or until the sauce thickens and coats the chicken and vegetables.
  6. Serve: Remove from heat and serve the stir fry immediately over rice or noodles. Garnish with sesame seeds, chopped green onions, or fresh cilantro if desired.

This Chicken Veggie Stir Fry is a versatile, flavorful, and healthy meal that’s easy to whip up, and it’s perfect for any weeknight dinner. Customize the veggies to your liking and enjoy!

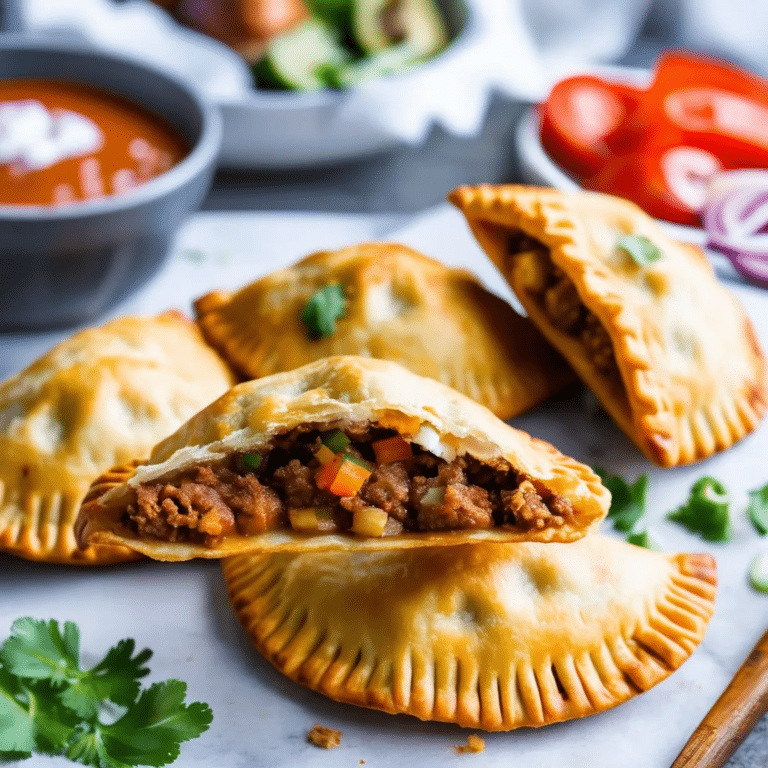
Pork Empanadas

0

Pork Empanadas are a delicious handheld pastry filled with savory, spiced pork that makes for a perfect snack, appetizer, or even a meal on the go. These empanadas feature a flaky, golden-brown crust that encases a filling bursting with flavors from tender ground pork, onions, garlic, and a medley of spices. The slight sweetness of the pastry dough perfectly balances the savory filling, creating a harmonious bite every time. Whether you enjoy them hot out of the oven or at room temperature, these pork empanadas are sure to satisfy and delight anyone who tastes them.

Ingredients:

For the Dough:

  • 2 1/2 cups all-purpose flour
  • 1/2 teaspoon salt
  • 1/2 cup unsalted butter, cold and cubed
  • 1 large egg
  • 1/3 cup cold water
  • 1 tablespoon white vinegar

For the Pork Filling:

  • 1 tablespoon olive oil
  • 1 small onion, finely chopped
  • 2 cloves garlic, minced
  • 1/2 pound ground pork
  • 1/2 teaspoon ground cumin
  • 1/2 teaspoon smoked paprika
  • 1/4 teaspoon ground oregano
  • 1/4 teaspoon ground black pepper
  • 1/2 teaspoon salt
  • 1/4 cup tomato sauce
  • 1 hard-boiled egg, chopped (optional)
  • 1/4 cup green olives, chopped (optional)
  • 2 tablespoons chopped fresh cilantro (optional)

For Assembly:

  • 1 egg, beaten (for egg wash)

Instructions:

  1. Prepare the Dough: In a large bowl, whisk together the flour and salt. Add the cold, cubed butter and use a pastry cutter or your fingers to cut the butter into the flour until the mixture resembles coarse crumbs. In a small bowl, whisk together the egg, cold water, and vinegar. Pour the wet ingredients into the flour mixture and stir until the dough comes together. Turn the dough out onto a lightly floured surface and knead a few times until smooth. Wrap the dough in plastic wrap and refrigerate for at least 1 hour.
  2. Make the Pork Filling: While the dough is chilling, heat the olive oil in a large skillet over medium heat. Add the chopped onion and garlic, and sauté until softened, about 3-4 minutes. Add the ground pork, breaking it up with a spoon as it cooks. Once the pork is browned, stir in the cumin, smoked paprika, oregano, black pepper, and salt. Add the tomato sauce and cook for another 2-3 minutes, until the mixture thickens slightly. Remove from heat and let cool. Stir in the chopped hard-boiled egg, olives, and cilantro if using.
  3. Assemble the Empanadas: Preheat your oven to 375°F (190°C). Line a baking sheet with parchment paper. On a lightly floured surface, roll out the dough to about 1/8-inch thickness. Use a round cutter (about 4-5 inches in diameter) to cut out circles of dough. Place a heaping tablespoon of pork filling in the center of each circle. Fold the dough over the filling to create a half-moon shape and press the edges together. Use a fork to crimp the edges and seal the empanada.
  4. Bake: Place the empanadas on the prepared baking sheet. Brush the tops with the beaten egg to give them a golden color when baked. Bake for 20-25 minutes, or until the empanadas are golden brown and crisp.
  5. Serve: Allow the empanadas to cool slightly before serving. Enjoy them on their own or with a side of salsa or chimichurri sauce.

These pork empanadas are sure to be a hit, whether you serve them at a party, as a snack, or for a satisfying meal!

Mini Black And White Cookies

0

Mini Black and White Cookies are a delightful twist on the classic New York bakery treat, perfect for when you want a little something sweet in a smaller size. These soft, cake-like cookies are coated with a layer of rich chocolate frosting on one half and a smooth vanilla glaze on the other, offering a perfect balance of flavors in every bite. The mini size makes them ideal for parties, afternoon tea, or just a quick snack when you’re craving something sweet. These cookies are as fun to make as they are to eat, and their distinctive appearance will make them the star of any dessert spread.

Ingredients:

For the Cookies:

  • 1 1/4 cups all-purpose flour
  • 1/2 teaspoon baking soda
  • 1/4 teaspoon salt
  • 1/3 cup unsalted butter, softened
  • 1/2 cup granulated sugar
  • 1 large egg
  • 1 teaspoon vanilla extract
  • 1/3 cup sour cream

For the Vanilla Icing:

  • 1 1/2 cups powdered sugar
  • 1 teaspoon light corn syrup
  • 1/2 teaspoon vanilla extract
  • 2-3 tablespoons milk

For the Chocolate Icing:

  • 1/2 cup powdered sugar
  • 2 tablespoons unsweetened cocoa powder
  • 1 teaspoon light corn syrup
  • 2-3 tablespoons milk

Instructions:

  1. Preheat the Oven: Preheat your oven to 350°F (175°C). Line a baking sheet with parchment paper or a silicone baking mat.
  2. Mix the Dry Ingredients: In a medium bowl, whisk together the flour, baking soda, and salt. Set aside.
  3. Cream the Butter and Sugar: In a large mixing bowl, beat the softened butter and sugar together until light and fluffy. Add the egg and vanilla extract, and continue to beat until well combined.
  4. Add the Dry Ingredients and Sour Cream: Gradually add the flour mixture to the butter mixture, alternating with the sour cream, beginning and ending with the flour mixture. Mix until just combined.
  5. Shape and Bake: Drop rounded teaspoons of dough onto the prepared baking sheet, spacing them about 2 inches apart. Gently flatten each dough ball slightly with the back of a spoon. Bake for 10-12 minutes, or until the edges are lightly golden and the tops are set. Let the cookies cool on the baking sheet for a few minutes, then transfer them to a wire rack to cool completely.
  6. Prepare the Vanilla Icing: In a small bowl, whisk together the powdered sugar, corn syrup, vanilla extract, and enough milk to reach a spreadable consistency.
  7. Prepare the Chocolate Icing: In another small bowl, whisk together the powdered sugar, cocoa powder, corn syrup, and enough milk to reach a spreadable consistency.
  8. Ice the Cookies: Once the cookies are completely cool, spread vanilla icing over one half of each cookie. Let the vanilla icing set slightly, then spread chocolate icing over the other half. Allow the icing to set before serving.

Enjoy these mini black and white cookies, perfect for any occasion!

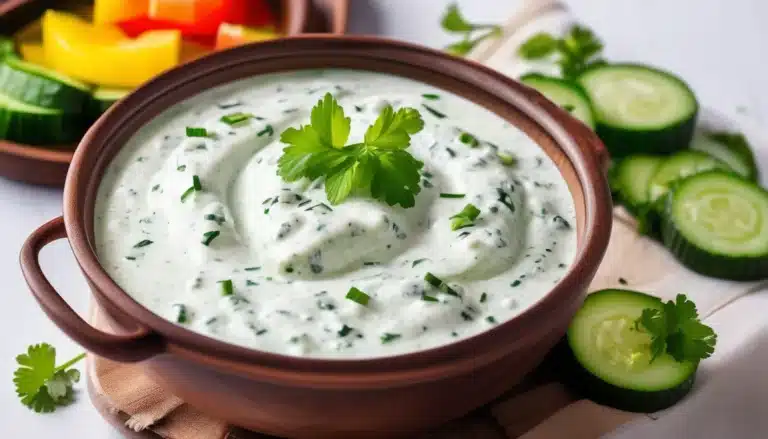
Cucumber Raita

0

Cucumber raita is a refreshing, cooling Indian side dish made with yogurt, cucumbers, and a blend of spices. It is often served alongside spicy main dishes like curries, biryanis, or kebabs, as the creamy yogurt and fresh cucumber help balance out the heat. This dish can be easily customized by adding various herbs and spices, but its simplicity is what makes it so versatile and delicious. Whether you’re enjoying it as a dip with naan or pairing it with a full meal, cucumber raita brings a light, tangy flavor that complements many savory dishes.

Ingredients:

  • 1 large cucumber, peeled, seeded, and finely diced
  • 1 cup plain yogurt (Greek or regular)
  • 1/2 teaspoon cumin powder (toasted for extra flavor)
  • 1/4 teaspoon black salt (optional, for tang)
  • 1/4 teaspoon regular salt (or to taste)
  • 1/4 teaspoon black pepper
  • 1/2 teaspoon finely chopped fresh mint or cilantro
  • 1/4 teaspoon chaat masala (optional, for a tangy kick)
  • 1 green chili, finely chopped (optional, for heat)
  • A pinch of sugar (optional, to balance flavors)

Instructions:

  1. In a medium mixing bowl, whisk the yogurt until smooth and creamy.
  2. Add the diced cucumber, cumin powder, black salt (if using), regular salt, and black pepper to the yogurt. Stir well to combine.
  3. If you prefer a bit of heat, mix in the chopped green chili. For extra flavor, you can also sprinkle in the chaat masala.
  4. Stir in the finely chopped mint or cilantro for a fresh, herbaceous touch.
  5. Taste and adjust the seasoning. If the raita is too tangy, you can add a pinch of sugar to balance the flavors.
  6. Chill the raita in the fridge for at least 30 minutes before serving, as it tastes best when cold.

Serve your cucumber raita chilled, alongside your favorite spicy dishes or with a plate of warm naan or pita bread.

Enjoy!

Microwave Caramel Corn

0

Microwave caramel corn is the perfect combination of sweet and salty, making it an ideal snack for parties, movie nights, or when you need a quick and easy treat. With this recipe, you’ll be able to make caramel corn in minutes using simple pantry staples and your microwave. The caramel coating is buttery, rich, and slightly crispy, making every kernel irresistibly delicious. This version eliminates the need for stovetop caramelizing, offering a mess-free and speedy method while still delivering that classic caramel crunch.

Ingredients:

  • 12 cups popped popcorn (about 1/2 cup unpopped kernels)
  • 1/2 cup unsalted butter
  • 1 cup brown sugar, packed
  • 1/4 cup light corn syrup
  • 1/2 tsp salt
  • 1/4 tsp baking soda
  • 1/2 tsp vanilla extract

Instructions:

  1. Pop the popcorn: Pop the kernels using your preferred method (air-popped or stovetop) and transfer the popped popcorn into a large, microwave-safe bowl. Remove any unpopped kernels.
  2. Prepare the caramel: In a microwave-safe bowl, combine the butter, brown sugar, corn syrup, and salt. Microwave on high for 2 minutes, then stir. Continue microwaving for another 2 minutes until the mixture is bubbly.
  3. Add vanilla and baking soda: Remove the caramel mixture from the microwave and stir in the baking soda and vanilla extract. The mixture will foam up slightly, becoming lighter in texture.
  4. Coat the popcorn: Pour the caramel mixture over the popped popcorn and gently stir to evenly coat all the kernels.
  5. Microwave the caramel corn: Place the bowl of coated popcorn back into the microwave and heat for 1 minute. Stir well, ensuring the caramel coats the popcorn evenly. Microwave for an additional minute, stir again, and repeat one final time (a total of 3 minutes microwaving).
  6. Cool and serve: Spread the caramel corn on a parchment-lined baking sheet to cool completely. Once cooled, break into pieces and enjoy!

This easy microwave caramel corn stays fresh for several days when stored in an airtight container.