Home Blog Page 802

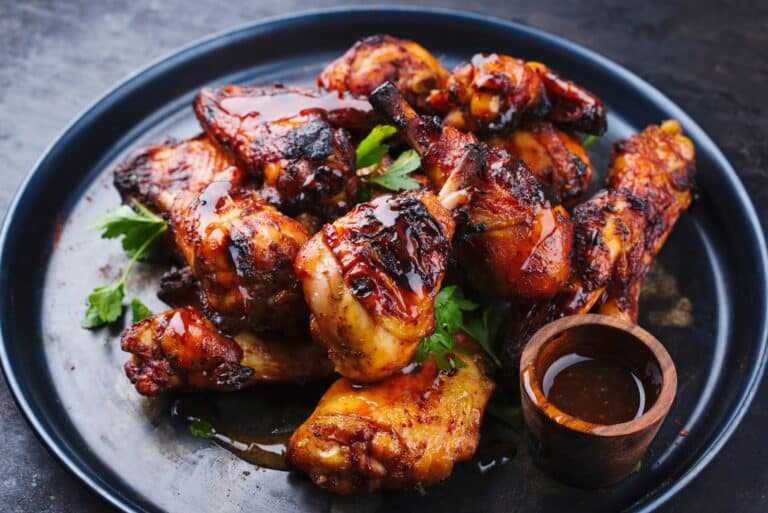
Best BBQ Chicken

Best BBQ Chicken is a mouthwatering dish that captures the essence of smoky, sweet, and savory flavors. Perfect for grilling season, this recipe combines tender chicken pieces with a rich, homemade barbecue sauce that caramelizes beautifully on the grill. The secret to achieving juicy and flavorful chicken lies in marinating it with a blend of spices and allowing it to absorb the delicious sauce as it cooks. Whether you’re hosting a summer cookout or simply enjoying a family dinner, this BBQ chicken is sure to be a hit, delivering a delightful combination of taste and texture that’s irresistible.

Ingredients

  • 4 chicken thighs
  • 4 chicken drumsticks
  • 1 tablespoon olive oil
  • Salt and pepper, to taste

For the BBQ Sauce:

  • 1 cup ketchup
  • 1/4 cup apple cider vinegar
  • 1/4 cup brown sugar
  • 2 tablespoons Worcestershire sauce
  • 2 tablespoons Dijon mustard
  • 1 tablespoon soy sauce
  • 2 cloves garlic, minced
  • 1 teaspoon smoked paprika
  • 1 teaspoon onion powder
  • 1/2 teaspoon cayenne pepper (optional)
  • 1/2 teaspoon black pepper

Instructions

  1. Prepare the chicken: Pat the chicken pieces dry with paper towels and season them with salt and pepper. Drizzle with olive oil, ensuring they are well coated.
  2. Make the BBQ sauce: In a medium saucepan, combine the ketchup, apple cider vinegar, brown sugar, Worcestershire sauce, Dijon mustard, soy sauce, minced garlic, smoked paprika, onion powder, cayenne pepper (if using), and black pepper. Stir to combine and bring to a simmer over medium heat. Cook for 10-15 minutes, stirring occasionally, until the sauce has thickened slightly. Remove from heat and let cool.
  3. Marinate the chicken: Place the chicken pieces in a large bowl or resealable plastic bag. Pour half of the BBQ sauce over the chicken, reserving the other half for basting. Toss to coat the chicken evenly. Cover and refrigerate for at least 1 hour, or up to 8 hours for maximum flavor.
  4. Preheat the grill: Preheat your grill to medium-high heat (around 375°F or 190°C).
  5. Grill the chicken: Remove the chicken from the marinade and place it on the grill. Cook for 25-30 minutes, turning occasionally, until the chicken is cooked through and reaches an internal temperature of 165°F (74°C). During the last 10 minutes of grilling, baste the chicken with the reserved BBQ sauce, flipping and basting frequently to create a caramelized glaze.
  6. Rest and serve: Remove the chicken from the grill and let it rest for 5 minutes before serving. Serve with additional BBQ sauce on the side, if desired.

Enjoy your Best BBQ Chicken as a delicious and flavorful main course, perfect for any barbecue or family meal, delivering smoky and savory goodness in every bite.
Loaded Sweet Potato Casserole

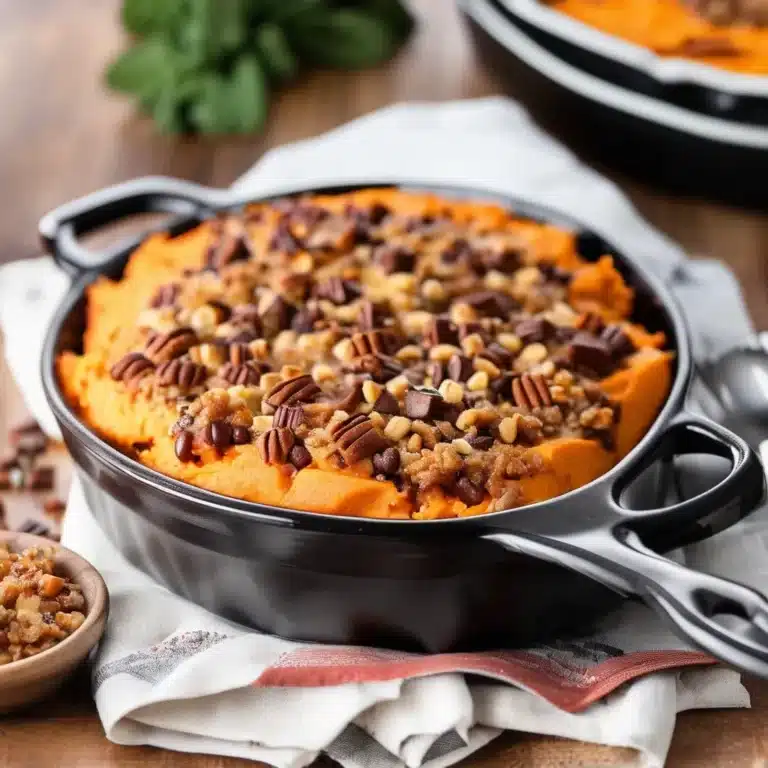
Loaded Sweet Potato Casserole is a decadent twist on a traditional holiday favorite, combining the natural sweetness of baked sweet potatoes with a rich, savory topping. This casserole is layered with a creamy sweet potato base and topped with crispy bacon, melted cheese, and crunchy pecans, creating a delightful mix of flavors and textures in every bite. Perfect for Thanksgiving, Christmas, or any family gathering, this dish offers a unique and satisfying side that’s sure to be a hit at the table. It’s easy to prepare and can be made ahead of time, allowing you to enjoy more time with loved ones during special occasions.

Ingredients

  • 4 large sweet potatoes, peeled and cubed
  • 1/2 cup unsalted butter, melted
  • 1/4 cup brown sugar
  • 1/2 cup heavy cream
  • 1 teaspoon vanilla extract
  • 1/2 teaspoon ground cinnamon
  • 1/4 teaspoon ground nutmeg
  • Salt and pepper, to taste
  • 1 cup shredded cheddar cheese
  • 1/2 cup cooked bacon, crumbled
  • 1/2 cup chopped pecans
  • 1/4 cup chopped green onions (for garnish)

Instructions

  1. Preheat the oven: Preheat your oven to 350°F (175°C). Grease a 9×13-inch baking dish with butter or non-stick spray.
  2. Cook the sweet potatoes: Place the cubed sweet potatoes in a large pot and cover with water. Bring to a boil and cook for 15-20 minutes, or until the potatoes are fork-tender. Drain and return to the pot.
  3. Mash the sweet potatoes: Using a potato masher or an electric mixer, mash the sweet potatoes until smooth. Stir in the melted butter, brown sugar, heavy cream, vanilla extract, cinnamon, nutmeg, salt, and pepper. Mix until well combined and creamy.
  4. Assemble the casserole: Spread the mashed sweet potatoes evenly in the prepared baking dish. Sprinkle the shredded cheddar cheese, crumbled bacon, and chopped pecans evenly over the top.
  5. Bake the casserole: Place the casserole in the preheated oven and bake for 25-30 minutes, or until the cheese is melted and bubbly.
  6. Garnish and serve: Remove from the oven and let cool for a few minutes. Garnish with chopped green onions before serving.

Enjoy your Loaded Sweet Potato Casserole as a deliciously rich and flavorful side dish that adds a touch of indulgence to any holiday meal, bringing together sweet and savory elements for a perfect harmony in every bite.

Stuffing Bread Pudding

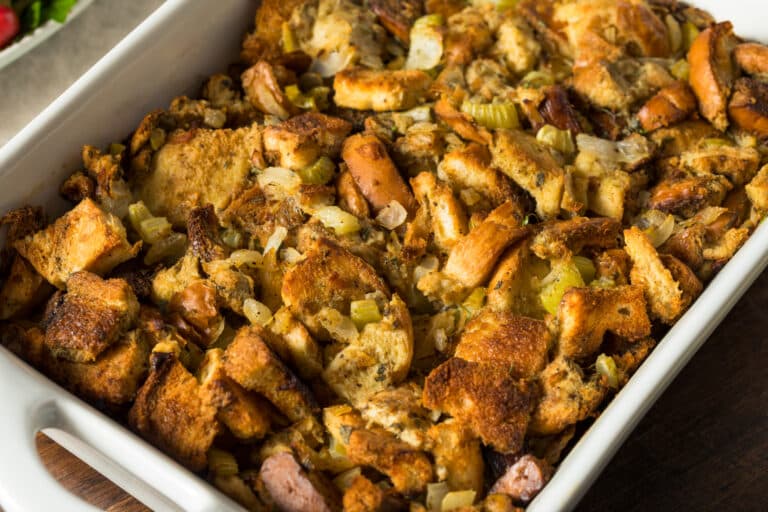
Stuffing Bread Pudding is a rich and savory dish that brings together the comforting flavors of traditional stuffing with the creamy texture of bread pudding. This dish is perfect for utilizing leftover bread or stuffing mix and transforms them into a delightful side dish that’s ideal for holiday feasts or any cozy gathering. With a medley of aromatic herbs, sautéed vegetables, and a custard-like base, this bread pudding offers a harmonious blend of flavors and textures. Serve it alongside roasted meats or as a vegetarian main course, and enjoy the warm, satisfying taste of this delicious and easy-to-make dish.

Ingredients

  • 1 loaf (about 1 pound) day-old bread (such as French bread or sourdough), cubed
  • 1/4 cup unsalted butter
  • 1 onion, finely chopped
  • 2 cloves garlic, minced
  • 2 celery stalks, chopped
  • 1 cup mushrooms, sliced
  • 1 tablespoon fresh thyme, chopped
  • 1 tablespoon fresh sage, chopped
  • 1 teaspoon salt
  • 1/2 teaspoon black pepper
  • 4 large eggs
  • 2 cups chicken or vegetable broth
  • 1 cup heavy cream
  • 1/2 cup grated Parmesan cheese
  • 1/4 cup fresh parsley, chopped (for garnish)

Instructions

  1. Preheat the oven: Preheat your oven to 350°F (175°C). Grease a 9×13-inch baking dish with butter or non-stick spray.
  2. Prepare the bread: Spread the cubed bread on a baking sheet and toast in the oven for 10-15 minutes, or until lightly golden and crisp. Remove from the oven and set aside.
  3. Sauté the vegetables: In a large skillet, melt the butter over medium heat. Add the chopped onion, minced garlic, celery, and mushrooms. Cook for 5-7 minutes, or until the vegetables are softened and fragrant. Stir in the fresh thyme, sage, salt, and black pepper. Remove from heat.
  4. Prepare the custard: In a large bowl, whisk together the eggs, chicken or vegetable broth, and heavy cream until well combined.
  5. Combine ingredients: In the prepared baking dish, combine the toasted bread cubes with the sautéed vegetable mixture. Pour the egg and cream mixture evenly over the top, pressing the bread down gently to soak up the liquid. Sprinkle the grated Parmesan cheese over the top.
  6. Bake the pudding: Cover the dish with aluminum foil and bake in the preheated oven for 30 minutes. Remove the foil and bake for an additional 15-20 minutes, or until the top is golden brown and the center is set.
  7. Garnish and serve: Remove from the oven and let cool for a few minutes. Garnish with chopped fresh parsley before serving.

Enjoy your Stuffing Bread Pudding as a comforting and flavorful addition to any meal, providing a delightful twist on classic stuffing with its creamy, custard-like texture and rich taste.

Crispy Smashed Potatoes

Crispy Smashed Potatoes are a delightful side dish that combines the fluffy interior of boiled potatoes with a perfectly crispy exterior. These savory treats are simple to prepare and packed with flavor, making them a versatile addition to any meal. The key to achieving the perfect texture is boiling the potatoes until tender, then smashing and roasting them at high heat. With a sprinkle of garlic, herbs, and a drizzle of olive oil, these potatoes become irresistibly crunchy and aromatic. Serve them as an appetizer, a side dish, or even as a base for creative toppings to suit any occasion.

Ingredients

  • 1 1/2 pounds baby potatoes (red or Yukon Gold)
  • 3 tablespoons olive oil
  • 2 cloves garlic, minced
  • 1 teaspoon dried rosemary or thyme
  • Salt and pepper, to taste
  • 1/4 cup grated Parmesan cheese (optional)
  • Fresh parsley, chopped (for garnish)

Instructions

  1. Preheat the oven: Preheat your oven to 425°F (220°C). Line a baking sheet with parchment paper or lightly grease it with olive oil.
  2. Boil the potatoes: Place the baby potatoes in a large pot and cover with cold water. Add a pinch of salt and bring to a boil. Cook the potatoes for 15-20 minutes or until they are fork-tender. Drain and let them cool slightly.
  3. Prepare the potatoes for smashing: Transfer the boiled potatoes to the prepared baking sheet. Use a potato masher or the bottom of a glass to gently press down on each potato until it is about 1/2 inch thick, being careful not to break them apart.
  4. Season the potatoes: Drizzle the smashed potatoes with olive oil. Sprinkle the minced garlic, dried rosemary or thyme, salt, and pepper evenly over the top. Optionally, sprinkle grated Parmesan cheese over the potatoes for extra flavor.
  5. Roast the potatoes: Place the baking sheet in the preheated oven and roast for 25-30 minutes, or until the potatoes are golden brown and crispy.
  6. Garnish and serve: Remove the potatoes from the oven and garnish with chopped fresh parsley. Serve immediately while hot.

Enjoy your Crispy Smashed Potatoes as a delicious and versatile dish that pairs well with a variety of main courses, offering a satisfying crunch and rich flavor in every bite.

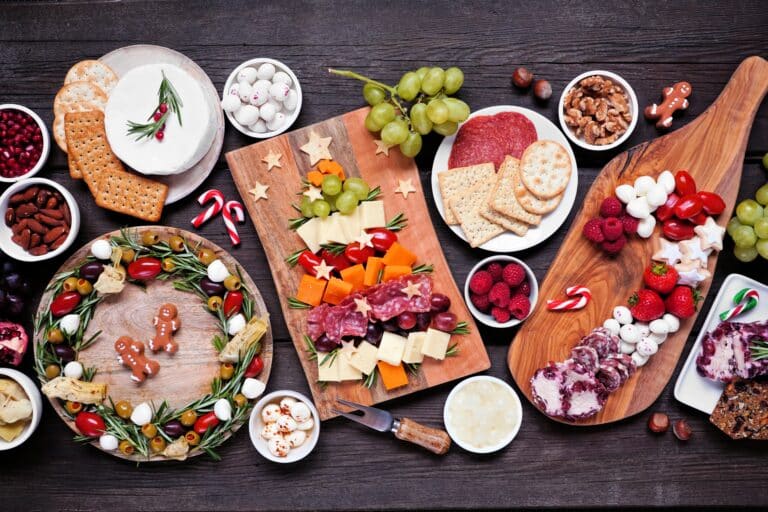
Christmas Tree Charcuterie Board

A Christmas Tree Charcuterie Board is a festive and eye-catching appetizer that brings the holiday spirit to your table with an assortment of meats, cheeses, fruits, nuts, and other tasty treats. Perfect for holiday gatherings, this board is arranged in the shape of a Christmas tree, complete with edible “ornaments” and garnishes that evoke the colors and warmth of the season. With its beautiful presentation and variety of flavors, a Christmas Tree Charcuterie Board not only looks stunning but also provides something for everyone to enjoy. It’s a creative and easy-to-assemble dish that will surely impress your guests and add a touch of cheer to your holiday festivities.

Ingredients

  • Cheeses:
    • 1 wedge Brie or Camembert
    • 1 block cheddar cheese, cubed
    • 1 block gouda cheese, sliced
  • Meats:
    • 1 package prosciutto or salami slices
    • 1 package pepperoni slices
  • Fruits and Nuts:
    • 1 cup grapes (red and green)
    • 1/2 cup dried apricots
    • 1/2 cup mixed nuts (almonds, walnuts, pecans)
  • Extras:
    • 1/4 cup olives (green and black)
    • 1/4 cup cherry tomatoes
    • 1/4 cup pickles or cornichons
    • Fresh rosemary sprigs (for garnish)
    • Crackers or sliced baguette

Instructions

  1. Choose a board: Select a large wooden or slate board as the base for your charcuterie display. Make sure it’s big enough to accommodate all ingredients in the shape of a Christmas tree.
  2. Arrange the cheeses: Start by placing the Brie or Camembert at the top of the board as the “star.” Next, arrange the cubed cheddar and sliced gouda in sections to form the “branches” of the tree. You can layer the cheeses to give depth and create a fuller tree shape.
  3. Add the meats: Fold or roll the prosciutto or salami slices and layer them in between the cheese sections. Spread out the pepperoni slices, tucking them among the cheese for a vibrant pop of color.
  4. Place the fruits and nuts: Scatter the grapes, dried apricots, and mixed nuts throughout the board, filling in gaps between the cheese and meats. This adds texture and sweetness to balance the savory elements.
  5. Include extras: Position olives, cherry tomatoes, and pickles around the tree to serve as “ornaments.” These will add variety and color to your board.
  6. Garnish: Use fresh rosemary sprigs to represent the “needles” of the Christmas tree, placing them strategically around the board to enhance the tree shape.
  7. Add crackers: Finally, arrange crackers or slices of baguette around the board or in a separate dish nearby for guests to pair with the cheese and meats.

Enjoy your Christmas Tree Charcuterie Board as a beautiful and delicious centerpiece that celebrates the flavors and festivity of the holiday season, making your gathering memorable and delightful.

Loaded Waffle Fries

Loaded Waffle Fries are a deliciously indulgent snack or side dish that brings together crispy waffle-cut potatoes with a mouthwatering mix of toppings. Perfect for sharing with friends at a party or as a comforting treat on a lazy day, these fries are topped with melted cheese, crispy bacon, cool sour cream, and fresh green onions. The combination of flavors and textures makes every bite irresistibly satisfying. This dish is easy to prepare and can be customized with your favorite toppings, making it a versatile and crowd-pleasing option for any occasion.

Ingredients

  • 1 bag (22 ounces) frozen waffle fries
  • 1 cup shredded cheddar cheese
  • 1/2 cup sour cream
  • 1/4 cup cooked bacon bits
  • 1/4 cup green onions, chopped
  • 1/4 cup diced tomatoes
  • 1 tablespoon ranch dressing (optional)
  • Salt and pepper, to taste
  • 1 tablespoon fresh parsley, chopped (for garnish)

Instructions

  1. Bake the waffle fries: Preheat your oven to 425°F (220°C). Spread the waffle fries in a single layer on a baking sheet and bake according to the package instructions, usually for 20-25 minutes, until golden brown and crispy. Flip halfway through for even cooking.
  2. Add cheese and bacon: Remove the fries from the oven and sprinkle the shredded cheddar cheese and bacon bits evenly over the fries. Return the baking sheet to the oven and bake for an additional 5 minutes, or until the cheese is melted and bubbly.
  3. Top with sour cream and veggies: Remove the fries from the oven and drizzle with sour cream. Scatter the chopped green onions and diced tomatoes over the top.
  4. Garnish and serve: Drizzle with ranch dressing if desired. Garnish with fresh parsley and serve immediately, either as a side dish or a tasty appetizer.

Enjoy your Loaded Waffle Fries as a fun and flavorful dish that’s perfect for any occasion, offering a delicious combination of classic flavors and satisfying textures in every bite.

Loaded Sour Cream and Onion Waffle Fries

Loaded Sour Cream and Onion Waffle Fries are the ultimate comfort food, combining crispy waffle fries with the classic flavor duo of sour cream and onion. This deliciously indulgent dish is perfect for sharing at parties, game nights, or simply as a satisfying snack. Topped with gooey melted cheese, tangy sour cream, and fresh green onions, these waffle fries offer a delightful blend of textures and flavors that will leave everyone craving more. Easy to prepare and endlessly customizable, this recipe is sure to become a crowd favorite, offering a creative twist on a classic appetizer.

Ingredients

  • 1 bag (22 ounces) frozen waffle fries
  • 1 cup shredded cheddar cheese
  • 1/2 cup sour cream
  • 1/4 cup green onions, chopped
  • 1/4 cup cooked bacon bits (optional)
  • 1 tablespoon dried onion flakes
  • 1 teaspoon garlic powder
  • Salt and pepper, to taste
  • 1 tablespoon fresh parsley, chopped (for garnish)

Instructions

  1. Bake the waffle fries: Preheat your oven to 425°F (220°C). Spread the waffle fries in a single layer on a baking sheet and bake according to the package instructions, usually for 20-25 minutes, until golden brown and crispy. Flip halfway through for even cooking.
  2. Season the fries: Remove the fries from the oven and sprinkle with salt, pepper, dried onion flakes, and garlic powder, tossing to coat evenly.
  3. Add cheese and bacon: Sprinkle the shredded cheddar cheese and bacon bits (if using) evenly over the fries. Return the baking sheet to the oven and bake for an additional 5 minutes, or until the cheese is melted and bubbly.
  4. Top with sour cream and onions: Remove the fries from the oven and drizzle with sour cream. Sprinkle the chopped green onions over the top.
  5. Garnish and serve: Garnish with fresh parsley and serve immediately, either as a side dish or a tasty appetizer.

Enjoy your Loaded Sour Cream and Onion Waffle Fries as a flavorful and fun dish that’s perfect for any occasion, offering a delightful combination of classic flavors and satisfying textures in every bite.

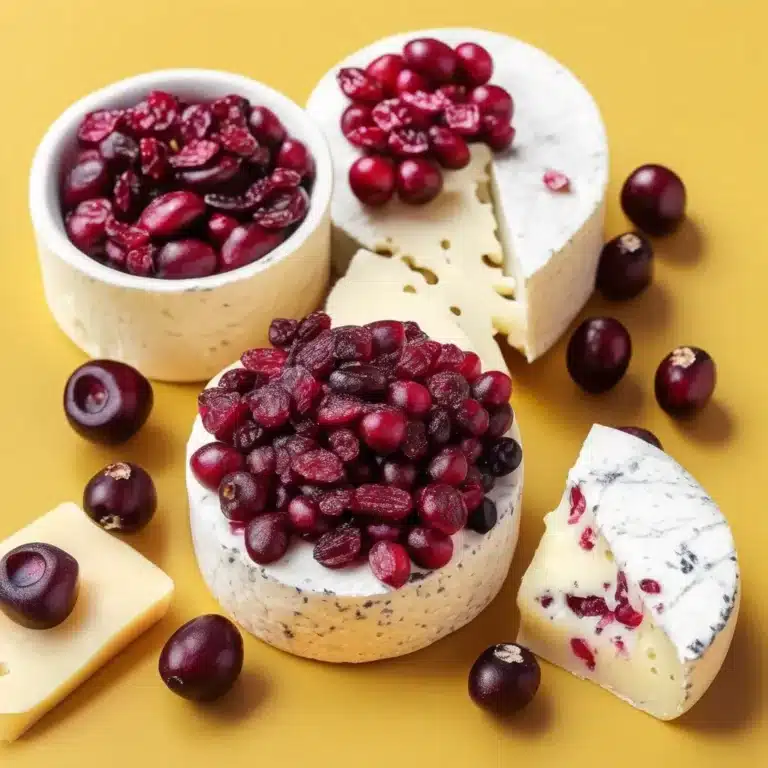
Homemade Vegan Cheese with Cranberries

Homemade Vegan Cheese with Cranberries is a delightful plant-based alternative to traditional cheese, offering a creamy texture and a perfect balance of sweet and savory flavors. This cheese is made from cashews, which provide a rich and smooth base, blended with nutritional yeast, lemon juice, and garlic for a cheesy and tangy taste. The addition of dried cranberries adds a touch of natural sweetness, making this cheese perfect for a festive cheese board or as a unique appetizer. Easy to prepare and customize, this vegan cheese is a delicious treat that can be enjoyed by everyone, whether you’re vegan or simply looking for a tasty dairy-free option.

Ingredients

  • 1 1/2 cups raw cashews, soaked for at least 4 hours or overnight
  • 1/4 cup nutritional yeast
  • 3 tablespoons lemon juice
  • 2 cloves garlic, minced
  • 1 teaspoon onion powder
  • 1/2 teaspoon salt
  • 1/4 teaspoon black pepper
  • 1/4 cup water
  • 1 tablespoon agar-agar powder
  • 1/2 cup dried cranberries, chopped
  • 1 tablespoon olive oil (for greasing the mold)

Instructions

  1. Prepare the cashews: Drain and rinse the soaked cashews thoroughly.
  2. Blend the ingredients: In a food processor, combine the soaked cashews, nutritional yeast, lemon juice, minced garlic, onion powder, salt, and black pepper. Process until smooth and creamy, scraping down the sides as needed.
  3. Cook the agar-agar: In a small saucepan, bring the water to a boil. Add the agar-agar powder and stir continuously for 3-5 minutes, or until the agar-agar is completely dissolved.
  4. Combine agar-agar with cashew mixture: With the food processor running, slowly pour the hot agar-agar mixture into the cashew mixture. Blend until fully combined and smooth.
  5. Fold in the cranberries: Transfer the cashew mixture to a bowl and fold in the chopped dried cranberries until evenly distributed.
  6. Set the cheese: Lightly grease a small mold or container with olive oil. Pour the mixture into the mold, smoothing the top with a spatula. Refrigerate for at least 2 hours, or until the cheese is firm and set.
  7. Serve: Once set, remove the cheese from the mold and place it on a serving plate. Serve with crackers, bread, or fresh fruit.

Enjoy your Homemade Vegan Cheese with Cranberries as a delicious and elegant addition to any gathering, offering a creamy, tangy, and slightly sweet treat that’s sure to impress.

Keto Chicken Crust Pizza

Keto Chicken Crust Pizza is a delicious low-carb alternative to traditional pizza, perfect for those following a ketogenic or low-carb diet. This innovative pizza features a flavorful crust made primarily from ground chicken, offering a high-protein base that satisfies your pizza cravings without the carbs. Topped with your favorite pizza sauce, gooey cheese, and a variety of toppings, this chicken crust pizza is both hearty and satisfying. Easy to customize and quick to prepare, it’s a great way to enjoy a classic comfort food while sticking to your dietary goals.

Ingredients

  • 1 pound ground chicken
  • 1/2 cup grated Parmesan cheese
  • 1 teaspoon garlic powder
  • 1 teaspoon onion powder
  • 1 teaspoon dried oregano
  • 1/2 teaspoon salt
  • 1/4 teaspoon black pepper
  • 1 large egg

For the Toppings:

  • 1/2 cup low-carb pizza sauce or marinara sauce
  • 1 1/2 cups shredded mozzarella cheese
  • 1/4 cup sliced pepperoni (or other toppings of choice)
  • 1/4 cup sliced bell peppers
  • 1/4 cup sliced olives
  • 1/4 cup fresh basil leaves, for garnish

Instructions

  1. Preheat the oven: Preheat your oven to 400°F (200°C). Line a baking sheet or pizza stone with parchment paper.
  2. Prepare the chicken crust: In a large bowl, combine the ground chicken, grated Parmesan cheese, garlic powder, onion powder, dried oregano, salt, black pepper, and egg. Mix well until all ingredients are evenly incorporated.
  3. Shape the crust: Place the chicken mixture onto the prepared baking sheet. Using your hands or a spatula, press the mixture into a flat, even circle, about 1/4-inch thick.
  4. Bake the crust: Bake the chicken crust in the preheated oven for 20 minutes, or until it is firm and lightly browned.
  5. Add the toppings: Remove the crust from the oven and spread the pizza sauce evenly over the top. Sprinkle the shredded mozzarella cheese over the sauce, then add your desired toppings, such as pepperoni, bell peppers, and olives.
  6. Bake the pizza: Return the pizza to the oven and bake for an additional 10-15 minutes, or until the cheese is melted and bubbly.
  7. Garnish and serve: Remove the pizza from the oven and let it cool for a few minutes. Garnish with fresh basil leaves before slicing and serving.

Enjoy your Keto Chicken Crust Pizza as a delicious and satisfying meal that fits perfectly into a low-carb lifestyle, offering all the flavors of traditional pizza without the carbs.

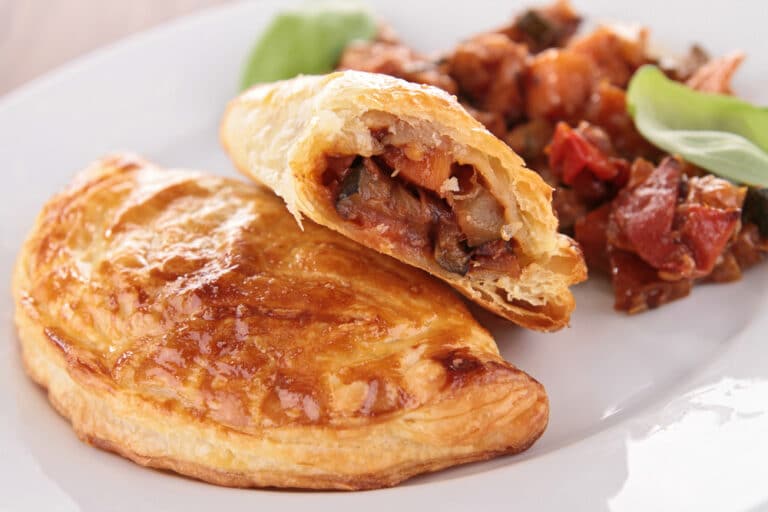
Empanadas (Beef Turnovers)

Empanadas are a delightful and versatile dish that has become a staple in Latin American cuisine. These savory pastries are filled with a flavorful mixture of beef, spices, and vegetables, encased in a buttery, flaky dough that crisps up beautifully when baked or fried. Perfect as a snack, appetizer, or main dish, empanadas are highly customizable, allowing you to get creative with your fillings. Whether enjoyed on their own or dipped in a tangy sauce, these beef turnovers are sure to be a hit with family and friends.

Ingredients:

  • For the Dough:
    • 3 cups all-purpose flour
    • 1 teaspoon salt
    • 1/2 cup unsalted butter, cold and diced
    • 1 egg
    • 3/4 cup cold water
  • For the Filling:
    • 1 tablespoon olive oil
    • 1 medium onion, finely chopped
    • 2 cloves garlic, minced
    • 1 lb ground beef
    • 1 teaspoon ground cumin
    • 1 teaspoon paprika
    • 1/2 teaspoon chili powder
    • 1/2 teaspoon salt
    • 1/4 teaspoon black pepper
    • 1/4 cup tomato sauce
    • 1/4 cup green olives, sliced
    • 1/4 cup raisins (optional)
    • 1 hard-boiled egg, chopped
  • For Assembly:
    • 1 egg, beaten (for egg wash)

Instructions:

  1. Make the Dough:
    • In a large bowl, mix the flour and salt. Add the cold, diced butter and use your fingers or a pastry cutter to blend until the mixture resembles coarse crumbs.
    • In a separate bowl, beat the egg with cold water and add it to the flour mixture. Mix until the dough comes together.
    • Turn the dough onto a floured surface and knead lightly. Wrap in plastic wrap and refrigerate for at least 30 minutes.
  2. Prepare the Filling:
    • In a large skillet, heat the olive oil over medium heat. Add the chopped onion and garlic, cooking until the onion is soft and translucent.
    • Add the ground beef to the skillet and cook until browned. Drain any excess fat.
    • Stir in the cumin, paprika, chili powder, salt, and black pepper, cooking for another minute.
    • Add the tomato sauce, green olives, raisins (if using), and chopped hard-boiled egg. Mix well and let the filling cool.
  3. Assemble the Empanadas:
    • Preheat the oven to 375°F (190°C) and line a baking sheet with parchment paper.
    • On a floured surface, roll out the dough to about 1/8-inch thickness. Use a round cutter (about 4-5 inches in diameter) to cut out circles.
    • Place a spoonful of filling in the center of each dough circle. Fold the dough over to create a half-moon shape and seal the edges with a fork.
    • Transfer the empanadas to the prepared baking sheet and brush the tops with the beaten egg wash.
  4. Bake:
    • Bake in the preheated oven for 20-25 minutes, or until golden brown and crisp.
  5. Serve:
    • Let the empanadas cool slightly before serving. Enjoy them warm with your favorite dipping sauce.

Enjoy these delicious and satisfying empanadas, perfect for any occasion!