Home Blog Page 819

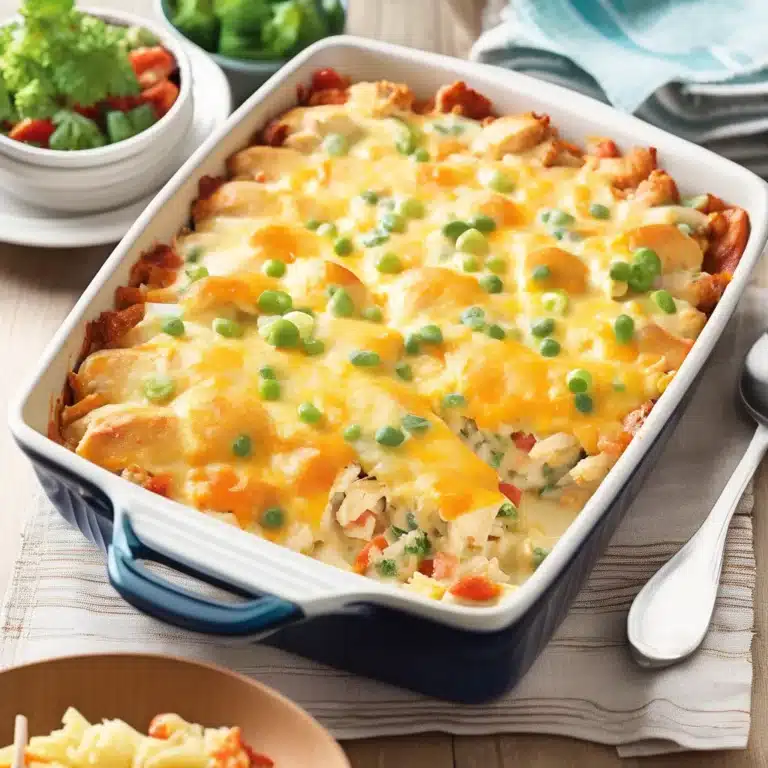
Cheesy Chicken Casserole

Cheesy Chicken Casserole is the ultimate comfort food, combining tender pieces of chicken with a rich and creamy cheese sauce, all baked to golden perfection. This dish is not only incredibly delicious but also straightforward to make, making it a fantastic option for busy weeknights or casual family gatherings. The combination of hearty chicken, gooey cheese, and flavorful seasonings creates a satisfying meal that everyone will love. Serve it with a side salad or steamed vegetables for a complete and balanced dinner.

Ingredients

  • 2 cups cooked chicken, shredded or diced
  • 2 cups cooked rice
  • 1 can (10.5 oz) cream of chicken soup
  • 1 cup sour cream
  • 1 cup shredded cheddar cheese
  • 1 cup shredded mozzarella cheese
  • 1/2 cup milk
  • 1 small onion, finely chopped
  • 1 teaspoon garlic powder
  • 1 teaspoon onion powder
  • 1 teaspoon dried thyme
  • Salt and pepper to taste
  • 1/2 cup breadcrumbs
  • 2 tablespoons melted butter
  • Fresh parsley, chopped (for garnish)

Instructions

  1. Preheat the Oven: Preheat your oven to 350°F (175°C).
  2. Prepare the Casserole Mixture: In a large bowl, combine the cooked chicken, cooked rice, cream of chicken soup, sour cream, cheddar cheese, mozzarella cheese, milk, and chopped onion. Mix well.
  3. Season the Mixture: Add the garlic powder, onion powder, dried thyme, salt, and pepper to the mixture. Stir until all ingredients are well combined.
  4. Transfer to Baking Dish: Pour the mixture into a greased 9×13-inch baking dish, spreading it out evenly.
  5. Prepare the Topping: In a small bowl, mix the breadcrumbs with the melted butter until evenly coated. Sprinkle the breadcrumb mixture over the top of the casserole.
  6. Bake: Place the casserole in the preheated oven and bake for 25-30 minutes, or until the top is golden brown and the casserole is bubbly.
  7. Garnish and Serve: Remove the casserole from the oven and let it cool for a few minutes. Garnish with fresh parsley before serving.

Enjoy your creamy, cheesy, and comforting Cheesy Chicken Casserole!
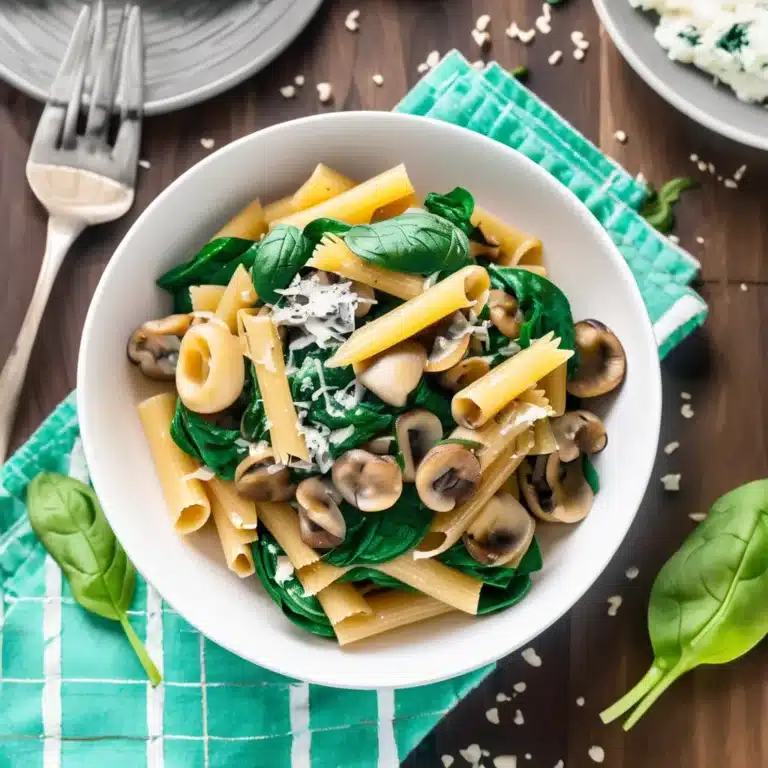
One Pot Spinach Mushroom Pasta

One Pot Spinach Mushroom Pasta is a simple yet delectable dish that combines the earthy flavors of mushrooms with the fresh taste of spinach, all enveloped in a creamy, savory sauce. This recipe is perfect for busy weeknights when you want a satisfying meal with minimal cleanup. The pasta cooks directly in the pot, absorbing all the rich flavors from the vegetables and broth, making each bite a delightful harmony of taste and texture. It’s a hearty, vegetarian-friendly meal that will please the entire family.

Ingredients

  • 2 tablespoons olive oil
  • 1 onion, finely chopped
  • 3 cloves garlic, minced
  • 8 oz mushrooms, sliced
  • 4 cups vegetable broth
  • 1 cup milk or heavy cream
  • 12 oz pasta (penne, fettuccine, or your choice)
  • 5 oz fresh spinach
  • 1/2 cup grated Parmesan cheese
  • 1 teaspoon dried thyme
  • 1 teaspoon dried basil
  • Salt and pepper to taste
  • Fresh parsley, chopped (for garnish)

Instructions

  1. Sauté the Aromatics: In a large pot or Dutch oven, heat the olive oil over medium heat. Add the chopped onion and cook until translucent, about 5 minutes. Add the minced garlic and cook for another minute.
  2. Cook the Mushrooms: Add the sliced mushrooms to the pot and sauté until they are soft and browned, about 5-7 minutes.
  3. Add Liquid and Pasta: Pour in the vegetable broth and milk or heavy cream. Stir in the dried thyme and basil. Bring the mixture to a boil.
  4. Cook the Pasta: Add the pasta to the pot, ensuring it’s submerged in the liquid. Reduce the heat to medium-low and let it simmer, stirring occasionally, until the pasta is cooked al dente and the liquid has mostly been absorbed, about 10-12 minutes.
  5. Add Spinach and Cheese: Stir in the fresh spinach and cook until wilted, about 2-3 minutes. Add the grated Parmesan cheese and mix until melted and well combined. Season with salt and pepper to taste.
  6. Serve: Remove the pot from heat and let it sit for a few minutes to thicken. Garnish with fresh parsley before serving.

Enjoy your creamy and flavorful One Pot Spinach Mushroom Pasta!

Steak and Rice Bowls with Vegetable Relish

Steak and Rice Bowls with Vegetable Relish is a vibrant and satisfying meal that combines juicy, perfectly cooked steak with a medley of fresh vegetables over a bed of fluffy rice. This dish is a delightful mix of textures and flavors, featuring tender beef, crisp and tangy vegetable relish, and the comforting heartiness of rice. It’s a versatile recipe that’s perfect for meal prepping or a quick weeknight dinner, offering a balanced and wholesome dining experience in every bite.

Ingredients

For the Steak:

  • 1 lb steak (ribeye, sirloin, or flank)
  • 2 tablespoons olive oil
  • 2 cloves garlic, minced
  • Salt and pepper to taste

For the Rice:

  • 2 cups cooked rice (white, brown, or jasmine)
  • 1 tablespoon butter or olive oil
  • Salt to taste

For the Vegetable Relish:

  • 1 cup cherry tomatoes, halved
  • 1 small cucumber, diced
  • 1/2 red onion, finely chopped
  • 1 bell pepper, diced
  • 1/4 cup fresh cilantro or parsley, chopped
  • 2 tablespoons olive oil
  • 1 tablespoon red wine vinegar
  • 1 teaspoon lemon juice
  • Salt and pepper to taste

Instructions

  1. Prepare the Steak: Season the steak with salt, pepper, and minced garlic. Drizzle with olive oil and let it marinate for at least 30 minutes.
  2. Cook the Rice: While the steak is marinating, cook the rice according to package instructions. Once cooked, fluff with a fork and stir in butter or olive oil and salt to taste. Set aside.
  3. Make the Vegetable Relish: In a medium bowl, combine cherry tomatoes, cucumber, red onion, bell pepper, and cilantro or parsley. Drizzle with olive oil, red wine vinegar, and lemon juice. Season with salt and pepper to taste. Mix well and set aside to let the flavors meld.
  4. Cook the Steak: Heat a grill or skillet over medium-high heat. Cook the steak for about 4-5 minutes per side, or until it reaches your desired level of doneness. Let the steak rest for 5 minutes before slicing it thinly against the grain.
  5. Assemble the Bowls: Divide the cooked rice among four bowls. Top with slices of steak and a generous portion of vegetable relish.
  6. Serve: Garnish with additional fresh herbs if desired and serve immediately.

Enjoy your delicious and colorful Steak and Rice Bowls with Vegetable Relish!

Grilled Balsamic Beef

Grilled Balsamic Beef is a delicious and easy-to-prepare dish that combines the rich flavors of beef with the tangy sweetness of balsamic vinegar. Perfect for summer barbecues or a quick weeknight dinner, this recipe brings out the best in your steak by marinating it in a flavorful balsamic mixture, then grilling it to perfection. The result is a tender, juicy steak with a delightful caramelized crust that pairs wonderfully with fresh salads, roasted vegetables, or your favorite grilled sides.

Ingredients

  • 2 lbs beef steaks (ribeye, sirloin, or your preferred cut)
  • 1/2 cup balsamic vinegar
  • 1/4 cup olive oil
  • 3 cloves garlic, minced
  • 2 tablespoons soy sauce
  • 2 tablespoons honey
  • 1 tablespoon Dijon mustard
  • 1 teaspoon dried rosemary
  • 1 teaspoon dried thyme
  • Salt and pepper to taste
  • Fresh parsley, chopped (for garnish)

Instructions

  1. Prepare the Marinade: In a medium bowl, whisk together the balsamic vinegar, olive oil, minced garlic, soy sauce, honey, Dijon mustard, dried rosemary, and dried thyme. Season with salt and pepper to taste.
  2. Marinate the Beef: Place the beef steaks in a large resealable plastic bag or a shallow dish. Pour the marinade over the steaks, ensuring they are well-coated. Seal the bag or cover the dish and refrigerate for at least 1 hour, preferably overnight for maximum flavor.
  3. Preheat the Grill: Preheat your grill to medium-high heat.
  4. Grill the Steaks: Remove the steaks from the marinade, allowing any excess to drip off. Grill the steaks for about 4-6 minutes per side, depending on your desired level of doneness. Use a meat thermometer to check for doneness: 130°F for medium-rare, 140°F for medium, and 150°F for medium-well.
  5. Rest the Steaks: Remove the steaks from the grill and let them rest for 5 minutes. This allows the juices to redistribute and results in a more tender steak.
  6. Serve: Slice the steaks against the grain and garnish with fresh parsley. Serve with your favorite side dishes.

Enjoy your flavorful and juicy Grilled Balsamic Beef!

Red Wine Braised Beef

This Red Wine Braised Beef Tips recipe is a comforting and elegant dish perfect for a cozy dinner or a special occasion. The beef tips are slowly braised in a rich red wine sauce, which infuses them with deep flavors and makes them incredibly tender. The addition of aromatic vegetables and herbs elevates the dish, creating a complex and satisfying meal that pairs beautifully with mashed potatoes, polenta, or a side of crusty bread to soak up the delicious sauce.

Ingredients

  • 2 lbs beef tips
  • 2 tablespoons olive oil
  • 1 large onion, chopped
  • 3 cloves garlic, minced
  • 2 carrots, diced
  • 2 celery stalks, diced
  • 1 cup red wine
  • 2 cups beef broth
  • 2 tablespoons tomato paste
  • 1 teaspoon dried thyme
  • 1 teaspoon dried rosemary
  • 2 bay leaves
  • Salt and pepper to taste
  • Fresh parsley, chopped (for garnish)

Instructions

  1. Prepare the Beef Tips: Season the beef tips with salt and pepper.
  2. Brown the Beef: In a large, heavy-bottomed pot or Dutch oven, heat the olive oil over medium-high heat. Add the beef tips and brown them on all sides, working in batches if necessary. Remove the beef from the pot and set aside.
  3. Sauté the Vegetables: In the same pot, add the chopped onion, carrots, and celery. Sauté until the vegetables are softened, about 5-7 minutes. Add the minced garlic and cook for another minute.
  4. Deglaze with Wine: Pour in the red wine and scrape up any browned bits from the bottom of the pot. Let the wine simmer for about 5 minutes, allowing it to reduce slightly.
  5. Add Tomato Paste and Herbs: Stir in the tomato paste, dried thyme, dried rosemary, and bay leaves. Mix well to combine.
  6. Braise the Beef: Return the browned beef tips to the pot. Pour in the beef broth and bring the mixture to a simmer. Cover the pot and reduce the heat to low. Let the beef braise for 2-3 hours, or until the beef tips are tender and the sauce has thickened.
  7. Adjust Seasoning: Taste and adjust the seasoning with additional salt and pepper if needed.
  8. Serve: Remove the bay leaves before serving. Garnish with fresh parsley. Serve the beef tips with mashed potatoes, polenta, or a side of crusty bread.

Enjoy your flavorful and tender Red Wine Braised Beef Tips!

Copycat Chipotle Chicken

Recreate the bold and smoky flavors of Chipotle’s famous chicken at home with this easy Copycat Chipotle Chicken recipe. Marinated in a blend of spices, chipotle peppers, and adobo sauce, this chicken is grilled to perfection, resulting in juicy and flavorful pieces that taste just like the restaurant version. Ideal for burritos, bowls, tacos, or salads, this versatile recipe is sure to become a family favorite. With simple ingredients and straightforward preparation, you can enjoy the deliciousness of Chipotle’s chicken right in your own kitchen.

Ingredients:

  • 2 pounds boneless, skinless chicken thighs
  • 3 chipotle peppers in adobo sauce
  • 2 tablespoons adobo sauce (from the chipotle peppers can)
  • 1/4 cup olive oil
  • 3 tablespoons lime juice (about 2 limes)
  • 4 garlic cloves, minced
  • 2 teaspoons ground cumin
  • 2 teaspoons dried oregano
  • 2 teaspoons smoked paprika
  • 1 teaspoon chili powder
  • 1 teaspoon salt
  • 1/2 teaspoon black pepper

Instructions:

  1. Prepare the Marinade:
    • In a blender or food processor, combine the chipotle peppers, adobo sauce, olive oil, lime juice, minced garlic, ground cumin, dried oregano, smoked paprika, chili powder, salt, and black pepper. Blend until smooth.
  2. Marinate the Chicken:
    • Place the chicken thighs in a large resealable plastic bag or a shallow dish. Pour the marinade over the chicken, ensuring each piece is well coated. Seal the bag or cover the dish and refrigerate for at least 2 hours, or overnight for best results.
  3. Grill the Chicken:
    • Preheat your grill to medium-high heat. Remove the chicken from the marinade and shake off any excess.
    • Grill the chicken thighs for 5-7 minutes per side, or until they reach an internal temperature of 165°F (75°C) and have nice grill marks. Adjust cooking time as needed based on the thickness of the chicken thighs.
  4. Serve:
    • Transfer the grilled chicken to a cutting board and let it rest for a few minutes. Slice the chicken into bite-sized pieces.
    • Serve the chicken in burritos, bowls, tacos, or salads, and enjoy the authentic Chipotle taste at home.

This Copycat Chipotle Chicken brings the savory, spicy flavors you love right to your table, making it an excellent choice for any meal.

Skillet Zucchini and Squash

Skillet Zucchini and Squash is a simple, healthy, and flavorful dish that makes the perfect side for any meal. This recipe brings together fresh zucchini and yellow squash, sautéed to perfection in a skillet with garlic, olive oil, and a sprinkle of herbs. The vegetables retain their vibrant colors and slightly crisp texture, making this dish as visually appealing as it is delicious. Quick to prepare and full of garden-fresh goodness, this versatile dish can be served alongside grilled meats, added to pasta, or enjoyed on its own for a light and nutritious option.

Ingredients:

  • 2 medium zucchini, sliced into rounds
  • 2 medium yellow squash, sliced into rounds
  • 2 tablespoons olive oil
  • 3 cloves garlic, minced
  • 1 teaspoon dried oregano
  • 1 teaspoon dried thyme
  • Salt and black pepper to taste
  • Freshly grated Parmesan cheese (optional)
  • Fresh basil or parsley, chopped (for garnish)

Instructions:

  1. Prepare the Vegetables:
    • Wash and slice the zucchini and yellow squash into even rounds, about 1/4-inch thick.
  2. Heat the Skillet:
    • Heat the olive oil in a large skillet over medium heat.
  3. Cook the Vegetables:
    • Add the minced garlic to the skillet and sauté for about 1 minute until fragrant.
    • Add the sliced zucchini and yellow squash to the skillet. Season with dried oregano, dried thyme, salt, and black pepper.
    • Sauté the vegetables for 5-7 minutes, stirring occasionally, until they are tender but still slightly crisp.
  4. Serve:
    • Transfer the cooked zucchini and squash to a serving dish.
    • If desired, sprinkle with freshly grated Parmesan cheese and garnish with chopped fresh basil or parsley.

Enjoy your Skillet Zucchini and Squash as a delicious and healthy side dish, perfect for complementing any main course or enjoyed on its own for a light meal!

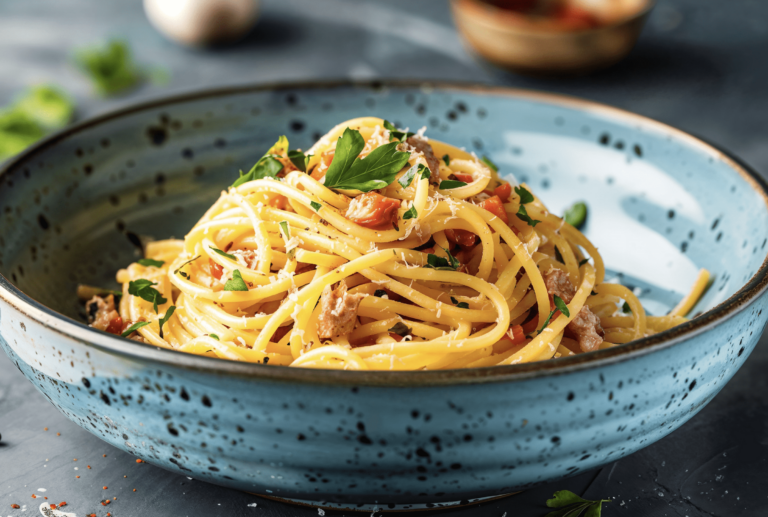
Chicken Carbonara

Description:
Chicken Carbonara is a rich and indulgent pasta dish that combines tender chicken with a creamy, egg-based sauce, crispy pancetta, and freshly grated Parmesan cheese. The dish is brought to life with a hint of garlic and a generous sprinkle of black pepper, creating a mouthwatering symphony of flavors and textures. This hearty and satisfying meal is perfect for a cozy dinner at home, offering a comforting blend of classic Italian ingredients that are sure to please both family and friends.

Ingredients:

  • 2 boneless, skinless chicken breasts, cut into bite-sized pieces
  • 12 oz spaghetti or fettuccine
  • 4 oz pancetta or bacon, diced
  • 4 cloves garlic, minced
  • 2 large eggs
  • 1 cup grated Parmesan cheese
  • 1/2 cup heavy cream
  • Salt and black pepper, to taste
  • 2 tbsp olive oil
  • Fresh parsley, chopped (optional, for garnish)

Instructions:

  1. Cook Pasta: Bring a large pot of salted water to a boil. Cook the spaghetti or fettuccine according to package instructions until al dente. Reserve 1 cup of pasta water, then drain and set aside.
  2. Cook Pancetta: In a large skillet over medium heat, cook the pancetta or bacon until crispy. Remove with a slotted spoon and set aside, leaving the rendered fat in the skillet.
  3. Cook Chicken: In the same skillet, add the olive oil. Add the chicken pieces and season with salt and black pepper. Cook until the chicken is golden brown and cooked through, about 5-7 minutes. Remove the chicken from the skillet and set aside.
  4. Prepare Sauce: In a bowl, whisk together the eggs, grated Parmesan cheese, and heavy cream until well combined.
  5. Combine Ingredients: Reduce the skillet heat to low. Add the minced garlic to the skillet and sauté until fragrant, about 1 minute. Return the cooked pancetta and chicken to the skillet. Add the cooked pasta and toss to combine.
  6. Add Sauce: Remove the skillet from the heat. Slowly pour the egg mixture over the pasta, tossing quickly to ensure the eggs don’t scramble. If the sauce is too thick, add the reserved pasta water a little at a time until the desired consistency is reached.
  7. Season and Serve: Season with additional salt and black pepper to taste. Garnish with chopped fresh parsley, if desired. Serve immediately with extra grated Parmesan cheese on the side.

Enjoy your Chicken Carbonara with a fresh green salad and crusty bread for a complete and delicious meal!


Air Fryer Tilapia

0

Air Fryer Tilapia is a quick, healthy, and delicious dish perfect for any weeknight dinner. This recipe features tilapia fillets seasoned with a blend of herbs and spices, then air-fried to crispy perfection with minimal oil. The result is a tender and flaky fish with a golden-brown crust that pairs wonderfully with a variety of sides. Not only is this dish easy to prepare, but it also takes advantage of the air fryer’s efficiency, making it a convenient and nutritious option for busy families. Serve it with a squeeze of fresh lemon juice and a side of steamed vegetables or a crisp salad for a complete meal.

Ingredients:

  • 4 tilapia fillets
  • 2 tablespoons olive oil
  • 1 teaspoon garlic powder
  • 1 teaspoon paprika
  • 1/2 teaspoon dried thyme
  • 1/2 teaspoon dried oregano
  • Salt and black pepper to taste
  • Lemon wedges (for serving)
  • Fresh parsley, chopped (for garnish)

Instructions:

  1. Prepare the Air Fryer:
    • Preheat your air fryer to 400°F (200°C) for about 5 minutes.
  2. Season the Tilapia:
    • Pat the tilapia fillets dry with paper towels. Brush both sides of the fillets with olive oil.
    • In a small bowl, mix together the garlic powder, paprika, dried thyme, dried oregano, salt, and black pepper.
    • Sprinkle the seasoning mixture evenly over both sides of the tilapia fillets, pressing it gently to adhere.
  3. Air Fry the Tilapia:
    • Place the seasoned tilapia fillets in a single layer in the air fryer basket. Do not overcrowd; cook in batches if necessary.
    • Air fry the fillets at 400°F (200°C) for 8-10 minutes, flipping halfway through, until the fish is golden brown and flakes easily with a fork.
  4. Serve:
    • Remove the tilapia from the air fryer and transfer to a serving platter.
    • Garnish with fresh parsley and serve with lemon wedges on the side for squeezing over the top.

Enjoy your Air Fryer Tilapia with your favorite sides, and relish the perfect blend of crispy texture and savory flavor in every bite!

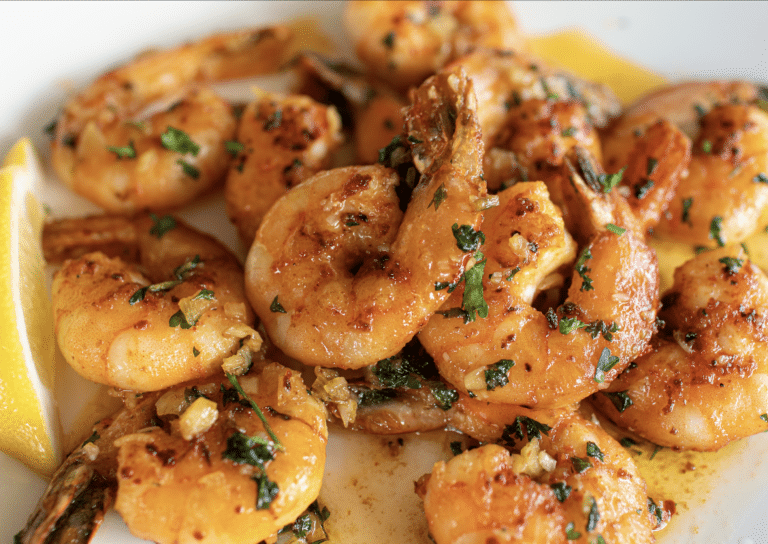
Shrimp Scampi Bake

Description:
This Shrimp Scampi Bake is a delightful twist on the classic shrimp scampi, offering all the garlicky, buttery flavors you love in a convenient, oven-baked dish. Succulent shrimp are tossed with a zesty blend of garlic, lemon, and white wine, then baked to perfection atop a bed of tender pasta. Topped with a golden, crunchy layer of breadcrumbs and Parmesan cheese, this dish is as elegant as it is comforting. Perfect for a weeknight dinner or a special occasion, this Shrimp Scampi Bake is sure to impress your family and friends.

Ingredients:

  • 1 lb large shrimp, peeled and deveined
  • 8 oz linguine or spaghetti
  • 4 cloves garlic, minced
  • 1/4 cup dry white wine
  • 1/4 cup chicken broth
  • 1/4 cup lemon juice (about 2 lemons)
  • 1/2 cup unsalted butter, melted
  • 1/4 cup olive oil
  • 1/2 tsp red pepper flakes (optional)
  • Salt and black pepper, to taste
  • 1/2 cup grated Parmesan cheese
  • 1/2 cup breadcrumbs
  • 2 tbsp fresh parsley, chopped
  • Lemon wedges, for garnish

Instructions:

  1. Preheat Oven: Preheat your oven to 375°F (190°C).
  2. Cook Pasta: Bring a large pot of salted water to a boil. Cook the linguine or spaghetti according to package instructions until al dente. Drain and set aside.
  3. Prepare Shrimp Mixture: In a large mixing bowl, combine the minced garlic, dry white wine, chicken broth, lemon juice, melted butter, olive oil, red pepper flakes (if using), salt, and black pepper. Add the shrimp and toss to coat thoroughly.
  4. Assemble the Dish: In a large baking dish, spread the cooked pasta evenly. Pour the shrimp mixture over the pasta, ensuring the shrimp are distributed evenly.
  5. Topping: In a small bowl, mix the grated Parmesan cheese and breadcrumbs. Sprinkle this mixture evenly over the shrimp and pasta.
  6. Bake: Place the baking dish in the preheated oven and bake for 20-25 minutes, or until the shrimp are pink and opaque, and the breadcrumb topping is golden brown.
  7. Garnish and Serve: Remove the dish from the oven and sprinkle with fresh parsley. Serve the Shrimp Scampi Bake hot, with lemon wedges on the side for extra zest.

Enjoy your Shrimp Scampi Bake with a glass of your favorite white wine and a side of garlic bread for a truly delicious meal!