Home Blog Page 818

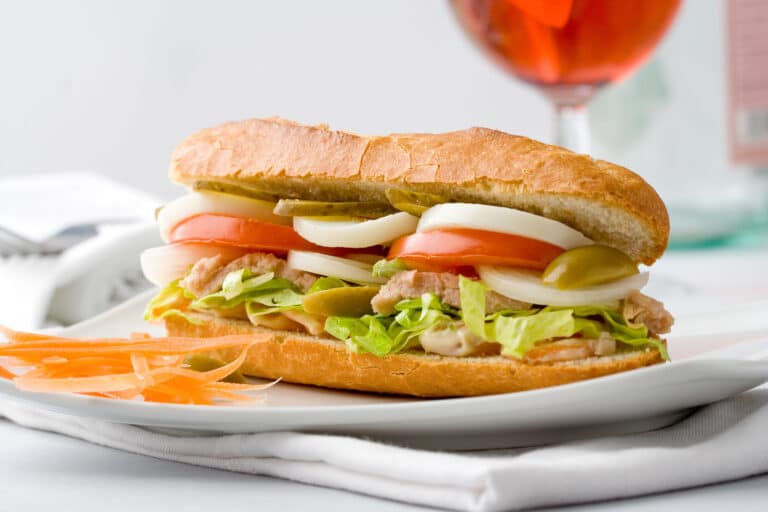
Tuna Egg Sandwich

The Tuna Egg Sandwich is a delightful fusion of protein-rich tuna and creamy, hard-boiled eggs, creating a satisfying and flavorful meal that’s perfect for lunch or a light dinner. This sandwich combines the tender texture of tuna with the smooth richness of eggs, all brought together with a touch of mayonnaise and a hint of mustard. Enhanced with crisp celery and zesty onions, this sandwich is not only delicious but also quick and easy to prepare. Perfect for a busy day or a picnic, the Tuna Egg Sandwich is a nutritious and tasty choice that will please everyone.

Ingredients

  • 1 can (5-6 ounces) tuna, drained
  • 2 hard-boiled eggs, chopped
  • 1/4 cup mayonnaise
  • 1 teaspoon Dijon mustard
  • 1 celery stalk, finely chopped
  • 1/4 small red onion, finely chopped
  • 1 tablespoon fresh parsley, chopped (optional)
  • Salt and pepper, to taste
  • 4 slices of your favorite bread (whole wheat, sourdough, or rye)
  • Lettuce leaves (optional)
  • Sliced tomatoes (optional)

Instructions

  1. Prepare the filling: In a medium bowl, combine the drained tuna, chopped hard-boiled eggs, mayonnaise, and Dijon mustard. Mix well until the ingredients are thoroughly combined.
  2. Add the vegetables: Stir in the finely chopped celery, red onion, and fresh parsley (if using). Mix until evenly distributed throughout the tuna and egg mixture.
  3. Season: Add salt and pepper to taste, adjusting the seasoning as needed.
  4. Assemble the sandwich: Lay out the bread slices. If desired, place a few lettuce leaves and tomato slices on two of the slices of bread.
  5. Add the filling: Spoon the tuna and egg mixture onto the prepared bread slices, spreading it out evenly.
  6. Complete the sandwich: Top with the remaining slices of bread to form sandwiches.
  7. Serve: Cut the sandwiches in half if desired and serve immediately. Enjoy your Tuna Egg Sandwich with a side of chips, pickles, or a fresh salad.

This versatile and nutritious sandwich is perfect for a quick meal at home or on the go, offering a delightful combination of flavors and textures that are sure to satisfy.
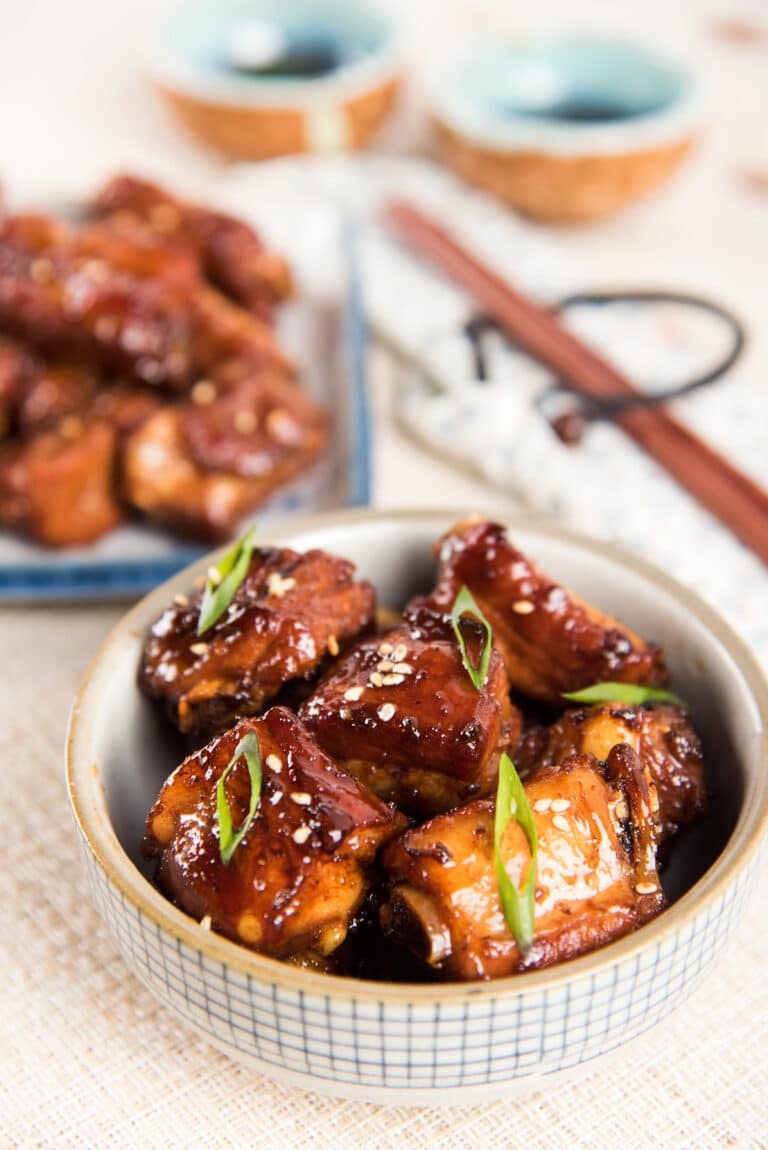
Chinese Spareribs

Chinese Spareribs are a delicious and succulent dish, perfect for any occasion. These ribs are marinated in a flavorful mix of soy sauce, hoisin sauce, honey, garlic, and five-spice powder, then slow-cooked until they are tender and glazed with a sticky, sweet, and savory sauce. The result is a mouthwatering combination of flavors and textures that will have everyone reaching for seconds. Ideal for family dinners, gatherings, or simply as a treat for yourself, these Chinese Spareribs are sure to impress with their deep, rich taste and melt-in-your-mouth tenderness.

Ingredients

  • 2 pounds pork spareribs, cut into individual ribs
  • 1/4 cup soy sauce
  • 1/4 cup hoisin sauce
  • 1/4 cup honey
  • 2 tablespoons rice vinegar
  • 2 tablespoons oyster sauce
  • 2 tablespoons brown sugar
  • 4 cloves garlic, minced
  • 1 tablespoon grated fresh ginger
  • 1 teaspoon Chinese five-spice powder
  • 1/2 teaspoon ground black pepper
  • 1/4 teaspoon red pepper flakes (optional)
  • 1 tablespoon sesame oil
  • 1/4 cup water
  • 2 green onions, thinly sliced (for garnish)
  • Sesame seeds (for garnish)

Instructions

  1. Prepare the marinade: In a large bowl, combine the soy sauce, hoisin sauce, honey, rice vinegar, oyster sauce, brown sugar, minced garlic, grated ginger, Chinese five-spice powder, ground black pepper, red pepper flakes (if using), and sesame oil. Mix well until the sugar is dissolved and all ingredients are well combined.
  2. Marinate the ribs: Place the spareribs in a large resealable plastic bag or a shallow dish. Pour the marinade over the ribs, ensuring they are evenly coated. Seal the bag or cover the dish and refrigerate for at least 4 hours, preferably overnight, to allow the flavors to penetrate the meat.
  3. Preheat the oven: Preheat your oven to 300°F (150°C).
  4. Prepare the baking dish: Arrange the marinated ribs in a single layer on a large baking sheet or in a baking dish. Pour the remaining marinade over the ribs and add 1/4 cup of water to the bottom of the dish to keep the ribs moist during cooking.
  5. Bake the ribs: Cover the baking sheet or dish with aluminum foil and bake in the preheated oven for 2 to 2.5 hours, or until the ribs are tender. Remove the foil during the last 30 minutes of baking to allow the ribs to develop a sticky, caramelized glaze.
  6. Baste the ribs: Occasionally baste the ribs with the pan juices to enhance the flavor and keep them moist.
  7. Finish and serve: Once the ribs are cooked and tender, remove them from the oven and let them rest for a few minutes. Garnish with sliced green onions and sesame seeds before serving.

These Chinese Spareribs are perfect as an appetizer, main dish, or part of a larger feast, bringing a deliciously rich and exotic flavor to your table that everyone will love.

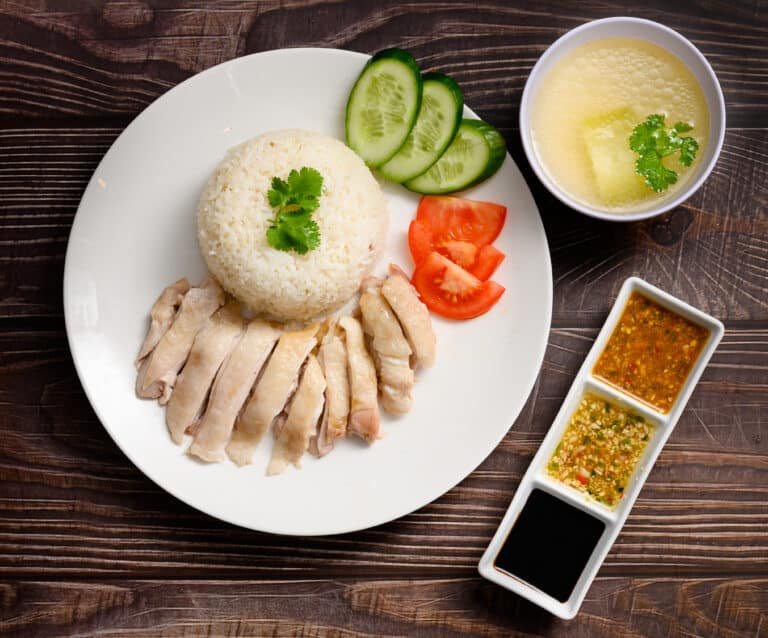
Southeast Asian Style Chicken Rice

Southeast Asian Style Chicken Rice, inspired by the famous Hainanese chicken rice, is a flavorful and aromatic dish that captures the essence of the region’s cuisine. This dish features poached chicken served with fragrant rice cooked in chicken broth, ginger, and garlic. Accompanied by a trio of sauces—ginger-scallion, chili, and sweet soy—this meal is a harmonious blend of flavors and textures. Perfect for any occasion, this recipe brings the taste of Southeast Asia to your kitchen with its simplicity and deliciousness.

Ingredients

For the Chicken:

  • 1 whole chicken (about 3-4 pounds)
  • Salt
  • 4 slices ginger
  • 4 cloves garlic, smashed
  • 2 green onions
  • Water

For the Rice:

  • 2 cups jasmine rice
  • 2 tablespoons chicken fat or vegetable oil
  • 4 cloves garlic, minced
  • 1 inch ginger, minced
  • 4 cups chicken broth (reserved from poaching the chicken)
  • 1/2 teaspoon salt

For the Ginger-Scallion Sauce:

  • 1/4 cup ginger, finely grated
  • 1/4 cup green onions, finely chopped
  • 1/4 cup vegetable oil
  • Salt, to taste

For the Chili Sauce:

  • 3 red chilies, chopped
  • 2 cloves garlic
  • 1 tablespoon ginger, grated
  • 1 tablespoon sugar
  • 2 tablespoons lime juice
  • 1/4 cup chicken broth

For the Sweet Soy Sauce:

  • 1/4 cup soy sauce
  • 2 tablespoons dark soy sauce
  • 1 tablespoon sugar
  • 1/4 cup chicken broth

Garnish:

  • Fresh cilantro leaves
  • Sliced cucumber

Instructions

  1. Prepare the Chicken:
    • Rinse the chicken and rub it all over with salt. Rinse again and place it in a large pot.
    • Add enough water to cover the chicken, along with the ginger slices, garlic, and green onions.
    • Bring to a boil, then reduce the heat and simmer for 30-40 minutes, or until the chicken is cooked through.
    • Remove the chicken from the pot and place it in an ice bath to stop the cooking and keep the skin tender. Reserve the broth for the rice and sauces.
  2. Cook the Rice:
    • Rinse the jasmine rice until the water runs clear.
    • In a large pot or rice cooker, heat the chicken fat or vegetable oil over medium heat. Add the minced garlic and ginger, and sauté until fragrant.
    • Add the rice and stir to coat each grain with the oil and aromatics.
    • Pour in the reserved chicken broth and salt. Bring to a boil, then reduce the heat to low, cover, and cook until the rice is tender and the liquid is absorbed.
  3. Make the Ginger-Scallion Sauce:
    • Combine the grated ginger, chopped green onions, and salt in a heatproof bowl.
    • Heat the vegetable oil until smoking hot, then carefully pour it over the ginger and green onion mixture. Stir to combine.
  4. Make the Chili Sauce:
    • Blend the red chilies, garlic, grated ginger, sugar, lime juice, and chicken broth until smooth. Adjust seasoning to taste.
  5. Make the Sweet Soy Sauce:
    • In a small saucepan, combine the soy sauce, dark soy sauce, sugar, and chicken broth. Bring to a boil, then reduce the heat and simmer until slightly thickened.
  6. Serve:
    • Carve the chicken into serving pieces and arrange on a platter.
    • Serve the chicken with the fragrant rice, cucumber slices, and the trio of sauces.
    • Garnish with fresh cilantro leaves.

This dish is a celebration of simple yet profound flavors, making it a beloved meal that brings the vibrant taste of Southeast Asia to your table.

Sticky Coconut Chicken and Rice Casserole

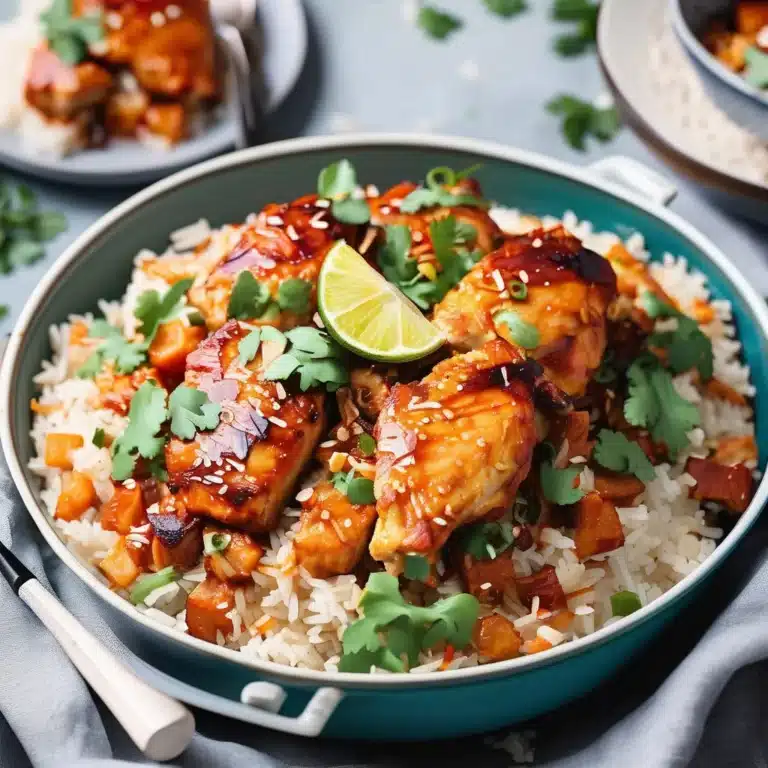
Sticky Coconut Chicken and Rice Casserole is a delightful fusion of sweet and savory flavors that will elevate your dinner routine. This dish features bone-in, skin-on chicken thighs that are baked to crispy perfection in a rich, creamy coconut sauce. The rice, infused with aromatic spices and the juices from the chicken, becomes wonderfully sticky and flavorful. Ideal for family dinners or meal prep, this easy-to-make casserole combines comfort with a touch of tropical flair, making it a memorable and satisfying meal for any occasion.

Ingredients

  • 4 bone-in, skin-on chicken thighs
  • Salt and pepper, to taste
  • 1 tablespoon olive oil
  • 1 cup jasmine rice
  • 1 (14-ounce) can coconut milk
  • 1 cup chicken broth
  • 1/4 cup soy sauce
  • 2 tablespoons honey
  • 2 cloves garlic, minced
  • 1 teaspoon ginger, grated
  • 1 teaspoon ground turmeric
  • 1/2 teaspoon crushed red pepper flakes (optional)
  • 1/2 cup green onions, sliced
  • 1/4 cup fresh cilantro, chopped
  • Lime wedges, for serving

Instructions

  1. Preheat the oven: Preheat your oven to 375°F (190°C).
  2. Season and sear the chicken: Season the chicken thighs generously with salt and pepper. Heat the olive oil in a large oven-safe skillet or casserole dish over medium-high heat. Add the chicken thighs, skin side down, and sear until the skin is golden brown and crispy, about 5-7 minutes. Flip the chicken and sear the other side for an additional 3-4 minutes. Remove the chicken from the skillet and set aside.
  3. Prepare the rice: In the same skillet, add the jasmine rice, coconut milk, chicken broth, soy sauce, honey, minced garlic, grated ginger, turmeric, and crushed red pepper flakes (if using). Stir to combine, scraping up any browned bits from the bottom of the skillet.
  4. Combine and bake: Place the seared chicken thighs on top of the rice mixture, skin side up. Cover the skillet or casserole dish with a lid or aluminum foil and bake in the preheated oven for 30-35 minutes, or until the rice is tender and the chicken is cooked through.
  5. Crisp the chicken: Remove the lid or foil and bake for an additional 10-15 minutes to allow the chicken skin to crisp up again.
  6. Finish and serve: Remove the skillet from the oven and let it sit, covered, for 5-10 minutes. This will allow the rice to absorb any remaining liquid. Garnish with sliced green onions and chopped cilantro.
  7. Serve: Serve the Sticky Coconut Chicken and Rice Casserole with lime wedges on the side. Enjoy!

This casserole pairs beautifully with a simple green salad or steamed vegetables, making it a complete and satisfying meal that’s perfect for any occasion.

Skillet Shrimp Fajitas with Cilantro-Lime Cream

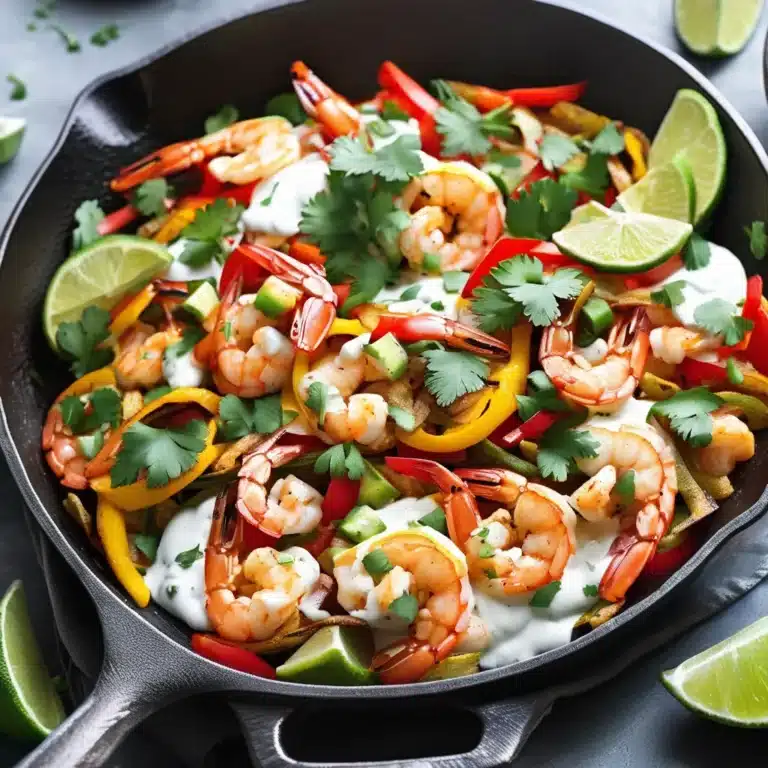
Skillet Shrimp Fajitas with Cilantro-Lime Cream is a vibrant and flavorful dish that brings the zest of Mexican cuisine to your dinner table. Juicy shrimp are seared to perfection with a medley of colorful bell peppers and onions, all seasoned with a bold fajita spice blend. Topped with a refreshing cilantro-lime cream, these fajitas offer a delightful contrast of spicy, savory, and tangy flavors. This one-skillet wonder is not only quick and easy to prepare but also makes for a visually stunning and delicious meal that’s perfect for weeknight dinners or casual gatherings.

Ingredients

  • For the Shrimp Fajitas:
    • 1 pound large shrimp, peeled and deveined
    • 1 tablespoon olive oil
    • 1 red bell pepper, thinly sliced
    • 1 yellow bell pepper, thinly sliced
    • 1 green bell pepper, thinly sliced
    • 1 large onion, thinly sliced
    • 2 cloves garlic, minced
    • 1 tablespoon fajita seasoning (store-bought or homemade)
    • Salt and pepper, to taste
    • Flour or corn tortillas, for serving
  • For the Cilantro-Lime Cream:
    • 1/2 cup sour cream
    • 1/4 cup mayonnaise
    • Zest and juice of 1 lime
    • 2 tablespoons fresh cilantro, finely chopped
    • Salt, to taste

Instructions

  1. Prepare the Cilantro-Lime Cream: In a small bowl, combine the sour cream, mayonnaise, lime zest, lime juice, and chopped cilantro. Mix well and season with salt to taste. Set aside.
  2. Season the shrimp: In a large bowl, toss the shrimp with the fajita seasoning, ensuring they are evenly coated. Set aside.
  3. Cook the vegetables: Heat the olive oil in a large skillet over medium-high heat. Add the sliced bell peppers and onions to the skillet. Cook, stirring occasionally, until the vegetables are tender and slightly charred, about 5-7 minutes. Add the minced garlic and cook for another minute until fragrant. Remove the vegetables from the skillet and set aside.
  4. Cook the shrimp: In the same skillet, add the seasoned shrimp. Cook for 2-3 minutes on each side until the shrimp are pink and opaque. Be careful not to overcook.
  5. Combine everything: Return the cooked vegetables to the skillet with the shrimp. Toss everything together and cook for another minute to heat through.
  6. Assemble the fajitas: Warm the tortillas according to package instructions. Spoon the shrimp and vegetable mixture onto each tortilla.
  7. Serve: Drizzle with the cilantro-lime cream and serve immediately. Enjoy your Skillet Shrimp Fajitas with Cilantro-Lime Cream!

This dish pairs wonderfully with Mexican rice, black beans, or a fresh avocado salad, making it a versatile and satisfying meal for any occasion.

Chicken Fra Diavolo

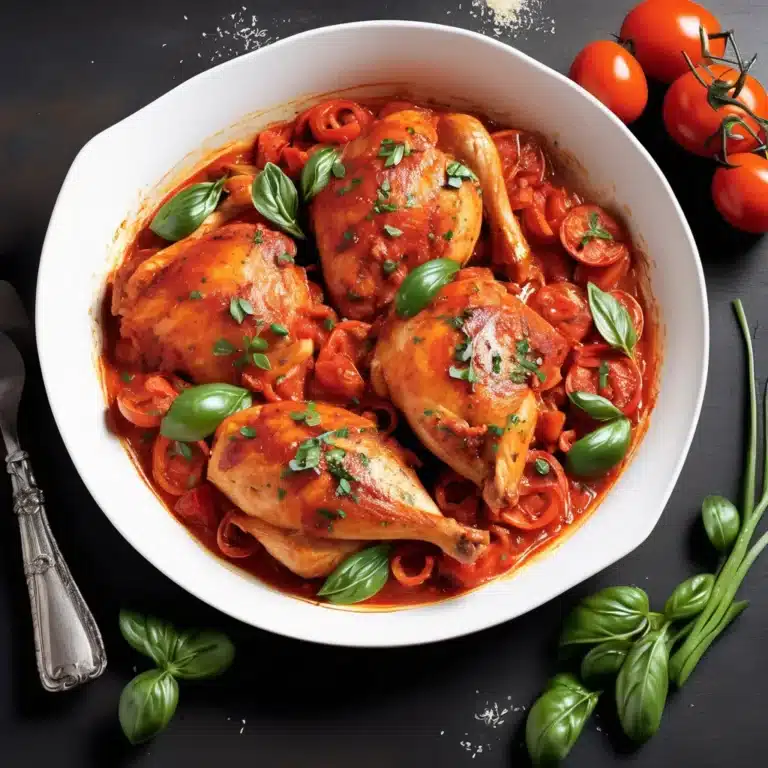
Chicken Fra Diavolo is a fiery Italian-American dish that brings together the succulent flavors of bone-in, skin-on chicken with a spicy tomato sauce. “Fra Diavolo,” meaning “Brother Devil,” perfectly captures the bold heat of the crushed red pepper flakes in this robust sauce. The crispy skin and tender meat of the chicken meld beautifully with the rich, spicy tomato sauce infused with garlic, herbs, and a splash of white wine. Perfect for spice lovers and anyone looking to elevate their dinner table, Chicken Fra Diavolo is a hearty, satisfying dish that pairs wonderfully with pasta or crusty bread to soak up the delicious sauce.

Ingredients

  • 4 bone-in, skin-on chicken thighs
  • Salt and pepper, to taste
  • 2 tablespoons olive oil
  • 1 large onion, finely chopped
  • 4 cloves garlic, minced
  • 1 teaspoon crushed red pepper flakes (adjust to taste)
  • 1/2 cup dry white wine
  • 1 (28-ounce) can crushed tomatoes
  • 1 teaspoon dried oregano
  • 1 teaspoon dried basil
  • 1/2 teaspoon dried thyme
  • 1/4 teaspoon sugar
  • Fresh parsley, chopped, for garnish
  • Fresh basil leaves, for garnish

Instructions

  1. Season the chicken: Season the chicken thighs generously with salt and pepper.
  2. Sear the chicken: Heat the olive oil in a large skillet over medium-high heat. Add the chicken thighs, skin side down, and cook until the skin is crispy and golden brown, about 5-7 minutes. Flip the chicken and sear the other side for another 5 minutes. Remove the chicken from the pan and set aside.
  3. Sauté the aromatics: In the same pan, add the chopped onion and cook until softened, about 3-4 minutes. Add the minced garlic and crushed red pepper flakes, and sauté for another minute until fragrant.
  4. Deglaze the pan: Pour in the white wine, scraping up any browned bits from the bottom of the pan. Let it simmer for 2-3 minutes until the wine has reduced by half.
  5. Make the sauce: Add the crushed tomatoes, dried oregano, dried basil, dried thyme, and sugar to the pan. Stir to combine and bring the sauce to a simmer.
  6. Simmer with chicken: Return the chicken thighs to the pan, skin side up, nestling them into the sauce. Let the mixture simmer for 30-35 minutes, or until the chicken is cooked through and the flavors have melded together. Adjust seasoning with salt and pepper if needed.
  7. Serve: Garnish with fresh parsley and basil leaves. Serve the Chicken Fra Diavolo over pasta, rice, or with a side of crusty bread to soak up the delicious sauce. Enjoy!

This spicy and aromatic dish is sure to spice up your meal rotation, offering a delightful kick that’s balanced by the rich tomato and herb sauce, complemented by the crispy, flavorful chicken skin.

One Pan Chicken Breast and Asparagus in Lemon Cream Sauce

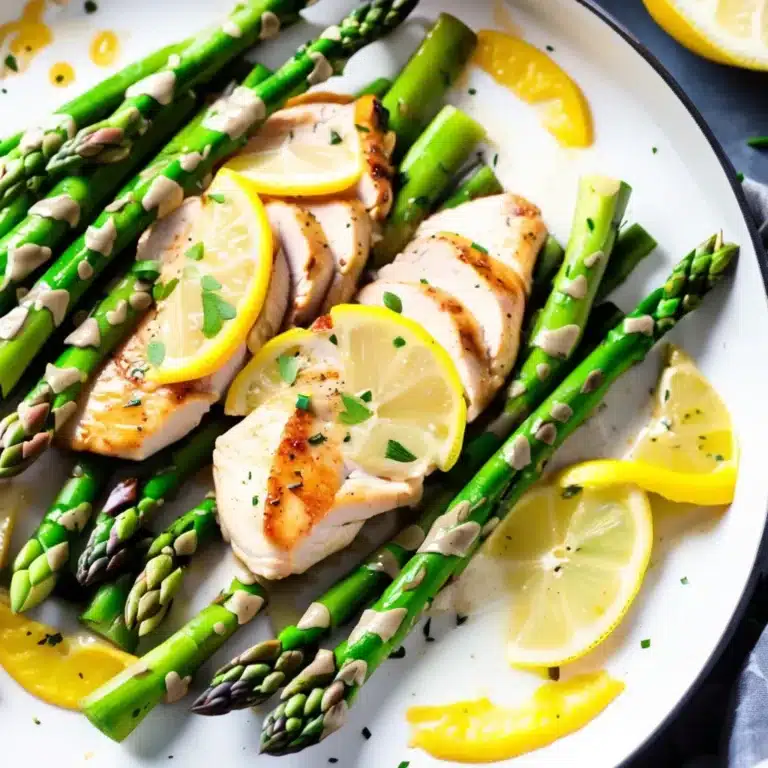
One Pan Chicken Breast and Asparagus in Lemon Cream Sauce is a delightful, elegant dish that’s incredibly easy to prepare. This recipe features tender chicken breasts and crisp asparagus spears, all coated in a rich and zesty lemon cream sauce. The best part? It all comes together in one pan, making both preparation and cleanup a breeze. Ideal for busy weeknights or when you want to impress without the fuss, this dish is sure to become a favorite in your household.

Ingredients

  • 4 boneless, skinless chicken breasts
  • Salt and pepper, to taste
  • 2 tablespoons olive oil
  • 1 pound asparagus, trimmed
  • 3 cloves garlic, minced
  • 1 cup chicken broth
  • 1 cup heavy cream
  • Zest and juice of 1 lemon
  • 1/2 cup grated Parmesan cheese
  • Fresh parsley, chopped, for garnish

Instructions

  1. Season the chicken: Season both sides of the chicken breasts with salt and pepper.
  2. Sear the chicken: Heat the olive oil in a large skillet over medium-high heat. Add the chicken breasts and cook for 5-7 minutes on each side until golden brown and cooked through. Remove the chicken from the pan and set aside.
  3. Cook the asparagus: In the same pan, add the asparagus and cook for 3-4 minutes until tender-crisp. Remove the asparagus from the pan and set aside.
  4. Make the sauce: Reduce the heat to medium and add the minced garlic to the pan. Sauté for about 1 minute until fragrant. Add the chicken broth, heavy cream, lemon zest, and lemon juice. Bring the mixture to a simmer, scraping up any browned bits from the bottom of the pan.
  5. Thicken the sauce: Stir in the grated Parmesan cheese and continue to simmer until the sauce thickens, about 3-4 minutes.
  6. Combine everything: Return the chicken and asparagus to the pan, spooning the sauce over the top. Cook for an additional 2-3 minutes until everything is heated through and well-coated in the sauce.
  7. Serve: Garnish with chopped fresh parsley and serve immediately. Enjoy your One Pan Chicken Breast and Asparagus in Lemon Cream Sauce!

This dish pairs beautifully with rice, pasta, or a crusty bread to soak up the delicious sauce, making it a versatile and satisfying meal for any occasion.

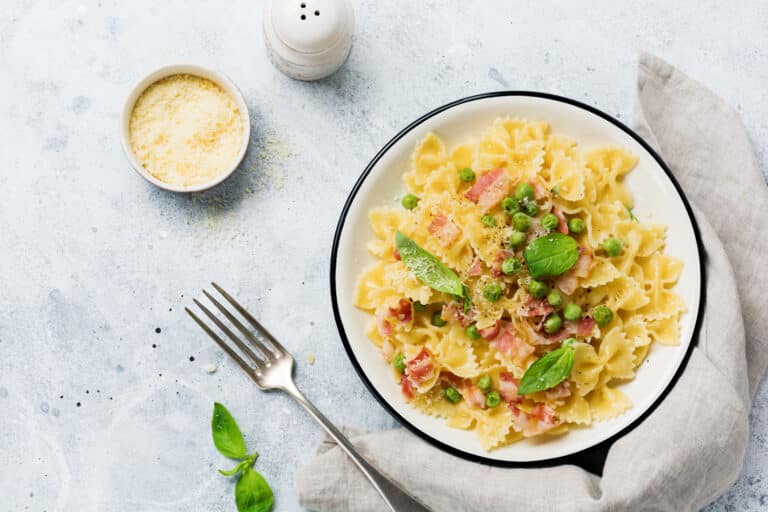
One Pan Pasta with Bacon and Peas

One Pan Pasta with Bacon and Peas is the ultimate solution for a quick, delicious, and hassle-free meal. This dish brings together the savory flavors of crispy bacon and the sweet pop of peas in a creamy sauce that perfectly coats every strand of pasta. The best part is that everything cooks in one pan, making cleanup a breeze. Perfect for busy weeknights or when you’re craving something comforting without the fuss, this pasta dish is sure to become a staple in your kitchen.

Ingredients

  • 8 ounces pasta (spaghetti, linguine, or your favorite shape)
  • 4 slices bacon, chopped
  • 1 small onion, finely chopped
  • 3 cloves garlic, minced
  • 2 cups chicken or vegetable broth
  • 1 cup heavy cream
  • 1 cup frozen peas
  • 1/2 cup grated Parmesan cheese
  • Salt and pepper, to taste
  • Fresh parsley, chopped, for garnish

Instructions

  1. Cook the bacon: In a large skillet or sauté pan, cook the chopped bacon over medium heat until crispy. Remove the bacon with a slotted spoon and set aside, leaving the bacon fat in the pan.
  2. Sauté the aromatics: Add the chopped onion to the pan with the bacon fat and sauté for about 3 minutes until softened. Add the minced garlic and cook for another minute until fragrant.
  3. Add the pasta and liquids: Add the pasta to the pan, followed by the chicken or vegetable broth and heavy cream. Bring to a boil, then reduce the heat to a simmer. Stir occasionally to prevent the pasta from sticking.
  4. Cook the pasta: Continue to cook the pasta in the liquid, stirring occasionally, until the pasta is al dente and most of the liquid has been absorbed, about 10-12 minutes.
  5. Add the peas and bacon: Stir in the frozen peas and cooked bacon, allowing the peas to heat through and the bacon to distribute evenly.
  6. Finish the dish: Stir in the grated Parmesan cheese and season with salt and pepper to taste. If the sauce is too thick, you can add a little more broth or cream to reach your desired consistency.
  7. Serve: Garnish with chopped fresh parsley and serve immediately. Enjoy your One Pan Pasta with Bacon and Peas!

This one-pan wonder is a comforting, flavorful meal that’s ready in no time, perfect for any occasion when you need a quick and satisfying dish.

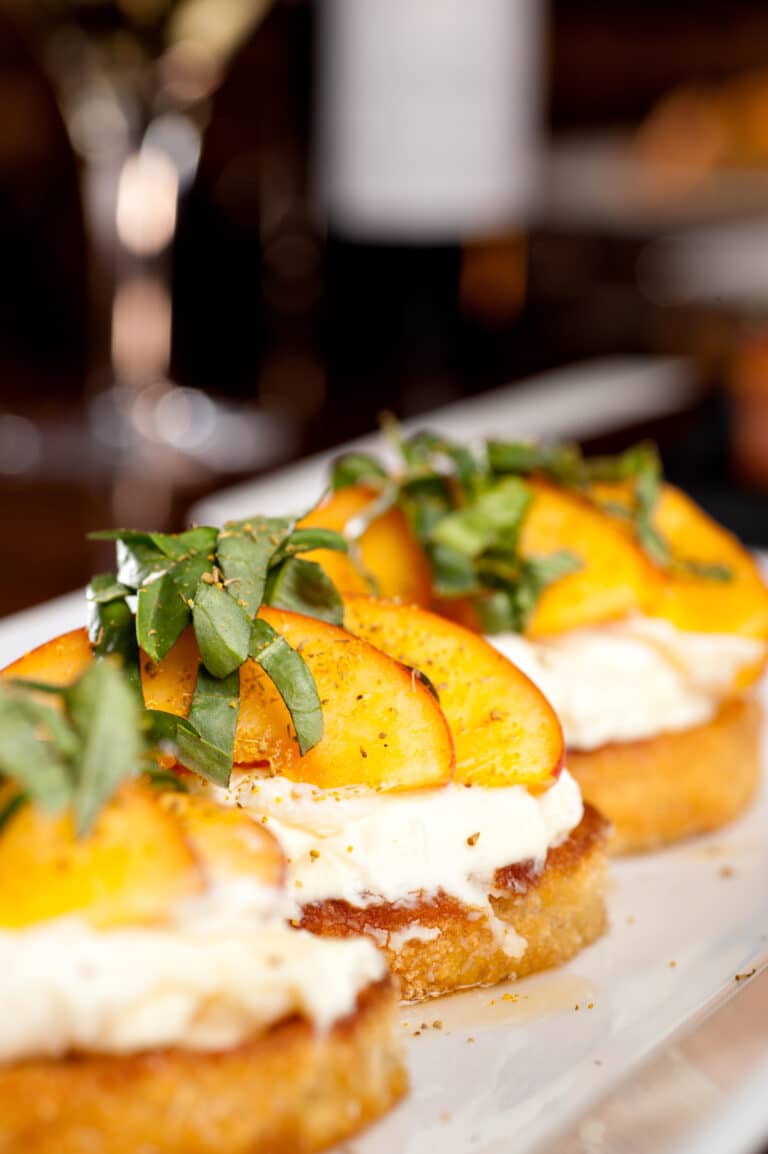
Peach Toast with Whipped Ricotta

Peach Toast with Whipped Ricotta is a delightful and refreshing breakfast or brunch option that brings together the natural sweetness of ripe peaches and the creamy, airy texture of whipped ricotta. The hint of honey and a sprinkle of fresh herbs elevate this simple toast to a gourmet level, making it perfect for a special morning treat or a light summer snack. This easy-to-make dish not only looks beautiful but also bursts with flavor in every bite.

Ingredients

  • 4 slices of your favorite bread (sourdough, whole grain, or brioche)
  • 1 cup ricotta cheese
  • 1 tablespoon honey, plus extra for drizzling
  • 1 teaspoon vanilla extract
  • 2-3 ripe peaches, thinly sliced
  • Fresh basil or mint leaves, for garnish
  • Olive oil, for drizzling
  • Salt and pepper, to taste

Instructions

  1. Prepare the bread: Lightly toast the slices of bread to your desired level of crispiness. You can use a toaster, oven, or grill for this.
  2. Whip the ricotta: In a medium bowl, combine the ricotta cheese, honey, and vanilla extract. Use a hand mixer or whisk to whip the mixture until it becomes smooth and airy.
  3. Assemble the toast: Spread a generous layer of whipped ricotta on each slice of toasted bread.
  4. Add the peaches: Arrange the peach slices on top of the ricotta-covered toast.
  5. Garnish: Drizzle a little olive oil and honey over the peaches. Sprinkle with a pinch of salt and pepper to enhance the flavors. Garnish with fresh basil or mint leaves for a burst of color and aroma.
  6. Serve: Serve immediately and enjoy your Peach Toast with Whipped Ricotta as a delightful start to your day or a light, refreshing snack.

This elegant yet simple dish is sure to impress and satisfy, making it a perfect addition to any breakfast or brunch menu.

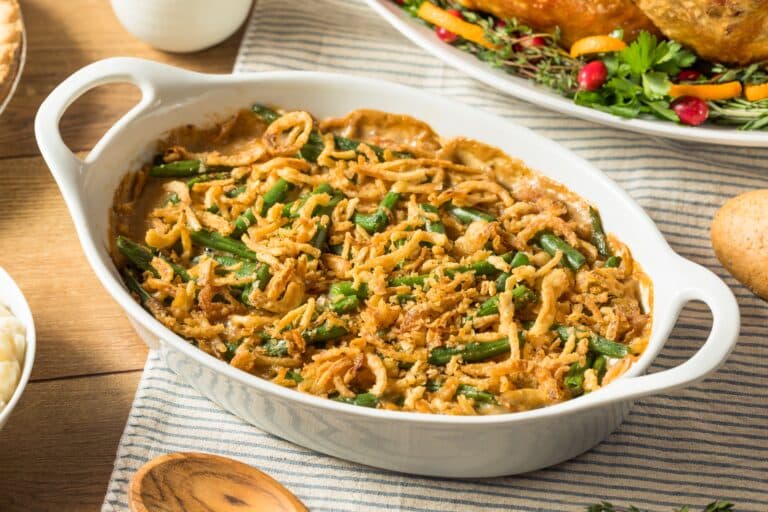
Best Green Bean Casserole

Green Bean Casserole is a classic American side dish, especially popular during holiday meals. This dish combines tender green beans with a creamy mushroom sauce, topped with crispy fried onions. The balance of flavors and textures makes it a crowd-pleaser. Whether you’re making it for Thanksgiving, Christmas, or just a cozy family dinner, this recipe is sure to become a favorite.

Ingredients

  • 1 pound fresh green beans, trimmed and cut into 1-inch pieces
  • 2 cups sliced mushrooms
  • 1 small onion, diced
  • 2 cloves garlic, minced
  • 2 tablespoons butter
  • 2 tablespoons all-purpose flour
  • 1 cup chicken or vegetable broth
  • 1 cup heavy cream
  • 1 teaspoon soy sauce
  • Salt and pepper to taste
  • 1 1/2 cups crispy fried onions

Instructions

  1. Preheat the oven: Preheat your oven to 350°F (175°C).
  2. Prepare the green beans: Bring a large pot of salted water to a boil. Add the green beans and cook for 5 minutes until tender-crisp. Drain and set aside.
  3. Sauté the vegetables: In a large skillet, melt the butter over medium heat. Add the diced onion and sauté for about 3 minutes until translucent. Add the garlic and mushrooms, and cook for another 5 minutes until the mushrooms are tender.
  4. Make the sauce: Sprinkle the flour over the vegetables and stir to combine. Cook for 1-2 minutes to remove the raw flour taste. Gradually whisk in the broth, followed by the heavy cream. Add the soy sauce, and season with salt and pepper to taste. Bring the mixture to a simmer and cook until thickened, about 5 minutes.
  5. Combine and bake: In a large mixing bowl, combine the cooked green beans and the mushroom sauce. Transfer the mixture to a greased 9×13-inch baking dish. Sprinkle the crispy fried onions evenly over the top.
  6. Bake: Bake in the preheated oven for 20-25 minutes, or until the casserole is bubbly and the onions are golden brown.
  7. Serve: Allow the casserole to cool for a few minutes before serving. Enjoy your delicious Green Bean Casserole!

This dish pairs wonderfully with roasted meats, mashed potatoes, and other festive dishes, making it an essential part of any celebratory meal.