Home Blog Page 820

Fantastic Fettuccine Alfredo

Experience the ultimate comfort food with our Fantastic Fettuccine Alfredo. This classic Italian dish features tender fettuccine noodles coated in a rich and creamy Alfredo sauce made from butter, heavy cream, and freshly grated Parmesan cheese. The sauce is gently simmered to perfection and seasoned with garlic, salt, and pepper, creating a velvety texture that clings to each strand of pasta. Garnished with fresh parsley and extra Parmesan, this dish is perfect for a cozy dinner at home or an elegant meal to impress your guests. Serve it with a side of garlic bread and a crisp salad for a truly indulgent experience.

Ingredients:

  • 1 pound fettuccine pasta
  • 1/2 cup unsalted butter
  • 2 cups heavy cream
  • 2 cups freshly grated Parmesan cheese
  • 3 cloves garlic, minced
  • Salt and black pepper to taste
  • Fresh parsley, chopped (for garnish)
  • Extra grated Parmesan cheese (for garnish)

Instructions:

  1. Cook the Fettuccine:
    • In a large pot of salted boiling water, cook the fettuccine according to package instructions until al dente. Drain and set aside.
  2. Prepare the Alfredo Sauce:
    • In a large skillet or saucepan, melt the butter over medium heat. Add the minced garlic and sauté for about 1 minute until fragrant.
    • Pour in the heavy cream and bring the mixture to a gentle simmer. Cook for about 5 minutes, stirring frequently, until the cream begins to thicken.
  3. Add the Cheese:
    • Gradually whisk in the grated Parmesan cheese until the sauce is smooth and creamy. Season with salt and black pepper to taste.
  4. Combine the Pasta and Sauce:
    • Add the cooked fettuccine to the skillet with the Alfredo sauce. Toss the pasta gently to coat it evenly with the sauce.
  5. Serve:
    • Transfer the Fettuccine Alfredo to serving plates. Garnish with chopped fresh parsley and extra grated Parmesan cheese.
    • Serve immediately and enjoy this rich and creamy delight!

This Fantastic Fettuccine Alfredo is a timeless dish that’s sure to become a favorite in your home, offering a perfect blend of simplicity and decadence.

Crockpot Italian Chicken

Crockpot Italian Chicken is a delightful and effortless dish that brings the robust flavors of Italian cuisine right to your dinner table with minimal effort. This recipe combines tender, juicy chicken with a medley of tomatoes, Italian herbs, and a splash of white wine, all slowly cooked to perfection. The result is a savory, aromatic meal that’s perfect for busy weeknights or a cozy weekend dinner. Simply set it in the morning, and by dinnertime, you’ll have a hearty, flavorful dish that pairs wonderfully with pasta, rice, or crusty bread.

Ingredients:

  • Chicken:
    • 4 boneless, skinless chicken breasts
    • 1 tablespoon olive oil
    • Salt and black pepper, to taste
  • Vegetables and Aromatics:
    • 1 large onion, thinly sliced
    • 3 cloves garlic, minced
    • 1 can (14.5 oz) diced tomatoes, undrained
    • 1 can (8 oz) tomato sauce
    • 1/2 cup chicken broth
    • 1/4 cup dry white wine (optional)
    • 1 teaspoon dried oregano
    • 1 teaspoon dried basil
    • 1/2 teaspoon dried thyme
    • 1/2 teaspoon crushed red pepper flakes (optional)
    • 1/2 cup sliced black olives (optional)
    • 1/4 cup grated Parmesan cheese
  • Garnish:
    • Fresh parsley, chopped
    • Grated Parmesan cheese

Instructions:

  1. Prepare the Chicken:
    1. Season the chicken breasts with salt and black pepper.
    2. In a skillet, heat the olive oil over medium-high heat. Brown the chicken breasts on both sides until golden, about 3-4 minutes per side. (Browning is optional but adds flavor.)
  2. Assemble in Crockpot:
    1. Place the sliced onion and minced garlic at the bottom of the crockpot.
    2. Arrange the browned chicken breasts on top of the onions and garlic.
    3. Pour the diced tomatoes and their juices, tomato sauce, chicken broth, and white wine (if using) over the chicken.
    4. Sprinkle with dried oregano, dried basil, dried thyme, and crushed red pepper flakes (if using).
  3. Cook:
    1. Cover and cook on low for 6-7 hours or on high for 3-4 hours, until the chicken is tender and cooked through.
  4. Finish:
    1. About 30 minutes before serving, stir in the sliced black olives (if using) and 1/4 cup grated Parmesan cheese.
    2. Cover and cook for an additional 30 minutes.
  5. Serve:
    1. Serve the Crockpot Italian Chicken over pasta, rice, or with crusty bread.
    2. Garnish with fresh parsley and additional grated Parmesan cheese.

Enjoy your Crockpot Italian Chicken, a dish that’s bursting with Italian flavors and cooked to perfection with minimal effort!

Bourbon Chicken

Bourbon Chicken is a savory and slightly sweet dish that perfectly balances bold flavors with tender chicken pieces. This dish features succulent boneless, skinless chicken thighs marinated in a rich blend of soy sauce, bourbon whiskey, brown sugar, apple cider vinegar, and aromatic spices such as garlic and ginger. The chicken is then cooked to a golden brown and simmered in the marinade, which is thickened to create a glossy, flavorful sauce. Finished with a garnish of fresh green onions and sesame seeds, this dish is both visually appealing and incredibly delicious. Perfect for serving over steamed rice or noodles, Bourbon Chicken offers a delightful combination of sweet, tangy, and savory notes that make it an irresistible meal for any occasion.

Ingredients:

  • Chicken:
    • 1 1/2 pounds boneless, skinless chicken thighs, cut into bite-sized pieces
    • 2 tablespoons vegetable oil
  • Marinade:
    • 1/4 cup soy sauce
    • 1/4 cup bourbon whiskey
    • 1/4 cup brown sugar, packed
    • 1/4 cup apple cider vinegar
    • 1/4 cup chicken broth
    • 1/4 cup water
    • 3 cloves garlic, minced
    • 1 tablespoon grated fresh ginger
    • 1/2 teaspoon crushed red pepper flakes (optional)
    • 1/2 teaspoon ground black pepper
  • Sauce Thickener:
    • 2 tablespoons cornstarch
    • 2 tablespoons water
  • Garnish:
    • 2 green onions, sliced
    • Sesame seeds

Instructions:

  1. Marinate the Chicken:
    1. In a large mixing bowl, combine the soy sauce, bourbon whiskey, brown sugar, apple cider vinegar, chicken broth, water, minced garlic, grated ginger, crushed red pepper flakes (if using), and ground black pepper.
    2. Add the chicken pieces to the marinade, ensuring they are fully submerged. Cover and refrigerate for at least 30 minutes, or up to 2 hours for more flavor.
  2. Cook the Chicken:
    1. Heat the vegetable oil in a large skillet or wok over medium-high heat.
    2. Remove the chicken from the marinade, reserving the marinade for later use.
    3. Add the chicken to the skillet and cook until browned and cooked through, about 5-7 minutes. Remove the chicken from the skillet and set aside.
  3. Make the Sauce:
    1. In the same skillet, pour in the reserved marinade.
    2. Bring the marinade to a boil, then reduce the heat and let it simmer for about 5 minutes.
  4. Thicken the Sauce:
    1. In a small bowl, mix the cornstarch with the water to create a slurry.
    2. Slowly add the cornstarch slurry to the simmering marinade, stirring constantly until the sauce thickens, about 2-3 minutes.
  5. Combine and Finish:
    1. Return the cooked chicken to the skillet, tossing it in the thickened sauce to coat evenly.
    2. Cook for an additional 2-3 minutes to ensure the chicken is heated through and well-coated with the sauce.
  6. Serve:
    1. Transfer the Bourbon Chicken to a serving platter.
    2. Garnish with sliced green onions and sesame seeds.

Enjoy your Bourbon Chicken with steamed rice or noodles for a delicious and satisfying meal!

Mom’s Zucchini Bread

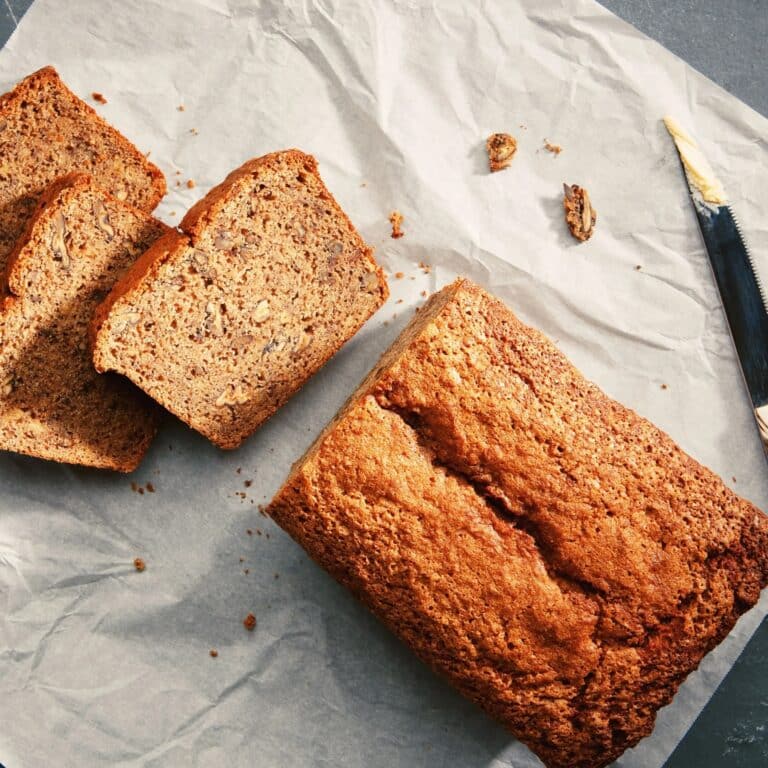
Mom’s Zucchini Bread is a moist and spiced delight, perfect for any time of day. This recipe combines grated zucchini, vegetable oil, and a blend of cinnamon and nutmeg for a flavorful, tender loaf. Optional add-ins like walnuts and chocolate chips add extra texture and sweetness. Baked to golden perfection, each slice offers a comforting taste that pairs wonderfully with coffee or tea. Enjoy this classic treat as a delightful snack or breakfast option!

Ingredients:

  • Dry Ingredients:
    • 3 cups all-purpose flour
    • 1 teaspoon baking powder
    • 1 teaspoon baking soda
    • 1 teaspoon salt
    • 1 tablespoon ground cinnamon
    • 1/2 teaspoon ground nutmeg
  • Wet Ingredients:
    • 3 large eggs
    • 1 cup vegetable oil
    • 1 1/2 cups granulated sugar
    • 1/2 cup brown sugar, packed
    • 2 teaspoons vanilla extract
    • 2 cups grated zucchini (about 2 medium zucchinis)
    • 1/2 cup sour cream or plain yogurt
  • Add-ins:
    • 1 cup chopped walnuts or pecans (optional)
    • 1 cup raisins or chocolate chips (optional)

Instructions:

  1. Prepare the Oven and Pans:
    1. Preheat your oven to 350°F (175°C).
    2. Grease and flour two 9×5-inch loaf pans, or line them with parchment paper.
  2. Combine Dry Ingredients:
    1. In a medium bowl, whisk together the flour, baking powder, baking soda, salt, cinnamon, and nutmeg.
  3. Combine Wet Ingredients:
    1. In a large mixing bowl, beat the eggs until light and frothy.
    2. Add the vegetable oil, granulated sugar, brown sugar, and vanilla extract. Mix until well combined.
    3. Stir in the grated zucchini and sour cream (or plain yogurt).
  4. Combine Wet and Dry Ingredients:
    1. Gradually add the dry ingredient mixture to the wet ingredients, mixing just until combined. Do not overmix.
    2. Fold in the chopped nuts and raisins or chocolate chips, if using.
  5. Bake the Bread:
    1. Divide the batter evenly between the prepared loaf pans.
    2. Bake in the preheated oven for 55-65 minutes, or until a toothpick inserted into the center of the loaves comes out clean.
    3. If the tops of the loaves start to brown too quickly, cover them loosely with aluminum foil.
  6. Cool and Serve:
    1. Remove the loaves from the oven and let them cool in the pans for about 10 minutes.
    2. Transfer the loaves to a wire rack to cool completely.

Enjoy your Mom’s Zucchini Bread with a cup of coffee or tea, or as a delightful snack any time of the day!

Crispy Pourable Pizza

Experience a delightful twist on traditional pizza with our Crispy Pourable Pizza, perfect for a quick and delicious meal. This recipe starts with a unique batter made from all-purpose flour, baking powder, salt, and a blend of garlic powder, dried oregano, and basil for a flavorful base. Whisked together with milk and egg, the batter is poured into a greased cast iron skillet or baking dish, creating a crispy yet tender crust. Topped with rich pizza sauce, a generous layer of shredded mozzarella and grated Parmesan cheese, and your favorite toppings like pepperoni, bell peppers, mushrooms, black olives, and red onion, this pizza is baked to golden perfection in just 20-25 minutes. Garnish with fresh basil leaves and a sprinkle of red pepper flakes for an extra kick. Serve hot and enjoy this innovative and easy pizza that’s sure to satisfy your cravings.

Ingredients:

  • Batter:
    • 1 cup all-purpose flour
    • 1 teaspoon baking powder
    • 1/2 teaspoon salt
    • 1/2 teaspoon garlic powder
    • 1/2 teaspoon dried oregano
    • 1/2 teaspoon dried basil
    • 1 cup milk
    • 1 egg
  • Toppings:
    • 1 cup pizza sauce
    • 2 cups shredded mozzarella cheese
    • 1/2 cup grated Parmesan cheese
    • 1/2 cup sliced pepperoni or other preferred meats
    • 1/2 cup sliced bell peppers
    • 1/2 cup sliced mushrooms
    • 1/4 cup sliced black olives
    • 1/4 cup chopped red onion
    • Fresh basil leaves, for garnish
    • Red pepper flakes, for garnish (optional)

Instructions:

  1. Prepare the Batter:
    1. Preheat your oven to 425°F (220°C). Grease a 10-inch cast iron skillet or a round baking dish.
    2. In a mixing bowl, whisk together the flour, baking powder, salt, garlic powder, dried oregano, and dried basil.
    3. In another bowl, whisk together the milk and egg until well combined.
    4. Gradually add the wet ingredients to the dry ingredients, stirring until just combined. The batter should be pourable.
  2. Assemble the Pizza:
    1. Pour the batter into the prepared skillet or baking dish, spreading it out evenly to cover the bottom.
    2. Spoon the pizza sauce over the batter, spreading it evenly but leaving a small border around the edges.
    3. Sprinkle the shredded mozzarella and grated Parmesan cheese over the sauce.
    4. Add your desired toppings, such as pepperoni, bell peppers, mushrooms, black olives, and red onion.
  3. Bake:
    1. Place the skillet or baking dish in the preheated oven and bake for 20-25 minutes, or until the edges are golden brown and crispy, and the cheese is melted and bubbly.
  4. Serve:
    1. Remove the pizza from the oven and let it cool for a few minutes.
    2. Garnish with fresh basil leaves and red pepper flakes, if desired.
    3. Slice and serve hot.

Enjoy your Crispy Pourable Pizza, a quick and easy twist on traditional pizza that’s perfect for a fast and delicious meal!

Juicy Peach Crisp

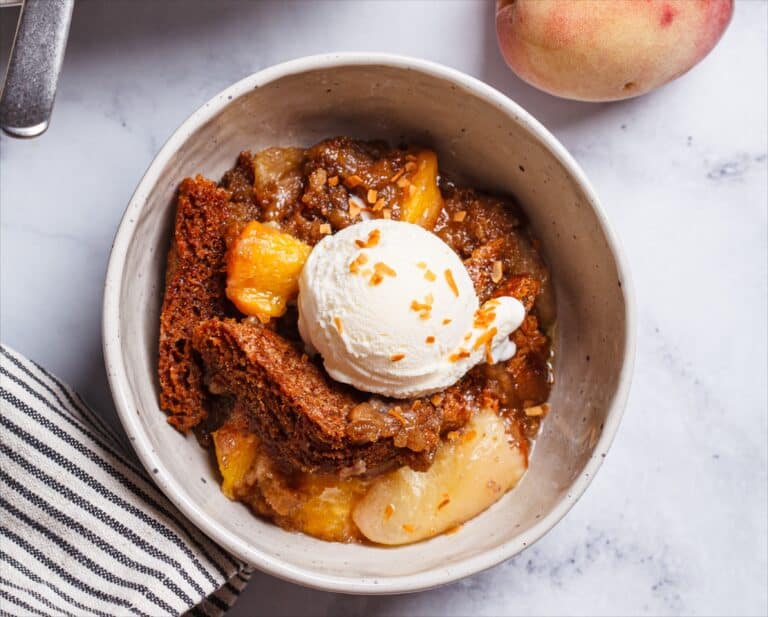
Juicy Peach Crisp is a delectable dessert, perfect for any occasion. This recipe features ripe peaches tossed with sugars, lemon juice, vanilla extract, cornstarch, cinnamon, and nutmeg, creating a sweet and spiced filling. Topped with a buttery crisp made from rolled oats, flour, brown sugar, and optional pecans or walnuts, it bakes to golden perfection in a 350°F oven. Serve warm with vanilla ice cream or whipped cream for an irresistible treat.

Ingredients:

  • Filling:
    • 6-8 ripe peaches, peeled, pitted, and sliced
    • 1/4 cup granulated sugar
    • 1/4 cup brown sugar
    • 1 tablespoon lemon juice
    • 1 teaspoon vanilla extract
    • 2 tablespoons cornstarch
    • 1/2 teaspoon ground cinnamon
    • 1/4 teaspoon ground nutmeg
  • Crisp Topping:
    • 1 cup old-fashioned rolled oats
    • 1/2 cup all-purpose flour
    • 1/2 cup brown sugar
    • 1/2 cup unsalted butter, cold and cut into small pieces
    • 1/2 teaspoon ground cinnamon
    • 1/4 teaspoon salt
    • 1/2 cup chopped pecans or walnuts (optional)

Instructions:

  1. Prepare the Filling:
    1. Preheat your oven to 350°F (175°C).
    2. In a large mixing bowl, combine the sliced peaches, granulated sugar, brown sugar, lemon juice, vanilla extract, cornstarch, ground cinnamon, and ground nutmeg. Toss until the peaches are evenly coated.
  2. Prepare the Crisp Topping:
    1. In another mixing bowl, combine the rolled oats, flour, brown sugar, ground cinnamon, and salt.
    2. Add the cold butter pieces to the mixture. Using a pastry cutter or your fingers, cut the butter into the mixture until it resembles coarse crumbs.
    3. Stir in the chopped pecans or walnuts, if using.
  3. Assemble the Crisp:
    1. Pour the peach filling into a greased 9×13-inch baking dish, spreading it out evenly.
    2. Sprinkle the crisp topping evenly over the peach filling.
  4. Bake:
    1. Bake in the preheated oven for 35-40 minutes, or until the topping is golden brown and the peach filling is bubbly.
  5. Serve:
    1. Remove the crisp from the oven and let it cool for about 10 minutes.
    2. Serve warm with a scoop of vanilla ice cream or a dollop of whipped cream, if desired.

Enjoy your Juicy Peach Crisp as a delightful dessert that’s perfect for any occasion!

Italian Sausage, Peppers, and Onions

Ingredients:

  • Sausage and Vegetables:
    • 1 1/2 pounds Italian sausage links (mild, sweet, or hot, according to preference)
    • 3 bell peppers (red, yellow, and green), sliced into strips
    • 2 large onions, sliced into rings
    • 3 cloves garlic, minced
    • 1/4 cup olive oil
    • Salt and black pepper to taste
    • 1 teaspoon dried oregano
    • 1 teaspoon dried basil
    • 1/2 teaspoon red pepper flakes (optional)
  • Sauce:
    • 1 can (14.5 oz) diced tomatoes
    • 1/4 cup tomato paste
    • 1/2 cup chicken broth or white wine
    • 1 tablespoon balsamic vinegar
  • Optional Garnishes:
    • Fresh basil leaves, chopped
    • Grated Parmesan cheese

Instructions:

  1. Cook the Sausages:
    1. In a large skillet, heat 2 tablespoons of olive oil over medium heat.
    2. Add the sausage links and cook until browned on all sides, about 7-10 minutes. The sausages do not need to be fully cooked at this stage.
    3. Remove the sausages from the skillet and set them aside.
  2. Cook the Vegetables:
    1. In the same skillet, add the remaining 2 tablespoons of olive oil.
    2. Add the sliced bell peppers and onions to the skillet. Season with salt, black pepper, dried oregano, dried basil, and red pepper flakes (if using).
    3. Cook, stirring occasionally, until the vegetables are tender and starting to caramelize, about 10-15 minutes.
    4. Add the minced garlic and cook for an additional 1-2 minutes until fragrant.
  3. Prepare the Sauce:
    1. Add the diced tomatoes, tomato paste, chicken broth or white wine, and balsamic vinegar to the skillet.
    2. Stir to combine and bring the mixture to a simmer.
  4. Combine and Simmer:
    1. Slice the browned sausages into 1-2 inch pieces and return them to the skillet with the vegetables and sauce.
    2. Reduce the heat to low, cover the skillet, and let the mixture simmer for 20-25 minutes, or until the sausages are fully cooked and the flavors have melded together.
  5. Serve:
    1. Transfer the sausage, peppers, and onions to a serving platter.
    2. Garnish with fresh basil leaves and grated Parmesan cheese, if desired.

Enjoy your Italian Sausage, Peppers, and Onions as a hearty main dish on its own, or serve it over pasta, rice, or in a sandwich roll for a delicious and satisfying meal!

All-American Loaded Baked Potato Salad

All-American Loaded Baked Potato Salad is a creamy and savory side dish perfect for barbecues, picnics, or any gathering. This recipe starts with tender cubed russet potatoes, boiled and cooled to perfection. The salad mix combines sour cream, mayonnaise, Dijon mustard, garlic powder, onion powder, and smoked paprika for a rich and flavorful dressing. Fold in shredded sharp cheddar cheese, crispy bacon, green onions, chives, red onion, and optional celery for added crunch. Chill the salad to let the flavors meld, and top with extra cheese, bacon, and green onions before serving. Enjoy this hearty and delicious potato salad as a standout accompaniment to any meal!

Ingredients:

  • Potatoes:
    • 4 large russet potatoes, washed and cubed
    • Salt, for boiling
  • Salad Mix:
    • 1 cup sour cream
    • 1 cup mayonnaise
    • 1 tablespoon Dijon mustard
    • 1 teaspoon garlic powder
    • 1 teaspoon onion powder
    • 1 teaspoon smoked paprika
    • Salt and black pepper to taste
  • Add-ins:
    • 1 cup shredded sharp cheddar cheese
    • 8 slices bacon, cooked until crispy and crumbled
    • 1/2 cup chopped green onions (scallions)
    • 1/2 cup chopped fresh chives
    • 1/2 cup diced red onion
    • 1/2 cup diced celery (optional)
    • 1/4 cup chopped fresh parsley
  • Optional Toppings:
    • Extra shredded cheese
    • Extra crumbled bacon
    • Extra chopped green onions

Instructions:

  1. Prepare the Potatoes:
    1. Place the cubed potatoes in a large pot and cover them with cold water. Add a generous pinch of salt.
    2. Bring the water to a boil over medium-high heat, then reduce the heat and let the potatoes simmer until they are tender but still firm, about 10-15 minutes.
    3. Drain the potatoes and let them cool to room temperature.
  2. Prepare the Salad Mix:
    1. In a large mixing bowl, combine the sour cream, mayonnaise, Dijon mustard, garlic powder, onion powder, and smoked paprika. Mix until well blended.
    2. Season with salt and black pepper to taste.
  3. Combine the Ingredients:
    1. Add the cooled potatoes to the bowl with the salad mix. Gently toss to coat the potatoes evenly with the dressing.
    2. Add the shredded cheddar cheese, crumbled bacon, chopped green onions, chives, red onion, and celery (if using). Gently fold the ingredients into the potato salad.
    3. Adjust seasoning with additional salt and pepper, if needed.
  4. Chill the Salad:
    1. Cover the bowl with plastic wrap or transfer the salad to an airtight container.
    2. Refrigerate for at least 2 hours, or overnight, to allow the flavors to meld together.
  5. Serve:
    1. Before serving, give the salad a gentle stir.
    2. Top with extra shredded cheese, crumbled bacon, and chopped green onions if desired.
    3. Garnish with fresh parsley.

Enjoy your All-American Loaded Baked Potato Salad as a perfect side dish for barbecues, picnics, or any gathering!

Berry Bliss: Top Baking Recipes with Fresh Summer Fruits

Everyone’s favorite berries are flooding the stores, and it’s time to dive into some delicious baked goods. Whether you like a tasty morning muffin or a delightful baked pie for dessert, here are some of the top recipes to utilize those summer berries.  

Bakery Style Blueberry Muffins  

Ingredients: 

1 ½ Cups Flour 

¾ Cup Sugar 

¼ Teaspoon Salt 

2 ½ Teaspoons Baking Powder 

⅓ Cup Olive Oil 

1 Egg 

½ Cup Milk 

1 Teaspoon Vanilla Extract 

1 Cup Fresh Blueberries 

¼ Cup Corse Sprinkling Sugar  

Instructions: 

Preheat the oven to 400 degrees. Line a muffin pan with paper or silicone liners. Combine the flour, sugar, salt, and baking powder in a large mixing bowl.  

Combine the oil, egg, milk, and vanilla in a separate bowl and whisk. Slowly incorporate both until you have a smooth mixture. Some lumps are okay. Fold in your blueberries. 

Pour the batter until the liner is almost filled. Sprinkle on half of the course sugar and bake for 15 to 20 minutes. Test with a toothpick to check for doneness.  

Sprinkle on the rest of the course sugar and enjoy. 

Strawberry Rhubarb Pie 

Ingredients: 

1 Package of Pie Crusts 

For the Filling: 

2 ½ Cups Fresh Strawberries Hulled and Quartered  

2 ½ Cups Fresh Rhubarb Chopped 

1 Cup Sugar 

¼ Cup Cornstarch 

1 Tablespoon Lemon Juice 

1 ½ Teaspoons Vanilla Extract 

Pinch of Salt 

Topping: 

1 Tablespoon Butter Diced Into Small Pieces 

1 Egg Beaten and 1 Tablespoon For Egg Wash  

1 Tablespoon Course Sugar  

Instructions: 

Preheat oven to 400 degrees. Press one of the pie crusts into a pie dish and remove any excess crust. Set the second dough sheet from the top to the side.  

Mix all the filling toppings in a large bowl until the fruit is thoroughly covered.  

Pour the mixture into the prepared pie crust. Sprinkle small pieces of butter on top. Place the second pie crust onto the pie and trim off any excess, then crimp to seal the edges. Slice an ‘X” on the top to vent. Brush the egg wash on the crust and sprinkle with coarse sugar. 

Bake for 45 to 55 minutes or until the crust is golden and the filling is bubbly. Enjoy!  

Fresh Blueberry Pie  

Ingredients: 

1 Package of Pie Crusts 

Filling:  

4 Cups Blueberries 

3/4 Cup Sugar 

1/4 Cup Cornstarch 

1 Tablespoon lemon juice 

Zest of One Lemon 

1/4 Teaspoon Cinnamon 

Pinch Salt 

Topping: 

1 Tablespoon Butter Diced Into Small Pieces 

1 Egg Beaten and 1 Tablespoon For Egg Wash  

1 Tablespoon Course Sugar  

Instructions: 

Preheat the oven to 400 degrees. Press one of the pie crusts into a pie place and trim off any excess crust.  

Combine the filling ingredients in a large mixing bowl and gently stir until incorporated. Pour the filling into the pie crust and dot the top of the filling with the butter. Place the second pie crust on top and cut a slit in the top to vent. 

Brush with an egg wash, sprinkle on the sugar, and bake for 45 to 55 minutes until golden brown and bubbly.  

Wrapping Up Summer Berry Recipes to Try  

Be sure to utilize those fresh berries this summer with these delicious and simple baked goods! If you have extras, I’m sure your friends and family wouldn’t mind if you shared! Baking with seasonal fruits enhances flavor and brings a touch of summer to every bite. Enjoy the sweetness of the season! 


Baking 101: Tips and Tricks For The Perfect Homemade Cookies

Baking the perfect homemade cookies is easier than it may seem. Creating crumbly soft cookies is all about using the proper ingredients and techniques. Let’s dive into just how even the most novice baker can knock homemade cookies out of the park! Let’s get baking.  

Must-Have Ingredients  

  • Flour 
  • Sugar 
  • Fat (Butter, Oil, Margarine, Lard) 
  • leavening Agents  
  • Add-ins (Nuts, Sprinkles, Chocolate chips, Etc.) 

Baking is a science. You must follow the proper formula while using the right ingredients in the correct order and in the correct amounts. Using high-quality ingredients and ensuring the proper measuring methods is key to getting the best cookies possible.  

Tips on Preparation 

Measuring 

One of the best tips for making the most delicious cookies is knowing how to measure your ingredients properly. Whether you’re using measuring cups or spoons, knowing the proper way to measure dry ingredients is key. Some recipes may even add the ingredients’ weight for an even more accurate recipe. 

Temperatures 

Temperatures are essential for baking. When it comes to cookies, you’ll want to ensure your butter and eggs are at room temperature. This allows things to bind together properly and makes for a more fluffy, well-baked cookie.  

Sifting Dry Ingredients  

Even if the recipe you’re following doesn’t mention sifting, it’s always good practice to do so. This allows for no lumps and clumping when mixing your cookies for a cohesive texture. This is especially needed when making sugar or shortbread cookies.  

Creaming Butter and Sugar  

For the proper cookie texture, you must cream your fat with sugar. This incorporates air into your cookie dough, allowing for a light crumb and soft cookie. Without this technique, your cookie will be hard and will not rise while baking.  

Mixing Wet and Dry Ingredients 

When baking, you never want to just throw all your ingredients into a bowl and hope for the best! Wet ingredients need to be mixed and prepared alongside the dry ingredients and then combined.  

Just be sure not to overmix. If you mix too much, the cookie will lose its soft texture and either fall apart or become crisp.  

Scooping Your Dough 

When scooping your cookie dough, you want to ensure uniform shapes and amounts. This is not only for an aesthetic purpose but also allows the cookies to bake at the same rate.  

Chilling Cookie Dough 

It’s important never to skip this step when called for by a recipe. This is typically seen with sugar or shortbread cookies. Because these cookies contain a large amount of fat and sugar, chilling helps prevent the cookie from spreading out.  

Wrapping Up Tips and Tricks for the Perfect Homemade Cookies  

You don’t have to be a professional baker to make delicious homemade cookies. All you need to do is learn the proper measuring techniques, use high-quality ingredients, and know the correct cooking techniques to ensure a perfectly baked cookie.