Home Blog Page 810

Ground Pork Tacos with Pineapple Salsa

These Ground Pork Tacos with Pineapple Salsa are a delightful blend of savory and sweet flavors, perfect for a quick weeknight dinner or a festive gathering. The juicy ground pork is seasoned with a mix of aromatic spices, creating a flavorful base for the tacos. The pineapple salsa adds a refreshing and tangy twist, balancing the richness of the pork. Each bite is a burst of flavor, with the soft tortillas wrapping everything together in a delicious embrace. Serve these tacos with your favorite toppings for a customizable and crowd-pleasing meal.

Ingredients:

For the Ground Pork:

  • 1 lb ground pork
  • 1 tablespoon olive oil
  • 1 small onion, finely chopped
  • 2 cloves garlic, minced
  • 1 teaspoon ground cumin
  • 1 teaspoon smoked paprika
  • 1/2 teaspoon chili powder
  • 1/2 teaspoon ground coriander
  • Salt and pepper to taste
  • Juice of 1 lime

For the Pineapple Salsa:

  • 1 cup fresh pineapple, finely diced
  • 1/2 red bell pepper, finely diced
  • 1/4 red onion, finely diced
  • 1 small jalapeño, seeded and finely diced
  • 1/4 cup fresh cilantro, chopped
  • Juice of 1 lime
  • Salt to taste

For the Tacos:

  • 8 small corn or flour tortillas
  • Toppings of your choice (e.g., shredded lettuce, sliced avocado, crumbled queso fresco, sour cream)

Instructions:

  1. Prepare the Pineapple Salsa:
    • In a medium bowl, combine the diced pineapple, red bell pepper, red onion, jalapeño, cilantro, and lime juice.
    • Season with salt to taste.
    • Mix well and set aside to let the flavors meld.
  2. Cook the Ground Pork:
    • Heat the olive oil in a large skillet over medium-high heat.
    • Add the chopped onion and cook until softened, about 3-4 minutes.
    • Add the minced garlic and cook for another minute until fragrant.
    • Add the ground pork to the skillet, breaking it up with a spoon, and cook until browned and cooked through, about 8-10 minutes.
    • Stir in the cumin, smoked paprika, chili powder, coriander, salt, and pepper. Cook for another 2-3 minutes, ensuring the spices are well incorporated.
    • Squeeze the lime juice over the cooked pork and stir to combine. Remove from heat.
  3. Assemble the Tacos:
    • Warm the tortillas in a dry skillet over medium heat or wrap them in a damp paper towel and microwave for 30 seconds.
    • Spoon the seasoned ground pork onto each tortilla.
    • Top with a generous spoonful of pineapple salsa.
    • Add your favorite toppings to each taco.
  4. Serve:
    • Serve the tacos immediately with lime wedges on the side.
    • Enjoy the delicious blend of savory pork and sweet, tangy pineapple salsa!

These Ground Pork Tacos with Pineapple Salsa are sure to become a favorite in your taco rotation, bringing a fresh and vibrant twist to your meals.


Slow Cooker Chicken and Vegetables

This hearty and wholesome Slow Cooker Chicken and Vegetables recipe is perfect for busy weeknights or lazy weekends. With minimal prep time and the convenience of a slow cooker, you can set it and forget it while still enjoying a delicious, home-cooked meal. Tender chicken breasts are simmered with a medley of fresh vegetables in a flavorful broth, resulting in a comforting dish that’s packed with nutrients and rich in taste. Serve it over rice or with crusty bread to soak up the savory juices.

Ingredients:

  • 4 boneless, skinless chicken breasts
  • 4 large carrots, peeled and cut into chunks
  • 4 potatoes, peeled and cut into chunks
  • 1 large onion, chopped
  • 3 cloves garlic, minced
  • 1 cup chicken broth
  • 1 cup frozen peas
  • 2 tbsp olive oil
  • 1 tsp dried thyme
  • 1 tsp dried rosemary
  • 1 tsp paprika
  • Salt and pepper to taste
  • 2 tbsp chopped fresh parsley (optional)

Instructions:

  1. Prepare the Ingredients:
    • In a large skillet, heat the olive oil over medium-high heat. Season the chicken breasts with salt, pepper, paprika, thyme, and rosemary.
    • Sear the chicken breasts in the skillet for 3-4 minutes on each side, until browned. This step is optional but adds extra flavor.
  2. Layer the Slow Cooker:
    • Place the chopped onions and garlic at the bottom of the slow cooker.
    • Add the carrots and potatoes on top of the onions and garlic.
    • Place the seared chicken breasts on top of the vegetables.
  3. Add the Broth:
    • Pour the chicken broth over the chicken and vegetables. Ensure that the liquid covers most of the vegetables for even cooking.
  4. Slow Cook:
    • Cover the slow cooker with the lid and cook on low for 6-7 hours or on high for 3-4 hours, until the chicken is fully cooked and the vegetables are tender.
  5. Add Peas:
    • About 30 minutes before serving, add the frozen peas to the slow cooker and stir gently. Continue cooking until the peas are heated through.
  6. Serve:
    • Once cooked, carefully remove the chicken and vegetables from the slow cooker. Serve hot, garnished with fresh parsley if desired.

Enjoy your Slow Cooker Chicken and Vegetables with a side of rice or some crusty bread to make it a complete and satisfying meal!

Jalapeno Popper Potato Salad

This Jalapeno Popper Potato Salad combines the classic creamy potato salad with the spicy, cheesy goodness of jalapeno poppers. It’s a delightful twist on a summer favorite, perfect for barbecues, picnics, or any gathering where you want to impress your guests with something a bit different. The combination of tender potatoes, smoky bacon, spicy jalapenos, and creamy dressing makes this dish a standout. Topped with shredded cheese and green onions, each bite is bursting with flavor, making it a crowd-pleaser every time.

Ingredients:

  • 2 pounds small potatoes, cut into bite-sized pieces
  • 4 slices bacon, cooked and crumbled
  • 3 fresh jalapenos, diced (remove seeds for less heat)
  • 1 cup shredded cheddar cheese
  • 1/2 cup cream cheese, softened
  • 1/2 cup mayonnaise
  • 1/4 cup sour cream
  • 2 tablespoons apple cider vinegar
  • 1 teaspoon garlic powder
  • 1 teaspoon onion powder
  • Salt and pepper to taste
  • 2 green onions, sliced (for garnish)

Instructions:

  1. Cook the Potatoes:
    • Place the potatoes in a large pot and cover them with water. Bring to a boil and cook until tender, about 10-15 minutes. Drain and let cool slightly.
  2. Prepare the Dressing:
    • In a large bowl, combine the cream cheese, mayonnaise, sour cream, apple cider vinegar, garlic powder, onion powder, salt, and pepper. Mix until smooth and creamy.
  3. Combine Ingredients:
    • Add the cooled potatoes, crumbled bacon, diced jalapenos, and shredded cheddar cheese to the bowl with the dressing. Gently toss to combine, ensuring all ingredients are evenly coated with the dressing.
  4. Chill:
    • Cover the salad and refrigerate for at least 1 hour to allow the flavors to meld together.
  5. Serve:
    • Before serving, give the salad a gentle stir. Garnish with sliced green onions and any additional toppings you like, such as extra bacon or jalapenos.
  6. Enjoy:
    • Serve chilled as a flavorful side dish at your next gathering.

Enjoy this zesty and creamy Jalapeno Popper Potato Salad that adds a deliciously spicy kick to your summer spreads!

Simple Crème Brûlée Dessert

Simple Crème Brûlée Dessert is a classic French treat that is both elegant and indulgent. This creamy custard dessert is topped with a layer of caramelized sugar, creating a delightful contrast between the silky custard and the crispy topping. With its rich vanilla flavor and smooth texture, Crème Brûlée is the perfect ending to any meal. Despite its sophisticated appearance, it is surprisingly easy to make at home with just a few basic ingredients. Serve it at your next dinner party, and watch your guests be impressed by this timeless dessert.

Ingredients

  • 2 cups heavy cream
  • 1 vanilla bean (or 1 teaspoon vanilla extract)
  • 5 large egg yolks
  • 1/2 cup granulated sugar
  • 2 tablespoons granulated sugar (for caramelizing)

Instructions

  1. Preheat the oven: Preheat your oven to 325°F (160°C). Place 4-6 ramekins in a large baking dish.
  2. Heat the cream: In a medium saucepan, combine the heavy cream and the seeds scraped from the vanilla bean (or the vanilla extract). Heat over medium heat until the cream just begins to simmer. Remove from heat and let it cool slightly.
  3. Prepare the egg mixture: In a medium bowl, whisk together the egg yolks and 1/2 cup of granulated sugar until the mixture becomes pale and slightly thickened.
  4. Combine the cream and egg mixture: Gradually pour the warm cream into the egg yolk mixture, whisking constantly to prevent the eggs from curdling. Continue whisking until fully combined.
  5. Strain the mixture: Strain the mixture through a fine-mesh sieve into a large measuring cup or another bowl to remove any cooked egg bits and ensure a smooth custard.
  6. Fill the ramekins: Pour the custard mixture evenly into the ramekins, filling them about 3/4 full.
  7. Create a water bath: Carefully pour hot water into the baking dish around the ramekins until the water reaches about halfway up the sides of the ramekins. This water bath helps the custards cook evenly.
  8. Bake: Bake in the preheated oven for 40-45 minutes, or until the custards are set but still slightly jiggly in the center. Remove the ramekins from the water bath and let them cool to room temperature. Then refrigerate for at least 2 hours or overnight.
  9. Caramelize the sugar: Just before serving, sprinkle about 1 teaspoon of granulated sugar evenly over the top of each custard. Using a kitchen torch, caramelize the sugar by heating it until it melts and turns a deep golden brown. If you don’t have a torch, you can place the ramekins under a broiler for a few minutes, watching closely to avoid burning.
  10. Serve: Let the caramelized sugar cool and harden for a minute before serving. Enjoy your Simple Crème Brûlée Dessert as a luxurious and impressive finale to any meal.

Enjoy your Simple Crème Brûlée Dessert as a luxurious and impressive finale to any meal, offering a delightful blend of creamy custard and crispy caramelized sugar in every bite.

Baked Ziti

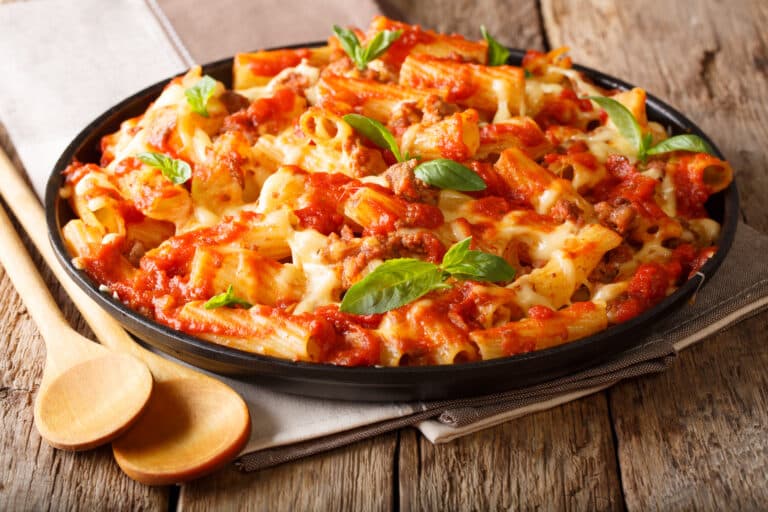
Baked Ziti is a classic Italian-American comfort food that’s perfect for feeding a crowd or enjoying as a family dinner. This hearty dish features tender pasta baked in a rich tomato sauce with layers of creamy ricotta and gooey melted mozzarella. The addition of savory Italian sausage and a blend of herbs gives it a robust flavor that everyone will love. Easy to make and incredibly satisfying, Baked Ziti is an excellent choice for potlucks, gatherings, or any night when you crave a warm, cheesy meal straight from the oven.

Ingredients

  • 1 pound ziti pasta
  • 1 pound Italian sausage (mild or spicy)
  • 1 small onion, finely chopped
  • 3 cloves garlic, minced
  • 1 (28-ounce) can crushed tomatoes
  • 1 (15-ounce) can tomato sauce
  • 1 (6-ounce) can tomato paste
  • 1 teaspoon dried basil
  • 1 teaspoon dried oregano
  • 1/2 teaspoon red pepper flakes (optional)
  • Salt and pepper, to taste
  • 1 cup ricotta cheese
  • 1/2 cup grated Parmesan cheese
  • 1 large egg
  • 2 cups shredded mozzarella cheese, divided
  • Fresh basil or parsley, chopped (for garnish)

Instructions

  1. Preheat the oven: Preheat your oven to 375°F (190°C). Grease a 9×13-inch baking dish with cooking spray or a little olive oil.
  2. Cook the pasta: Bring a large pot of salted water to a boil. Add the ziti pasta and cook according to the package instructions until al dente. Drain and set aside.
  3. Prepare the sauce: In a large skillet over medium heat, cook the Italian sausage, breaking it up with a spoon, until browned and cooked through. Add the chopped onion and minced garlic, and cook until the onion is softened, about 5 minutes. Stir in the crushed tomatoes, tomato sauce, tomato paste, dried basil, dried oregano, red pepper flakes (if using), salt, and pepper. Simmer for about 10-15 minutes, allowing the flavors to meld together.
  4. Mix the ricotta filling: In a medium bowl, combine the ricotta cheese, grated Parmesan cheese, and egg. Mix until well combined.
  5. Assemble the ziti: In a large mixing bowl, combine the cooked ziti pasta with the tomato sauce and sausage mixture. Stir until the pasta is evenly coated with the sauce.
  6. Layer the ingredients: Spread half of the pasta mixture in the prepared baking dish. Drop spoonfuls of the ricotta mixture evenly over the pasta. Sprinkle 1 cup of shredded mozzarella cheese over the ricotta. Top with the remaining pasta mixture and spread it out evenly. Sprinkle the remaining 1 cup of shredded mozzarella cheese over the top.
  7. Bake: Cover the baking dish with aluminum foil and bake in the preheated oven for 25 minutes. Remove the foil and bake for an additional 10-15 minutes, or until the cheese is melted and bubbly and the top is slightly golden.
  8. Serve: Let the baked ziti cool for a few minutes before serving. Garnish with chopped fresh basil or parsley.

Enjoy your Baked Ziti as a comforting and flavorful meal that’s perfect for any occasion, providing a delicious combination of pasta, cheese, and savory tomato sauce in every bite.

King Ranch Chicken and Fresh Veggie Casserole

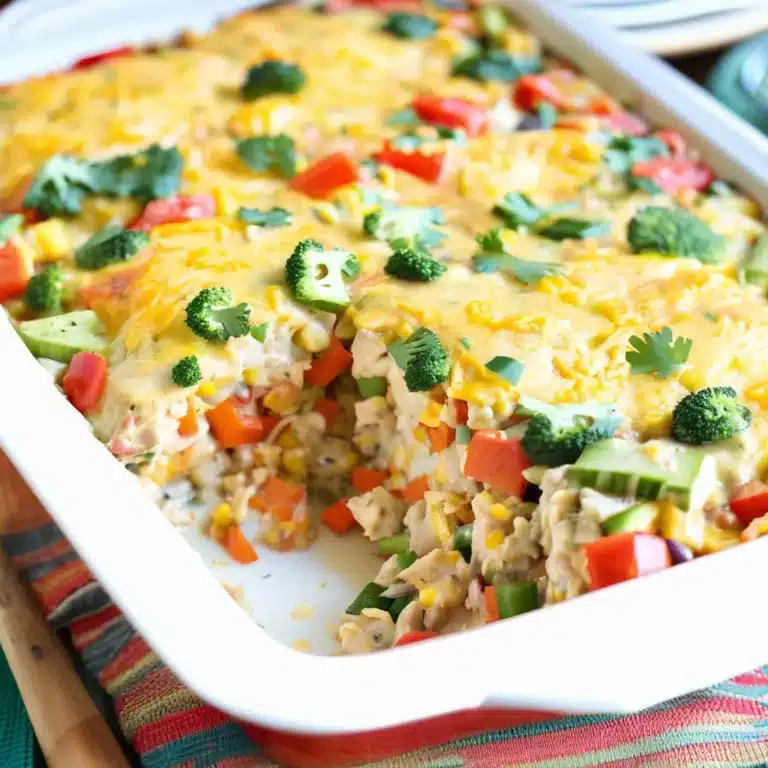
King Ranch Chicken and Fresh Veggie Casserole is a hearty, comforting dish that combines the rich flavors of creamy chicken, vibrant vegetables, and melty cheese. Originating from Texas, this casserole brings a taste of the Southwest to your dinner table with layers of tender chicken, bell peppers, tomatoes, and corn tortillas, all smothered in a luscious sauce made from scratch. Perfect for family dinners or potlucks, this casserole is not only delicious but also packed with nutrients from the fresh veggies. It’s an easy, make-ahead dish that will leave everyone asking for seconds.

Ingredients:

  • For the Sauce:
    • 2 tablespoons butter
    • 2 tablespoons all-purpose flour
    • 1 cup chicken broth
    • 1 cup milk
    • 1 can (10 oz) diced tomatoes with green chilies
    • 1 teaspoon ground cumin
    • 1 teaspoon chili powder
    • Salt and pepper to taste
  • For the Casserole:
    • 3 cups cooked chicken, shredded or cubed
    • 1 red bell pepper, diced
    • 1 green bell pepper, diced
    • 1 medium onion, finely chopped
    • 1 cup corn kernels (fresh or frozen)
    • 2 cloves garlic, minced
    • 2 cups shredded cheddar cheese
    • 1 cup sour cream
    • 12 small corn tortillas, torn into pieces
    • 1/4 cup fresh cilantro, chopped (for garnish)

Instructions:

  1. Prepare the Sauce:
    • In a medium saucepan, melt the butter over medium heat. Stir in the flour and cook for 1-2 minutes until the mixture is bubbly and lightly golden.
    • Gradually whisk in the chicken broth and milk, cooking until the sauce is smooth and thickened, about 5 minutes.
    • Stir in the diced tomatoes with green chilies, ground cumin, chili powder, salt, and pepper. Simmer for another 2-3 minutes, then remove from heat.
  2. Cook the Vegetables:
    • In a large skillet, heat a bit of oil over medium heat. Add the diced red and green bell peppers, chopped onion, corn, and minced garlic.
    • Cook until the vegetables are tender, about 5-7 minutes. Remove from heat.
  3. Assemble the Casserole:
    • Preheat your oven to 350°F (175°C). Grease a 9×13-inch baking dish.
    • Spread a thin layer of the prepared sauce on the bottom of the dish.
    • Layer half of the torn corn tortillas over the sauce, followed by half of the cooked chicken, half of the vegetable mixture, and half of the shredded cheddar cheese.
    • Repeat the layers, ending with the remaining sauce and cheese on top.
  4. Bake:
    • Cover the casserole with aluminum foil and bake in the preheated oven for 25 minutes.
    • Remove the foil and bake for an additional 10-15 minutes, or until the cheese is bubbly and golden brown.
  5. Serve:
    • Let the casserole cool for a few minutes before serving. Garnish with fresh cilantro.

Enjoy your King Ranch Chicken and Fresh Veggie Casserole, a delicious and satisfying meal that’s perfect for any occasion!

The Denver Omelet

The Denver Omelet, also known as the Western Omelet, is a classic American breakfast favorite that combines a medley of colorful vegetables, savory ham, and melty cheese within a fluffy egg base. This hearty and satisfying omelet is perfect for starting your day off right, offering a delicious blend of flavors and textures. The combination of sautéed bell peppers, onions, and ham creates a delightful contrast to the creamy eggs, making it a popular choice for brunch or any meal of the day. Easy to prepare and packed with protein, the Denver Omelet is a delicious and wholesome way to enjoy a classic breakfast dish.

Ingredients:

  • 3 large eggs
  • 1/4 cup diced ham
  • 1/4 cup diced green bell pepper
  • 1/4 cup diced red bell pepper
  • 1/4 cup diced onion
  • 1/4 cup shredded cheddar cheese
  • 1 tablespoon butter or oil
  • Salt and pepper to taste
  • Fresh chives or parsley, chopped (for garnish, optional)

Instructions:

  1. Prepare the Ingredients:
    • Crack the eggs into a bowl, add a pinch of salt and pepper, and whisk until well combined.
  2. Sauté the Vegetables and Ham:
    • In a non-stick skillet, heat the butter or oil over medium heat.
    • Add the diced ham, green bell pepper, red bell pepper, and onion. Sauté for about 5 minutes, until the vegetables are softened and the ham is slightly browned. Remove from the skillet and set aside.
  3. Cook the Omelet:
    • In the same skillet, pour the whisked eggs and let them cook undisturbed for about 1-2 minutes until the edges start to set.
    • Using a spatula, gently lift the edges of the omelet and tilt the skillet to allow the uncooked eggs to flow to the edges.
  4. Add the Filling:
    • Once the eggs are mostly set but still slightly runny on top, sprinkle the sautéed vegetables and ham evenly over one half of the omelet.
    • Sprinkle the shredded cheddar cheese over the vegetables and ham.
  5. Fold and Finish:
    • Carefully fold the omelet in half to cover the filling. Cook for another 1-2 minutes until the cheese is melted and the eggs are fully set.
    • Slide the omelet onto a plate.
  6. Serve:
    • Garnish with chopped fresh chives or parsley if desired.
    • Serve immediately with toast, hash browns, or a side salad.

Enjoy your Denver Omelet, a classic and flavorful breakfast dish that’s sure to please!

Creamy au Gratin Potatoes

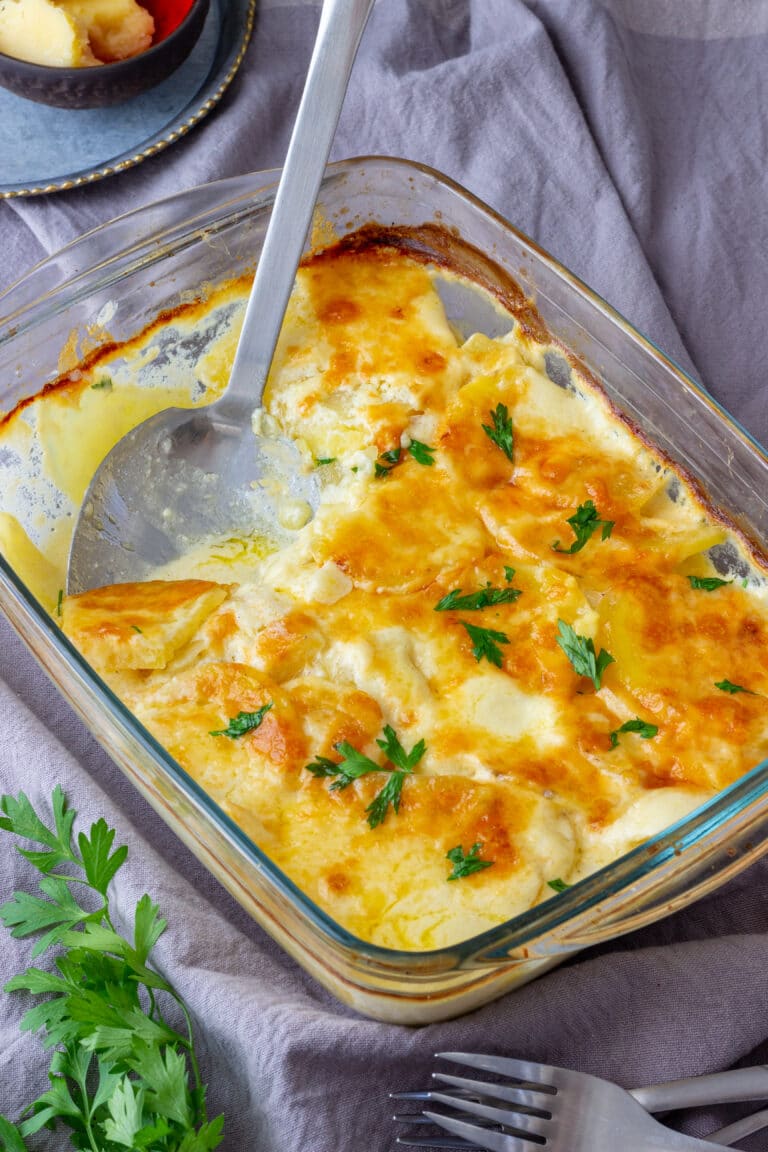
Creamy au Gratin Potatoes are a classic comfort food that brings a touch of elegance to any meal. Thinly sliced potatoes are layered with a rich, velvety cheese sauce and baked to golden perfection. The result is a dish that’s irresistibly creamy, cheesy, and full of flavor, with a crispy, browned top. Perfect as a side dish for holiday dinners, family gatherings, or any special occasion, these au gratin potatoes are sure to be a crowd-pleaser that will leave everyone asking for seconds.

Ingredients

  • 2 pounds russet potatoes, peeled and thinly sliced
  • 1 onion, finely chopped
  • 3 cloves garlic, minced
  • 3 tablespoons unsalted butter
  • 3 tablespoons all-purpose flour
  • 2 cups whole milk
  • 1 cup heavy cream
  • 2 cups shredded cheddar cheese
  • 1 cup shredded Gruyère cheese
  • 1 teaspoon salt
  • 1/2 teaspoon black pepper
  • 1/2 teaspoon ground nutmeg
  • 1/4 cup grated Parmesan cheese
  • Fresh parsley, chopped (for garnish)

Instructions

  1. Preheat the oven: Preheat your oven to 375°F (190°C). Grease a 9×13-inch baking dish with butter or non-stick spray.
  2. Prepare the cheese sauce: In a medium saucepan over medium heat, melt the butter. Add the chopped onion and cook until softened, about 5 minutes. Stir in the minced garlic and cook for another minute until fragrant. Sprinkle the flour over the onions and garlic, stirring constantly to form a roux. Cook for 2-3 minutes, without letting it brown.
  3. Add the milk and cream: Gradually whisk in the milk and heavy cream, stirring constantly to avoid lumps. Continue to cook until the mixture thickens, about 5-7 minutes.
  4. Add the cheese and seasonings: Remove the saucepan from the heat and stir in the shredded cheddar cheese and Gruyère cheese until melted and smooth. Add the salt, black pepper, and ground nutmeg, stirring to combine.
  5. Layer the potatoes: Arrange half of the sliced potatoes in an even layer in the prepared baking dish. Pour half of the cheese sauce over the potatoes, spreading it evenly. Repeat with the remaining potatoes and cheese sauce.
  6. Top with Parmesan: Sprinkle the grated Parmesan cheese over the top of the dish.
  7. Bake: Cover the baking dish with aluminum foil and bake in the preheated oven for 45 minutes. Remove the foil and continue baking for an additional 25-30 minutes, or until the top is golden brown and the potatoes are tender when pierced with a fork.
  8. Serve: Let the au gratin potatoes cool for a few minutes before serving. Garnish with chopped fresh parsley.

Enjoy your Creamy au Gratin Potatoes as a rich and flavorful side dish that complements any main course, providing a comforting and decadent addition to your meal.

Homemade Breakfast Sausage

Homemade Breakfast Sausage is a delicious and customizable way to start your day with a protein-packed punch. Unlike store-bought versions, this recipe allows you to control the quality of ingredients and adjust the seasoning to suit your taste. With a perfect blend of savory spices and a touch of sweetness, these sausages are tender, juicy, and bursting with flavor. Whether you enjoy them alongside eggs and toast or as part of a breakfast sandwich, these homemade sausages are sure to become a morning favorite.

Ingredients:

  • 1 lb ground pork
  • 1 teaspoon salt
  • 1/2 teaspoon black pepper
  • 1 teaspoon dried sage
  • 1 teaspoon dried thyme
  • 1 teaspoon dried rosemary, crushed
  • 1/2 teaspoon garlic powder
  • 1/2 teaspoon onion powder
  • 1/2 teaspoon smoked paprika
  • 1/4 teaspoon crushed red pepper flakes (optional)
  • 1 tablespoon brown sugar or maple syrup (optional)
  • 1/4 teaspoon ground nutmeg
  • 1/4 teaspoon ground allspice
  • 1 tablespoon vegetable oil (for cooking)

Instructions:

  1. Prepare the Sausage Mixture:
    • In a large bowl, combine the ground pork with salt, black pepper, sage, thyme, rosemary, garlic powder, onion powder, smoked paprika, crushed red pepper flakes (if using), brown sugar or maple syrup (if using), nutmeg, and allspice.
    • Mix well until all the spices are evenly distributed throughout the meat.
  2. Form the Patties:
    • Divide the sausage mixture into 8 equal portions. Shape each portion into a patty about 2.5 inches in diameter.
  3. Cook the Sausage:
    • In a large skillet, heat the vegetable oil over medium heat.
    • Add the sausage patties to the skillet, cooking in batches if necessary to avoid overcrowding.
    • Cook the patties for about 4-5 minutes on each side, or until they are golden brown and cooked through, with an internal temperature of 160°F (70°C).
  4. Serve:
    • Serve the homemade breakfast sausage patties hot, alongside your favorite breakfast sides.

Enjoy your Homemade Breakfast Sausage, a flavorful and hearty addition to your morning meal that’s sure to please everyone at the table!

Easy Chicken Lettuce Wraps

Easy Chicken Lettuce Wraps are a light and flavorful dish perfect for a quick meal or appetizer. These wraps combine ground chicken with a savory mixture of garlic, ginger, and soy sauce, complemented by crunchy water chestnuts and green onions. Served in crisp lettuce leaves, they offer a refreshing and healthy alternative to traditional wraps or sandwiches. With minimal prep and cook time, these lettuce wraps are perfect for busy weeknights or casual gatherings, delivering a burst of Asian-inspired flavors that are sure to please everyone at the table.

Ingredients:

  • 1 lb ground chicken
  • 1 tablespoon vegetable oil
  • 1 small onion, finely chopped
  • 3 cloves garlic, minced
  • 1 tablespoon fresh ginger, minced
  • 1/4 cup hoisin sauce
  • 2 tablespoons soy sauce
  • 1 tablespoon rice vinegar
  • 1 teaspoon sesame oil
  • 1 can (8 oz) water chestnuts, drained and diced
  • 3 green onions, sliced
  • 1 head butter or iceberg lettuce, leaves separated
  • Optional toppings: shredded carrots, chopped peanuts, fresh cilantro, and sriracha sauce

Instructions:

  1. Cook the Chicken:
    • Heat the vegetable oil in a large skillet over medium-high heat. Add the ground chicken and cook, breaking it up with a spoon, until it is browned and cooked through, about 5-7 minutes.
  2. Add Aromatics:
    • Add the chopped onion, minced garlic, and minced ginger to the skillet. Cook for another 2-3 minutes until the onion is translucent and the garlic and ginger are fragrant.
  3. Prepare the Sauce:
    • In a small bowl, whisk together the hoisin sauce, soy sauce, rice vinegar, and sesame oil. Pour the sauce into the skillet with the chicken mixture, stirring to combine.
  4. Add Water Chestnuts and Green Onions:
    • Stir in the diced water chestnuts and sliced green onions. Cook for another 2-3 minutes until everything is well combined and heated through.
  5. Assemble the Wraps:
    • Spoon the chicken mixture into the center of each lettuce leaf. Top with optional toppings like shredded carrots, chopped peanuts, fresh cilantro, and a drizzle of sriracha sauce if desired.
  6. Serve:
    • Serve the lettuce wraps immediately, allowing everyone to assemble their own wraps at the table.

Enjoy your Easy Chicken Lettuce Wraps, a fresh and tasty dish that’s perfect for any occasion!