Home Blog Page 809

Split Pea Soup

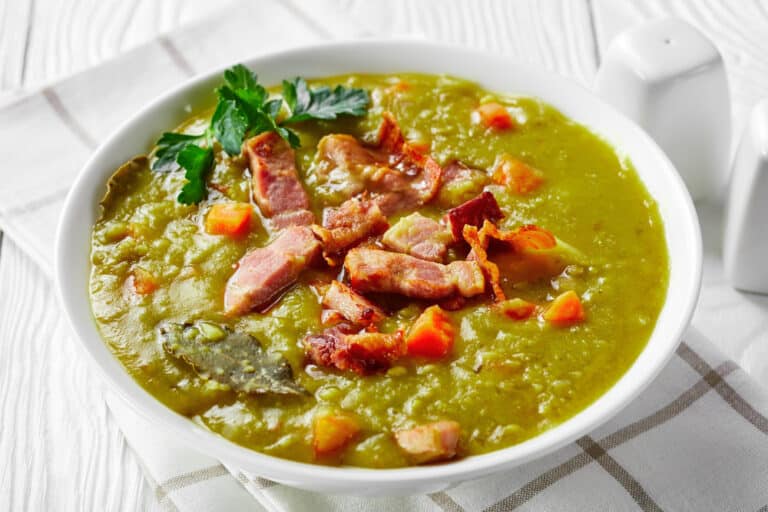
Split Pea Soup is a hearty and comforting dish that has been a staple in many kitchens for generations. This rich and flavorful soup is made from dried split peas, which break down as they cook, creating a creamy and satisfying texture without the need for cream or dairy. The addition of smoked ham or bacon adds depth and smokiness to the dish, while carrots, celery, and onions bring a touch of sweetness and earthiness. Perfect for chilly days, this soup is not only delicious but also packed with protein and fiber, making it a nutritious choice for any meal. Serve it with crusty bread for a complete and satisfying meal that warms both the body and the soul.

Ingredients:

  • 1 tablespoon olive oil
  • 1 onion, chopped
  • 2 carrots, diced
  • 2 celery stalks, diced
  • 2 cloves garlic, minced
  • 1 teaspoon dried thyme
  • 1 teaspoon dried rosemary
  • 1 bay leaf
  • 2 cups dried split peas, rinsed and picked over
  • 1 smoked ham hock or 1 cup diced smoked bacon
  • 8 cups chicken or vegetable broth
  • Salt and pepper, to taste
  • Optional: chopped fresh parsley for garnish

Instructions:

  1. Sauté the Vegetables: In a large pot, heat the olive oil over medium heat. Add the chopped onion, carrots, and celery. Sauté for about 5 minutes until the vegetables are softened.
  2. Add Garlic and Herbs: Stir in the minced garlic, thyme, rosemary, and bay leaf. Cook for an additional 1-2 minutes until the garlic is fragrant.
  3. Add Split Peas and Ham: Add the rinsed split peas to the pot along with the smoked ham hock or diced bacon. Stir to combine.
  4. Add Broth: Pour in the chicken or vegetable broth. Bring the mixture to a boil, then reduce the heat to low. Cover and simmer for about 1-1.5 hours, stirring occasionally, until the peas are tender and the soup has thickened.
  5. Adjust Seasoning: Remove the ham hock, if used, and shred any meat. Return the meat to the pot. Season the soup with salt and pepper to taste.
  6. Serve: Ladle the soup into bowls and garnish with fresh parsley if desired. Serve hot with crusty bread on the side.

Enjoy your delicious homemade Split Pea Soup!
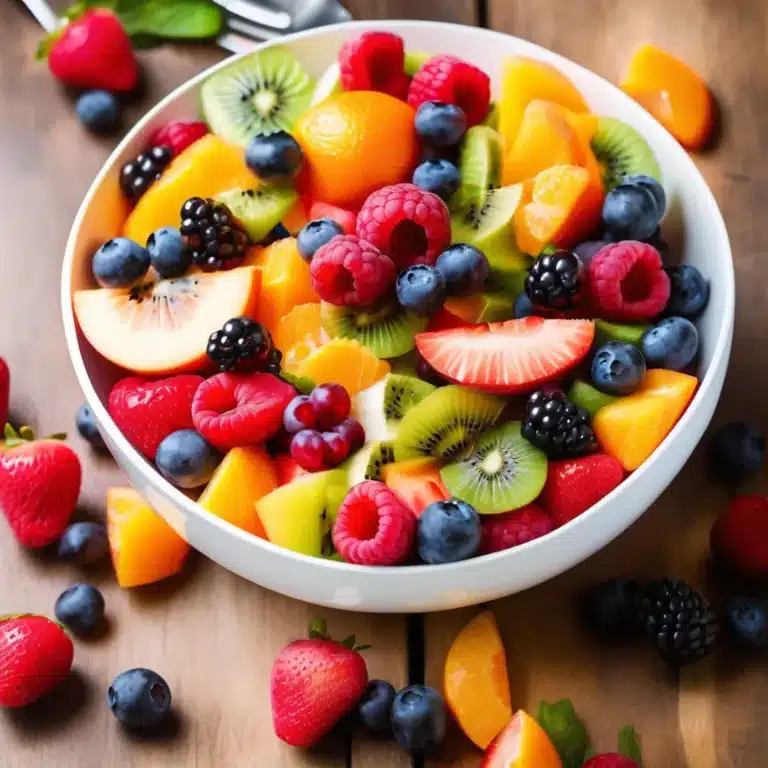
Perfect Summer Fruit Salad

This Perfect Summer Fruit Salad is a refreshing and colorful medley of the season’s finest fruits. Bursting with flavors, it combines juicy berries, sweet melons, and crisp apples, all tossed in a light citrus dressing that enhances their natural sweetness. This salad is perfect for picnics, barbecues, or a healthy snack on a hot day. It’s easy to prepare and can be customized with your favorite fruits, making it a versatile dish that everyone will love.

Ingredients

  • 1 cup strawberries, hulled and sliced
  • 1 cup blueberries
  • 1 cup raspberries
  • 1 cup watermelon, cubed
  • 1 cup cantaloupe, cubed
  • 1 apple, diced
  • 1 kiwi, peeled and sliced
  • 1 banana, sliced
  • 1 tablespoon honey
  • 1 tablespoon lime juice
  • 1 teaspoon lemon zest
  • Fresh mint leaves for garnish (optional)

Instructions

  1. Prepare the Fruit:
    • Wash all the fruits thoroughly.
    • Slice the strawberries, dice the apple, cube the watermelon and cantaloupe, and slice the kiwi and banana.
  2. Make the Dressing:
    • In a small bowl, whisk together the honey, lime juice, and lemon zest until well combined.
  3. Assemble the Salad:
    • In a large mixing bowl, gently combine all the prepared fruits.
    • Drizzle the citrus dressing over the fruit and toss gently to coat evenly.
  4. Serve:
    • Transfer the fruit salad to a serving bowl or individual cups.
    • Garnish with fresh mint leaves if desired.
  5. Chill (Optional):
    • For an extra refreshing treat, chill the fruit salad in the refrigerator for about 30 minutes before serving.

Enjoy this delightful and healthy fruit salad as a sweet treat or a vibrant addition to any meal!

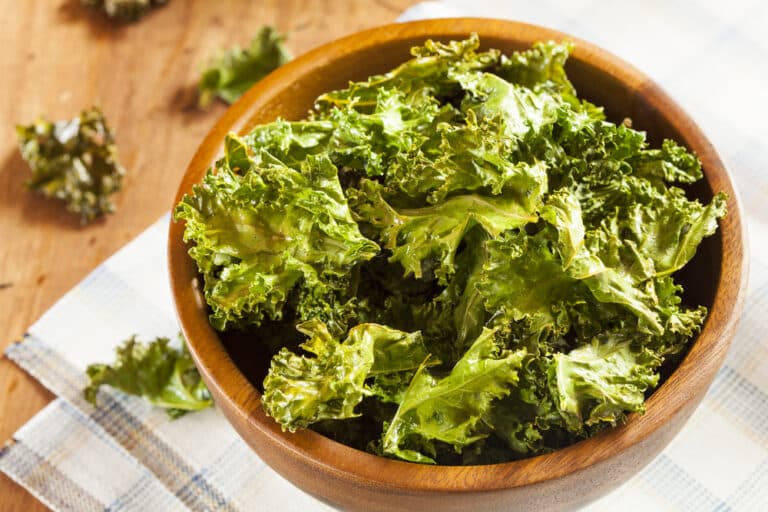
Baked Kale Chips

Kale chips are a delicious and healthy snack that’s easy to make at home. They are perfect for satisfying a craving for something crunchy without the guilt of indulging in unhealthy snacks. These chips are made by baking fresh kale leaves with a bit of olive oil and your favorite seasonings until they’re crispy and irresistible. Not only are they packed with vitamins and nutrients, but they are also incredibly versatile. You can enjoy them on their own, or as a topping for soups and salads. With just a few simple ingredients and a short baking time, you can enjoy a homemade snack that’s both nutritious and tasty.

Ingredients:

  • 1 bunch of kale
  • 1 tablespoon olive oil
  • 1/2 teaspoon salt
  • 1/4 teaspoon black pepper
  • Optional seasonings: garlic powder, onion powder, smoked paprika, or nutritional yeast

Instructions:

  1. Preheat the Oven: Preheat your oven to 300°F (150°C).
  2. Prepare the Kale: Wash the kale thoroughly and dry it completely with a salad spinner or paper towels. Remove the thick stems and tear the leaves into bite-sized pieces.
  3. Season the Kale: Place the kale pieces in a large bowl. Drizzle the olive oil over the kale and sprinkle with salt, pepper, and any optional seasonings you like. Massage the kale with your hands to ensure the oil and seasonings are evenly distributed.
  4. Bake the Kale: Spread the kale pieces in a single layer on a baking sheet lined with parchment paper. Make sure the pieces are not overlapping to ensure even baking.
  5. Bake Until Crisp: Bake in the preheated oven for 20-25 minutes, or until the kale is crisp but not browned. Keep a close eye on them after 15 minutes to prevent burning.
  6. Cool and Serve: Let the kale chips cool on the baking sheet for a few minutes before transferring them to a bowl. Enjoy immediately or store in an airtight container for up to a week.

These homemade kale chips are a great way to enjoy a nutritious snack that’s full of flavor and crunch. Feel free to experiment with different seasonings to create your perfect batch!

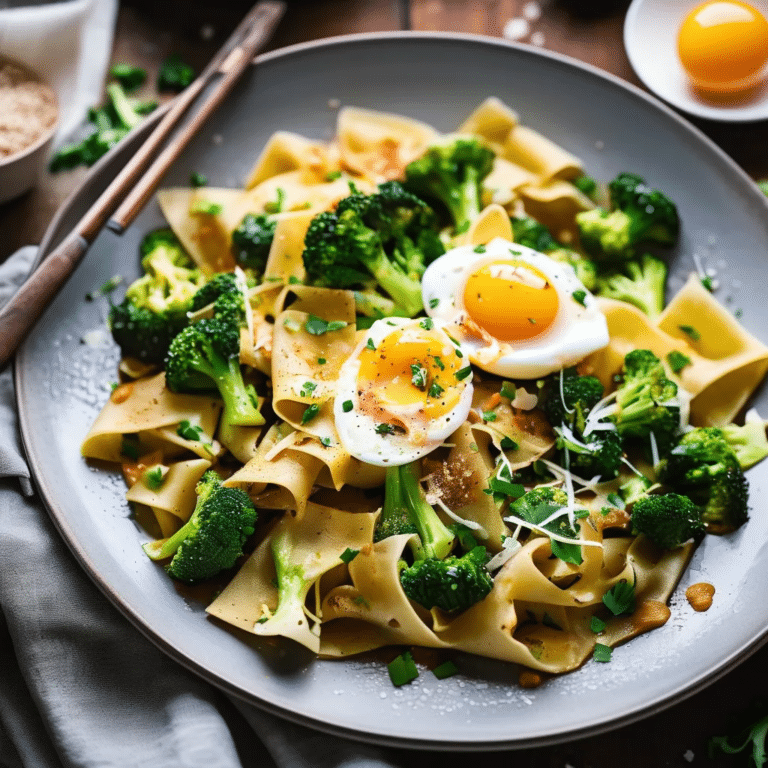
Chili Garlic Pappardelle With Smashed Broccoli & Soft Eggs

Chili garlic pappardelle with smashed broccoli and soft eggs is a flavorful and comforting pasta dish that offers a delightful combination of textures and flavors. The wide, flat pappardelle noodles are tossed in a spicy chili garlic sauce, providing a rich, aromatic base that’s both hearty and satisfying. Smashed broccoli adds a wonderful crunch and earthy flavor, while perfectly soft eggs with runny yolks create a luxurious, velvety coating for the pasta. This dish is both simple to prepare and impressive enough to serve for a special occasion, making it a versatile option for any meal. Garnished with a sprinkle of Parmesan cheese and fresh herbs, this pasta is a perfect balance of spicy, savory, and creamy.

Ingredients:

  • 8 oz pappardelle pasta
  • 2 cups broccoli florets
  • 3 tbsp olive oil
  • 4 cloves garlic, minced
  • 1 tsp red chili flakes (adjust to taste)
  • 1/2 tsp salt, plus more for boiling water
  • 1/4 tsp black pepper
  • 1/4 cup grated Parmesan cheese
  • 2 large eggs
  • 1 tbsp lemon juice
  • Fresh parsley, chopped (for garnish)
  • Extra grated Parmesan (for serving)

Instructions:

  1. Cook the Pappardelle:
    • Bring a large pot of salted water to a boil. Add the pappardelle and cook according to the package instructions until al dente. Reserve 1/2 cup of pasta water, then drain the pasta and set it aside.
  2. Prepare the Broccoli:
    • While the pasta cooks, steam or boil the broccoli florets until they are just tender, about 4-5 minutes. Drain and transfer the broccoli to a large skillet over medium heat.
  3. Sauté the Broccoli:
    • Add 1 tablespoon of olive oil to the skillet with the broccoli. Use a fork or potato masher to gently smash the broccoli, creating a mix of chunky and finely mashed pieces. Cook for 2-3 minutes, allowing the broccoli to get slightly crispy.
  4. Make the Chili Garlic Sauce:
    • Push the broccoli to one side of the skillet and add the remaining olive oil. Add the minced garlic and red chili flakes, sautéing for about 1 minute until fragrant. Mix the garlic and chili with the broccoli, then season with salt and black pepper.
  5. Combine Pasta and Sauce:
    • Add the cooked pappardelle to the skillet with the broccoli and chili garlic mixture. Toss to coat the pasta evenly, adding a splash of reserved pasta water if needed to create a light sauce. Stir in the lemon juice and grated Parmesan cheese.
  6. Cook the Eggs:
    • In a separate small skillet, bring a small amount of water to a gentle simmer. Carefully add the eggs and poach them for about 3-4 minutes until the whites are set but the yolks are still runny. Remove the eggs with a slotted spoon.
  7. Serve:
    • Divide the chili garlic pappardelle with smashed broccoli among serving plates. Top each serving with a soft-poached egg. Garnish with fresh parsley and extra Parmesan cheese.

Chili garlic pappardelle with smashed broccoli and soft eggs is a beautifully balanced dish that offers the perfect mix of spice, creaminess, and crunch. The runny yolk from the soft eggs adds richness, elevating this pasta to a gourmet experience that’s both easy to make and utterly satisfying.

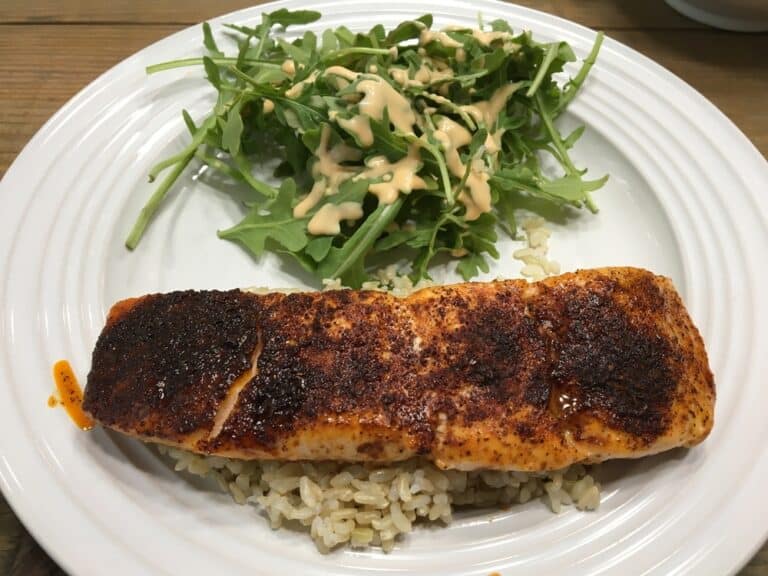
Blackened Salmon Fillets

Blackened salmon fillets are a delicious and healthy dish that combines the rich, buttery taste of salmon with a spicy, smoky crust. This recipe is perfect for a quick weeknight dinner or a special occasion, offering a burst of flavors with each bite. The blackening technique involves coating the fish with a blend of spices and searing it at high heat, creating a beautiful, dark crust while keeping the inside moist and tender. Pair it with a fresh salad or steamed vegetables for a complete and satisfying meal.

Ingredients:

  • 4 salmon fillets (about 6 ounces each)
  • 2 tablespoons paprika
  • 1 tablespoon onion powder
  • 1 tablespoon garlic powder
  • 1 teaspoon cayenne pepper (adjust to taste)
  • 1 teaspoon dried thyme
  • 1 teaspoon dried oregano
  • 1 teaspoon salt
  • 1/2 teaspoon black pepper
  • 2 tablespoons olive oil or melted butter
  • Lemon wedges (for serving)

Instructions:

  1. Prepare the Spice Mix: In a small bowl, combine the paprika, onion powder, garlic powder, cayenne pepper, thyme, oregano, salt, and black pepper. Mix well.
  2. Season the Salmon: Pat the salmon fillets dry with paper towels. Brush both sides of each fillet with olive oil or melted butter. Generously coat each fillet with the spice mix, pressing the spices into the fish to ensure they stick well.
  3. Heat the Pan: Heat a large cast-iron skillet over medium-high heat until it is smoking hot. This is essential for achieving the blackened effect.
  4. Cook the Salmon: Place the salmon fillets in the hot skillet, skin-side down if the skin is on. Cook for about 3-4 minutes per side, depending on the thickness of the fillets, until the salmon is blackened and cooked through. Be careful not to overcrowd the pan; cook in batches if necessary.
  5. Serve: Remove the salmon from the skillet and let it rest for a minute. Serve with lemon wedges on the side for squeezing over the top.

Enjoy your Blackened Salmon Fillets with your favorite side dishes for a delightful and flavorful meal!

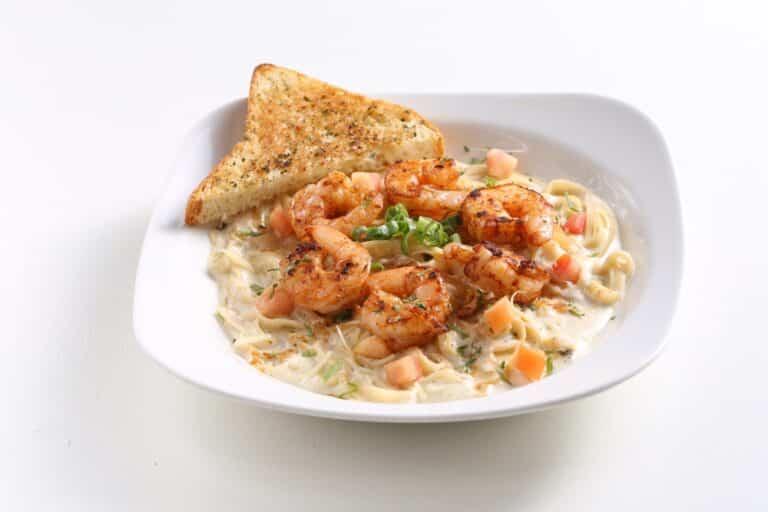
Creamy Pesto Shrimp

Indulge in the rich flavors of this delectable Creamy Pesto Shrimp dish, perfect for a quick yet impressive meal. Combining succulent shrimp with a velvety, basil pesto-infused cream sauce, this recipe brings together the freshness of herbs, the richness of cream, and the savory goodness of shrimp in a harmonious blend. Serve it over pasta, rice, or with a side of crusty bread to soak up every bit of the delicious sauce. Whether you’re cooking for a weeknight dinner or a special occasion, this dish is sure to delight your taste buds and leave everyone craving more.

Ingredients:

  • 1 pound large shrimp, peeled and deveined
  • 2 tablespoons olive oil
  • 4 cloves garlic, minced
  • 1 cup heavy cream
  • 1/2 cup basil pesto (store-bought or homemade)
  • 1/4 cup grated Parmesan cheese
  • 1 tablespoon lemon juice
  • Salt and pepper to taste
  • Fresh basil leaves, for garnish
  • Optional: cooked pasta, rice, or crusty bread for serving

Instructions:

  1. Prepare the Shrimp:
    • Season the shrimp with a pinch of salt and pepper.
  2. Cook the Shrimp:
    • In a large skillet, heat the olive oil over medium-high heat.
    • Add the shrimp and cook for 2-3 minutes on each side until they are pink and opaque. Remove the shrimp from the skillet and set aside.
  3. Make the Sauce:
    • In the same skillet, add the minced garlic and sauté for about 1 minute until fragrant.
    • Pour in the heavy cream, stirring to combine with the garlic.
    • Reduce the heat to medium-low and let the cream simmer for about 2-3 minutes, slightly thickening.
  4. Add the Pesto and Cheese:
    • Stir in the basil pesto and grated Parmesan cheese, blending well with the cream sauce.
    • Let the mixture simmer for another 2-3 minutes, allowing the flavors to meld together.
  5. Combine and Serve:
    • Return the cooked shrimp to the skillet, tossing to coat them in the creamy pesto sauce.
    • Add the lemon juice and season with additional salt and pepper to taste.
    • Cook for another 1-2 minutes until the shrimp are heated through.
  6. Garnish and Serve:
    • Garnish with fresh basil leaves.
    • Serve immediately over cooked pasta, rice, or with crusty bread.

Enjoy your Creamy Pesto Shrimp, a dish that’s as delightful to eat as it is to prepare!

Creamed Chipped Beef on Toast

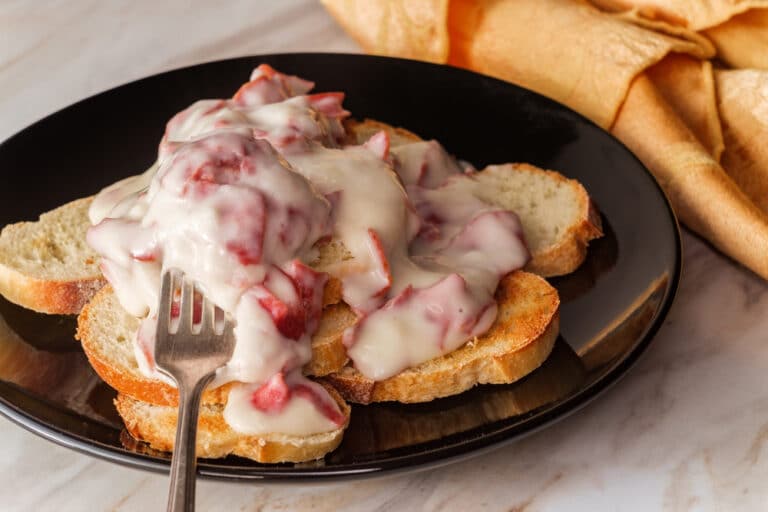
Creamed Chipped Beef on Toast, also affectionately known as “S.O.S.” (Same Old Stuff), is a classic comfort food that dates back to the early 20th century. Originally popularized by the military due to its simplicity and hearty nature, this dish has found a cherished place in American cuisine. The creamy, savory beef mixture atop crispy toast provides a satisfying blend of textures and flavors that can be enjoyed any time of the day. It’s a nostalgic dish that brings warmth and a sense of history to the table, perfect for a cozy breakfast or a quick dinner.

Ingredients:

  • 8 ounces of dried beef, sliced into thin strips
  • 4 tablespoons unsalted butter
  • 1/4 cup all-purpose flour
  • 3 cups whole milk
  • 1/4 teaspoon ground black pepper
  • 1/4 teaspoon garlic powder (optional)
  • 1/4 teaspoon onion powder (optional)
  • 8 slices of bread, toasted

Instructions:

  1. Prepare the Beef:
    • If the dried beef is particularly salty, rinse it under cold water and pat dry with paper towels.
    • Slice the dried beef into thin strips or small pieces.
  2. Make the Cream Sauce:
    • In a large skillet, melt the butter over medium heat.
    • Once the butter is melted and bubbly, add the flour. Stir constantly for about 2 minutes to create a roux, ensuring it doesn’t brown.
    • Gradually add the milk to the roux, whisking continuously to avoid lumps. Bring the mixture to a gentle simmer, allowing it to thicken. This should take about 5-7 minutes.
  3. Add Seasonings and Beef:
    • Stir in the ground black pepper, garlic powder, and onion powder if using.
    • Add the sliced dried beef to the sauce, stirring to combine. Allow the mixture to heat through, cooking for an additional 3-4 minutes.
  4. Prepare the Toast:
    • While the beef mixture is heating, toast the slices of bread until golden brown.
  5. Assemble the Dish:
    • Place two slices of toast on each plate.
    • Spoon the creamed chipped beef mixture generously over the toast.
  6. Serve:
    • Serve immediately, enjoying the dish while it’s hot and the toast is still crispy.

This simple yet flavorful dish is best enjoyed fresh but can be stored in the refrigerator for up to two days. Reheat gently on the stove, adding a splash of milk if needed to restore the creamy consistency.

Beef and Pineapple Stir Fry

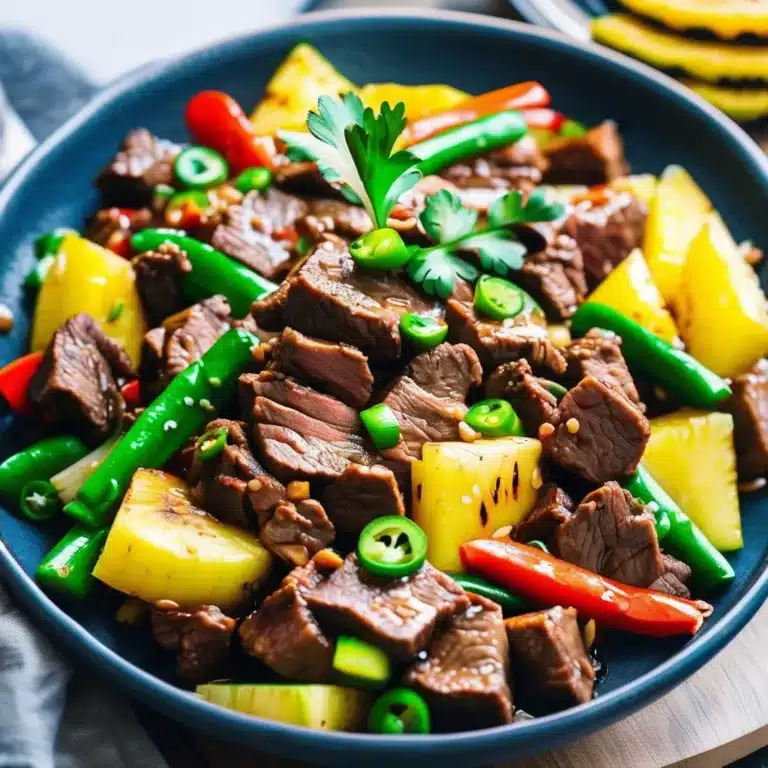
This Beef and Pineapple Stir Fry is a delightful blend of savory and sweet flavors, offering a quick and nutritious meal that is perfect for busy weeknights. The tender beef strips are marinated to perfection, while the pineapple chunks add a burst of juicy sweetness. Combined with a medley of colorful vegetables and a rich, flavorful sauce, this stir fry is sure to become a family favorite. Serve it over steamed rice or noodles for a complete and satisfying dinner that everyone will love.

Ingredients:

  • 1 lb (450g) beef sirloin, thinly sliced
  • 1 cup fresh pineapple chunks
  • 1 red bell pepper, sliced
  • 1 green bell pepper, sliced
  • 1 medium onion, sliced
  • 2 cloves garlic, minced
  • 1 tablespoon ginger, grated
  • 2 tablespoons soy sauce
  • 2 tablespoons oyster sauce
  • 1 tablespoon hoisin sauce
  • 1 tablespoon cornstarch
  • 1/2 cup beef broth
  • 2 tablespoons vegetable oil
  • 1 tablespoon sesame oil
  • Salt and pepper to taste
  • Cooked rice or noodles, for serving

Instructions:

  1. Marinate the Beef: In a bowl, mix the beef slices with 1 tablespoon of soy sauce, 1 tablespoon of oyster sauce, and 1 tablespoon of cornstarch. Let it marinate for at least 15 minutes.
  2. Prepare the Sauce: In a small bowl, combine the remaining soy sauce, oyster sauce, hoisin sauce, and beef broth. Set aside.
  3. Cook the Beef: Heat 1 tablespoon of vegetable oil in a large skillet or wok over medium-high heat. Add the marinated beef and stir-fry until browned and cooked through, about 3-4 minutes. Remove the beef from the skillet and set aside.
  4. Stir Fry Vegetables: In the same skillet, add the remaining vegetable oil and sesame oil. Add the garlic and ginger, and stir-fry for about 30 seconds until fragrant. Add the onions and bell peppers, and stir-fry for 2-3 minutes until they start to soften.
  5. Combine Ingredients: Return the beef to the skillet, and add the pineapple chunks. Pour the prepared sauce over the mixture and stir well to combine. Cook for another 2-3 minutes, allowing the flavors to meld and the sauce to thicken slightly.
  6. Season and Serve: Taste and adjust seasoning with salt and pepper if needed. Serve the stir fry hot over cooked rice or noodles.

Enjoy your delicious Beef and Pineapple Stir Fry!

Slow Cooker Beef Massaman Curry

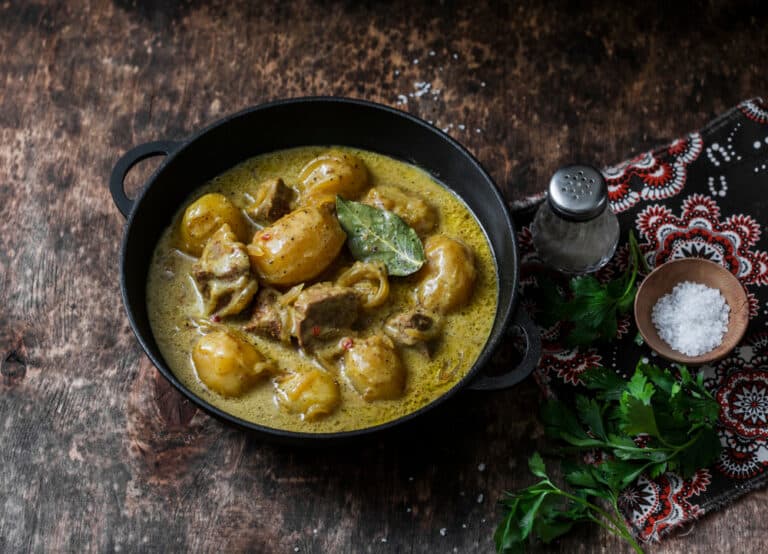
Indulge in the rich, aromatic flavors of Thailand with this Slow Cooker Beef Massaman Curry. This dish is a harmonious blend of tender beef, creamy coconut milk, and an array of spices that create a symphony of tastes in every bite. The slow cooking process ensures that the beef absorbs all the wonderful spices, becoming melt-in-your-mouth tender. With the addition of potatoes, peanuts, and a hint of sweetness from palm sugar, this curry is both comforting and exotic. Perfect for a cozy dinner, this recipe allows you to enjoy the depth of Thai cuisine with minimal effort.

Ingredients:

  • 2 lbs beef chuck, cut into 2-inch cubes
  • 2 cups coconut milk
  • 1 cup beef broth
  • 3 tbsp Massaman curry paste
  • 2 medium potatoes, peeled and cut into chunks
  • 1 large onion, chopped
  • 3 cloves garlic, minced
  • 1-inch piece of ginger, minced
  • 1 cinnamon stick
  • 3 cardamom pods
  • 2 tbsp fish sauce
  • 2 tbsp tamarind paste
  • 2 tbsp palm sugar (or brown sugar)
  • 1/2 cup roasted peanuts
  • 1 tbsp lime juice
  • Fresh cilantro, for garnish

Instructions:

  1. Prepare the Beef: Season the beef cubes with salt and pepper. In a skillet, heat a bit of oil over medium-high heat and sear the beef until browned on all sides. Transfer the beef to the slow cooker.
  2. Sauté the Aromatics: In the same skillet, add the chopped onion, garlic, and ginger. Sauté until the onion is translucent and fragrant. Add the Massaman curry paste and cook for another 2 minutes until the paste is well incorporated and fragrant.
  3. Combine Ingredients: Transfer the sautéed mixture to the slow cooker. Add the coconut milk, beef broth, cinnamon stick, cardamom pods, fish sauce, tamarind paste, and palm sugar. Stir to combine.
  4. Add Potatoes and Cook: Add the potato chunks to the slow cooker, ensuring they are submerged in the liquid. Cover and cook on low for 6-8 hours, or until the beef is tender and the potatoes are cooked through.
  5. Finish the Dish: About 30 minutes before serving, stir in the roasted peanuts and lime juice. Adjust seasoning with more fish sauce or sugar if needed.
  6. Serve: Remove the cinnamon stick and cardamom pods. Serve the curry over steamed jasmine rice, garnished with fresh cilantro.

Enjoy this delightful Slow Cooker Beef Massaman Curry that brings the taste of Thailand to your kitchen with ease and simplicity.

Crispy Slow Cooker Carnitas

Carnitas, a traditional Mexican dish, translates to “little meats” and is known for its tender, flavorful, and crispy texture. This recipe leverages the convenience of a slow cooker to achieve perfectly seasoned pork that’s juicy on the inside and delightfully crispy on the outside. The slow cooking process allows the pork to absorb a rich blend of spices, while a final stint under the broiler ensures the coveted crispiness that makes carnitas irresistible. Whether you’re serving them in tacos, burritos, or on their own, these crispy slow cooker carnitas are sure to be a hit at any meal.

Ingredients:

  • 4 pounds pork shoulder (pork butt), trimmed and cut into large chunks
  • 1 tablespoon salt
  • 1 teaspoon black pepper
  • 1 tablespoon ground cumin
  • 1 tablespoon dried oregano
  • 1 teaspoon smoked paprika
  • 1 teaspoon ground coriander
  • 4 cloves garlic, minced
  • 1 onion, quartered
  • 1 jalapeño, seeded and chopped
  • 1 cup orange juice (about 2 oranges)
  • 1 lime, juiced
  • 1/2 cup chicken broth
  • 2 bay leaves

Instructions:

  1. Prepare the Pork:
    • Season the pork chunks generously with salt, pepper, cumin, oregano, smoked paprika, and coriander.
  2. Assemble in the Slow Cooker:
    • Place the seasoned pork in the slow cooker. Add the minced garlic, quartered onion, chopped jalapeño, orange juice, lime juice, chicken broth, and bay leaves.
  3. Cook the Pork:
    • Cover and cook on low for 8-10 hours, or on high for 4-6 hours, until the pork is tender and easily shredded with a fork.
  4. Shred the Meat:
    • Once cooked, remove the pork from the slow cooker and shred it using two forks. Transfer the shredded meat to a baking sheet lined with aluminum foil.
  5. Crisp the Pork:
    • Preheat your broiler. Spread the shredded pork evenly on the baking sheet and ladle about 1/2 cup of the cooking liquid over the top.
    • Broil for 5-10 minutes, or until the edges of the pork become crispy and browned. Keep a close eye on it to avoid burning.
  6. Serve:
    • Serve the crispy carnitas with warm tortillas, diced onions, fresh cilantro, lime wedges, and your favorite toppings.

Enjoy your delicious, crispy slow cooker carnitas!