Home Blog Page 793

FETA FRIES

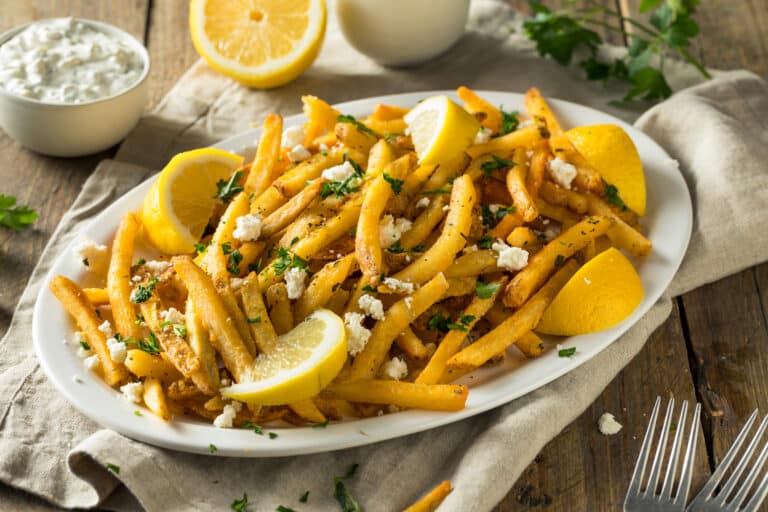
Feta Fries are a delightful twist on classic fries, elevating them to a whole new level with a Mediterranean flair. These crispy, golden fries are topped with crumbled feta cheese, fresh herbs, and a drizzle of tangy lemon juice, creating a burst of flavors in every bite. The creamy and salty feta complements the crispy fries perfectly, while the herbs and lemon add freshness and brightness to the dish. Feta Fries make an excellent appetizer, side dish, or snack, and are perfect for sharing at gatherings or enjoying as a treat for yourself. Serve them with a side of tzatziki or garlic aioli for an extra layer of flavor.

Ingredients

  • 4 large russet potatoes, washed and cut into fries
  • 3 tablespoons olive oil
  • 1 teaspoon salt
  • 1/2 teaspoon black pepper
  • 1 teaspoon garlic powder
  • 1 cup feta cheese, crumbled
  • 2 tablespoons fresh parsley, chopped
  • 2 tablespoons fresh dill, chopped
  • 1 lemon, cut into wedges

Instructions

  1. Preheat the oven: Preheat your oven to 425°F (220°C). Line a baking sheet with parchment paper or lightly grease it with olive oil.
  2. Prepare the fries: In a large bowl, toss the potato fries with olive oil, salt, black pepper, and garlic powder until evenly coated.
  3. Bake the fries: Spread the fries in a single layer on the prepared baking sheet. Bake for 25-30 minutes, flipping halfway through, until the fries are golden brown and crispy.
  4. Add the toppings: Remove the fries from the oven and transfer them to a serving platter. Immediately sprinkle the crumbled feta cheese over the hot fries, allowing it to slightly melt. Sprinkle the chopped parsley and dill on top.
  5. Finish with lemon: Squeeze fresh lemon juice over the fries just before serving to add a tangy kick.
  6. Serve: Serve the Feta Fries immediately with lemon wedges on the side for extra flavor.

Enjoy your Feta Fries as a deliciously crispy and flavorful dish that brings a taste of the Mediterranean to your table, perfect for any occasion.
GAI PAD KING

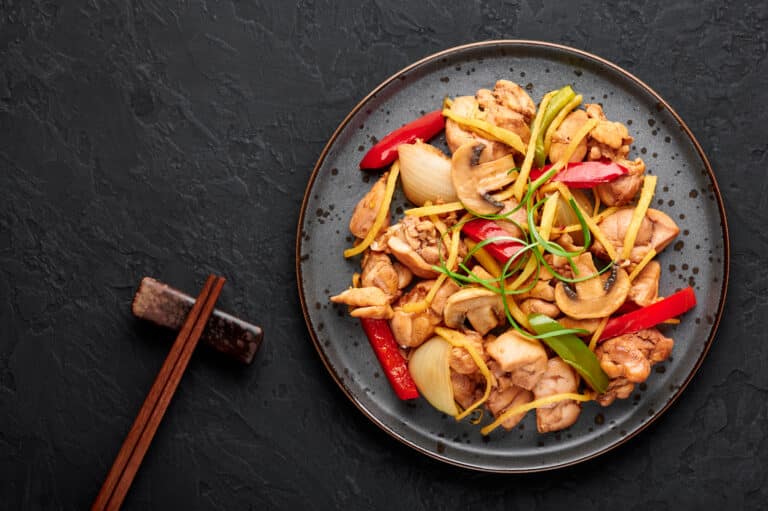
Gai Pad King is a classic Thai stir-fry dish that features tender slices of chicken cooked with fresh ginger, mushrooms, and a medley of vibrant vegetables. The name “Gai Pad King” translates to “chicken stir-fried with ginger,” and this dish delivers on that promise with its aromatic and slightly spicy flavors. The fresh ginger provides a warming kick that complements the savory sauce, made with soy sauce, oyster sauce, and a touch of sweetness. Quick and easy to prepare, Gai Pad King is perfect for a weeknight dinner and pairs wonderfully with steamed jasmine rice for a satisfying and balanced meal.

Ingredients

  • 1 pound chicken breast, thinly sliced
  • 2 tablespoons vegetable oil
  • 3 cloves garlic, minced
  • 1 onion, thinly sliced
  • 1 red bell pepper, sliced
  • 1 cup mushrooms, sliced
  • 2 tablespoons fresh ginger, julienned
  • 2 tablespoons soy sauce
  • 1 tablespoon oyster sauce
  • 1 teaspoon fish sauce
  • 1 teaspoon sugar
  • 1/4 cup chicken broth or water
  • 2 green onions, sliced
  • Fresh cilantro, for garnish

Instructions

  1. Prepare the ingredients: Slice the chicken breast into thin strips and set aside. Prepare the vegetables and ginger.
  2. Stir-fry the chicken: Heat the vegetable oil in a large wok or skillet over medium-high heat. Add the sliced chicken and stir-fry for 3-4 minutes until cooked through and lightly browned. Remove the chicken from the wok and set aside.
  3. Cook the vegetables: In the same wok, add the minced garlic, onion, bell pepper, mushrooms, and julienned ginger. Stir-fry for 3-4 minutes until the vegetables are tender-crisp and fragrant.
  4. Combine and season: Return the cooked chicken to the wok. Add the soy sauce, oyster sauce, fish sauce, sugar, and chicken broth or water. Stir everything together, ensuring the chicken and vegetables are evenly coated with the sauce. Cook for another 2-3 minutes until heated through.
  5. Finish with green onions: Stir in the sliced green onions and cook for an additional minute.
  6. Serve: Transfer the Gai Pad King to a serving dish and garnish with fresh cilantro. Serve hot with steamed jasmine rice.

Enjoy your Gai Pad King as a flavorful and aromatic Thai dish that brings the authentic taste of Thailand to your kitchen, perfect for any occasion.

STEAK SHAWAFEL

Steak Shawafel is a delicious fusion dish that combines the bold, aromatic flavors of Middle Eastern shawarma with the crisp, comforting textures of a falafel. This innovative creation features tender, marinated steak cooked to perfection and paired with crispy falafel, all wrapped in a soft pita. The addition of fresh vegetables and a creamy tahini sauce adds layers of flavor and texture, making it an irresistible meal. Perfect for lunch or dinner, this dish is sure to satisfy your cravings for something exotic and comforting, offering a unique twist on two classic favorites.

Ingredients

For the Steak Marinade:

  • 1 pound flank steak or sirloin, thinly sliced
  • 3 tablespoons olive oil
  • 2 tablespoons lemon juice
  • 3 cloves garlic, minced
  • 1 teaspoon ground cumin
  • 1 teaspoon ground coriander
  • 1 teaspoon smoked paprika
  • 1/2 teaspoon cayenne pepper
  • Salt and pepper, to taste

For the Falafel:

  • 1 can (15 ounces) chickpeas, drained and rinsed
  • 1/4 cup fresh parsley, chopped
  • 1/4 cup fresh cilantro, chopped
  • 1 small onion, chopped
  • 2 cloves garlic, minced
  • 1 teaspoon ground cumin
  • 1 teaspoon ground coriander
  • 1/2 teaspoon baking powder
  • Salt and pepper, to taste
  • 2 tablespoons all-purpose flour
  • Vegetable oil, for frying

For the Tahini Sauce:

  • 1/2 cup tahini
  • 2 tablespoons lemon juice
  • 1 garlic clove, minced
  • 1/4 cup water (more if needed)
  • Salt, to taste

For Assembly:

  • 4 pita breads
  • 1 cup lettuce, shredded
  • 1 tomato, sliced
  • 1/2 cucumber, sliced
  • Pickles (optional)

Instructions

  1. Marinate the steak: In a bowl, combine olive oil, lemon juice, garlic, cumin, coriander, paprika, cayenne, salt, and pepper. Add the steak slices and toss to coat. Cover and marinate in the refrigerator for at least 30 minutes or overnight for more flavor.
  2. Prepare the falafel mixture: In a food processor, combine chickpeas, parsley, cilantro, onion, garlic, cumin, coriander, baking powder, salt, pepper, and flour. Pulse until a coarse mixture forms. Refrigerate for 30 minutes to firm up.
  3. Make the falafel: Shape the falafel mixture into small patties. Heat vegetable oil in a skillet over medium-high heat. Fry the falafel patties in batches until golden brown, about 3-4 minutes per side. Drain on paper towels.
  4. Cook the steak: In the same skillet, add the marinated steak slices and cook over medium-high heat for 2-3 minutes per side until cooked to your desired doneness. Remove from heat.
  5. Prepare the tahini sauce: In a bowl, whisk together tahini, lemon juice, garlic, water, and salt until smooth. Adjust the consistency with more water if needed.
  6. Assemble the shawafel: Warm the pita breads in a skillet or oven. Spread a generous amount of tahini sauce on each pita. Top with lettuce, tomato, cucumber, steak slices, and falafel. Add pickles if desired.
  7. Serve: Fold the pitas around the filling and serve immediately.

Enjoy your Steak Shawafel as a delightful fusion of flavors and textures that combines the best of Middle Eastern cuisine in every bite!

BASIL FRIED RICE

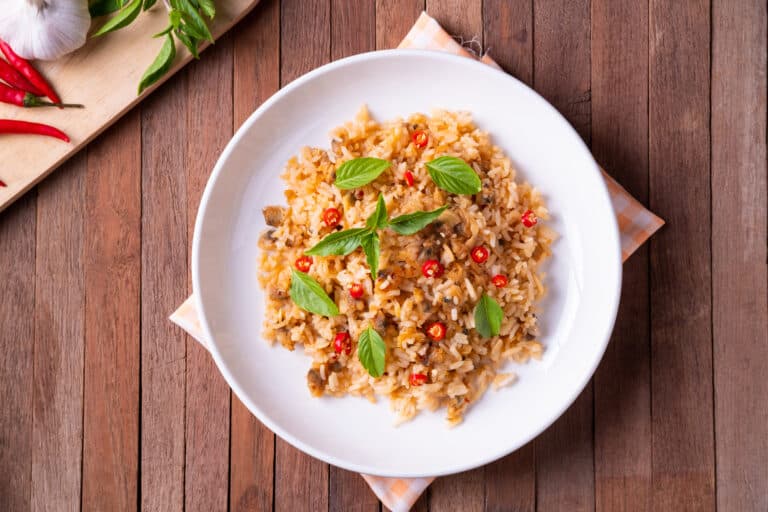
Basil Fried Rice is a delicious and aromatic dish that combines fragrant jasmine rice with fresh basil leaves, vegetables, and your choice of protein. This dish is a popular Thai street food that captures the essence of Thai cuisine with its bold flavors and vibrant colors. The key to this dish is the generous use of Thai basil, which adds a unique, slightly spicy, and anise-like flavor that distinguishes it from other fried rice recipes. Quick to prepare and incredibly satisfying, Basil Fried Rice is perfect for a weeknight dinner or as a side dish for a Thai-inspired feast.

Ingredients

  • 3 cups cooked jasmine rice, preferably day-old
  • 2 tablespoons vegetable oil
  • 3 cloves garlic, minced
  • 1 onion, finely chopped
  • 1 bell pepper, diced
  • 1 cup mixed vegetables (such as carrots, peas, and corn)
  • 1 pound protein of choice (such as chicken, shrimp, or tofu), diced
  • 2 tablespoons soy sauce
  • 1 tablespoon fish sauce
  • 1 teaspoon sugar
  • 1/2 teaspoon chili flakes (optional)
  • 1 cup fresh Thai basil leaves
  • 2 green onions, chopped
  • Lime wedges (for serving)

Instructions

  1. Prepare the rice: If you haven’t already, cook the jasmine rice according to package instructions and allow it to cool. For best results, use day-old rice as it will have less moisture and fry better.
  2. Cook the protein: Heat 1 tablespoon of vegetable oil in a large wok or skillet over medium-high heat. Add the protein and cook until it is fully cooked and slightly browned. Remove from the wok and set aside.
  3. Stir-fry the vegetables: In the same wok, add the remaining tablespoon of oil. Add the minced garlic and chopped onion, and stir-fry for about 1 minute until fragrant. Add the bell pepper and mixed vegetables, and continue to stir-fry for another 3-4 minutes until the vegetables are tender-crisp.
  4. Combine ingredients: Add the cooked protein back to the wok, along with the cooked jasmine rice. Stir everything together, breaking up any clumps of rice.
  5. Season the rice: Add the soy sauce, fish sauce, sugar, and chili flakes (if using). Stir-fry for another 2-3 minutes, ensuring everything is well combined and heated through.
  6. Add basil and green onions: Remove the wok from heat and gently fold in the fresh Thai basil leaves and chopped green onions until the basil is wilted.
  7. Serve: Transfer the basil fried rice to serving plates and garnish with lime wedges.

Enjoy your Basil Fried Rice as a flavorful and aromatic dish that brings a taste of Thailand to your table, perfect for any occasion!

VEGETABLE EGG ROLL

Vegetable Egg Rolls are a delightful appetizer that combines a medley of fresh vegetables wrapped in a crispy, golden shell. These rolls are a vegetarian-friendly take on the classic egg roll, offering a satisfying crunch and a burst of flavor in every bite. Filled with a mixture of cabbage, carrots, mushrooms, and bean sprouts, they are seasoned with soy sauce and sesame oil to create a deliciously savory taste. Perfect as a starter or a snack, Vegetable Egg Rolls are easy to prepare and a hit at any gathering. Serve them with sweet chili sauce or soy sauce for dipping, and enjoy a tasty and wholesome treat.

Ingredients

  • 2 tablespoons vegetable oil
  • 1 cup cabbage, finely shredded
  • 1 cup carrots, julienned
  • 1 cup bean sprouts
  • 1/2 cup shiitake mushrooms, sliced
  • 2 green onions, chopped
  • 2 cloves garlic, minced
  • 2 tablespoons soy sauce
  • 1 teaspoon sesame oil
  • Salt and pepper, to taste
  • 12 egg roll wrappers
  • Vegetable oil, for frying

Instructions

  1. Prepare the filling: Heat 2 tablespoons of vegetable oil in a large skillet over medium-high heat. Add the cabbage, carrots, bean sprouts, mushrooms, and green onions. Stir-fry for 3-4 minutes until the vegetables are tender.
  2. Season the filling: Add the minced garlic, soy sauce, sesame oil, salt, and pepper to the skillet. Stir well to combine and cook for another 1-2 minutes. Remove from heat and let the mixture cool slightly.
  3. Assemble the egg rolls: Place an egg roll wrapper on a clean surface with one corner pointing towards you (diamond shape). Spoon 2-3 tablespoons of the vegetable filling onto the bottom third of the wrapper. Fold the bottom corner over the filling, then fold the sides over, and roll tightly. Seal the edge with a little water. Repeat with the remaining wrappers and filling.
  4. Fry the egg rolls: Heat about 2 inches of vegetable oil in a deep skillet or wok to 350°F (175°C). Carefully add the egg rolls, a few at a time, and fry for 3-4 minutes until golden brown and crispy. Remove with a slotted spoon and drain on paper towels.
  5. Serve: Serve the vegetable egg rolls hot with sweet chili sauce or soy sauce for dipping.

Enjoy your Vegetable Egg Rolls as a crunchy and flavorful appetizer that is sure to be a hit at any meal or gathering!

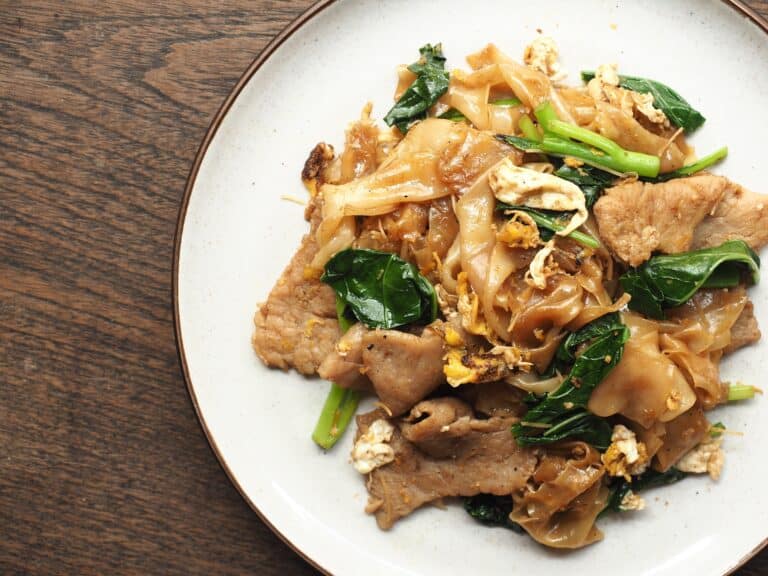
AUTHENTIC THAI PAD SEE EW

Pad See Ew is a popular Thai street food dish that features wide rice noodles stir-fried with soy sauce, garlic, Chinese broccoli, and your choice of protein, typically chicken, pork, or tofu. The name “Pad See Ew” translates to “stir-fried soy sauce noodles,” and the dish is known for its savory, slightly sweet, and smoky flavors. This authentic recipe captures the essence of traditional Thai cooking, offering a delicious balance of flavors and textures. With its simple ingredients and quick preparation, Pad See Ew is perfect for a satisfying weeknight meal or a special occasion. Serve it with a wedge of lime and chili flakes for an added kick.

Ingredients

  • 8 ounces wide rice noodles (fresh or dried)
  • 2 tablespoons vegetable oil
  • 2 cloves garlic, minced
  • 1/2 pound chicken, pork, or tofu, thinly sliced
  • 2 large eggs, lightly beaten
  • 2 cups Chinese broccoli (gai lan), cut into 2-inch pieces
  • 1 tablespoon light soy sauce
  • 1 tablespoon dark soy sauce
  • 1 tablespoon oyster sauce
  • 1 teaspoon sugar
  • White pepper, to taste
  • Lime wedges and chili flakes, for serving

Instructions

  1. Prepare the noodles: If using dried rice noodles, soak them in warm water for about 30 minutes or until soft, then drain and set aside. If using fresh rice noodles, separate them and set aside.
  2. Cook the protein: Heat 1 tablespoon of vegetable oil in a large wok or skillet over medium-high heat. Add the sliced chicken, pork, or tofu and stir-fry until cooked through, about 3-4 minutes. Remove from the wok and set aside.
  3. Scramble the eggs: In the same wok, add the remaining tablespoon of vegetable oil. Add the minced garlic and stir-fry for about 30 seconds until fragrant. Push the garlic to the side and pour in the beaten eggs. Scramble the eggs until just set.
  4. Stir-fry the noodles: Add the softened noodles to the wok, along with the cooked protein. Stir in the Chinese broccoli and toss everything together.
  5. Season the dish: Add the light soy sauce, dark soy sauce, oyster sauce, sugar, and a pinch of white pepper. Stir-fry everything together for 2-3 minutes until the noodles are evenly coated with the sauce and the Chinese broccoli is tender-crisp.
  6. Serve: Transfer the Pad See Ew to serving plates. Serve hot with lime wedges and chili flakes on the side.

Enjoy your Authentic Thai Pad See Ew as a delicious and satisfying dish that brings the flavors of Thailand to your table, perfect for any occasion.
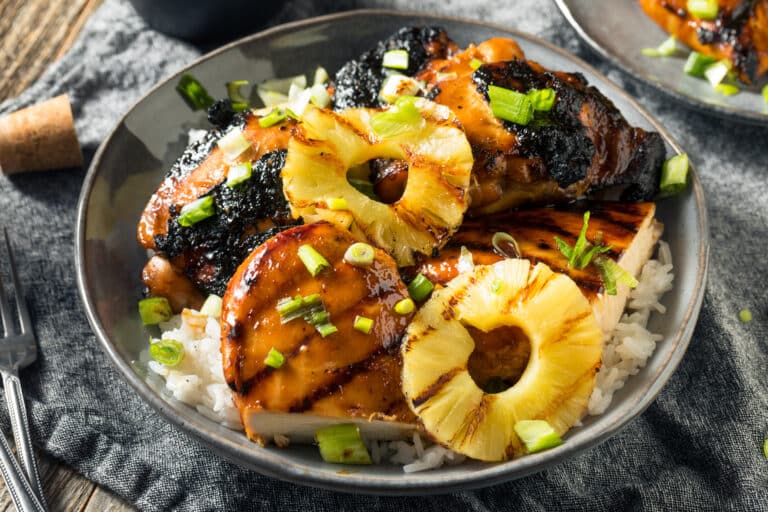
HULI HULI CHICKEN

Huli Huli Chicken is a delicious Hawaiian dish known for its sweet and savory flavors, perfect for grilling enthusiasts and anyone looking to add a tropical twist to their barbecue. The name “huli huli” means “turn, turn” in Hawaiian, referring to the traditional method of cooking the chicken on a rotisserie and turning it frequently to baste with a flavorful glaze. This recipe uses a marinade made from soy sauce, pineapple juice, ginger, garlic, and brown sugar, infusing the chicken with a delightful balance of tangy, sweet, and smoky flavors. Whether you’re hosting a summer barbecue or craving a taste of the islands, Huli Huli Chicken is sure to impress with its mouthwatering taste and aroma.

Ingredients

  • 4-6 chicken thighs or breasts (bone-in and skin-on for the best flavor)

For the Marinade:

  • 1/2 cup soy sauce
  • 1/2 cup pineapple juice
  • 1/4 cup ketchup
  • 1/4 cup brown sugar
  • 2 tablespoons rice vinegar
  • 2 tablespoons ginger, grated
  • 3 cloves garlic, minced
  • 1 tablespoon sesame oil
  • 1 tablespoon Worcestershire sauce

For the Glaze:

  • Reserved marinade
  • 2 tablespoons honey

Instructions

  1. Prepare the marinade: In a large bowl, whisk together the soy sauce, pineapple juice, ketchup, brown sugar, rice vinegar, ginger, garlic, sesame oil, and Worcestershire sauce. Reserve about 1/2 cup of the marinade for the glaze.
  2. Marinate the chicken: Place the chicken in a large resealable plastic bag or a shallow dish. Pour the remaining marinade over the chicken, ensuring it is well coated. Seal the bag or cover the dish and refrigerate for at least 4 hours, preferably overnight, to allow the flavors to penetrate the chicken.
  3. Make the glaze: In a small saucepan, combine the reserved marinade with honey. Bring to a simmer over medium heat and cook for 5-7 minutes until slightly thickened. Set aside.
  4. Preheat the grill: Preheat your grill to medium heat, about 375°F (190°C).
  5. Grill the chicken: Remove the chicken from the marinade and discard the used marinade. Place the chicken on the grill, skin-side down, and cook for 6-8 minutes per side, basting frequently with the glaze, until the chicken is cooked through and has a nice char. Use a meat thermometer to ensure the internal temperature reaches 165°F (75°C).
  6. Serve: Remove the chicken from the grill and let it rest for a few minutes. Serve with additional glaze and garnish with green onions or sesame seeds if desired.

Enjoy your Huli Huli Chicken as a flavorful and tropical dish that brings a taste of Hawaii to your barbecue, perfect for any occasion.

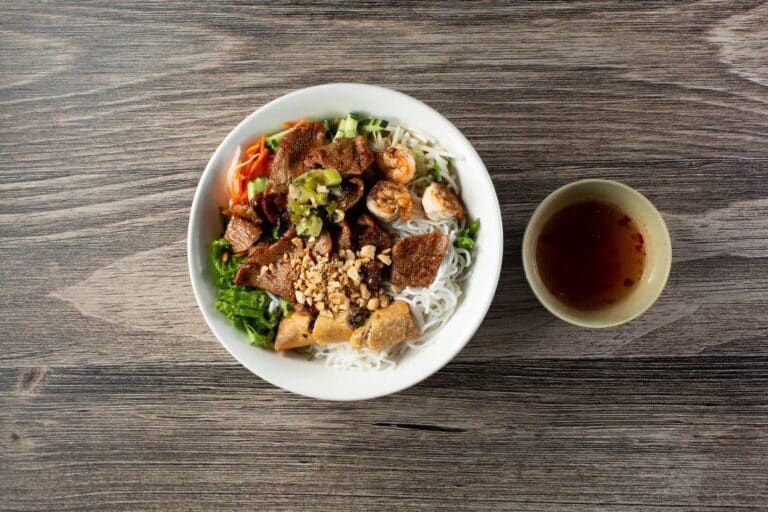
VERMICELLI GRILLED SHRIMP

Vermicelli Grilled Shrimp is a light and flavorful dish that combines succulent, marinated shrimp with delicate vermicelli noodles and fresh vegetables. This dish is inspired by Vietnamese cuisine, where the flavors of lemongrass, garlic, and lime create a refreshing and aromatic marinade for the shrimp. The grilled shrimp are served atop a bed of tender vermicelli noodles, accompanied by crisp vegetables and drizzled with a tangy nuoc cham sauce. Perfect for a healthy and satisfying meal, this dish is ideal for warm weather dining or whenever you’re craving a taste of Southeast Asia.

Ingredients

For the Shrimp:

  • 1 pound large shrimp, peeled and deveined
  • 2 tablespoons fish sauce
  • 2 tablespoons lime juice
  • 1 tablespoon brown sugar
  • 2 cloves garlic, minced
  • 1 tablespoon lemongrass, finely chopped
  • 1 tablespoon vegetable oil

For the Vermicelli Bowl:

  • 8 ounces vermicelli rice noodles
  • 1 cup cucumber, julienned
  • 1 cup carrots, julienned
  • 1 cup bean sprouts
  • 1/4 cup fresh mint leaves
  • 1/4 cup fresh cilantro leaves
  • 1/4 cup roasted peanuts, chopped

For the Nuoc Cham Sauce:

  • 1/4 cup fish sauce
  • 1/4 cup lime juice
  • 2 tablespoons sugar
  • 1/4 cup water
  • 1 clove garlic, minced
  • 1 small red chili, thinly sliced (optional)

Instructions

  1. Marinate the shrimp: In a bowl, combine the fish sauce, lime juice, brown sugar, garlic, lemongrass, and vegetable oil. Add the shrimp and toss to coat. Let marinate for at least 15 minutes.
  2. Prepare the noodles: Cook the vermicelli noodles according to package instructions. Drain and rinse under cold water. Set aside.
  3. Make the nuoc cham sauce: In a small bowl, combine the fish sauce, lime juice, sugar, water, garlic, and chili (if using). Stir until the sugar dissolves. Set aside.
  4. Grill the shrimp: Preheat a grill or grill pan over medium-high heat. Thread the shrimp onto skewers and grill for 2-3 minutes per side, or until cooked through and lightly charred.
  5. Assemble the bowls: Divide the cooked vermicelli noodles among serving bowls. Top with grilled shrimp, cucumber, carrots, bean sprouts, mint, cilantro, and chopped peanuts.
  6. Serve: Drizzle with nuoc cham sauce and serve immediately.

Enjoy your Vermicelli Grilled Shrimp as a refreshing and delicious meal that brings the vibrant flavors of Southeast Asia to your table.

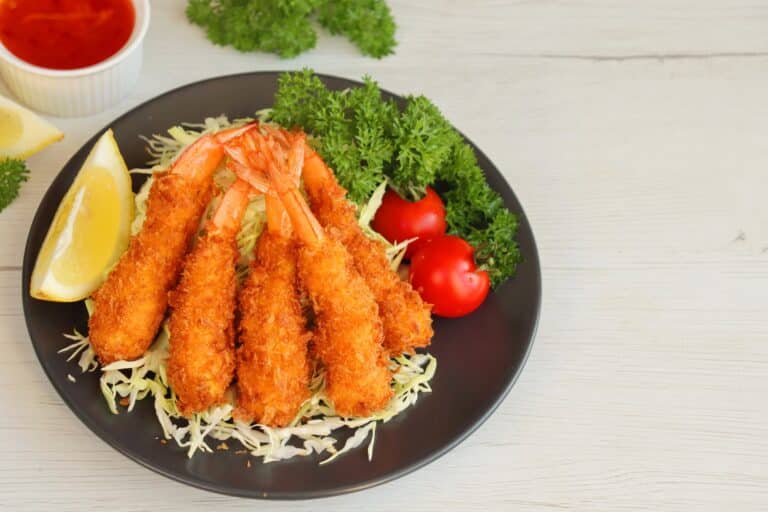
CRISPY BREADED SHRIMP

Crispy Breaded Shrimp is a delightful seafood dish that combines tender shrimp with a crunchy, golden coating. Perfect as an appetizer, party snack, or main course, these shrimp are seasoned and breaded with a mix of panko breadcrumbs and spices, then fried to perfection. The result is a deliciously crispy exterior that contrasts beautifully with the juicy shrimp inside. Quick and easy to prepare, Crispy Breaded Shrimp can be served with your choice of dipping sauce, such as cocktail sauce or tartar sauce, making them a versatile and crowd-pleasing addition to any meal or gathering.

Ingredients

  • 1 pound large shrimp, peeled and deveined, tails on
  • 1/2 cup all-purpose flour
  • 1 teaspoon salt
  • 1/2 teaspoon black pepper
  • 2 large eggs
  • 1 tablespoon water
  • 1 cup panko breadcrumbs
  • 1/2 cup grated Parmesan cheese
  • 1 teaspoon garlic powder
  • 1 teaspoon paprika
  • 1 teaspoon dried parsley
  • Vegetable oil, for frying
  • Lemon wedges, for serving

Instructions

  1. Prepare the breading stations: Set up three shallow bowls. In the first bowl, combine the flour, salt, and pepper. In the second bowl, whisk together the eggs and water. In the third bowl, mix the panko breadcrumbs, Parmesan cheese, garlic powder, paprika, and dried parsley.
  2. Bread the shrimp: Pat the shrimp dry with paper towels. Dredge each shrimp in the flour mixture, shaking off any excess. Dip the shrimp into the egg mixture, then coat it with the breadcrumb mixture, pressing gently to adhere.
  3. Heat the oil: In a large skillet or deep fryer, heat about 1 inch of vegetable oil over medium-high heat until it reaches 350°F (175°C).
  4. Fry the shrimp: Carefully add the breaded shrimp to the hot oil in batches, being careful not to overcrowd the pan. Fry for 2-3 minutes per side, or until golden brown and cooked through. Remove the shrimp with a slotted spoon and drain on paper towels.
  5. Serve: Serve the crispy breaded shrimp hot with lemon wedges and your choice of dipping sauce.

Enjoy your Crispy Breaded Shrimp as a delicious and satisfying dish that’s sure to impress with its flavorful, crunchy coating and tender shrimp inside.

SAMOSA

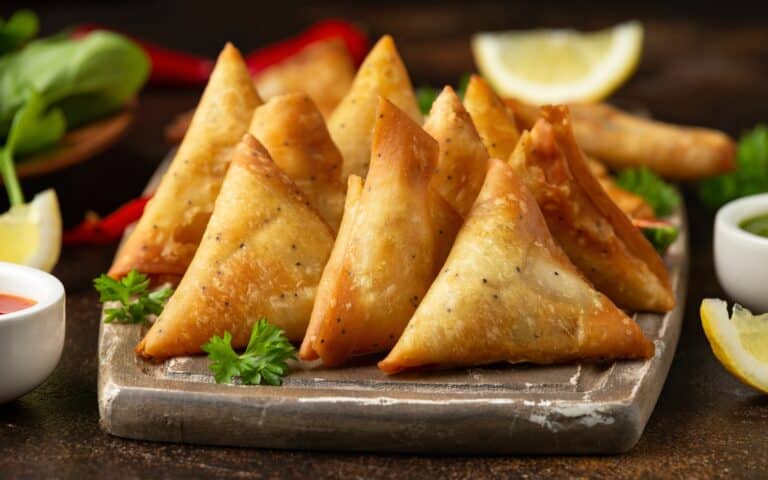
Samosas are a beloved Indian snack, known for their crispy, golden pastry and flavorful, spiced filling. These triangular pastries are typically filled with a mixture of potatoes, peas, and aromatic spices, creating a delicious balance of textures and flavors. Perfect as an appetizer or a tea-time treat, samosas are popular worldwide for their savory goodness and satisfying crunch. Making samosas at home allows you to customize the filling to your taste and enjoy them fresh and hot. Serve them with tamarind or mint chutney for a traditional and delectable experience.

Ingredients

For the Dough:

  • 2 cups all-purpose flour
  • 1/4 cup vegetable oil or melted ghee
  • 1/2 teaspoon salt
  • 1/2 cup water (more as needed)

For the Filling:

  • 2 tablespoons vegetable oil
  • 1 teaspoon cumin seeds
  • 1 onion, finely chopped
  • 2 cloves garlic, minced
  • 1 teaspoon ginger, minced
  • 2 green chilies, finely chopped (optional)
  • 2 large potatoes, boiled, peeled, and diced
  • 1/2 cup green peas, fresh or frozen
  • 1 teaspoon coriander powder
  • 1 teaspoon cumin powder
  • 1/2 teaspoon garam masala
  • 1/2 teaspoon turmeric powder
  • Salt, to taste
  • 2 tablespoons fresh cilantro, chopped
  • 1 tablespoon lemon juice

For Frying:

  • Vegetable oil, for deep frying

Instructions

  1. Make the dough: In a large bowl, combine the flour and salt. Add the oil or ghee and rub it into the flour with your fingers until the mixture resembles breadcrumbs. Gradually add water and knead into a firm, smooth dough. Cover and let it rest for 30 minutes.
  2. Prepare the filling: Heat oil in a pan over medium heat. Add the cumin seeds and let them sizzle for a few seconds. Add the onion, garlic, ginger, and green chilies, and sauté until the onion is soft and translucent.
  3. Add the spices: Stir in the coriander powder, cumin powder, garam masala, turmeric, and salt. Cook for a minute until fragrant.
  4. Cook the vegetables: Add the diced potatoes and peas to the pan. Cook for 5-7 minutes, stirring occasionally. Add the cilantro and lemon juice, mix well, and adjust seasoning if needed. Remove from heat and let cool.
  5. Shape the samosas: Divide the dough into equal portions and roll each portion into a ball. Roll out each ball into a thin circle and cut it in half to form two semi-circles. Fold each semi-circle into a cone and seal the edge with a little water. Fill the cone with the potato filling and seal the top edge to form a triangle. Ensure all edges are tightly sealed.
  6. Fry the samosas: Heat oil in a deep pan over medium heat. Fry the samosas in batches, turning occasionally, until they are golden brown and crispy. Drain on paper towels.
  7. Serve: Enjoy hot samosas with tamarind or mint chutney.

Savor your homemade Samosas as a delicious and traditional snack that brings the authentic taste of Indian street food to your table.