Home Blog Page 814

Tex-Mex Pork Chops and Rice Skillet

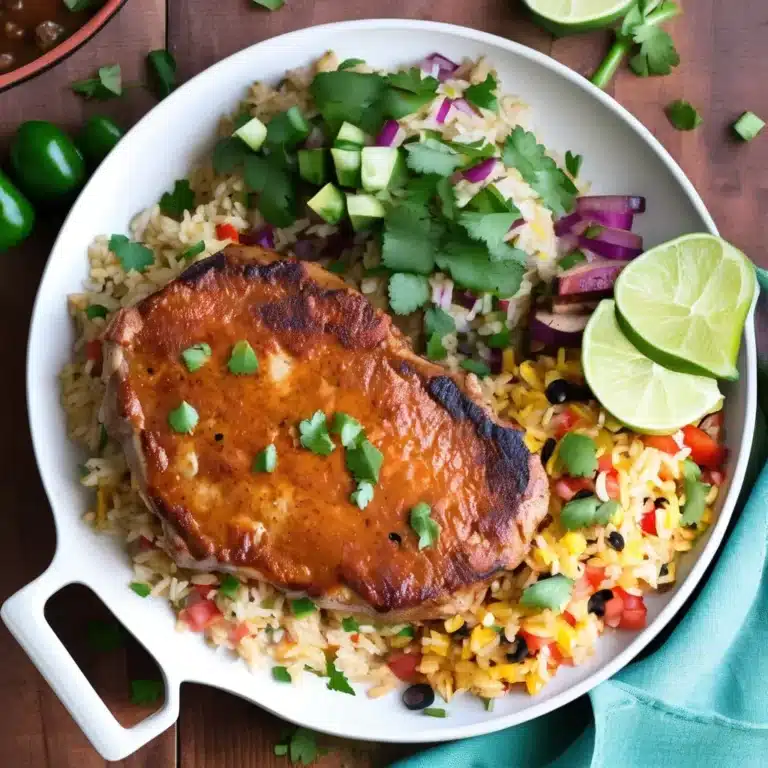
Tex-Mex Pork Chops and Rice Skillet is a hearty, flavorful dish that brings the vibrant tastes of Tex-Mex cuisine to your dinner table. This one-pan meal features juicy pork chops seared to perfection, paired with a zesty rice mixture loaded with black beans, corn, tomatoes, and a medley of bold spices. The convenience of cooking everything in a single skillet not only makes cleanup a breeze but also allows the flavors to meld beautifully. Perfect for a busy weeknight or a casual family dinner, this dish is sure to satisfy with its savory and slightly spicy notes.

Ingredients

  • 4 bone-in pork chops
  • 2 tablespoons olive oil
  • 1 teaspoon chili powder
  • 1 teaspoon ground cumin
  • 1 teaspoon paprika
  • 1/2 teaspoon garlic powder
  • 1/2 teaspoon onion powder
  • Salt and pepper, to taste
  • 1 cup long-grain white rice
  • 1 1/2 cups chicken broth
  • 1 (15-ounce) can black beans, drained and rinsed
  • 1 cup corn kernels (fresh, canned, or frozen)
  • 1 (14.5-ounce) can diced tomatoes, with juices
  • 1 small onion, chopped
  • 1 bell pepper, chopped
  • 2 cloves garlic, minced
  • 1/2 cup shredded cheddar cheese (optional)
  • Fresh cilantro, chopped (for garnish)
  • Lime wedges (for serving)

Instructions

  1. Season the pork chops: In a small bowl, mix together the chili powder, ground cumin, paprika, garlic powder, onion powder, salt, and pepper. Rub this spice mixture evenly over both sides of the pork chops.
  2. Sear the pork chops: Heat the olive oil in a large skillet over medium-high heat. Add the pork chops and sear for 3-4 minutes on each side, until they are nicely browned. Remove the pork chops from the skillet and set them aside.
  3. Sauté the vegetables: In the same skillet, add the chopped onion and bell pepper. Cook for about 3-4 minutes until softened. Add the minced garlic and cook for another minute until fragrant.
  4. Cook the rice: Stir in the rice, chicken broth, black beans, corn, and diced tomatoes with their juices. Bring the mixture to a boil, then reduce the heat to low.
  5. Simmer: Return the pork chops to the skillet, nestling them into the rice mixture. Cover and simmer for 20-25 minutes, or until the rice is tender and the pork chops are cooked through.
  6. Add cheese (optional): If using, sprinkle shredded cheddar cheese over the top of the skillet during the last 5 minutes of cooking, covering to allow the cheese to melt.
  7. Serve: Remove the skillet from the heat. Garnish with chopped fresh cilantro and serve with lime wedges.

Enjoy your Tex-Mex Pork Chops and Rice Skillet as a delicious and satisfying meal that brings the bold flavors of Tex-Mex cuisine to your table, all in one convenient dish.
Baked Chicken Breasts and Vegetables

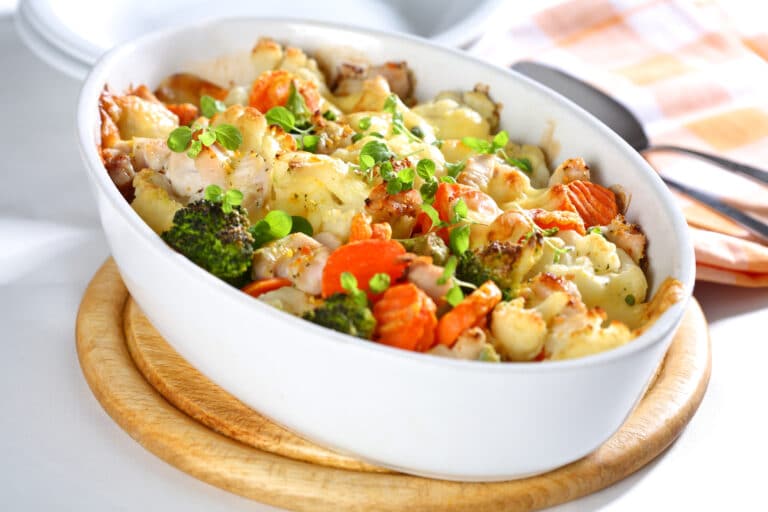
Baked Chicken Breasts and Vegetables is a versatile and nutritious dish that’s perfect for a quick and easy weeknight dinner. This recipe combines tender, juicy chicken breasts with a medley of colorful vegetables, all seasoned with a blend of herbs and spices. The oven does all the work, roasting the ingredients to perfection and infusing them with rich flavors. With minimal prep and cleanup, this wholesome meal is not only delicious but also a breeze to prepare, making it an ideal option for busy families. Serve it with a side of rice, quinoa, or a fresh salad for a complete and satisfying meal.

Ingredients

  • 4 boneless, skinless chicken breasts
  • 1 red bell pepper, sliced
  • 1 yellow bell pepper, sliced
  • 1 zucchini, sliced
  • 1 red onion, sliced
  • 1 cup cherry tomatoes, halved
  • 1 cup broccoli florets
  • 3 tablespoons olive oil
  • 1 teaspoon garlic powder
  • 1 teaspoon dried oregano
  • 1 teaspoon dried thyme
  • 1 teaspoon paprika
  • Salt and pepper, to taste
  • 1 lemon, sliced
  • Fresh parsley or basil, chopped (for garnish)

Instructions

  1. Preheat the oven: Preheat your oven to 400°F (200°C). Line a large baking sheet with parchment paper or aluminum foil for easy cleanup.
  2. Prepare the vegetables: In a large bowl, combine the sliced red and yellow bell peppers, zucchini, red onion, cherry tomatoes, and broccoli florets. Drizzle with 2 tablespoons of olive oil, and season with garlic powder, dried oregano, dried thyme, paprika, salt, and pepper. Toss to coat the vegetables evenly.
  3. Season the chicken: Place the chicken breasts on the prepared baking sheet. Drizzle with the remaining 1 tablespoon of olive oil, and season both sides with salt, pepper, and a sprinkle of paprika.
  4. Arrange the vegetables: Spread the seasoned vegetables around the chicken breasts on the baking sheet. Top each chicken breast with a slice of lemon.
  5. Bake: Place the sheet pan in the preheated oven and bake for 25-30 minutes, or until the chicken breasts are cooked through and reach an internal temperature of 165°F (75°C), and the vegetables are tender and slightly caramelized.
  6. Serve: Remove the sheet pan from the oven and let it cool for a few minutes. Garnish the chicken and vegetables with chopped fresh parsley or basil.

Enjoy your Baked Chicken Breasts and Vegetables as a healthy, delicious, and convenient meal that’s perfect for any night of the week, offering a delightful blend of flavors and textures in every bite.

Sheet Pan Salmon and Veggies

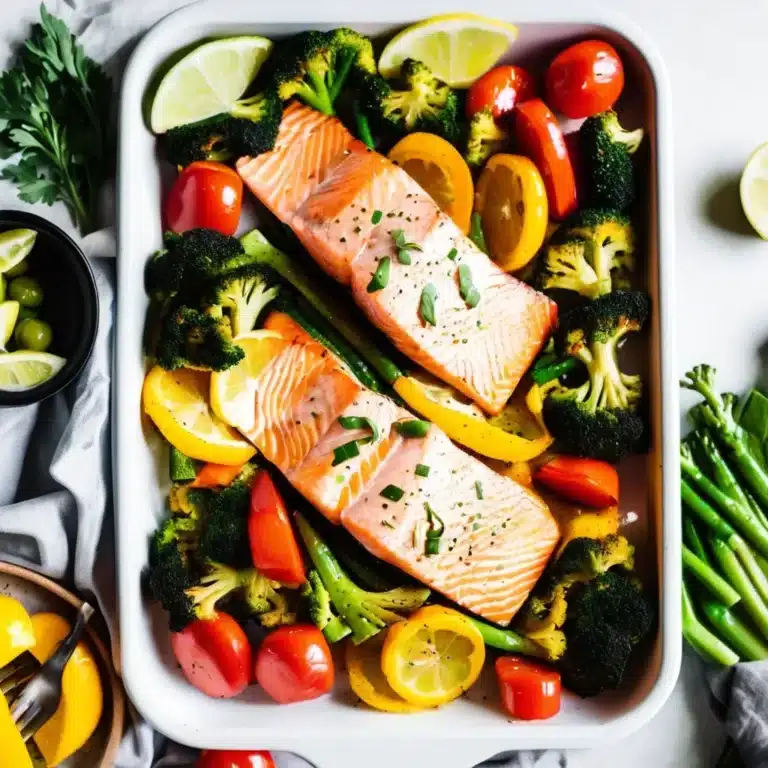
Sheet Pan Salmon and Veggies is a simple, nutritious, and flavorful meal that’s perfect for busy weeknights. This one-pan wonder features tender, flaky salmon fillets surrounded by a colorful array of roasted vegetables, all seasoned with a delightful blend of herbs and spices. The beauty of this dish lies in its convenience and minimal cleanup, as everything cooks together on a single sheet pan. Packed with protein, healthy fats, and a variety of vitamins and minerals, this meal is as wholesome as it is delicious. Serve it with a squeeze of fresh lemon juice and a sprinkle of herbs for an easy, elegant dinner.

Ingredients

  • 4 salmon fillets (about 6 ounces each)
  • 1 cup cherry tomatoes, halved
  • 1 cup broccoli florets
  • 1 red bell pepper, sliced
  • 1 yellow bell pepper, sliced
  • 1 zucchini, sliced
  • 1 red onion, sliced
  • 3 tablespoons olive oil
  • 1 teaspoon garlic powder
  • 1 teaspoon dried oregano
  • 1 teaspoon dried thyme
  • Salt and pepper, to taste
  • 1 lemon, sliced
  • Fresh parsley or dill, chopped (for garnish)

Instructions

  1. Preheat the oven: Preheat your oven to 400°F (200°C). Line a large baking sheet with parchment paper or aluminum foil for easy cleanup.
  2. Prepare the vegetables: In a large bowl, combine the cherry tomatoes, broccoli florets, red and yellow bell peppers, zucchini, and red onion. Drizzle with 2 tablespoons of olive oil, and season with garlic powder, dried oregano, dried thyme, salt, and pepper. Toss to coat the vegetables evenly.
  3. Arrange the vegetables and salmon: Spread the seasoned vegetables in an even layer on the prepared baking sheet. Place the salmon fillets on top of the vegetables. Drizzle the remaining 1 tablespoon of olive oil over the salmon fillets and season with salt and pepper. Top each salmon fillet with a slice of lemon.
  4. Bake: Place the sheet pan in the preheated oven and bake for 15-20 minutes, or until the salmon is cooked through and flakes easily with a fork, and the vegetables are tender and slightly caramelized.
  5. Serve: Remove the sheet pan from the oven and let it cool for a few minutes. Garnish the salmon and vegetables with chopped fresh parsley or dill.

Enjoy your Sheet Pan Salmon and Veggies as a healthy, delicious, and convenient meal that’s perfect for any night of the week, offering a delightful blend of flavors and textures in every bite.

Brown Sugar Ham Steak

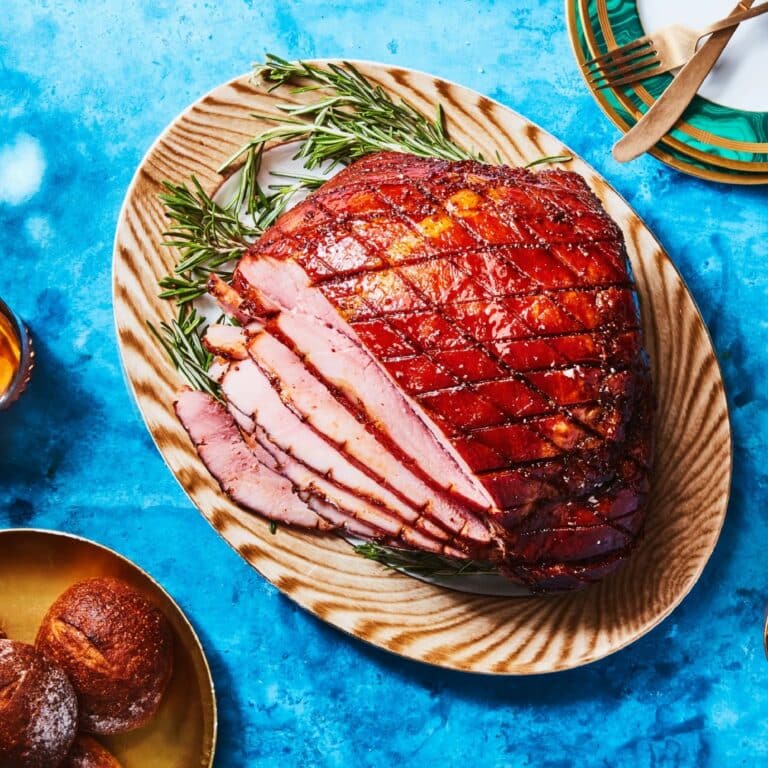
Brown Sugar Ham Steak is a quick and flavorful dish that’s perfect for a hearty breakfast, brunch, or an easy dinner. This recipe transforms a simple ham steak into a sweet and savory delight by glazing it with a mixture of brown sugar, mustard, and a touch of butter. The caramelized glaze enhances the natural flavor of the ham, creating a deliciously crispy and sticky exterior while keeping the meat juicy and tender. Serve this delectable ham steak with eggs, roasted vegetables, or a fresh salad for a complete and satisfying meal.

Ingredients

  • 1 ham steak (about 1 to 1 1/2 pounds)
  • 1/4 cup brown sugar
  • 2 tablespoons Dijon mustard
  • 2 tablespoons unsalted butter
  • 1/4 teaspoon ground cinnamon (optional)
  • 1/4 teaspoon ground cloves (optional)
  • Fresh parsley, chopped (for garnish)

Instructions

  1. Prepare the glaze: In a small saucepan over medium heat, combine the brown sugar, Dijon mustard, unsalted butter, ground cinnamon, and ground cloves (if using). Stir until the butter is melted and the sugar is dissolved, forming a smooth glaze. Remove from heat and set aside.
  2. Preheat the skillet: Heat a large skillet over medium-high heat.
  3. Cook the ham steak: Place the ham steak in the preheated skillet. Cook for about 2-3 minutes on each side, or until it is heated through and slightly browned.
  4. Add the glaze: Pour the prepared brown sugar glaze over the ham steak, spreading it evenly. Continue to cook for another 3-4 minutes, basting the ham with the glaze and turning occasionally, until the glaze is bubbly and caramelized.
  5. Serve: Transfer the ham steak to a serving platter and drizzle any remaining glaze from the skillet over the top. Garnish with chopped fresh parsley.

Enjoy your Brown Sugar Ham Steak as a sweet and savory dish that’s perfect for any meal, bringing a delightful caramelized flavor to your table with minimal effort.

Fish in Foil

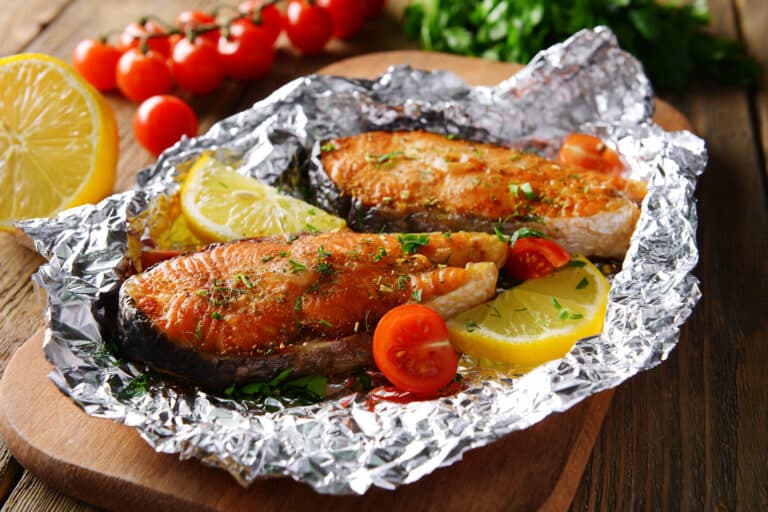
Fish in Foil is a simple yet delicious way to prepare a healthy and flavorful meal with minimal cleanup. This method involves wrapping fresh fish fillets, along with vegetables and herbs, in foil packets and baking them until perfectly cooked. The fish steams in its own juices, absorbing the flavors of the added ingredients, resulting in tender, flaky fish with vibrant, aromatic vegetables. Ideal for busy weeknights or outdoor grilling, this versatile recipe can be customized with your favorite seasonings and produce, making it a go-to for a quick and nutritious dinner.

Ingredients

  • 4 fish fillets (such as salmon, cod, or tilapia)
  • 1 lemon, thinly sliced
  • 2 cloves garlic, minced
  • 1 small red onion, thinly sliced
  • 1 cup cherry tomatoes, halved
  • 1 zucchini, thinly sliced
  • 2 tablespoons olive oil
  • 1 tablespoon fresh dill, chopped (or 1 teaspoon dried dill)
  • 1 tablespoon fresh parsley, chopped (optional)
  • Salt and pepper, to taste
  • 4 sheets of aluminum foil (about 12×18 inches each)

Instructions

  1. Preheat the oven: Preheat your oven to 400°F (200°C).
  2. Prepare the foil packets: Lay out the sheets of aluminum foil on a flat surface. Place one fish fillet in the center of each sheet.
  3. Season the fish: Drizzle each fillet with olive oil and season with salt and pepper. Sprinkle minced garlic evenly over the fillets.
  4. Add the vegetables: Divide the sliced lemon, red onion, cherry tomatoes, and zucchini among the four foil packets, arranging them around and on top of the fish fillets.
  5. Add herbs: Sprinkle fresh dill and parsley (if using) over the fish and vegetables.
  6. Seal the packets: Fold the sides of the foil over the fish and vegetables, sealing the packets tightly to trap steam inside. Make sure there are no gaps or openings.
  7. Bake: Place the foil packets on a baking sheet and bake in the preheated oven for 20-25 minutes, or until the fish is cooked through and flakes easily with a fork.
  8. Serve: Carefully open the foil packets, being cautious of the hot steam. Transfer the fish and vegetables to serving plates.

Enjoy your Fish in Foil as a healthy, flavorful, and convenient meal that’s perfect for any night of the week, offering a delightful combination of tender fish and aromatic, steamed vegetables.

Seared Ahi Tuna Steaks

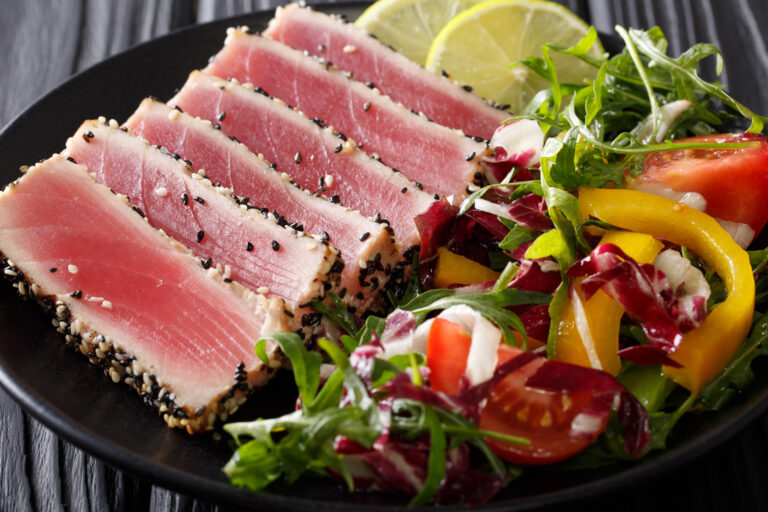
Seared Ahi Tuna Steaks are a culinary delight, offering a perfect balance between a flavorful, seared exterior and a tender, rare interior. This quick and elegant dish highlights the natural taste of fresh tuna, enhanced by a simple seasoning of salt, pepper, and sesame seeds. The high-heat searing process locks in the flavors while creating a beautifully crusted outer layer. Ideal for a sophisticated dinner or a light, healthy meal, these seared tuna steaks can be served with a variety of sides, such as a fresh salad, steamed vegetables, or a bed of rice, making them a versatile addition to your culinary repertoire.

Ingredients

  • 2 ahi tuna steaks (about 6 ounces each)
  • 2 tablespoons sesame oil (or olive oil)
  • 1/4 cup soy sauce
  • 1 tablespoon fresh lemon juice
  • 1 tablespoon sesame seeds (white or black, or a mix)
  • Salt and pepper, to taste
  • 2 green onions, sliced (for garnish)
  • Fresh cilantro or parsley, chopped (for garnish)

Instructions

  1. Prepare the tuna: Pat the tuna steaks dry with paper towels. Season both sides with salt and pepper.
  2. Marinate the tuna: In a shallow dish, combine the soy sauce and fresh lemon juice. Place the tuna steaks in the marinade, turning to coat evenly. Let them marinate for about 10 minutes, turning occasionally.
  3. Coat with sesame seeds: Remove the tuna steaks from the marinade and pat them dry. Sprinkle sesame seeds evenly over both sides of the tuna steaks, pressing gently to adhere.
  4. Heat the skillet: Heat the sesame oil in a large skillet or cast-iron pan over high heat until the oil is shimmering and hot.
  5. Sear the tuna: Carefully place the tuna steaks in the hot skillet. Sear for about 1-2 minutes on each side for rare, or 2-3 minutes for medium-rare, depending on your preference. The tuna should have a nice crust on the outside while remaining pink in the center.
  6. Rest and slice: Remove the tuna steaks from the skillet and let them rest for a minute. Slice the steaks against the grain into thin slices.
  7. Serve: Arrange the seared tuna slices on a serving platter. Garnish with sliced green onions and chopped fresh cilantro or parsley.

Enjoy your Seared Ahi Tuna Steaks as a delicious and sophisticated dish that brings out the best in fresh tuna, offering a perfect combination of textures and flavors for a truly memorable meal.

Grilled Cheese Sandwich

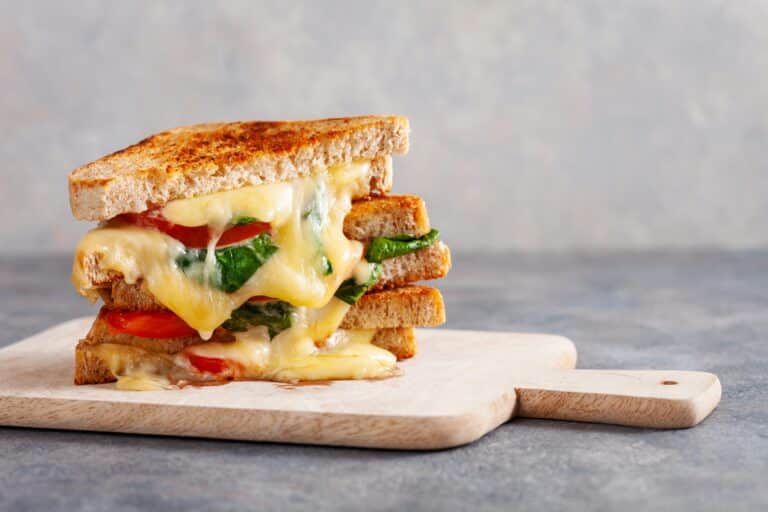
The Grilled Cheese Sandwich is a timeless classic that delivers a perfect blend of crispy, golden-brown bread and gooey, melted cheese. Simple yet incredibly satisfying, this sandwich is a go-to comfort food that’s quick and easy to make. Whether enjoyed on its own, paired with a bowl of tomato soup, or enhanced with additional ingredients like tomatoes or bacon, the Grilled Cheese Sandwich is a beloved favorite for both kids and adults. Its simplicity and deliciousness make it a staple in any kitchen, ideal for a quick lunch, dinner, or even a snack.

Ingredients

  • 4 slices of bread (white, whole wheat, sourdough, or your favorite type)
  • 2-3 tablespoons unsalted butter, softened
  • 4 slices of your favorite cheese (cheddar, American, Swiss, or a blend)
  • Optional: Tomato slices, bacon, ham, or avocado

Instructions

  1. Prepare the bread: Spread a thin layer of softened butter on one side of each slice of bread. Ensure the butter covers the entire surface to achieve a crispy, golden crust.
  2. Assemble the sandwich: Place two slices of bread, buttered side down, on a cutting board or plate. Place two slices of cheese on each slice of bread. If adding optional ingredients like tomato slices, bacon, ham, or avocado, place them on top of the cheese. Top with the remaining slices of bread, buttered side up.
  3. Preheat the skillet: Heat a large skillet or griddle over medium-low heat. Allow the skillet to warm up for a minute or two to ensure even cooking.
  4. Cook the sandwich: Place the assembled sandwiches in the skillet. Cook for 3-4 minutes on each side, or until the bread is golden brown and the cheese is melted. Press down gently with a spatula to help the sandwich adhere and the cheese to melt evenly. Adjust the heat if necessary to prevent burning.
  5. Serve: Remove the grilled cheese sandwiches from the skillet and let them cool for a minute. Slice them diagonally for easy handling and an attractive presentation.

Enjoy your Grilled Cheese Sandwich as a comforting, delicious meal or snack that’s perfect any time of the day, providing a satisfying combination of crispy bread and melty cheese in every bite.

Air Fryer Firecracker Salmon Bites

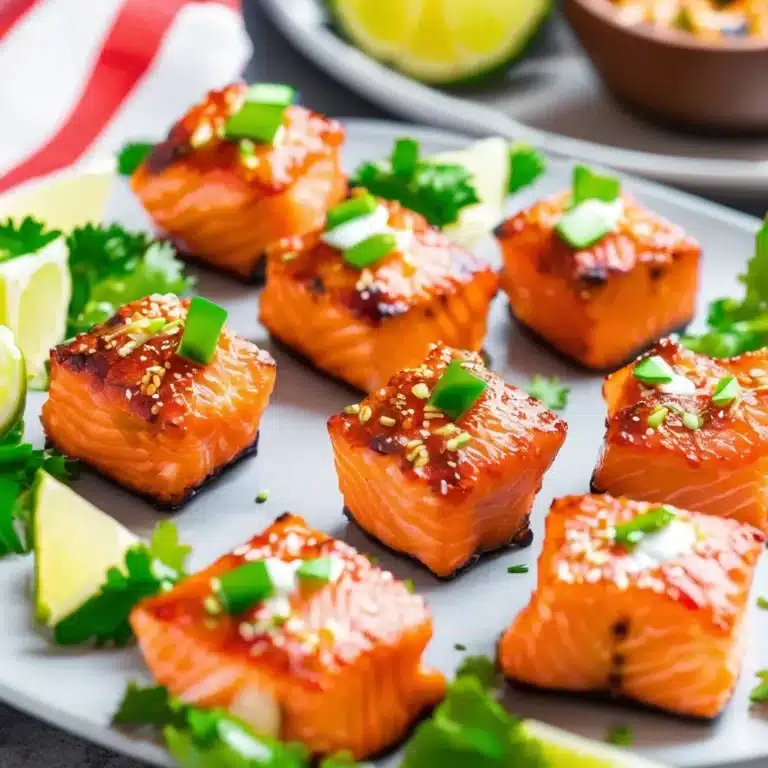
Air Fryer Firecracker Salmon Bites are a bold and flavorful appetizer or main dish that will ignite your taste buds. These bite-sized pieces of salmon are marinated in a spicy, sweet, and tangy firecracker sauce, then air fried to crispy perfection. The combination of heat from the sriracha, sweetness from the honey, and tanginess from the lime juice creates an irresistible glaze that perfectly complements the rich, tender salmon. Quick and easy to prepare, these salmon bites are perfect for a healthy snack, party appetizer, or light dinner.

Ingredients

  • 1 pound salmon fillets, skin removed and cut into bite-sized pieces
  • 2 tablespoons olive oil
  • Salt and pepper, to taste
  • 2 tablespoons sriracha sauce
  • 2 tablespoons honey
  • 1 tablespoon soy sauce
  • 1 tablespoon lime juice
  • 2 cloves garlic, minced
  • 1 teaspoon grated ginger
  • 1 teaspoon sesame oil
  • Sliced green onions, for garnish
  • Sesame seeds, for garnish

Instructions

  1. Prepare the salmon: In a large bowl, toss the salmon pieces with olive oil, salt, and pepper to coat them evenly.
  2. Make the firecracker sauce: In a small bowl, whisk together the sriracha sauce, honey, soy sauce, lime juice, minced garlic, grated ginger, and sesame oil until well combined.
  3. Marinate the salmon: Pour half of the firecracker sauce over the salmon pieces, tossing to coat evenly. Let the salmon marinate for at least 15 minutes to allow the flavors to penetrate.
  4. Preheat the air fryer: Preheat your air fryer to 400°F (200°C) for about 3-5 minutes.
  5. Air fry the salmon: Arrange the marinated salmon pieces in a single layer in the air fryer basket. You may need to cook them in batches depending on the size of your air fryer. Cook the salmon at 400°F (200°C) for 8-10 minutes, or until they are crispy on the outside and cooked through.
  6. Glaze the salmon: Once the salmon bites are cooked, transfer them to a large bowl. Drizzle the remaining firecracker sauce over the salmon and toss to coat evenly.
  7. Serve: Garnish the Air Fryer Firecracker Salmon Bites with sliced green onions and sesame seeds. Serve immediately.

Enjoy your Air Fryer Firecracker Salmon Bites as a delicious and vibrant dish that’s sure to impress, offering a perfect balance of spicy, sweet, and tangy flavors in every bite.

Air Fryer Buffalo Wings

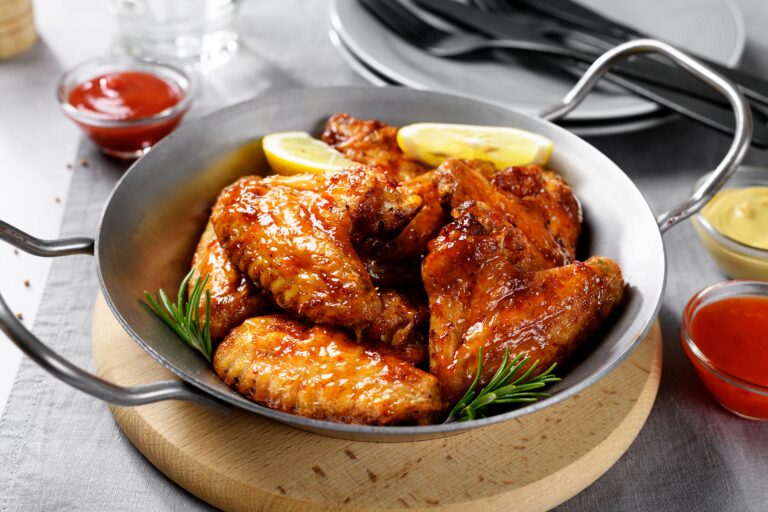
Air Fryer Buffalo Wings are a healthier and equally delicious alternative to traditional deep-fried wings, offering the same crispy texture and spicy flavor without the extra oil. These wings are coated in a mouthwatering Buffalo sauce made from hot sauce, butter, and a touch of garlic, then cooked to perfection in the air fryer. Perfect for game day, parties, or a simple weeknight treat, these wings are quick and easy to make, delivering all the zest and crunch you crave. Serve them with celery sticks and blue cheese or ranch dressing for a classic and satisfying snack.

Ingredients

  • 2 pounds chicken wings, separated into drumettes and flats
  • 1 tablespoon olive oil
  • 1 teaspoon salt
  • 1/2 teaspoon black pepper
  • 1/2 teaspoon garlic powder
  • 1/2 teaspoon paprika
  • 1/2 cup hot sauce (such as Frank’s RedHot)
  • 3 tablespoons unsalted butter, melted
  • 1 teaspoon garlic powder
  • 1 tablespoon honey (optional)
  • Celery sticks, for serving
  • Blue cheese or ranch dressing, for serving

Instructions

  1. Preheat the air fryer: Preheat your air fryer to 400°F (200°C) for about 3-5 minutes.
  2. Prepare the wings: In a large bowl, toss the chicken wings with olive oil, salt, black pepper, garlic powder, and paprika until evenly coated.
  3. Air fry the wings: Arrange the wings in a single layer in the air fryer basket. You may need to cook them in batches depending on the size of your air fryer. Cook the wings at 400°F (200°C) for 20-25 minutes, flipping them halfway through, until they are crispy and golden brown.
  4. Make the Buffalo sauce: While the wings are cooking, prepare the Buffalo sauce. In a small bowl, combine the hot sauce, melted butter, garlic powder, and honey (if using). Mix well until smooth.
  5. Coat the wings: Once the wings are cooked, transfer them to a large bowl. Pour the Buffalo sauce over the wings and toss to coat them evenly.
  6. Serve: Serve the Air Fryer Buffalo Wings immediately with celery sticks and blue cheese or ranch dressing on the side.

Enjoy your Air Fryer Buffalo Wings as a delicious, spicy, and crispy snack that’s perfect for any occasion, offering all the flavor of traditional wings with a healthier twist.

Air Fryer Chicken Quesadillas

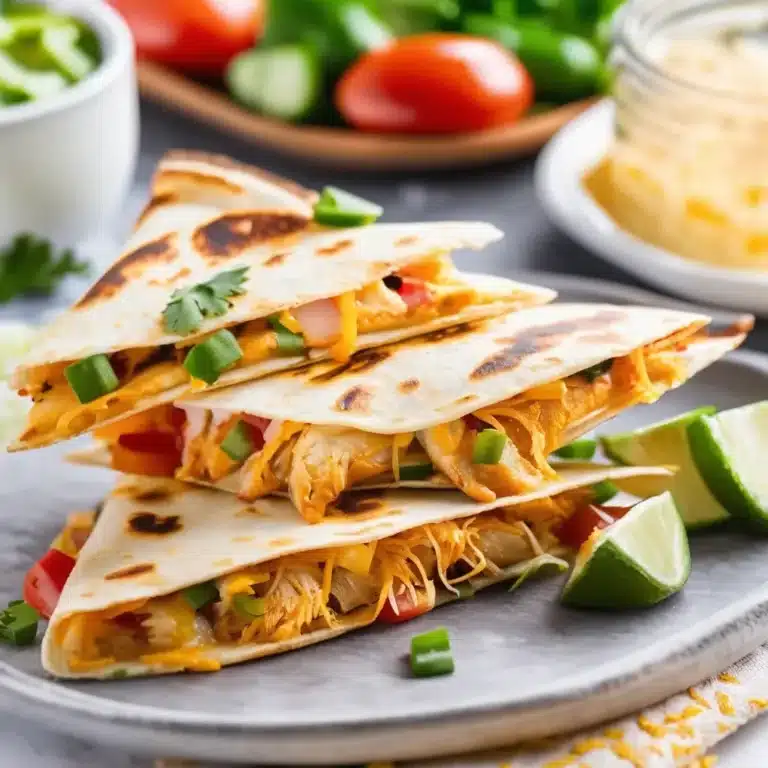
Air Fryer Chicken Quesadillas are a quick, easy, and delicious way to enjoy a classic Mexican favorite with a crispy, golden finish. These quesadillas are filled with tender, seasoned chicken, gooey melted cheese, and your choice of vegetables, all perfectly cooked in the air fryer for a lighter take on this popular dish. Ideal for a weeknight dinner or a tasty snack, these quesadillas come together in no time and are sure to be a hit with the whole family. Serve them with your favorite salsa, guacamole, or sour cream for a complete and satisfying meal.

Ingredients

  • 2 cups cooked chicken, shredded or diced
  • 1 tablespoon olive oil
  • 1 teaspoon chili powder
  • 1/2 teaspoon ground cumin
  • 1/2 teaspoon garlic powder
  • 1/2 teaspoon onion powder
  • Salt and pepper, to taste
  • 1 cup shredded cheddar or Monterey Jack cheese
  • 4 large flour tortillas
  • 1/2 cup bell peppers, thinly sliced (optional)
  • 1/2 cup onions, thinly sliced (optional)
  • Cooking spray
  • Salsa, guacamole, and sour cream (for serving)

Instructions

  1. Season the chicken: In a medium bowl, combine the shredded or diced chicken with olive oil, chili powder, ground cumin, garlic powder, onion powder, salt, and pepper. Mix well to ensure the chicken is evenly coated with the spices.
  2. Assemble the quesadillas: Lay out the flour tortillas on a flat surface. Sprinkle a layer of shredded cheese on one half of each tortilla. Add the seasoned chicken on top of the cheese. If using, add the sliced bell peppers and onions. Sprinkle another layer of cheese over the chicken and vegetables. Fold the other half of each tortilla over the filling to form a half-moon shape.
  3. Preheat the air fryer: Preheat your air fryer to 375°F (190°C) for about 3 minutes.
  4. Cook the quesadillas: Lightly spray both sides of the quesadillas with cooking spray to help them crisp up. Place one or two quesadillas in the air fryer basket, depending on the size of your air fryer, without overlapping. Cook for 5-6 minutes, flipping halfway through, until the tortillas are golden brown and crispy, and the cheese is melted.
  5. Repeat: Repeat the cooking process with the remaining quesadillas.
  6. Serve: Cut the quesadillas into wedges and serve immediately with salsa, guacamole, and sour cream.

Enjoy your Air Fryer Chicken Quesadillas as a delicious, quick, and satisfying meal that’s perfect for any occasion, offering a delightful blend of flavors and textures in every bite.