Home Blog Page 799

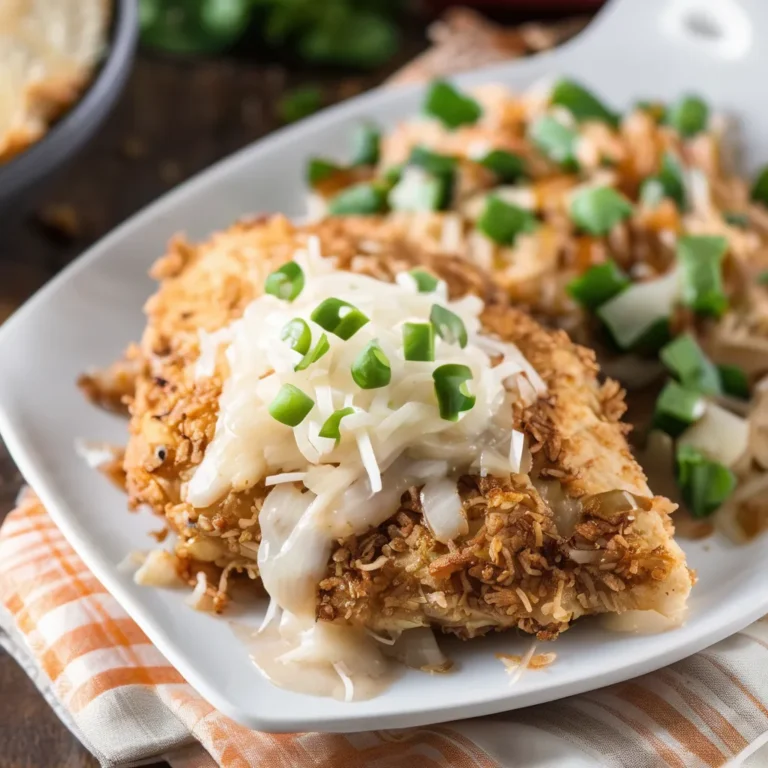
Crunchy French Onion Chicken

Crunchy French Onion Chicken is a delicious and easy-to-make dish that combines the savory flavors of French onion soup with crispy, juicy chicken. This recipe features chicken breasts coated in a flavorful mixture of French onion soup mix and crispy breadcrumbs, then baked to golden perfection. The result is a dish that’s crunchy on the outside and tender on the inside, with a delightful burst of onion flavor in every bite. Perfect for a weeknight dinner or a special occasion, this dish pairs well with mashed potatoes, steamed vegetables, or a fresh salad for a complete and satisfying meal.

Ingredients:

  • 4 boneless, skinless chicken breasts
  • 1 packet (1 oz) French onion soup mix
  • 1 cup plain breadcrumbs or panko
  • 1/2 cup grated Parmesan cheese
  • 1/2 cup all-purpose flour
  • 2 eggs, beaten
  • 1 tablespoon olive oil or melted butter
  • Salt and pepper to taste
  • Fresh parsley, chopped (for garnish)

Instructions:

  1. Prepare the Coating:
    • In a shallow bowl, mix the French onion soup mix, breadcrumbs, and Parmesan cheese together. In a separate bowl, place the flour, and in another bowl, place the beaten eggs.
  2. Coat the Chicken:
    • Season the chicken breasts with salt and pepper. Dip each chicken breast into the flour, shaking off any excess, then dip it into the beaten eggs, ensuring it is fully coated.
    • Press the chicken into the breadcrumb mixture, making sure it is well coated on all sides. Gently press the mixture onto the chicken to adhere.
  3. Bake the Chicken:
    • Preheat your oven to 400°F (200°C). Line a baking sheet with parchment paper or lightly grease it with olive oil or butter.
    • Place the coated chicken breasts on the prepared baking sheet. Drizzle a little olive oil or melted butter over the top of each piece to help with browning.
    • Bake for 25-30 minutes, or until the chicken is cooked through and the coating is golden brown and crispy. The internal temperature should reach 165°F (75°C).
  4. Serve:
    • Remove the chicken from the oven and let it rest for a few minutes before serving.
    • Garnish with freshly chopped parsley.

Enjoy your Crunchy French Onion Chicken, a flavorful and satisfying dish that’s sure to become a family favorite!
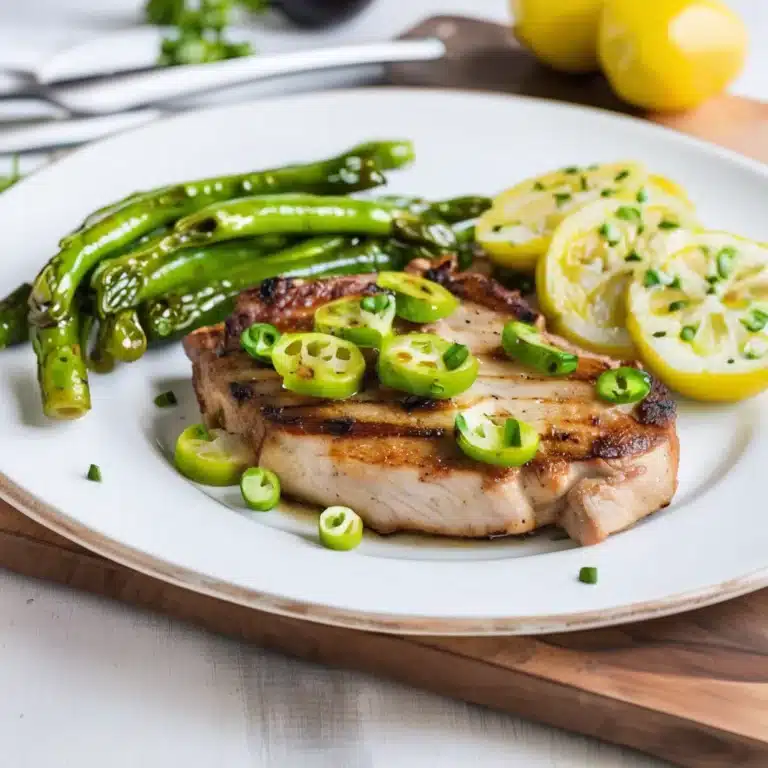
PEPPERONCINI PORK CHOPS

Pepperoncini Pork Chops are a zesty and flavorful dish that transforms ordinary pork chops into a mouthwatering meal with the addition of tangy pepperoncini peppers. This easy-to-make recipe features succulent pork chops simmered in a savory sauce infused with garlic, onions, and the unique heat of pepperoncini. The result is a dish that is both comforting and exciting, with a perfect balance of spice and tenderness. Serve these pork chops over mashed potatoes or rice to soak up the delicious sauce, making for a satisfying dinner that’s sure to become a new family favorite.

Ingredients

  • 4 bone-in pork chops (about 1 inch thick)
  • Salt and pepper, to taste
  • 2 tablespoons olive oil
  • 1 onion, thinly sliced
  • 3 cloves garlic, minced
  • 1 cup chicken broth
  • 1/2 cup pepperoncini peppers, sliced (reserve some of the juice)
  • 1 tablespoon Worcestershire sauce
  • 1 teaspoon dried oregano
  • 1 teaspoon dried thyme
  • 1 tablespoon butter
  • Fresh parsley, chopped (for garnish)

Instructions

  1. Season the pork chops: Pat the pork chops dry with paper towels and season both sides with salt and pepper.
  2. Sear the pork chops: In a large skillet, heat the olive oil over medium-high heat. Add the pork chops and sear for 3-4 minutes on each side, until golden brown. Remove the pork chops from the skillet and set aside.
  3. Sauté the onions and garlic: In the same skillet, add the sliced onion and sauté for 3-4 minutes until softened. Add the minced garlic and cook for an additional minute until fragrant.
  4. Make the sauce: Stir in the chicken broth, sliced pepperoncini peppers, reserved pepperoncini juice, Worcestershire sauce, oregano, and thyme. Bring the mixture to a simmer.
  5. Simmer the pork chops: Return the pork chops to the skillet, nestling them into the sauce. Reduce the heat to low, cover, and simmer for 15-20 minutes, or until the pork chops are cooked through and tender.
  6. Finish the sauce: Remove the lid and add the butter to the skillet, stirring to incorporate it into the sauce.
  7. Serve: Transfer the pork chops to a serving platter and spoon the sauce over the top. Garnish with chopped fresh parsley.

Enjoy your Pepperoncini Pork Chops as a flavorful and satisfying meal, perfect for adding a little spice to your dinner routine.

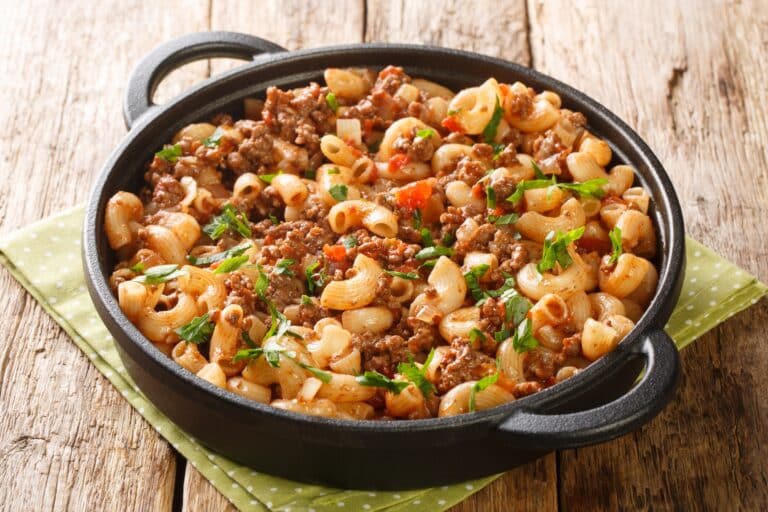
HAMBURGER CASSEROLE

Hamburger Casserole is a comforting, family-friendly dish that combines ground beef, pasta, and a rich tomato sauce, all topped with melted cheese. This hearty casserole is perfect for busy weeknights or casual gatherings, offering a satisfying and easy-to-make meal that everyone will love. With layers of seasoned beef, tender pasta, and gooey cheese, it’s a delicious way to enjoy classic flavors in a single dish. Customize it with your favorite vegetables or spices to make it your own, and serve it with a side salad or garlic bread for a complete meal that’s sure to please both kids and adults alike.

Ingredients

  • 1 pound ground beef
  • 1 onion, chopped
  • 2 cloves garlic, minced
  • 1 red bell pepper, diced
  • 1 teaspoon salt
  • 1/2 teaspoon black pepper
  • 1 teaspoon dried oregano
  • 1 teaspoon dried basil
  • 1 can (14.5 ounces) diced tomatoes
  • 1 can (15 ounces) tomato sauce
  • 2 cups uncooked pasta (such as rotini or elbow macaroni)
  • 1 1/2 cups shredded cheddar cheese
  • 1/2 cup shredded mozzarella cheese
  • 2 tablespoons fresh parsley, chopped (for garnish)

Instructions

  1. Cook the pasta: Bring a large pot of salted water to a boil. Add the pasta and cook according to the package instructions until al dente. Drain and set aside.
  2. Preheat the oven: Preheat your oven to 375°F (190°C).
  3. Cook the beef and vegetables: In a large skillet over medium heat, add the ground beef and cook until browned, breaking it up with a spoon. Drain any excess fat. Add the chopped onion, minced garlic, and diced red bell pepper. Cook for 5-7 minutes, or until the vegetables are softened.
  4. Add seasonings and sauce: Stir in the salt, black pepper, oregano, basil, diced tomatoes, and tomato sauce. Bring to a simmer and cook for 5 minutes.
  5. Combine with pasta: In a large mixing bowl, combine the cooked pasta with the beef mixture. Stir until well combined.
  6. Assemble the casserole: Transfer the pasta and beef mixture to a 9×13-inch baking dish. Sprinkle the cheddar and mozzarella cheeses evenly over the top.
  7. Bake: Place the casserole in the preheated oven and bake for 20-25 minutes, or until the cheese is melted and bubbly.
  8. Garnish and serve: Remove the casserole from the oven and let it cool for a few minutes. Garnish with chopped fresh parsley before serving.

Enjoy your Hamburger Casserole as a comforting and delicious meal that brings together the classic flavors of beef and pasta, perfect for any occasion.

Honey Glazed Chicken

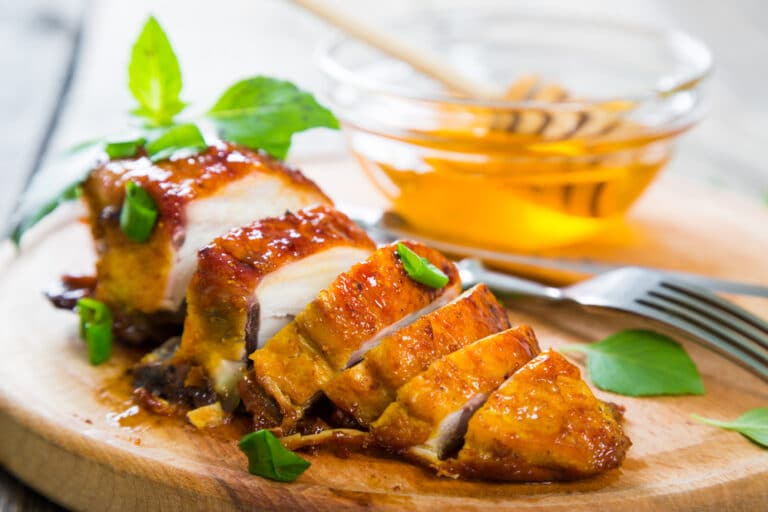
Honey Glazed Chicken is a delicious and simple dish that combines the natural sweetness of honey with savory spices to create a flavorful and sticky glaze. This recipe features juicy chicken pieces coated in a delightful mixture of honey, soy sauce, and garlic, which caramelizes beautifully in the oven. Perfect for a quick weeknight dinner or a special occasion, this dish is sure to be a hit with its combination of sweet and savory flavors. Serve it with rice or roasted vegetables for a complete meal that’s both satisfying and easy to prepare.

Ingredients:

  • 4 boneless, skinless chicken breasts
  • 1/2 cup honey
  • 1/4 cup soy sauce
  • 2 tablespoons olive oil
  • 3 cloves garlic, minced
  • 1 tablespoon apple cider vinegar or lemon juice
  • 1 teaspoon ground ginger
  • 1/2 teaspoon black pepper
  • 1/2 teaspoon salt
  • 1/4 teaspoon red pepper flakes (optional, for heat)
  • 1 tablespoon cornstarch mixed with 2 tablespoons water (for thickening)
  • Fresh parsley or green onions, chopped (for garnish)
  • Sesame seeds (for garnish)

Instructions:

  1. Prepare the Marinade:
    • In a small bowl, whisk together the honey, soy sauce, olive oil, minced garlic, apple cider vinegar (or lemon juice), ground ginger, black pepper, salt, and red pepper flakes (if using).
  2. Marinate the Chicken:
    • Place the chicken breasts in a shallow dish or a large resealable plastic bag. Pour the honey mixture over the chicken, ensuring it’s well-coated. Seal the bag or cover the dish, and marinate in the refrigerator for at least 30 minutes, or up to 2 hours for more flavor.
  3. Preheat the Oven:
    • Preheat your oven to 375°F (190°C).
  4. Bake the Chicken:
    • Remove the chicken from the marinade and place it in a baking dish. Reserve the marinade for later.
    • Bake the chicken in the preheated oven for 25-30 minutes, or until the chicken is cooked through and reaches an internal temperature of 165°F (74°C).
  5. Make the Glaze:
    • While the chicken is baking, pour the reserved marinade into a small saucepan. Bring it to a simmer over medium heat.
    • Stir in the cornstarch slurry and continue to simmer until the sauce thickens, about 2-3 minutes.
  6. Glaze the Chicken:
    • Once the chicken is cooked, remove it from the oven and brush the thickened glaze over the chicken pieces.
    • Return the chicken to the oven and bake for an additional 5 minutes, or until the glaze is bubbly and caramelized.
  7. Serve:
    • Garnish the Honey Glazed Chicken with chopped fresh parsley or green onions and sesame seeds.
    • Serve with steamed rice, roasted vegetables, or your favorite side dishes.

Enjoy your Honey Glazed Chicken, a perfect blend of sweet and savory that’s sure to delight everyone at the table!

Sheet Pan New Orleans-Style Shrimp

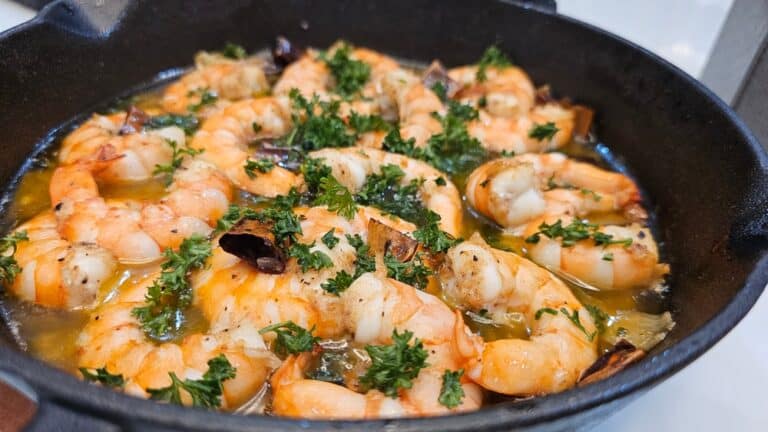
Sheet Pan New Orleans-Style Shrimp is a quick and flavorful dish that brings the vibrant tastes of the Big Easy to your dinner table. This recipe features plump, juicy shrimp seasoned with a bold Cajun spice blend, roasted alongside tender bell peppers and onions. The whole dish is cooked on a single sheet pan, making cleanup a breeze. Perfect for busy weeknights or when you’re craving a little southern flair, this dish delivers a delightful combination of spicy, smoky, and savory flavors that are sure to please. Serve it over rice or with crusty bread to soak up the delicious juices.

Ingredients:

  • 1 lb large shrimp, peeled and deveined
  • 2 tablespoons olive oil
  • 1 tablespoon Cajun seasoning
  • 1 teaspoon smoked paprika
  • 1/2 teaspoon garlic powder
  • 1/2 teaspoon onion powder
  • 1/4 teaspoon cayenne pepper (optional, for extra heat)
  • Salt and pepper to taste
  • 1 red bell pepper, sliced
  • 1 yellow bell pepper, sliced
  • 1 red onion, sliced
  • 1 lemon, sliced
  • 2 tablespoons chopped fresh parsley (for garnish)

Instructions:

  1. Preheat the Oven:
    • Preheat your oven to 425°F (220°C).
  2. Prepare the Shrimp and Vegetables:
    • In a large bowl, combine the shrimp, olive oil, Cajun seasoning, smoked paprika, garlic powder, onion powder, cayenne pepper, salt, and pepper. Toss until the shrimp are well coated in the spices.
    • Add the sliced bell peppers and onion to the bowl and toss to combine.
  3. Arrange on a Sheet Pan:
    • Spread the shrimp and vegetable mixture evenly on a large sheet pan. Arrange the lemon slices over the top.
  4. Roast in the Oven:
    • Place the sheet pan in the preheated oven and roast for 10-12 minutes, or until the shrimp are pink and opaque, and the vegetables are tender.
  5. Serve:
    • Remove the sheet pan from the oven and sprinkle the shrimp and vegetables with chopped fresh parsley.
    • Serve immediately over rice or with crusty bread.

Enjoy your Sheet Pan New Orleans-Style Shrimp, a delicious and easy dish with the flavors of Louisiana!

HOMEMADE CANNOLI

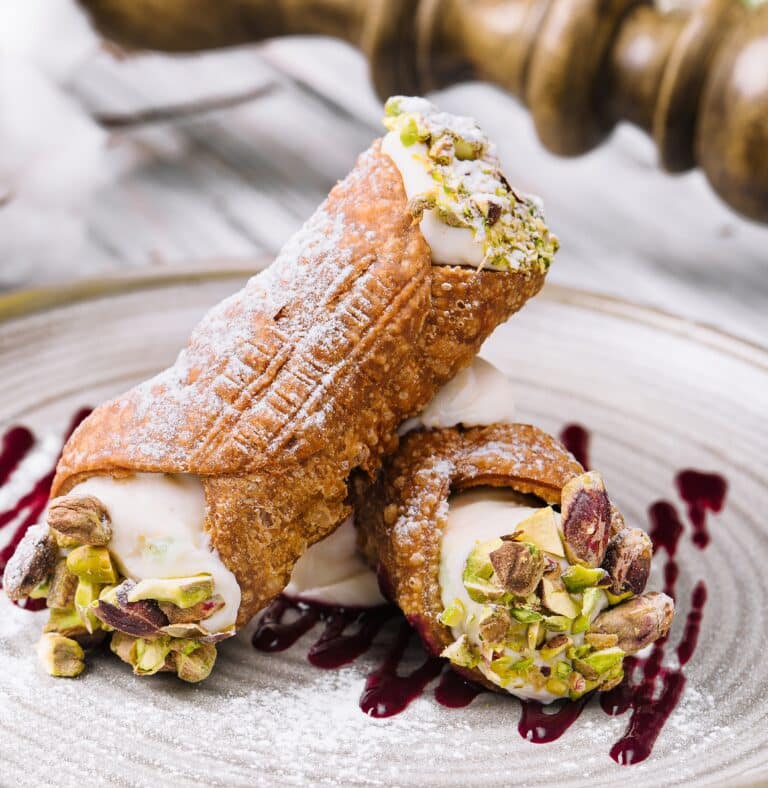
Homemade Cannoli are a delightful Italian dessert that features a crispy, fried pastry shell filled with a rich and creamy ricotta filling. These delicious treats are often enjoyed during special occasions and holidays, but they can easily be made at home to satisfy any sweet craving. The key to a perfect cannoli is the contrast between the crunchy shell and the smooth, sweet filling, often enhanced with chocolate chips, candied fruits, or nuts. Making cannoli from scratch allows you to customize the flavors and enjoy a fresh, authentic taste of Italy right in your kitchen.

Ingredients

For the Shells:

  • 2 cups all-purpose flour
  • 2 tablespoons granulated sugar
  • 1/2 teaspoon salt
  • 3 tablespoons unsalted butter, chilled and cubed
  • 1 large egg
  • 1/2 cup Marsala wine (or red wine)
  • 1 egg white, lightly beaten (for sealing the shells)
  • Vegetable oil, for frying

For the Filling:

  • 2 cups ricotta cheese, drained
  • 3/4 cup powdered sugar
  • 1 teaspoon vanilla extract
  • 1/2 cup mini chocolate chips
  • 1/4 cup candied orange peel or chopped pistachios (optional)

For Garnish:

  • Powdered sugar, for dusting
  • Chopped pistachios or chocolate chips (optional)

Instructions

  1. Make the dough for the shells: In a large bowl, whisk together the flour, sugar, and salt. Cut in the chilled butter using a pastry cutter or your fingers until the mixture resembles coarse crumbs. Add the egg and Marsala wine, mixing until a dough forms. Knead the dough on a lightly floured surface until smooth, about 5 minutes. Wrap in plastic wrap and refrigerate for at least 1 hour.
  2. Prepare the filling: In a medium bowl, combine the ricotta cheese, powdered sugar, and vanilla extract. Mix until smooth and creamy. Fold in the mini chocolate chips and candied orange peel or pistachios if using. Cover and refrigerate until ready to use.
  3. Roll and cut the dough: Roll out the chilled dough on a lightly floured surface to about 1/8-inch thickness. Use a 4-inch round cutter to cut out circles of dough. Wrap each circle around a cannoli mold, sealing the edges with a little egg white.
  4. Fry the shells: Heat vegetable oil in a deep fryer or large, heavy pot to 350°F (175°C). Carefully fry the dough-wrapped molds in batches until golden brown, about 2-3 minutes. Remove the shells and let them drain on paper towels. Once cool enough to handle, carefully slide the shells off the molds.
  5. Fill the shells: Just before serving, fill a pastry bag with the ricotta mixture and pipe it into the cooled cannoli shells from both ends.
  6. Garnish and serve: Dust the filled cannoli with powdered sugar and garnish with additional chocolate chips or chopped pistachios if desired. Serve immediately.

Enjoy your Homemade Cannoli as a delicious and authentic Italian dessert that brings a taste of tradition to your table with each delightful bite.

MAMA’S CHICKEN TORTELLINI

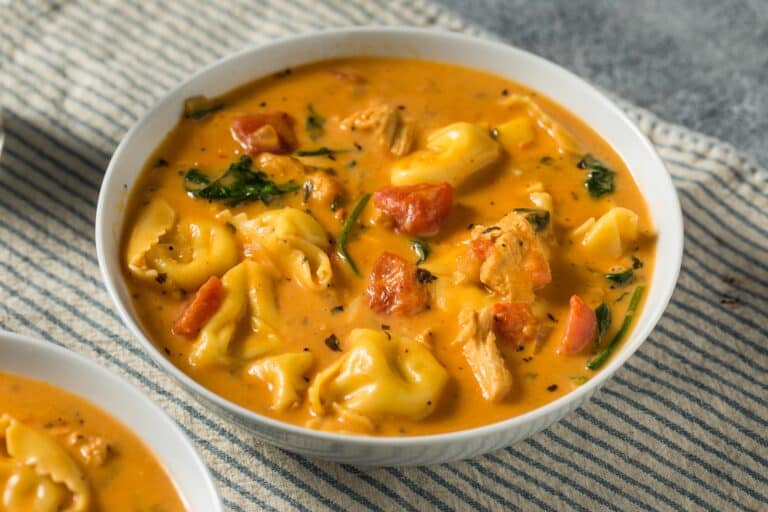
Mama’s Chicken Tortellini is a comforting and hearty dish that combines tender pieces of chicken with cheese-filled tortellini in a creamy, savory sauce. This dish brings a touch of homemade warmth to your table with its rich flavors and satisfying textures, making it perfect for family dinners or special occasions. The addition of fresh herbs and vegetables adds a layer of freshness that balances the richness of the dish. Easy to prepare and sure to please even the pickiest eaters, Mama’s Chicken Tortellini is a timeless recipe that you’ll want to make again and again.

Ingredients

  • 1 tablespoon olive oil
  • 1 pound boneless, skinless chicken breasts, diced
  • Salt and pepper, to taste
  • 2 cloves garlic, minced
  • 1 onion, chopped
  • 1 red bell pepper, diced
  • 1 cup mushrooms, sliced
  • 1 teaspoon dried Italian seasoning
  • 1/2 cup chicken broth
  • 1 cup heavy cream
  • 1/2 cup grated Parmesan cheese
  • 1 package (9 ounces) cheese tortellini
  • 2 tablespoons fresh parsley, chopped
  • 1/4 cup fresh basil leaves, chopped (for garnish)

Instructions

  1. Cook the chicken: Heat the olive oil in a large skillet over medium-high heat. Add the diced chicken, season with salt and pepper, and cook until browned and cooked through, about 5-7 minutes. Remove the chicken from the skillet and set aside.
  2. Sauté the vegetables: In the same skillet, add the minced garlic, chopped onion, red bell pepper, and mushrooms. Cook for 5-7 minutes, or until the vegetables are softened.
  3. Add the seasoning: Stir in the dried Italian seasoning and cook for an additional minute until fragrant.
  4. Make the sauce: Add the chicken broth to the skillet and bring to a simmer. Stir in the heavy cream and grated Parmesan cheese, mixing until the sauce is smooth and slightly thickened.
  5. Cook the tortellini: While the sauce is simmering, cook the cheese tortellini according to the package instructions. Drain and set aside.
  6. Combine the ingredients: Add the cooked chicken and tortellini to the skillet with the sauce. Stir to combine, ensuring everything is evenly coated in the sauce. Cook for 2-3 minutes until heated through.
  7. Garnish and serve: Remove the skillet from the heat and stir in the chopped parsley. Garnish with fresh basil leaves before serving.

Enjoy your Mama’s Chicken Tortellini as a delicious and comforting meal that brings warmth and flavor to your dining table, perfect for any occasion.

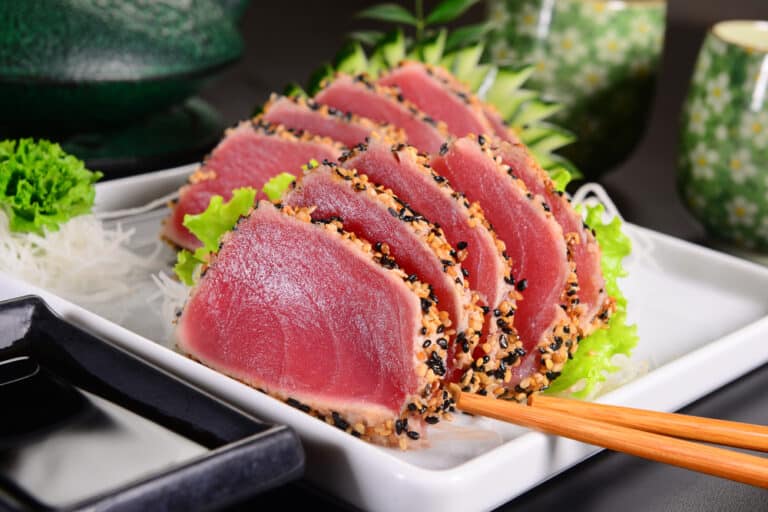
Sesame-Seared Tuna

Sesame-Seared Tuna is a sophisticated yet simple dish that combines the rich, buttery flavor of tuna with the nutty crunch of sesame seeds. This recipe is perfect for a quick and elegant dinner, as it takes only minutes to prepare and cook. The tuna is seasoned with soy sauce and sesame oil before being coated in sesame seeds and quickly seared to create a flavorful crust while keeping the inside perfectly rare and tender. Serve with a light salad or steamed vegetables for a balanced and nutritious meal that’s sure to impress.

Ingredients:

  • 2 tuna steaks (about 6 oz each)
  • 2 tablespoons soy sauce
  • 1 tablespoon sesame oil
  • 1 tablespoon vegetable oil
  • 1/2 cup white sesame seeds
  • 1/4 cup black sesame seeds (optional, for color contrast)
  • Salt and pepper to taste
  • Lemon wedges (for serving)

Instructions:

  1. Marinate the Tuna:
    • In a shallow dish, combine the soy sauce and sesame oil.
    • Season the tuna steaks with salt and pepper, then place them in the dish, turning to coat evenly. Let them marinate for about 10 minutes.
  2. Prepare the Sesame Coating:
    • In a separate shallow dish, mix the white and black sesame seeds.
    • Remove the tuna steaks from the marinade and press them into the sesame seeds, coating both sides evenly.
  3. Sear the Tuna:
    • Heat the vegetable oil in a large skillet over medium-high heat.
    • Add the sesame-coated tuna steaks to the skillet and sear for about 1-2 minutes per side, depending on your desired level of doneness. The outside should be golden brown and the inside should remain rare.
  4. Serve:
    • Remove the tuna from the skillet and let it rest for a minute or two.
    • Slice the tuna steaks into thin slices and arrange them on a serving platter.
    • Serve with lemon wedges on the side.

Enjoy your Sesame-Seared Tuna, a delicious and elegant dish that’s perfect for any occasion!

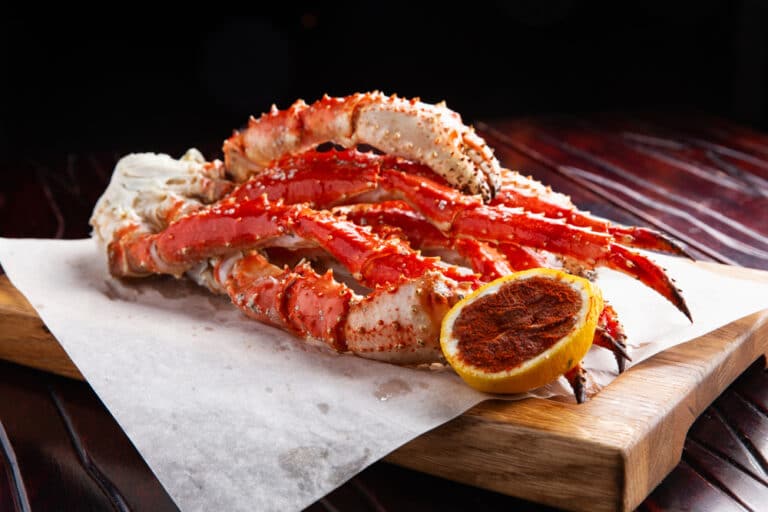
Crab Legs with Garlic Butter Sauce

Crab Legs with Garlic Butter Sauce is a luxurious and indulgent dish that is surprisingly simple to prepare. The sweet and tender crab meat is perfectly complemented by a rich and savory garlic butter sauce, making this dish a favorite for special occasions or a decadent treat at home. The combination of fresh lemon juice and garlic-infused butter enhances the natural flavors of the crab, while a sprinkle of fresh parsley adds a touch of brightness. Whether you’re hosting a dinner party or simply craving seafood, this dish is sure to impress with its delicious taste and elegant presentation.

Ingredients:

  • 2 lbs crab legs (king crab or snow crab)
  • 1/2 cup unsalted butter
  • 4 cloves garlic, minced
  • 1 tablespoon lemon juice
  • 1 tablespoon fresh parsley, chopped
  • Salt and pepper to taste
  • Lemon wedges (for serving)

Instructions:

  1. Prepare the Crab Legs:
    • If the crab legs are frozen, thaw them in the refrigerator for several hours or overnight.
    • Rinse the crab legs under cold water to remove any ice or debris.
  2. Cook the Crab Legs:
    • Fill a large pot with water and bring it to a boil. Add a pinch of salt to the boiling water.
    • Place the crab legs in the pot and cook for 5-7 minutes, or until heated through. If using a steamer, steam the crab legs for 6-8 minutes.
  3. Make the Garlic Butter Sauce:
    • In a small saucepan, melt the butter over medium heat.
    • Add the minced garlic and cook for 1-2 minutes, until fragrant and lightly golden.
    • Stir in the lemon juice and season with salt and pepper. Remove the sauce from heat.
  4. Serve the Crab Legs:
    • Arrange the cooked crab legs on a large platter.
    • Drizzle some of the garlic butter sauce over the crab legs and sprinkle with fresh parsley.
    • Serve immediately with the remaining garlic butter sauce on the side for dipping, and lemon wedges for squeezing.

Enjoy your Crab Legs with Garlic Butter Sauce, a delightful seafood dish that’s perfect for any special occasion or an elegant meal at home!

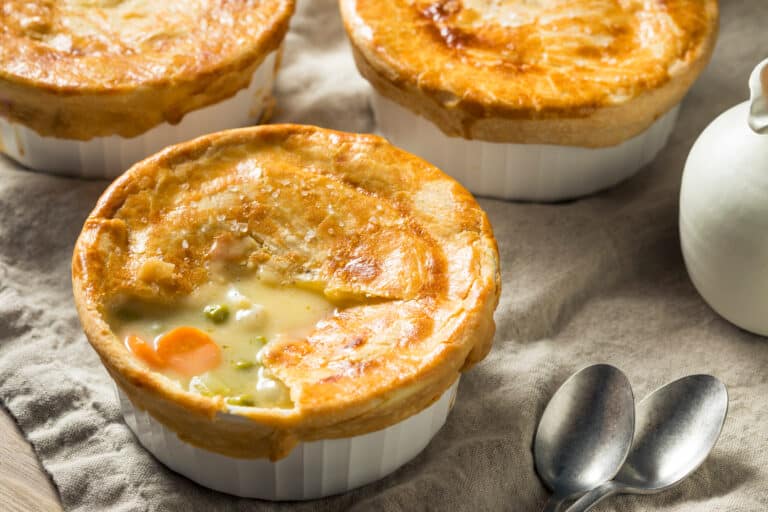
CHICKEN POT PIE

Chicken Pot Pie is a comforting classic that brings together tender chicken, colorful vegetables, and a rich, creamy sauce encased in a flaky, golden crust. This dish is perfect for cozy family dinners or special occasions, offering a warm and satisfying meal that everyone will love. The combination of savory flavors and comforting textures makes it a favorite during colder months, but it’s equally delightful any time of the year. With its buttery pastry and hearty filling, Chicken Pot Pie is the epitome of comfort food, delivering a delicious homemade taste with every bite.

Ingredients

  • 2 tablespoons butter
  • 1 pound boneless, skinless chicken breasts, diced
  • Salt and pepper, to taste
  • 1 onion, chopped
  • 2 cloves garlic, minced
  • 2 carrots, diced
  • 2 celery stalks, diced
  • 1/2 cup frozen peas
  • 1/2 cup frozen corn
  • 1/4 cup all-purpose flour
  • 2 cups chicken broth
  • 1 cup heavy cream
  • 1 teaspoon dried thyme
  • 1 teaspoon dried parsley
  • 1 package (about 14 ounces) refrigerated pie crusts
  • 1 egg, beaten (for egg wash)

Instructions

  1. Preheat the oven: Preheat your oven to 400°F (200°C).
  2. Cook the chicken: In a large skillet over medium heat, melt the butter. Add the diced chicken and season with salt and pepper. Cook until the chicken is browned and cooked through, about 5-7 minutes. Remove the chicken from the skillet and set aside.
  3. Sauté the vegetables: In the same skillet, add the chopped onion, garlic, carrots, and celery. Cook for 5-7 minutes, or until the vegetables are softened.
  4. Add the peas and corn: Stir in the frozen peas and corn, cooking for an additional 2 minutes.
  5. Make the sauce: Sprinkle the flour over the vegetables and stir to coat. Gradually add the chicken broth, stirring constantly until the mixture thickens. Stir in the heavy cream, thyme, and parsley. Return the cooked chicken to the skillet and mix well. Season with additional salt and pepper to taste. Remove from heat.
  6. Assemble the pie: Roll out one pie crust and fit it into the bottom of a 9-inch pie dish. Pour the chicken and vegetable mixture into the crust. Roll out the second pie crust and place it over the filling. Trim any excess crust and crimp the edges to seal. Cut a few slits in the top crust to allow steam to escape. Brush the crust with the beaten egg.
  7. Bake the pie: Place the pie on a baking sheet to catch any drips and bake in the preheated oven for 25-30 minutes, or until the crust is golden brown.
  8. Cool and serve: Allow the pie to cool for at least 10 minutes before slicing and serving.

Enjoy your Chicken Pot Pie as a hearty and delicious meal that offers a comforting combination of flavors and textures, perfect for any occasion.