Home Blog Page 785

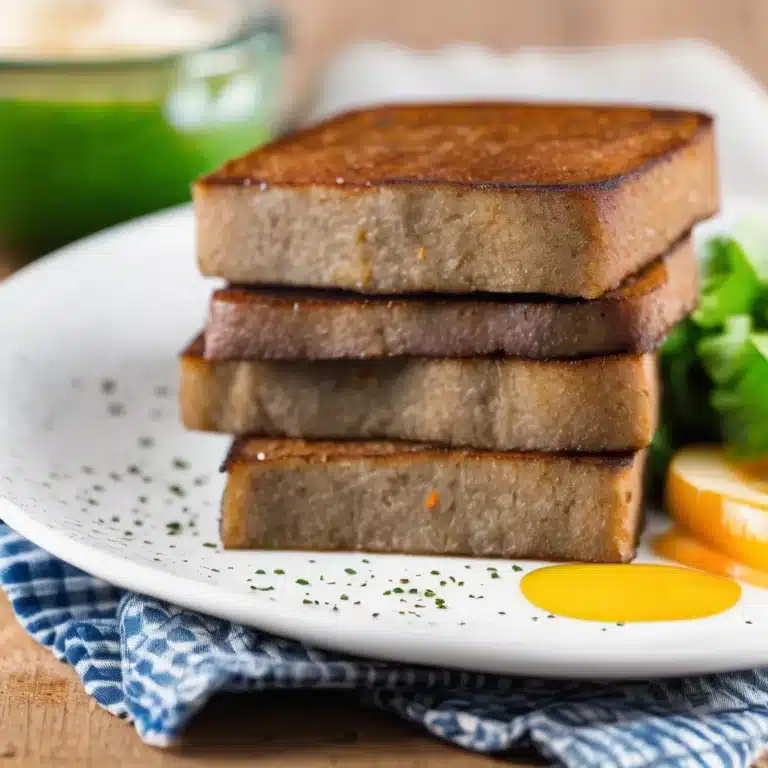
Scrapple

Scrapple is a classic American dish with roots in Pennsylvania Dutch cuisine, offering a unique and hearty breakfast option. Traditionally made from pork scraps, cornmeal, and a blend of savory spices, scrapple is cooked until thickened, then cooled and sliced into slabs that are pan-fried to crispy perfection. The result is a deliciously crispy exterior with a soft, flavorful interior. Often served with eggs and toast or topped with maple syrup, scrapple is a versatile dish that showcases the ingenuity of early American settlers, making use of every part of the pig to create a satisfying and economical meal.

Ingredients:

  • 1 lb pork shoulder or pork butt
  • 1/2 lb pork liver (optional)
  • 1 onion, quartered
  • 1 bay leaf
  • 1 teaspoon salt
  • 1/2 teaspoon black pepper
  • 1 teaspoon sage
  • 1 teaspoon thyme
  • 1/2 teaspoon nutmeg
  • 1 cup yellow cornmeal
  • 4 cups water
  • 2 tablespoons unsalted butter or vegetable oil (for frying)

Instructions:

  1. Cook the Pork:
    • In a large pot, combine the pork shoulder, pork liver (if using), onion, bay leaf, salt, and 4 cups of water. Bring to a boil, then reduce the heat and simmer for about 1.5 to 2 hours, until the meat is tender.
    • Remove the meat from the pot and set aside to cool. Discard the bay leaf and onion, but reserve the cooking liquid.
  2. Prepare the Meat:
    • Once the meat is cool enough to handle, finely chop or grind it using a food processor or meat grinder. Ensure the texture is uniform and smooth.
  3. Make the Scrapple Mixture:
    • Return the reserved cooking liquid to a simmer in the pot. Gradually whisk in the cornmeal, stirring continuously to avoid lumps.
    • Add the chopped meat back into the pot and stir in the black pepper, sage, thyme, and nutmeg.
    • Continue cooking over low heat, stirring frequently, until the mixture thickens and pulls away from the sides of the pot, about 20-30 minutes.
  4. Set the Scrapple:
    • Pour the thickened scrapple mixture into a greased loaf pan, pressing down to smooth the surface. Allow it to cool to room temperature, then cover and refrigerate until firm, ideally overnight.
  5. Fry the Scrapple:
    • Once set, turn the scrapple out of the loaf pan and slice into 1/2-inch thick slabs.
    • Heat butter or vegetable oil in a skillet over medium-high heat. Add the scrapple slices and fry until golden brown and crispy on both sides, about 3-4 minutes per side.
  6. Serve:
    • Serve the scrapple hot, with eggs, toast, or your favorite breakfast accompaniments. It can also be enjoyed with a drizzle of maple syrup or apple butter for a sweet contrast.

Enjoy your homemade scrapple, a delicious and traditional breakfast treat that brings a taste of Americana to your table!
Tuna Melt Sandwich

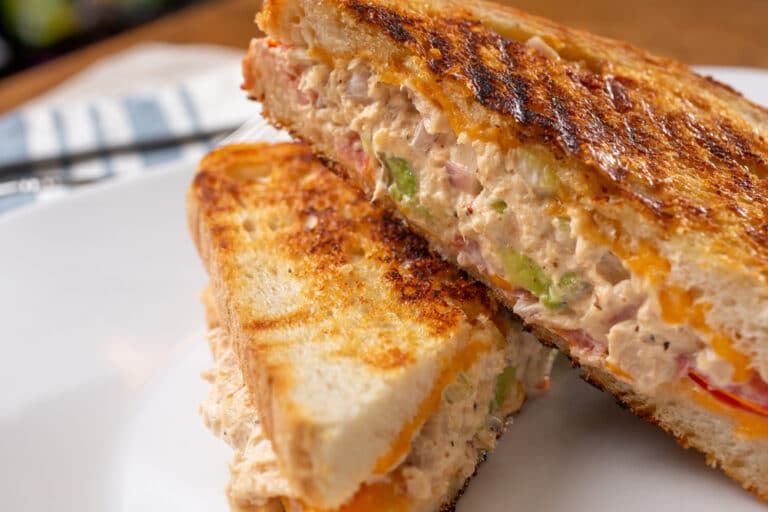
The Tuna Melt Sandwich is a classic comfort food that perfectly combines the creamy, savory flavors of a tuna salad with the gooey deliciousness of melted cheese. This simple yet satisfying sandwich is a great way to use canned tuna and is ideal for a quick lunch or an easy dinner. The crispy, toasted bread provides the perfect contrast to the soft, rich filling, making each bite irresistible. Customize your tuna melt with your favorite type of cheese and additional toppings for a personal touch on this timeless dish.

Ingredients:

  • For the Tuna Salad:
    • 2 cans (5 oz each) tuna in water, drained
    • 1/4 cup mayonnaise
    • 1 tablespoon Dijon mustard
    • 1 tablespoon lemon juice
    • 1/4 cup celery, finely chopped
    • 2 tablespoons red onion, finely chopped
    • Salt and pepper to taste
  • For the Sandwich:
    • 4 slices of bread (sourdough, rye, or your choice)
    • 4 slices of cheddar, Swiss, or American cheese
    • 2 tablespoons butter, softened
    • Tomato slices (optional)
    • Pickles (optional)

Instructions:

  1. Make the Tuna Salad:
    • In a medium bowl, combine the drained tuna, mayonnaise, Dijon mustard, lemon juice, chopped celery, and chopped red onion. Mix well until all ingredients are evenly combined.
    • Season with salt and pepper to taste.
  2. Assemble the Sandwiches:
    • Butter one side of each slice of bread.
    • Place two slices of bread, buttered side down, in a skillet over medium heat.
    • Layer each slice with a slice of cheese, a generous amount of tuna salad, tomato slices (if using), and a second slice of cheese.
    • Top with the remaining slices of bread, buttered side up.
  3. Cook the Sandwiches:
    • Cook the sandwiches over medium heat until the bread is golden brown and crispy, about 3-4 minutes per side. Press down gently with a spatula to help melt the cheese and ensure even cooking.
    • If necessary, reduce the heat to low to allow the cheese to melt without burning the bread.
  4. Serve:
    • Cut the sandwiches in half and serve immediately with pickles on the side, if desired.

Enjoy your Tuna Melt Sandwich, a warm and comforting meal that’s perfect for any time of day!

Roasted Veggie Grain Bowl

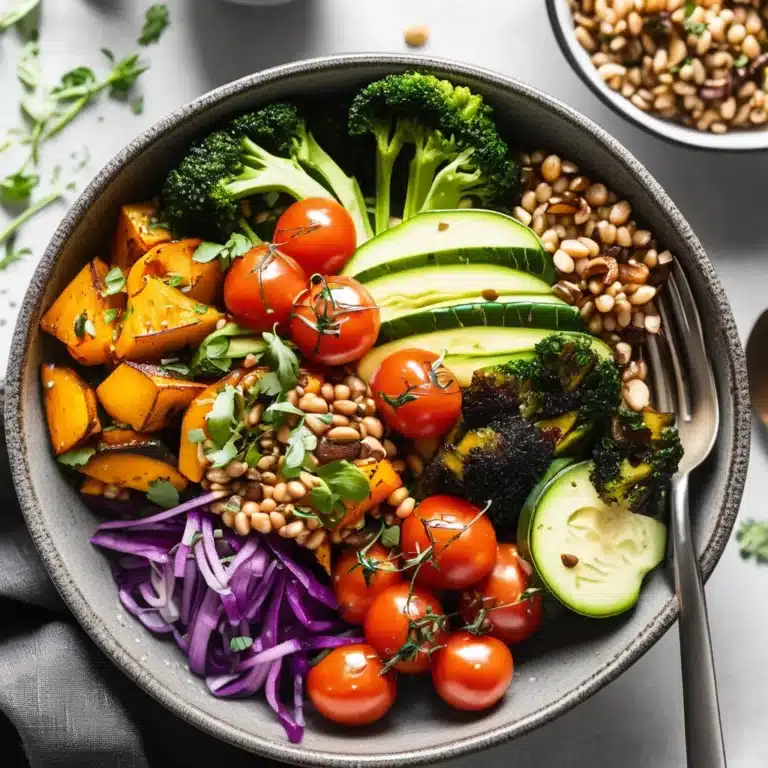
Roasted Veggie Grain Bowl is a wholesome and versatile dish that combines the earthy flavors of roasted vegetables with the nutty taste of grains, creating a delicious and nourishing meal. This recipe features a mix of seasonal vegetables roasted to perfection, paired with your choice of grains such as quinoa, farro, or brown rice, and topped with a creamy tahini dressing. Packed with nutrients and flavors, this bowl is not only satisfying but also incredibly easy to customize based on what you have on hand. It’s perfect for meal prep or a quick weeknight dinner, providing a balanced and vibrant meal that will leave you feeling energized and full.

Ingredients:

  • For the Roasted Vegetables:
    • 1 sweet potato, peeled and diced
    • 1 red bell pepper, sliced
    • 1 zucchini, sliced
    • 1 cup cherry tomatoes, halved
    • 1 red onion, sliced
    • 2 tablespoons olive oil
    • Salt and pepper to taste
    • 1 teaspoon smoked paprika
    • 1 teaspoon garlic powder
  • For the Grain Bowl:
    • 1 cup quinoa, farro, or brown rice
    • 2 cups water or vegetable broth
    • 1 can (15 oz) chickpeas, drained and rinsed
    • 1 avocado, sliced
    • 1/4 cup feta cheese, crumbled (optional)
    • 2 tablespoons pumpkin seeds or sunflower seeds
  • For the Tahini Dressing:
    • 1/4 cup tahini
    • 2 tablespoons lemon juice
    • 1 tablespoon olive oil
    • 1 tablespoon maple syrup or honey
    • 1 clove garlic, minced
    • 2-4 tablespoons water (to thin)
    • Salt and pepper to taste

Instructions:

  1. Cook the Grains:
    • Rinse the quinoa, farro, or brown rice under cold water. In a medium saucepan, bring the water or vegetable broth to a boil. Add the grains, reduce heat to low, cover, and simmer according to package instructions until tender. Fluff with a fork and set aside.
  2. Roast the Vegetables:
    • Preheat the oven to 425°F (220°C). In a large bowl, toss the sweet potato, red bell pepper, zucchini, cherry tomatoes, and red onion with olive oil, smoked paprika, garlic powder, salt, and pepper.
    • Spread the vegetables evenly on a baking sheet. Roast in the preheated oven for 20-25 minutes, or until the vegetables are tender and lightly caramelized, stirring halfway through.
  3. Prepare the Tahini Dressing:
    • In a small bowl, whisk together the tahini, lemon juice, olive oil, maple syrup or honey, minced garlic, salt, and pepper. Add water as needed to achieve the desired consistency.
  4. Assemble the Grain Bowl:
    • Divide the cooked grains among four bowls. Top each bowl with a portion of roasted vegetables and chickpeas.
    • Add slices of avocado and sprinkle with feta cheese (if using) and pumpkin or sunflower seeds.
  5. Drizzle and Serve:
    • Drizzle the tahini dressing over each bowl. Serve immediately, garnished with additional herbs or seeds as desired.

Enjoy your Roasted Veggie Grain Bowl, a colorful and nutritious meal that is both delicious and satisfying!

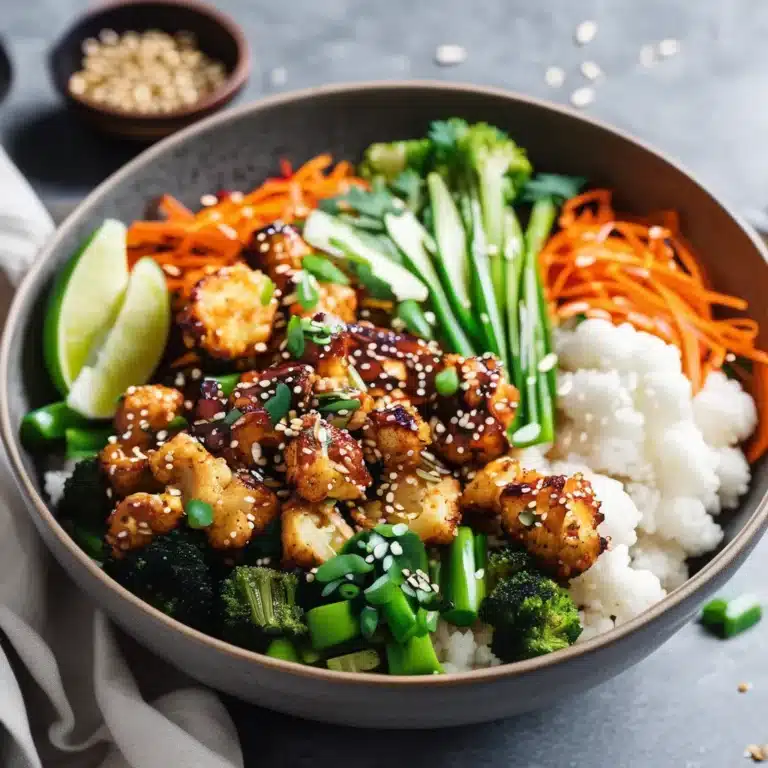
Sticky Sesame Cauliflower Bowl

Sticky Sesame Cauliflower Bowl is a delicious and satisfying plant-based dish that delivers a perfect combination of sweet, savory, and spicy flavors. Roasted cauliflower florets are coated in a sticky sesame glaze, making them irresistibly crispy on the outside and tender on the inside. Served over a bed of fluffy rice and paired with fresh vegetables, this bowl is not only healthy but also packed with flavor. The addition of crunchy toppings like sesame seeds and green onions adds texture and vibrancy to the dish, making it a great option for a quick and nutritious meal that everyone will love.

Ingredients:

  • For the Cauliflower:
    • 1 large head of cauliflower, cut into bite-sized florets
    • 2 tablespoons olive oil
    • 1/2 teaspoon salt
    • 1/4 teaspoon black pepper
  • For the Sticky Sesame Sauce:
    • 1/4 cup soy sauce
    • 1/4 cup honey or maple syrup
    • 2 tablespoons rice vinegar
    • 1 tablespoon sesame oil
    • 2 cloves garlic, minced
    • 1 teaspoon grated ginger
    • 1 tablespoon cornstarch mixed with 2 tablespoons water (slurry)
    • 1 tablespoon sesame seeds
  • For the Bowl:
    • 2 cups cooked white or brown rice
    • 1 cup edamame (shelled and cooked)
    • 1 carrot, julienned
    • 1 cucumber, thinly sliced
    • 2 green onions, sliced
    • Additional sesame seeds (for garnish)
    • Fresh cilantro or parsley (for garnish)

Instructions:

  1. Roast the Cauliflower:
    • Preheat your oven to 425°F (220°C).
    • On a large baking sheet, toss the cauliflower florets with olive oil, salt, and black pepper. Spread them in a single layer.
    • Roast in the oven for 25-30 minutes, or until the cauliflower is golden brown and crispy, tossing halfway through.
  2. Prepare the Sticky Sesame Sauce:
    • In a small saucepan, combine soy sauce, honey (or maple syrup), rice vinegar, sesame oil, minced garlic, and grated ginger.
    • Bring the mixture to a simmer over medium heat. Stir in the cornstarch slurry and cook until the sauce thickens, about 2-3 minutes.
    • Remove from heat and stir in the sesame seeds.
  3. Coat the Cauliflower:
    • Once the cauliflower is roasted, transfer it to a large bowl and pour the sticky sesame sauce over the top.
    • Toss the cauliflower to coat it evenly with the sauce.
  4. Assemble the Bowls:
    • Divide the cooked rice among four bowls.
    • Top each bowl with sticky sesame cauliflower, edamame, julienned carrot, and sliced cucumber.
    • Garnish with sliced green onions, additional sesame seeds, and fresh cilantro or parsley.

Enjoy your Sticky Sesame Cauliflower Bowl, a flavorful and healthy meal that’s perfect for any time of the day!

Garlic Naan Bread

Garlic Naan Bread is a delicious and aromatic Indian flatbread that pairs perfectly with a variety of dishes, from curries to grilled meats. This soft and chewy bread is infused with the rich flavors of garlic and butter, making it an irresistible addition to any meal. Traditionally cooked in a tandoor oven, this version of naan can easily be made on a stovetop or in an oven, allowing you to enjoy freshly baked naan at home. Serve it warm, brushed with extra garlic butter and a sprinkle of fresh herbs for an authentic and mouthwatering experience.

Ingredients:

  • 2 cups all-purpose flour, plus more for dusting
  • 1 teaspoon sugar
  • 1 teaspoon salt
  • 1/2 teaspoon baking powder
  • 1/2 cup plain yogurt
  • 1/2 cup warm water
  • 1 tablespoon olive oil
  • 3 cloves garlic, minced
  • 3 tablespoons unsalted butter, melted
  • Fresh cilantro or parsley, chopped (for garnish)

Instructions:

  1. Make the Dough:
    • In a large bowl, combine the flour, sugar, salt, and baking powder.
    • In a separate bowl, mix the yogurt, warm water, and olive oil. Pour the wet ingredients into the dry ingredients and mix until a dough forms.
    • Knead the dough on a floured surface for about 5 minutes until it is smooth and elastic. Add more flour if the dough is too sticky.
  2. Let the Dough Rise:
    • Place the dough in a lightly oiled bowl, cover it with a damp cloth or plastic wrap, and let it rest in a warm place for about 1-2 hours, or until it doubles in size.
  3. Prepare the Garlic Butter:
    • In a small bowl, combine the melted butter with the minced garlic. Set aside.
  4. Shape the Naan:
    • Once the dough has risen, punch it down and divide it into 6 equal portions.
    • Roll each portion into a ball and then flatten it with a rolling pin into an oval or round shape about 1/4-inch thick.
  5. Cook the Naan:
    • Heat a non-stick skillet or cast-iron pan over medium-high heat.
    • Place one piece of rolled-out dough into the hot pan. Cook for about 1-2 minutes until bubbles form on the surface and the bottom is golden brown.
    • Flip the naan and cook for another 1-2 minutes until both sides are cooked through.
  6. Add the Garlic Butter:
    • Remove the naan from the pan and immediately brush it with the garlic butter. Repeat the cooking process with the remaining dough.
  7. Garnish and Serve:
    • Sprinkle the warm garlic naan with chopped cilantro or parsley before serving.

Enjoy your Garlic Naan Bread fresh and warm, a perfect accompaniment to your favorite dishes or as a delicious snack on its own!

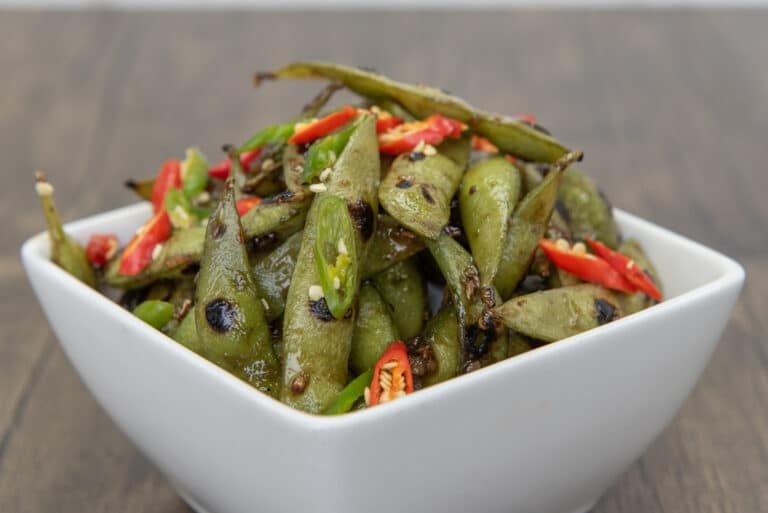
GARLIC EDAMAME

Garlic Edamame is a simple yet flavorful appetizer or snack that brings a touch of umami to your table. This dish features steamed edamame pods tossed in a fragrant garlic sauce, delivering a satisfying and nutritious treat that’s perfect for sharing. The combination of garlic, soy sauce, and sesame oil creates a savory glaze that enhances the natural sweetness of the edamame. Quick to prepare and easy to enjoy, Garlic Edamame is an excellent choice for a healthy snack or a delightful addition to any meal.

Ingredients:

  • 1 lb edamame in pods (fresh or frozen)
  • 1 tablespoon vegetable oil
  • 3 cloves garlic, minced
  • 2 tablespoons soy sauce
  • 1 tablespoon sesame oil
  • 1 teaspoon red pepper flakes (optional)
  • Sea salt, to taste
  • Sesame seeds (for garnish)

Instructions:

  1. Cook the Edamame:
    • If using frozen edamame, bring a large pot of water to a boil. Add the edamame and cook for 3-5 minutes until tender. Drain and set aside.
  2. Prepare the Garlic Sauce:
    • In a large skillet or wok, heat the vegetable oil over medium heat. Add the minced garlic and cook for 1-2 minutes until fragrant and slightly golden, being careful not to burn it.
  3. Toss the Edamame:
    • Add the cooked edamame to the skillet, along with the soy sauce, sesame oil, and red pepper flakes (if using).
    • Toss the edamame in the sauce until well coated and heated through, about 2-3 minutes.
  4. Season and Serve:
    • Transfer the garlic edamame to a serving bowl. Sprinkle with sea salt to taste and garnish with sesame seeds.

Enjoy your Garlic Edamame, a delicious and healthy snack that’s packed with flavor!

Fried Chicken Tenders

Fried Chicken Tenders are a delicious and crispy treat that everyone loves. These juicy strips of chicken are coated in a flavorful batter and fried to golden perfection, making them a favorite for kids and adults alike. Whether you’re serving them as an appetizer, a snack, or a main dish, these chicken tenders are versatile and can be paired with your favorite dipping sauces for extra flavor. Quick and easy to make, they’re perfect for a family dinner, game day, or any occasion that calls for something crunchy and satisfying.

Ingredients:

  • 1.5 lbs chicken tenders
  • 1 cup buttermilk
  • 1 teaspoon salt
  • 1 teaspoon black pepper
  • 1 teaspoon garlic powder
  • 1 teaspoon onion powder
  • 1 teaspoon paprika
  • 1/2 teaspoon cayenne pepper (optional for heat)
  • 1 cup all-purpose flour
  • 1/2 cup cornstarch
  • Vegetable oil (for frying)

Instructions:

  1. Marinate the Chicken:
    • In a large bowl, combine the buttermilk, salt, black pepper, garlic powder, onion powder, paprika, and cayenne pepper (if using).
    • Add the chicken tenders to the bowl, ensuring they are fully coated in the buttermilk mixture. Cover and refrigerate for at least 1 hour or overnight for best results.
  2. Prepare the Coating:
    • In a shallow dish, mix the flour and cornstarch together. Season with a little salt and pepper.
  3. Coat the Chicken:
    • Remove the chicken tenders from the buttermilk marinade, allowing any excess to drip off.
    • Dredge each chicken tender in the flour and cornstarch mixture, pressing gently to ensure the coating adheres well. Place the coated tenders on a wire rack to rest while you heat the oil.
  4. Fry the Chicken:
    • In a large skillet or deep fryer, heat about 2 inches of vegetable oil to 350°F (175°C).
    • Carefully add the chicken tenders to the hot oil in batches, avoiding overcrowding the pan. Fry for about 3-4 minutes per side, or until golden brown and cooked through. The internal temperature should reach 165°F (74°C).
    • Remove the tenders from the oil and place them on a paper towel-lined plate to drain excess oil.
  5. Serve:
    • Serve the fried chicken tenders hot with your favorite dipping sauces such as ranch, honey mustard, barbecue sauce, or ketchup.

Enjoy your Fried Chicken Tenders, a crispy and flavorful dish that’s perfect for any occasion!

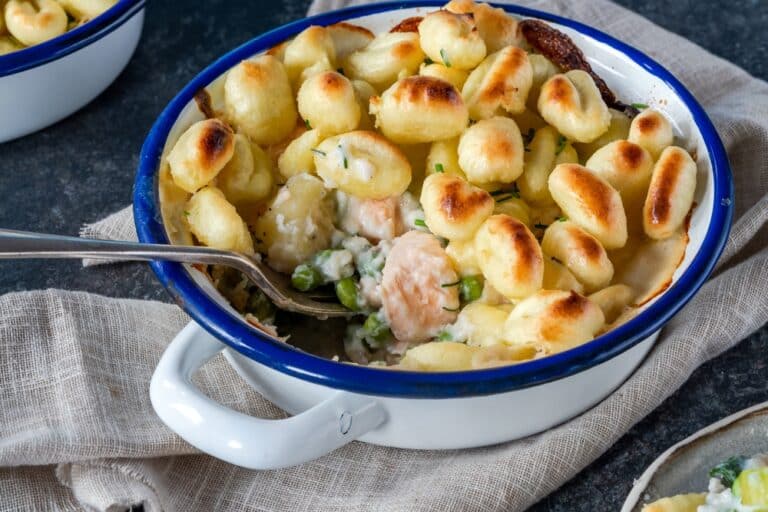
Gnocchi Fish Pie

Gnocchi Fish Pie is a delightful twist on the classic fish pie, combining the creamy, comforting flavors of tender fish and vegetables with the soft, pillowy texture of gnocchi. This dish is perfect for seafood lovers who want a hearty and satisfying meal that is both easy to make and impressive to serve. The combination of flaky white fish, smoked haddock, and prawns adds a variety of flavors and textures, all brought together with a rich and cheesy white sauce. Topped with golden-brown gnocchi and a sprinkle of fresh herbs, this pie is sure to become a family favorite.

Ingredients:

  • 1 lb white fish fillets (such as cod or haddock), cut into bite-sized pieces
  • 1/2 lb smoked haddock fillets, cut into bite-sized pieces
  • 1/2 lb prawns, peeled and deveined
  • 1 lb gnocchi
  • 2 tablespoons olive oil
  • 1 medium onion, finely chopped
  • 2 cloves garlic, minced
  • 1 cup frozen peas
  • 1/4 cup fresh parsley, chopped
  • 2 cups milk
  • 2 tablespoons butter
  • 2 tablespoons all-purpose flour
  • 1/2 cup grated cheddar cheese
  • Salt and pepper to taste
  • Fresh dill or chives (for garnish)

Instructions:

  1. Cook the Gnocchi:
    • Bring a large pot of salted water to a boil. Add the gnocchi and cook according to the package instructions until they float to the surface.
    • Drain the gnocchi and set aside.
  2. Prepare the Fish Filling:
    • In a large skillet, heat the olive oil over medium heat. Add the chopped onion and cook until softened, about 5 minutes.
    • Add the minced garlic and cook for another minute until fragrant.
    • Stir in the frozen peas and cook for an additional 2 minutes.
  3. Make the White Sauce:
    • In a separate saucepan, melt the butter over medium heat. Stir in the flour and cook for 1-2 minutes to form a roux.
    • Gradually whisk in the milk, ensuring there are no lumps. Cook the sauce until it thickens, about 5 minutes.
    • Stir in the grated cheddar cheese and season with salt and pepper to taste.
  4. Assemble the Fish Pie:
    • Preheat your oven to 400°F (200°C).
    • In a large baking dish, combine the white fish, smoked haddock, prawns, cooked onion mixture, and chopped parsley. Pour the white sauce over the fish mixture, ensuring everything is evenly coated.
  5. Top with Gnocchi:
    • Evenly distribute the cooked gnocchi over the top of the fish mixture.
    • Place the dish in the oven and bake for 20-25 minutes, or until the gnocchi are golden brown and the fish is cooked through.
  6. Serve:
    • Garnish the gnocchi fish pie with fresh dill or chives before serving.

Enjoy your Gnocchi Fish Pie, a delicious and comforting dish that’s perfect for any occasion!

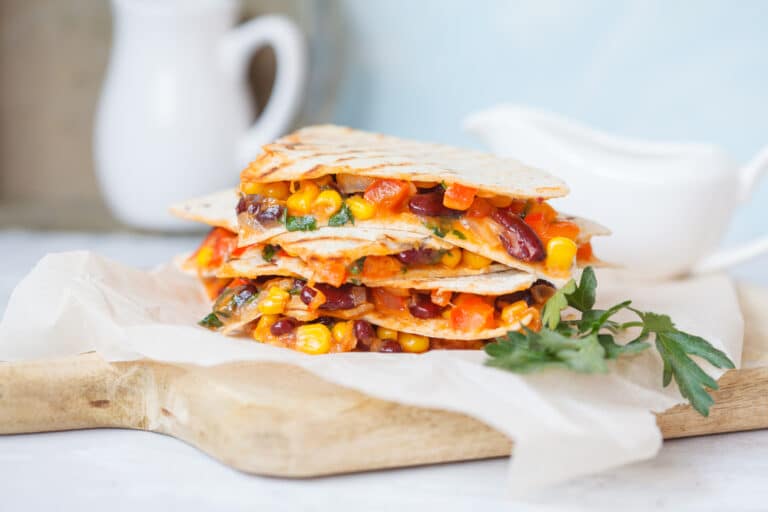
Vegetarian Quesadillas

Vegetarian Quesadillas are a quick and delicious meal option that’s perfect for lunch, dinner, or even a hearty snack. Filled with a colorful medley of vegetables and melted cheese, these quesadillas are packed with flavor and nutrition. The crispy tortilla provides the perfect contrast to the warm and gooey filling, making each bite satisfying and delicious. Whether you’re catering to vegetarians or just looking for a meatless meal, these quesadillas are versatile and easy to customize with your favorite ingredients. Serve them with salsa, guacamole, or sour cream for a delightful Mexican-inspired dish that everyone will love.

Ingredients:

  • 4 large flour tortillas
  • 2 cups shredded cheese (cheddar, Monterey Jack, or a blend)
  • 1 tablespoon olive oil
  • 1 red bell pepper, sliced
  • 1 green bell pepper, sliced
  • 1 small red onion, thinly sliced
  • 1 cup mushrooms, sliced
  • 1 zucchini, sliced
  • 1 teaspoon ground cumin
  • 1 teaspoon chili powder
  • Salt and pepper to taste
  • Fresh cilantro, chopped (for garnish)
  • Salsa, guacamole, and sour cream (for serving)

Instructions:

  1. Prepare the Vegetables:
    • Heat the olive oil in a large skillet over medium heat. Add the sliced bell peppers, onion, mushrooms, and zucchini.
    • Sauté for about 5-7 minutes until the vegetables are tender.
  2. Season the Vegetables:
    • Add the ground cumin, chili powder, salt, and pepper to the vegetables. Stir well to combine and cook for another 2 minutes.
  3. Assemble the Quesadillas:
    • Lay one tortilla flat on a clean surface. Sprinkle 1/2 cup of shredded cheese over half of the tortilla.
    • Spoon a portion of the cooked vegetables over the cheese, then fold the tortilla in half to enclose the filling.
  4. Cook the Quesadillas:
    • Heat a non-stick skillet or griddle over medium heat. Place the assembled quesadilla in the skillet and cook for 3-4 minutes on each side, or until the tortilla is golden brown and the cheese is melted.
    • Repeat the process with the remaining tortillas and filling.
  5. Serve:
    • Slice each quesadilla into wedges. Garnish with fresh cilantro and serve with salsa, guacamole, and sour cream on the side.

Enjoy your Vegetarian Quesadillas, a tasty and satisfying meal that’s sure to please everyone at the table!

Spicy Sausage & Bean One-Pot

Spicy Sausage & Bean One-Pot is a comforting and flavorful dish that’s perfect for a cozy dinner at home. This recipe combines the robust flavors of spicy sausage with the earthy richness of beans, all cooked together in a single pot for a simple yet satisfying meal. The addition of tomatoes and aromatic spices creates a rich and hearty sauce that complements the savory sausage and tender beans. Easy to prepare and requiring minimal cleanup, this one-pot meal is perfect for busy weeknights or when you’re craving something warm and filling.

Ingredients:

  • 1 tablespoon olive oil
  • 1 lb spicy sausage (such as chorizo or andouille), sliced
  • 1 large onion, chopped
  • 2 cloves garlic, minced
  • 1 red bell pepper, diced
  • 1 can (14.5 oz) diced tomatoes
  • 1 can (15 oz) cannellini beans, drained and rinsed
  • 1 can (15 oz) kidney beans, drained and rinsed
  • 1 cup chicken or vegetable broth
  • 1 teaspoon smoked paprika
  • 1/2 teaspoon cayenne pepper (optional, for extra heat)
  • 1 teaspoon dried oregano
  • Salt and pepper to taste
  • Fresh parsley, chopped (for garnish)
  • Grated Parmesan cheese (for serving)

Instructions:

  1. Cook the Sausage:
    • In a large pot or Dutch oven, heat the olive oil over medium heat. Add the sliced sausage and cook until browned and cooked through, about 5-7 minutes. Remove the sausage from the pot and set aside.
  2. Sauté the Vegetables:
    • In the same pot, add the chopped onion and cook until softened, about 4-5 minutes.
    • Add the minced garlic and diced red bell pepper, cooking for another 2-3 minutes until the pepper is tender.
  3. Add the Tomatoes and Beans:
    • Stir in the diced tomatoes (with their juice), cannellini beans, and kidney beans. Mix well to combine.
  4. Add the Broth and Spices:
    • Pour in the chicken or vegetable broth. Add the smoked paprika, cayenne pepper (if using), dried oregano, salt, and pepper. Stir well to combine.
  5. Simmer the One-Pot:
    • Return the cooked sausage to the pot. Bring the mixture to a simmer and let it cook for about 20-25 minutes, allowing the flavors to meld together and the sauce to thicken slightly.
  6. Serve:
    • Remove from heat and serve hot. Garnish with freshly chopped parsley and a sprinkle of grated Parmesan cheese if desired.

Enjoy your Spicy Sausage & Bean One-Pot, a delicious and hearty meal that’s perfect for any time of the year!