Home Blog Page 784

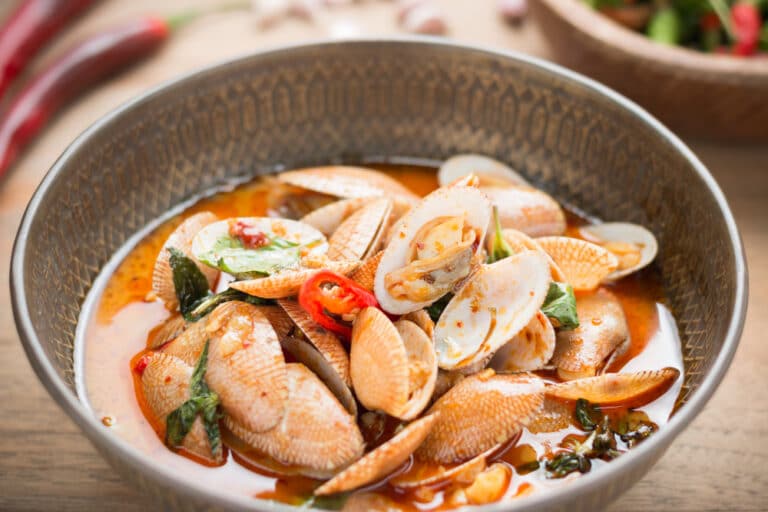
Spicy Tomato Clams

Spicy Tomato Clams is a delectable dish that brings together the briny sweetness of fresh clams with a rich and spicy tomato sauce. This recipe is perfect for seafood lovers looking for a quick yet flavorful meal. The clams are steamed in a zesty sauce made with garlic, tomatoes, and red pepper flakes, creating a harmonious blend of spicy and savory flavors. This dish is perfect for a casual dinner or as an impressive appetizer for a gathering. Serve it with crusty bread to soak up the delicious sauce, and enjoy a taste of coastal cuisine in the comfort of your own home.

Ingredients:

  • 2 lbs fresh clams, scrubbed and cleaned
  • 2 tablespoons olive oil
  • 4 cloves garlic, minced
  • 1/2 teaspoon red pepper flakes (adjust to taste)
  • 1 can (14.5 oz) diced tomatoes
  • 1/2 cup dry white wine
  • 1 tablespoon tomato paste
  • 1 teaspoon sugar
  • Salt and pepper to taste
  • 1/4 cup fresh parsley, chopped
  • Lemon wedges (for serving)
  • Crusty bread (for serving)

Instructions:

  1. Prepare the Clams:
    • Soak the clams in a bowl of cold water with a little salt for about 20 minutes to remove any sand. Rinse them under cold running water, scrubbing the shells to clean them thoroughly.
  2. Make the Tomato Sauce:
    • In a large pot or skillet, heat the olive oil over medium heat. Add the minced garlic and red pepper flakes, sautéing until the garlic is fragrant, about 1 minute.
    • Add the diced tomatoes, white wine, tomato paste, and sugar to the pot. Stir well to combine, then bring the mixture to a simmer. Let it cook for about 10 minutes to allow the flavors to meld together. Season with salt and pepper to taste.
  3. Cook the Clams:
    • Increase the heat to medium-high and add the cleaned clams to the pot. Cover with a lid and cook for about 5-7 minutes, or until the clams open. Discard any clams that do not open.
  4. Finish and Serve:
    • Stir in the chopped parsley and mix well.
    • Serve the spicy tomato clams in bowls with lemon wedges on the side. Enjoy with crusty bread to soak up the flavorful sauce.

Enjoy your Spicy Tomato Clams, a dish bursting with flavor and perfect for any occasion!
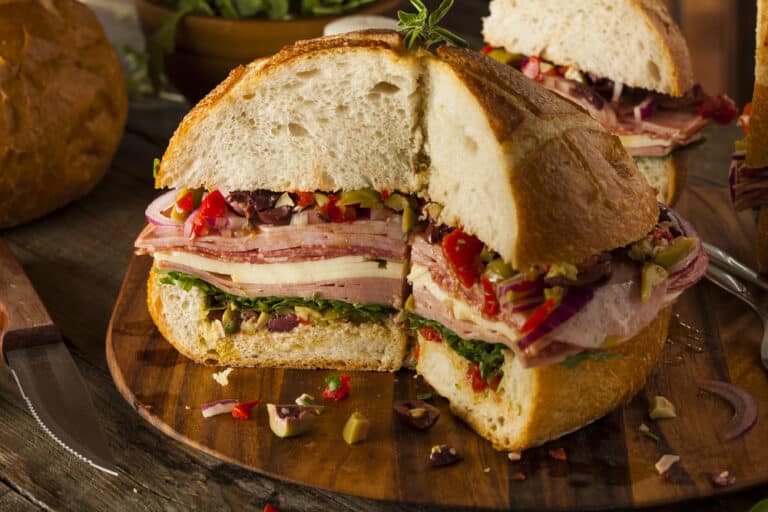
Muffuletta Sandwich

The Muffuletta Sandwich is a classic New Orleans creation known for its bold flavors and hearty composition. Originally created by Italian immigrants, this sandwich features layers of cured meats, tangy cheeses, and a distinctive olive salad, all packed into a round loaf of Italian bread. The olive salad, with its mix of green and black olives, pickled vegetables, and herbs, is the star of the show, infusing the sandwich with a zesty and savory punch. Perfect for picnics, parties, or a satisfying lunch, the Muffuletta is best enjoyed after resting, allowing the flavors to meld together beautifully.

Ingredients:

  • For the Olive Salad:
    • 1 cup green olives, pitted and chopped
    • 1 cup black olives, pitted and chopped
    • 1/2 cup giardiniera (Italian pickled vegetables), chopped
    • 1/4 cup roasted red peppers, chopped
    • 2 tablespoons capers, drained
    • 2 cloves garlic, minced
    • 1/4 cup olive oil
    • 2 tablespoons red wine vinegar
    • 1 teaspoon dried oregano
    • 1/2 teaspoon crushed red pepper flakes
    • Salt and pepper to taste
  • For the Sandwich:
    • 1 large round loaf of Italian or French bread
    • 1/4 pound mortadella, thinly sliced
    • 1/4 pound salami, thinly sliced
    • 1/4 pound ham, thinly sliced
    • 1/4 pound provolone cheese, thinly sliced
    • 1/4 pound mozzarella cheese, thinly sliced

Instructions:

  1. Make the Olive Salad:
    • In a medium bowl, combine the green olives, black olives, giardiniera, roasted red peppers, capers, and minced garlic.
    • Add the olive oil, red wine vinegar, dried oregano, and crushed red pepper flakes. Mix well and season with salt and pepper to taste.
    • Cover and refrigerate for at least 1 hour, or preferably overnight, to allow the flavors to meld.
  2. Prepare the Bread:
    • Slice the round loaf of bread in half horizontally.
    • Hollow out some of the bread from the inside to create space for the filling.
  3. Assemble the Sandwich:
    • Spread half of the olive salad evenly over the bottom half of the bread.
    • Layer the mortadella, salami, ham, provolone, and mozzarella on top of the olive salad.
    • Spread the remaining olive salad over the top half of the bread.
  4. Combine and Rest:
    • Place the top half of the bread over the layered ingredients, pressing down gently.
    • Wrap the sandwich tightly in plastic wrap and let it rest for at least 30 minutes to 1 hour. This allows the flavors to blend and the bread to absorb some of the dressing.
  5. Serve:
    • Slice the Muffuletta into wedges and serve at room temperature.

Enjoy your Muffuletta Sandwich, a delightful and flavorful slice of New Orleans tradition!

Hot Pastrami Sandwich

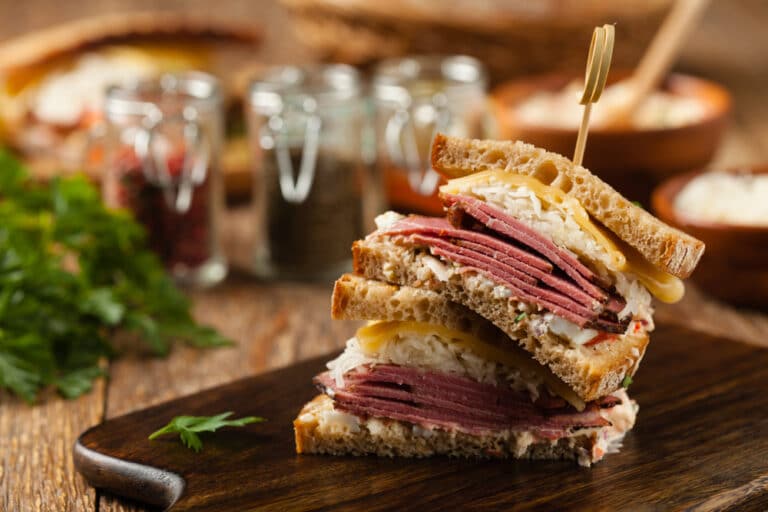
A Hot Pastrami Sandwich is a classic deli favorite that brings together thinly sliced pastrami, melted cheese, tangy mustard, and crunchy pickles between slices of hearty rye bread. The savory and slightly smoky flavor of the pastrami, warmed to perfection, pairs beautifully with the sharpness of Swiss cheese and the tanginess of mustard, creating a satisfying and mouthwatering experience with every bite. Perfect for lunch or a quick dinner, this sandwich is easy to make and delivers a comforting, delicious taste that’s sure to satisfy your cravings for deli-style goodness.

Ingredients:

  • 8 oz pastrami, thinly sliced
  • 4 slices rye bread
  • 2 tablespoons unsalted butter, softened
  • 4 slices Swiss cheese
  • 2 tablespoons Dijon or yellow mustard
  • 4 dill pickle slices (optional)
  • Sauerkraut (optional)

Instructions:

  1. Prepare the Bread:
    • Spread softened butter on one side of each slice of rye bread.
  2. Assemble the Sandwich:
    • Place one slice of bread, buttered side down, on a skillet or griddle.
    • Layer two slices of Swiss cheese on the bread, followed by half of the pastrami.
    • Add pickles and sauerkraut if desired, then spread a tablespoon of mustard on top.
    • Place another slice of bread on top, buttered side up, to complete the sandwich.
  3. Cook the Sandwich:
    • Heat the skillet or griddle over medium heat. Cook the sandwich for about 3-4 minutes on each side, pressing down gently with a spatula, until the bread is golden brown and the cheese is melted.
  4. Serve:
    • Remove the sandwich from the skillet and cut it in half diagonally. Serve hot with your favorite side dish, such as potato chips or coleslaw.

Enjoy your Hot Pastrami Sandwich, a delicious and satisfying meal that brings the taste of a classic deli right to your home!

Frito Pie

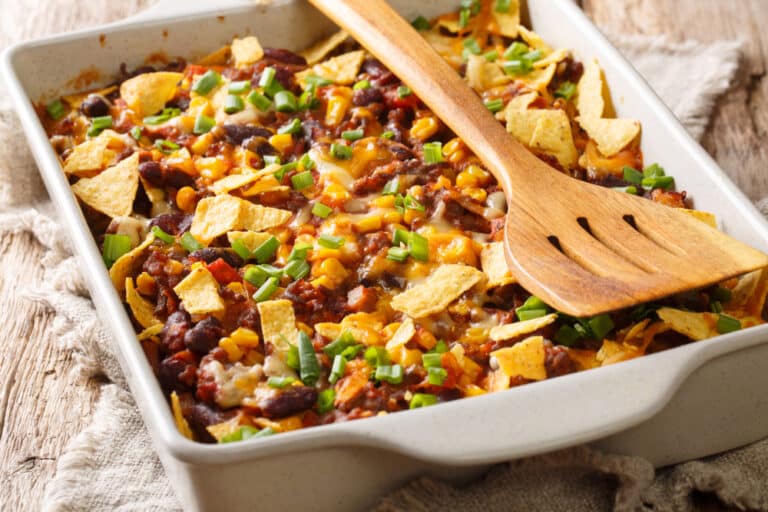
Frito Pie is a classic American comfort food that combines the crunch of corn chips with a hearty, flavorful chili, topped with melted cheese and fresh toppings. This dish is quick and easy to prepare, making it perfect for casual gatherings, game day, or a simple weeknight dinner. With its layers of savory chili, crispy Fritos, and gooey cheese, Frito Pie delivers a satisfying mix of textures and flavors that everyone will love. Customize it with your favorite toppings like sour cream, jalapeños, and green onions for an extra kick.

Ingredients:

  • 1 lb ground beef
  • 1 tablespoon vegetable oil
  • 1 medium onion, chopped
  • 2 cloves garlic, minced
  • 1 can (15 oz) kidney beans, drained and rinsed
  • 1 can (15 oz) diced tomatoes
  • 1 can (8 oz) tomato sauce
  • 2 tablespoons chili powder
  • 1 teaspoon ground cumin
  • 1 teaspoon paprika
  • Salt and pepper to taste
  • 4 cups Fritos corn chips
  • 2 cups shredded cheddar cheese

Optional Toppings:

  • Sour cream
  • Sliced jalapeños
  • Chopped green onions
  • Chopped cilantro
  • Diced tomatoes

Instructions:

  1. Cook the Beef:
    • In a large skillet, heat the vegetable oil over medium-high heat. Add the ground beef and cook until browned, breaking it apart with a spoon, about 5-7 minutes.
  2. Add Aromatics and Spices:
    • Add the chopped onion to the skillet and cook until softened, about 3-4 minutes. Add the minced garlic and cook for another minute.
    • Stir in the chili powder, cumin, paprika, salt, and pepper. Cook for 1-2 minutes until the spices are fragrant.
  3. Simmer the Chili:
    • Add the kidney beans, diced tomatoes, and tomato sauce to the skillet. Stir well to combine.
    • Bring the mixture to a simmer and let it cook for 15-20 minutes, stirring occasionally, until the flavors are well blended and the chili thickens slightly.
  4. Assemble the Frito Pie:
    • Preheat your oven to 350°F (175°C).
    • In a large baking dish, spread half of the Fritos on the bottom. Top with half of the chili, then half of the shredded cheese.
    • Repeat the layers with the remaining Fritos, chili, and cheese.
  5. Bake:
    • Place the baking dish in the preheated oven and bake for 10-15 minutes, or until the cheese is melted and bubbly.
  6. Serve:
    • Remove the Frito Pie from the oven and let it cool slightly. Serve warm with optional toppings like sour cream, jalapeños, green onions, cilantro, and diced tomatoes.

Enjoy your Frito Pie, a delicious and easy-to-make dish that’s sure to be a hit with family and friends!

Fried Catfish

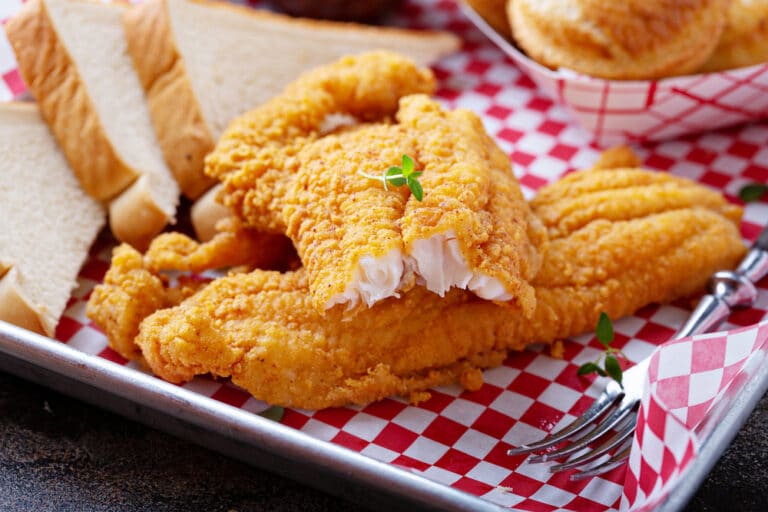
Fried Catfish is a Southern classic that brings a delightful crispy texture and rich flavor to the table. This dish is simple yet packed with taste, featuring catfish fillets coated in a perfectly seasoned cornmeal batter and fried to golden perfection. The result is a crunchy exterior that encases tender, flaky fish, making it a favorite for fish lovers and comfort food enthusiasts alike. Paired with tangy tartar sauce, a slice of lemon, and a side of coleslaw or cornbread, Fried Catfish is perfect for a casual dinner or a backyard gathering.

Ingredients:

  • 4 catfish fillets
  • 1 cup buttermilk
  • 1 cup cornmeal
  • 1/2 cup all-purpose flour
  • 1 teaspoon salt
  • 1/2 teaspoon black pepper
  • 1 teaspoon paprika
  • 1/2 teaspoon cayenne pepper (optional)
  • 1 teaspoon garlic powder
  • Vegetable oil (for frying)
  • Lemon wedges (for serving)
  • Tartar sauce (for serving)

Instructions:

  1. Prepare the Catfish:
    • Rinse the catfish fillets under cold water and pat them dry with paper towels.
    • Place the fillets in a shallow dish and pour the buttermilk over them, ensuring they are well coated. Let them soak for at least 15 minutes to tenderize and flavor the fish.
  2. Mix the Coating:
    • In a large shallow dish or pie plate, combine the cornmeal, flour, salt, black pepper, paprika, cayenne pepper (if using), and garlic powder. Mix well to ensure the seasonings are evenly distributed.
  3. Heat the Oil:
    • Pour enough vegetable oil into a large skillet or deep fryer to reach a depth of about 1 inch. Heat the oil over medium-high heat until it reaches 350°F (175°C).
  4. Coat the Catfish:
    • Remove the catfish fillets from the buttermilk, allowing any excess to drip off. Dredge each fillet in the cornmeal mixture, pressing gently to ensure an even coating on all sides.
  5. Fry the Catfish:
    • Carefully place the coated fillets into the hot oil. Fry in batches to avoid overcrowding, cooking for about 3-4 minutes per side or until the catfish is golden brown and cooked through.
    • Use a slotted spoon or tongs to remove the fillets from the oil and drain them on a paper towel-lined plate.
  6. Serve:
    • Serve the fried catfish hot with lemon wedges and tartar sauce on the side.

Enjoy your Fried Catfish, a delightful dish that captures the essence of Southern cooking with its crispy texture and savory flavor!

Hawaiian Sausage Skillet

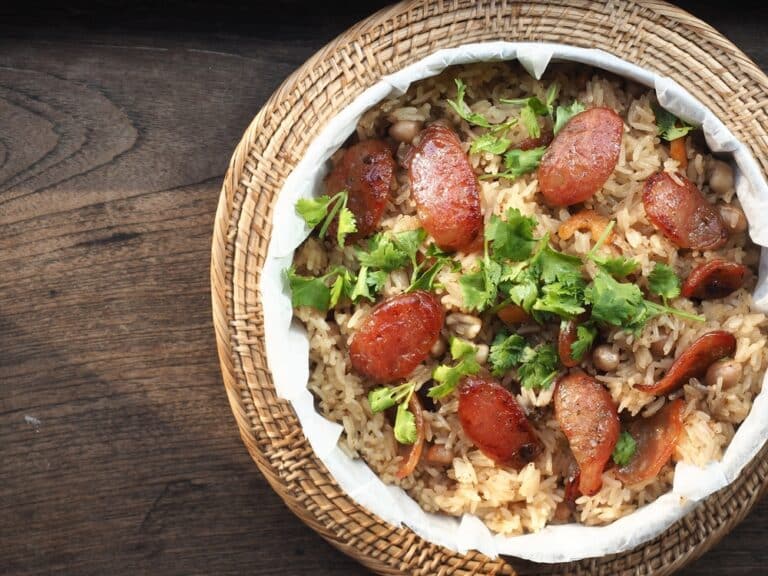
Hawaiian Sausage Skillet is a quick and delicious one-pan meal that combines the savory flavors of sausage with the sweetness of pineapple and colorful bell peppers. This dish is inspired by Hawaiian cuisine, known for its balance of sweet and savory elements. The sausage is browned to perfection, then simmered with a tangy pineapple glaze, creating a flavorful and satisfying dish that’s perfect for busy weeknights. Serve it over steamed rice or noodles for a complete meal that the whole family will love. With minimal prep and clean-up, this recipe is as easy as it is tasty.

Ingredients:

  • 1 lb smoked sausage or kielbasa, sliced
  • 1 tablespoon vegetable oil
  • 1 large onion, sliced
  • 1 red bell pepper, sliced
  • 1 yellow bell pepper, sliced
  • 1 cup fresh pineapple chunks (or canned, drained)
  • 2 tablespoons soy sauce
  • 2 tablespoons brown sugar
  • 1 tablespoon apple cider vinegar
  • 1 tablespoon ketchup
  • 1 teaspoon garlic powder
  • 1 teaspoon ginger powder
  • Salt and pepper to taste
  • 2 green onions, sliced (for garnish)
  • Cooked white rice or noodles (for serving)

Instructions:

  1. Brown the Sausage:
    • In a large skillet, heat the vegetable oil over medium-high heat. Add the sliced sausage and cook until browned on all sides, about 5-7 minutes. Remove the sausage from the skillet and set aside.
  2. Cook the Vegetables:
    • In the same skillet, add the sliced onion and bell peppers. Cook for about 5 minutes until the vegetables start to soften.
  3. Add Pineapple and Sausage:
    • Stir in the pineapple chunks and cooked sausage. Mix well to combine.
  4. Make the Sauce:
    • In a small bowl, whisk together the soy sauce, brown sugar, apple cider vinegar, ketchup, garlic powder, and ginger powder.
  5. Simmer:
    • Pour the sauce over the sausage and vegetables in the skillet. Stir to coat everything evenly. Bring the mixture to a simmer and cook for about 5 minutes, allowing the flavors to meld and the sauce to thicken slightly.
  6. Season and Serve:
    • Season with salt and pepper to taste. Remove from heat.
    • Serve the Hawaiian Sausage Skillet over cooked white rice or noodles and garnish with sliced green onions.

Enjoy your Hawaiian Sausage Skillet, a quick and flavorful meal that brings a taste of the tropics to your table!

Fried Alligator Bites

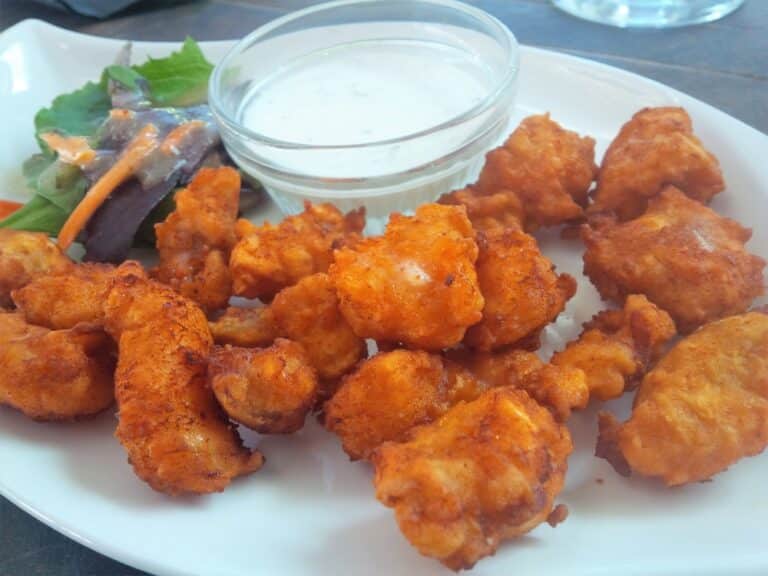
Fried Alligator Bites are a delicious and adventurous Southern delicacy that offers a unique twist on classic fried snacks. Known for their mild flavor and firm texture, alligator bites are often compared to chicken or fish but with a slightly gamier taste. This recipe features tender pieces of alligator meat marinated in buttermilk to ensure juiciness, then coated in a spiced flour mixture for a perfectly crispy exterior. Ideal as an appetizer or a main course, these bites are best served with a tangy dipping sauce like remoulade or ranch to enhance their flavor. Whether you’re trying them for the first time or are a seasoned fan, Fried Alligator Bites are sure to impress with their savory and satisfying taste.

Ingredients:

  • 1 lb alligator meat, cut into bite-sized pieces
  • 1 cup buttermilk
  • 1 cup all-purpose flour
  • 1/2 cup cornmeal
  • 1 teaspoon salt
  • 1/2 teaspoon black pepper
  • 1 teaspoon paprika
  • 1/2 teaspoon garlic powder
  • 1/2 teaspoon onion powder
  • 1/4 teaspoon cayenne pepper (optional)
  • Vegetable oil, for frying
  • Lemon wedges, for serving

Instructions:

  1. Marinate the Alligator:
    • Place the alligator pieces in a bowl and cover them with buttermilk. Let them marinate in the refrigerator for at least 1 hour to tenderize the meat and enhance the flavor.
  2. Prepare the Coating:
    • In a shallow dish, combine the flour, cornmeal, salt, black pepper, paprika, garlic powder, onion powder, and cayenne pepper. Mix well to ensure even seasoning.
  3. Coat the Alligator:
    • Remove the alligator pieces from the buttermilk, allowing any excess to drip off. Dredge each piece in the flour mixture, pressing lightly to ensure the coating adheres well.
  4. Fry the Alligator:
    • Heat about 2 inches of vegetable oil in a deep skillet or pot to 350°F (175°C). Carefully add the coated alligator bites in batches, avoiding overcrowding the pan.
    • Fry the bites for about 3-4 minutes or until they are golden brown and cooked through. Use a slotted spoon to remove them from the oil and drain them on paper towels.
  5. Serve:
    • Serve the Fried Alligator Bites hot with lemon wedges and your choice of dipping sauce, such as remoulade, ranch, or tartar sauce.

Enjoy your Fried Alligator Bites as a unique and flavorful dish that’s sure to be a hit at any gathering!

Kentucky Burgoo

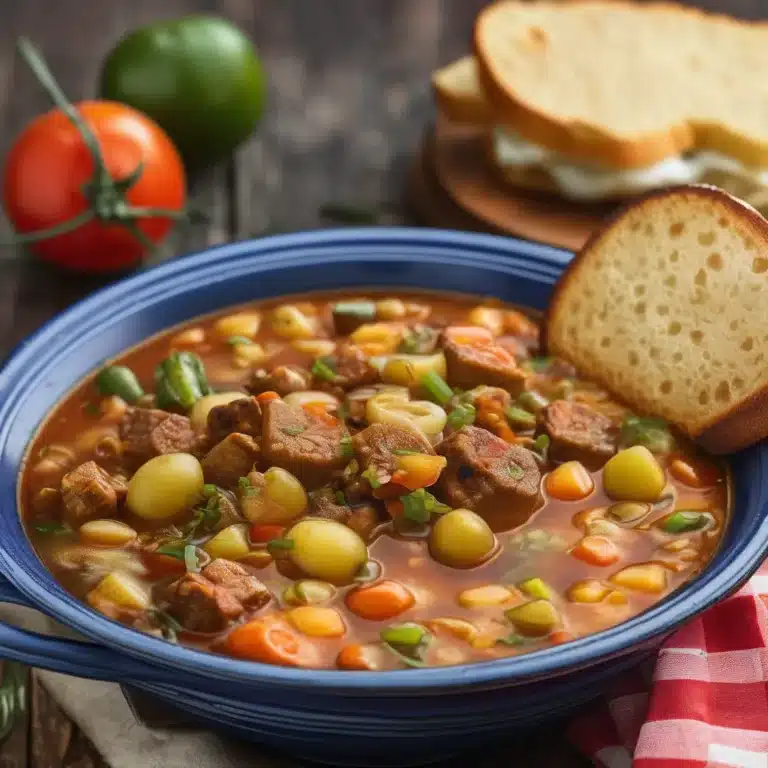
Kentucky Burgoo is a traditional Southern stew known for its rich, hearty flavors and versatility. Often served at large gatherings and celebrations, this dish is a perfect example of community cooking, where everyone contributes different ingredients to the pot. Made with a variety of meats such as beef, pork, and chicken, along with a colorful array of vegetables, this stew is slow-cooked to perfection, allowing the flavors to meld together beautifully. The result is a comforting and filling meal that showcases the best of Southern cooking. Whether you’re hosting a party or looking for a soul-warming dinner, Kentucky Burgoo is sure to please.

Ingredients:

  • For the Meats:
    • 1 lb beef stew meat, cut into chunks
    • 1 lb pork shoulder, cut into chunks
    • 1 lb chicken thighs, boneless and skinless
    • 1 tablespoon vegetable oil
    • Salt and pepper to taste
  • For the Stew:
    • 1 large onion, chopped
    • 3 cloves garlic, minced
    • 2 cups beef or chicken broth
    • 1 can (14.5 oz) crushed tomatoes
    • 1/2 cup barbecue sauce
    • 2 tablespoons Worcestershire sauce
    • 1 tablespoon hot sauce (optional)
    • 2 bay leaves
    • 2 cups frozen corn
    • 2 cups frozen lima beans
    • 2 cups sliced carrots
    • 2 cups diced potatoes
    • 1 cup sliced okra
    • 1 teaspoon dried thyme
    • 1 teaspoon paprika

Instructions:

  1. Brown the Meats:
    • In a large pot or Dutch oven, heat the vegetable oil over medium-high heat. Season the beef, pork, and chicken with salt and pepper.
    • Add the beef and pork to the pot and brown on all sides, about 5-7 minutes. Remove the meat and set aside.
    • Add the chicken to the pot and brown on both sides, about 5 minutes per side. Remove the chicken and set aside.
  2. Sauté the Vegetables:
    • In the same pot, add the chopped onion and cook until softened, about 5 minutes.
    • Add the minced garlic and cook for another minute until fragrant.
  3. Simmer the Stew:
    • Return all the meats to the pot. Add the broth, crushed tomatoes, barbecue sauce, Worcestershire sauce, hot sauce (if using), and bay leaves.
    • Bring the mixture to a boil, then reduce the heat to low. Cover and simmer for 1.5 to 2 hours, stirring occasionally.
  4. Add the Vegetables:
    • Add the corn, lima beans, carrots, potatoes, and okra to the pot.
    • Stir in the dried thyme and paprika. Continue to simmer for another 45 minutes to 1 hour, or until the vegetables are tender and the stew has thickened.
  5. Serve:
    • Remove the bay leaves before serving. Taste and adjust seasoning with salt and pepper if needed.

Enjoy your Kentucky Burgoo, a hearty and flavorful stew that brings the best of Southern hospitality to your table!

Beef Jerky

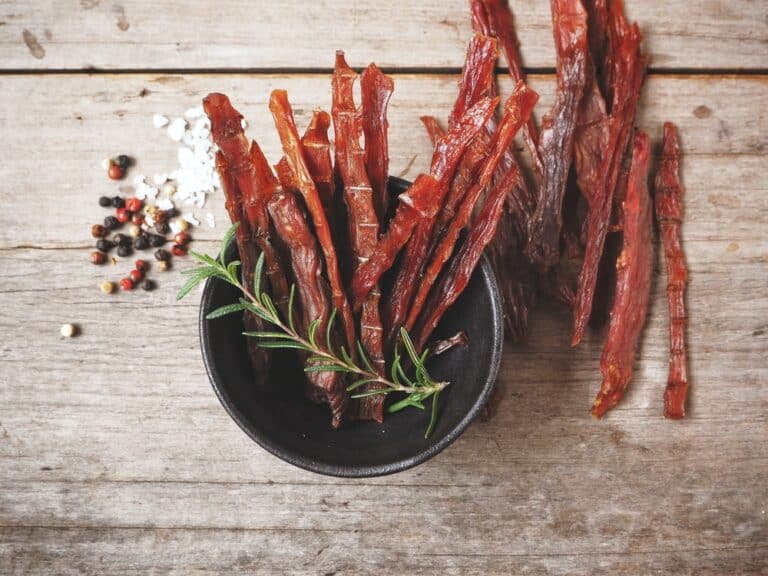
Beef jerky is a classic, protein-packed snack that’s perfect for on-the-go munching or a flavorful addition to any adventure. Making your own jerky at home allows you to control the flavors, textures, and quality of the ingredients, resulting in a superior product compared to store-bought versions. This recipe uses a simple marinade to infuse the beef with a smoky, savory flavor, and the low-temperature drying process ensures the jerky remains chewy and tender. Whether you prefer it spicy, sweet, or somewhere in between, this customizable beef jerky recipe is sure to satisfy your cravings.

Ingredients:

  • 2 lbs beef (such as flank steak, eye of round, or top round), thinly sliced against the grain
  • 1/2 cup soy sauce
  • 1/4 cup Worcestershire sauce
  • 2 tablespoons brown sugar
  • 1 tablespoon smoked paprika
  • 1 teaspoon garlic powder
  • 1 teaspoon onion powder
  • 1 teaspoon black pepper
  • 1/2 teaspoon cayenne pepper (optional, for heat)

Instructions:

  1. Prepare the Beef:
    • Freeze the beef for about 1-2 hours to make slicing easier. Using a sharp knife, slice the beef into thin strips, about 1/8 to 1/4 inch thick, cutting against the grain for tender jerky.
  2. Make the Marinade:
    • In a large bowl, combine the soy sauce, Worcestershire sauce, brown sugar, smoked paprika, garlic powder, onion powder, black pepper, and cayenne pepper (if using). Mix well to dissolve the sugar.
  3. Marinate the Beef:
    • Add the beef slices to the marinade, ensuring they are fully submerged. Cover and refrigerate for at least 4 hours, preferably overnight, to allow the flavors to penetrate the meat.
  4. Prepare for Drying:
    • Preheat your oven to 170°F (75°C) or use a food dehydrator according to the manufacturer’s instructions.
    • If using an oven, line baking sheets with foil and place wire racks on top. Arrange the marinated beef strips on the racks in a single layer, leaving space between each piece for air circulation.
  5. Dry the Jerky:
    • Place the beef in the oven or dehydrator. Dry at 170°F (75°C) for 4-6 hours, or until the jerky is dry but still slightly pliable when bent. The exact drying time may vary depending on the thickness of the slices and humidity levels.
  6. Store:
    • Once dried, allow the jerky to cool completely before storing it in airtight containers or resealable bags. Properly dried jerky can last up to 2 weeks at room temperature and longer if refrigerated.

Enjoy your homemade beef jerky as a delicious and portable snack that’s perfect for any occasion!

Teriyaki Glazed Chicken and Broccoli Bowl

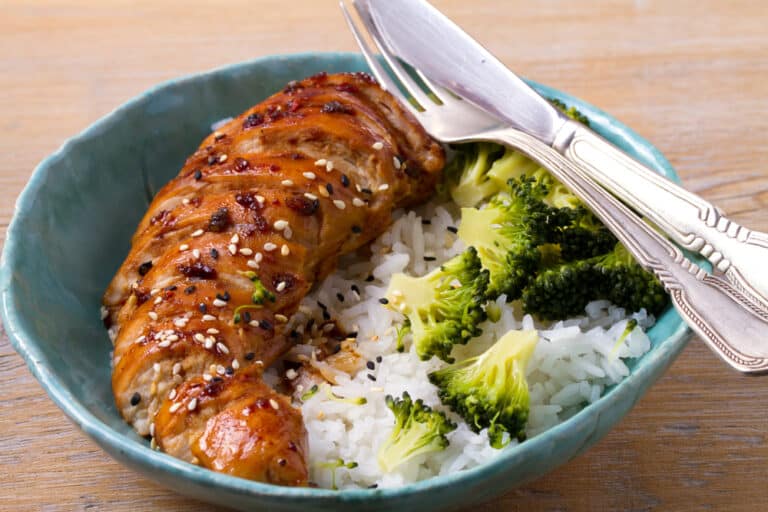
Teriyaki Glazed Chicken and Broccoli Bowl is a delicious and wholesome meal that combines tender chicken pieces with crisp broccoli, all coated in a rich, savory teriyaki glaze. This dish is a perfect balance of flavors and textures, with juicy chicken, crunchy vegetables, and a sweet and tangy sauce that is sure to satisfy your taste buds. Served over a bed of fluffy rice, this bowl is not only easy to prepare but also makes for a quick and nutritious weeknight dinner. The homemade teriyaki sauce adds a depth of flavor that elevates the entire dish, making it a favorite for both kids and adults alike.

Ingredients:

  • For the Teriyaki Sauce:
    • 1/4 cup soy sauce
    • 1/4 cup mirin (Japanese sweet rice wine)
    • 2 tablespoons honey or brown sugar
    • 1 tablespoon rice vinegar
    • 2 cloves garlic, minced
    • 1 teaspoon grated ginger
    • 1 tablespoon cornstarch mixed with 2 tablespoons water (slurry)
  • For the Chicken and Broccoli Bowl:
    • 1 lb boneless, skinless chicken breast or thighs, cut into bite-sized pieces
    • 2 tablespoons vegetable oil
    • 3 cups broccoli florets
    • 1 red bell pepper, sliced
    • 2 cups cooked white or brown rice
    • Salt and pepper to taste
    • Sesame seeds (for garnish)
    • Sliced green onions (for garnish)

Instructions:

  1. Make the Teriyaki Sauce:
    • In a small saucepan, combine the soy sauce, mirin, honey (or brown sugar), rice vinegar, minced garlic, and grated ginger.
    • Bring the mixture to a simmer over medium heat. Stir in the cornstarch slurry and cook until the sauce thickens, about 2-3 minutes. Remove from heat and set aside.
  2. Cook the Chicken:
    • Heat 1 tablespoon of vegetable oil in a large skillet or wok over medium-high heat.
    • Add the chicken pieces and season with salt and pepper. Cook until browned and cooked through, about 5-7 minutes. Remove the chicken from the skillet and set aside.
  3. Cook the Vegetables:
    • In the same skillet, add the remaining 1 tablespoon of vegetable oil.
    • Add the broccoli florets and sliced red bell pepper. Stir-fry for about 4-5 minutes until the vegetables are tender-crisp.
  4. Combine Chicken and Sauce:
    • Return the cooked chicken to the skillet with the vegetables.
    • Pour the teriyaki sauce over the chicken and vegetables. Stir well to coat everything evenly with the sauce.
    • Cook for an additional 2-3 minutes until everything is heated through.
  5. Assemble the Bowls:
    • Divide the cooked rice among four bowls.
    • Top each bowl with the teriyaki chicken and broccoli mixture.
    • Garnish with sesame seeds and sliced green onions.

Enjoy your Teriyaki Glazed Chicken and Broccoli Bowl, a flavorful and healthy meal that’s perfect for any occasion!