Home Blog Page 4

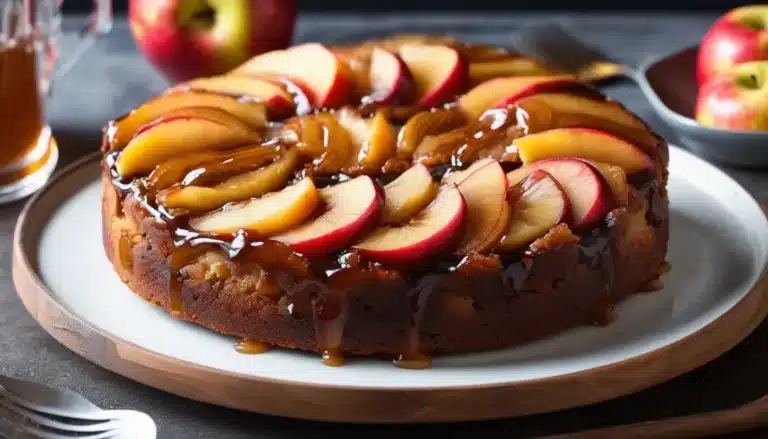
MAPPLE APPLE UPSIDE-DOWN CAKE

Maple Apple Upside-Down Cake is a delicious twist on the classic upside-down cake, combining the rich flavors of caramelized apples and maple syrup. The tender, buttery cake perfectly complements the sweetness of the apples, creating a dessert that’s both comforting and elegant. This cake is ideal for fall when apples are in season, but it’s a lovely treat any time of year. Serve it warm with a dollop of whipped cream or a scoop of vanilla ice cream for a truly indulgent dessert.

Ingredients:

For the apple topping:

  • 2 large apples (Granny Smith, Honeycrisp, or your favorite baking apple), peeled, cored, and sliced
  • ¼ cup unsalted butter
  • ½ cup pure maple syrup
  • ¼ cup brown sugar, packed
  • 1 teaspoon ground cinnamon
  • A pinch of salt

For the cake:

  • 1½ cups all-purpose flour
  • 1½ teaspoons baking powder
  • ¼ teaspoon baking soda
  • ½ teaspoon salt
  • ½ teaspoon ground cinnamon
  • ½ cup unsalted butter, softened
  • ¾ cup granulated sugar
  • 2 large eggs
  • 1 teaspoon vanilla extract
  • ½ cup buttermilk (or milk with 1 teaspoon of lemon juice)

Instructions:

  1. Preheat the oven:
    • Preheat your oven to 350°F (175°C). Grease a 9-inch round cake pan and set it aside.
  2. Prepare the apple topping:
    • In a medium saucepan over medium heat, melt the butter, then add the maple syrup, brown sugar, cinnamon, and a pinch of salt. Stir and cook for about 2-3 minutes until the mixture thickens slightly.
    • Pour the maple mixture into the prepared cake pan, spreading it evenly across the bottom. Arrange the apple slices in a circular pattern on top of the maple mixture, overlapping them slightly if needed.
  3. Make the cake batter:
    • In a medium bowl, whisk together the flour, baking powder, baking soda, salt, and cinnamon.
    • In a separate large bowl, cream together the softened butter and sugar using an electric mixer until light and fluffy, about 3-4 minutes.
    • Add the eggs one at a time, beating well after each addition, then mix in the vanilla extract.
    • Gradually add the dry ingredients to the wet ingredients, alternating with the buttermilk, beginning and ending with the dry ingredients. Mix until just combined, being careful not to overmix.
  4. Assemble and bake the cake:
    • Carefully spread the cake batter over the apples and maple mixture, smoothing the top with a spatula.
    • Bake in the preheated oven for 35-40 minutes, or until a toothpick inserted into the center comes out clean and the cake is golden brown.
  5. Cool and invert the cake:
    • Let the cake cool in the pan for about 10-15 minutes. Run a knife around the edges of the pan to loosen the cake, then place a serving plate upside down over the pan. In one quick motion, flip the pan and plate over to invert the cake. Gently lift off the pan to reveal the caramelized apples on top.
  6. Serve:
    • Serve the cake warm, topped with whipped cream, ice cream, or an extra drizzle of maple syrup if desired.

Enjoy this Maple Apple Upside-Down Cake for its beautifully caramelized apples and rich, buttery flavor—a perfect dessert for any occasion!


AMARETTI COOKIES

Amaretti Cookies are classic Italian almond cookies that are crisp on the outside with a chewy, soft interior. Made with just a few simple ingredients, including almond flour and egg whites, these cookies are gluten-free and packed with a delightful almond flavor. Whether you enjoy them with a cup of espresso, as a holiday treat, or simply as a light dessert, Amaretti Cookies are sure to impress with their unique texture and sweet, nutty taste.

Ingredients:

  • 2 cups almond flour (blanched almond meal)
  • 1 cup granulated sugar
  • 2 large egg whites, at room temperature
  • 1 teaspoon almond extract
  • ½ teaspoon vanilla extract (optional)
  • A pinch of salt
  • Powdered sugar (for rolling, optional)

Instructions:

  1. Preheat the oven:
    • Preheat your oven to 325°F (165°C) and line a baking sheet with parchment paper or a silicone baking mat.
  2. Whip the egg whites:
    • In a large bowl, beat the egg whites with a pinch of salt using a hand mixer or stand mixer on medium-high speed. Whip the egg whites until they form soft peaks, about 2-3 minutes.
  3. Make the dough:
    • Gently fold in the granulated sugar, almond flour, almond extract, and vanilla extract (if using) into the egg whites. Stir until the mixture forms a sticky dough.
  4. Shape the cookies:
    • Using a tablespoon or small cookie scoop, scoop portions of the dough and roll them into balls. If desired, roll each ball in powdered sugar to coat them. Place the dough balls on the prepared baking sheet, leaving about 2 inches of space between them.
  5. Bake the cookies:
    • Bake in the preheated oven for 20-25 minutes, or until the cookies are golden on the edges but still soft in the center. The cookies should develop cracks on the surface, which is characteristic of Amaretti Cookies.
  6. Cool and serve:
    • Allow the cookies to cool on the baking sheet for 5 minutes before transferring them to a wire rack to cool completely.

Enjoy these delicious Amaretti Cookies with your favorite beverage, or package them up for a lovely homemade gift!

CREAMY CHICKEN PENNE

Creamy Chicken Penne is a comforting, flavorful dish that’s perfect for weeknight dinners or when you’re craving a rich, creamy pasta. Tender pieces of chicken are tossed with penne pasta and coated in a velvety garlic Parmesan cream sauce. It’s an indulgent meal that comes together quickly, making it both satisfying and convenient. You can also customize it by adding vegetables like spinach, mushrooms, or broccoli for extra nutrition.

Ingredients:

  • 12 oz penne pasta
  • 2 tablespoons olive oil
  • 1 pound boneless, skinless chicken breasts, cut into bite-sized pieces
  • Salt and pepper, to taste
  • 3 garlic cloves, minced
  • 1 teaspoon Italian seasoning
  • ½ cup chicken broth
  • 1½ cups heavy cream
  • 1 cup grated Parmesan cheese
  • ½ teaspoon crushed red pepper flakes (optional, for a bit of heat)
  • Fresh parsley, chopped (for garnish)

Instructions:

  1. Cook the pasta:
    • Bring a large pot of salted water to a boil. Cook the penne pasta according to the package instructions until al dente. Drain the pasta, reserving about ½ cup of pasta water, and set it aside.
  2. Cook the chicken:
    • While the pasta cooks, heat the olive oil in a large skillet over medium-high heat. Season the chicken pieces with salt, pepper, and Italian seasoning.
    • Add the chicken to the skillet and cook for about 6-8 minutes, until fully cooked and browned on all sides. Remove the chicken from the skillet and set it aside.
  3. Make the creamy sauce:
    • In the same skillet, add the minced garlic and cook for about 30 seconds until fragrant. Pour in the chicken broth and scrape up any browned bits from the bottom of the skillet.
    • Lower the heat to medium and stir in the heavy cream. Let it simmer for 2-3 minutes to slightly thicken.
    • Add the grated Parmesan cheese and stir until it melts into the sauce. If the sauce is too thick, you can add a bit of the reserved pasta water to loosen it up.
  4. Combine the pasta and chicken:
    • Return the cooked chicken to the skillet, along with the drained pasta. Toss everything together until the pasta and chicken are fully coated in the creamy sauce. If using, sprinkle in the crushed red pepper flakes for a little heat.
  5. Garnish and serve:
    • Remove the skillet from heat and garnish with fresh parsley. Serve the Creamy Chicken Penne hot with extra Parmesan on top if desired.

Enjoy this rich, delicious Creamy Chicken Penne for a comforting meal that’s sure to be a family favorite!

CASHEW MILK

0

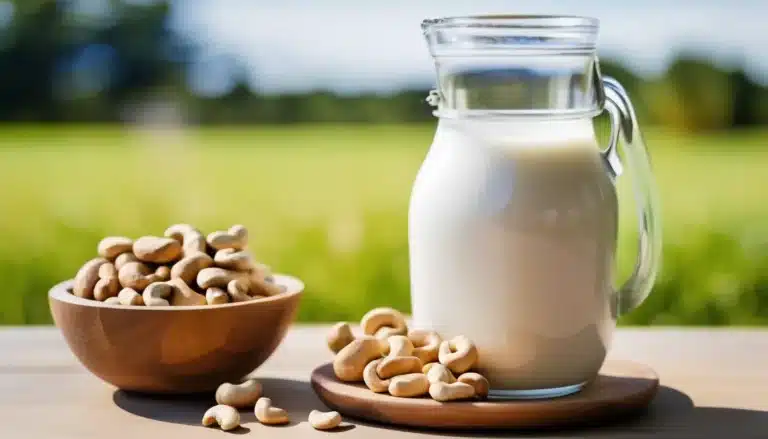
Cashew milk is a smooth, creamy, and delicious dairy-free alternative that’s perfect for anyone looking for a plant-based milk option. It’s naturally slightly sweet, making it great for drinking on its own, adding to coffee, smoothies, or using in recipes. Unlike some other nut milks, cashew milk doesn’t need to be strained, which means you get a rich and silky texture with less waste. Plus, it’s easy to customize the sweetness and flavor to suit your taste.

Ingredients:

  • 1 cup raw cashews (soaked overnight or for at least 4 hours)
  • 4 cups water (plus more for soaking)
  • 1-2 tablespoons maple syrup, honey, or your favorite sweetener (optional)
  • 1 teaspoon vanilla extract (optional)
  • A pinch of salt

Instructions:

  1. Soak the cashews:
    • Place the raw cashews in a bowl and cover them with water. Let them soak for at least 4 hours or overnight, until they’re soft. After soaking, drain and rinse the cashews thoroughly.
  2. Blend the cashews:
    • Add the soaked cashews and 4 cups of fresh water to a high-speed blender. Blend on high for about 1-2 minutes, or until the mixture is completely smooth and creamy.
  3. Optional flavorings:
    • If you like, add the maple syrup (or sweetener of choice), vanilla extract, and a pinch of salt. Blend again to combine.
  4. Store the cashew milk:
    • Pour the cashew milk into an airtight container or bottle and refrigerate. Since there’s no need to strain, the cashew milk will have a wonderfully rich texture. It should last for up to 4-5 days in the refrigerator. Shake well before each use, as natural separation may occur.

Notes:

  • You can adjust the creaminess of the milk by using more or less water. For a thicker consistency, use 3 cups of water instead of 4.
  • Feel free to experiment with additional flavorings like cinnamon, nutmeg, or cocoa powder for a twist on classic cashew milk.

Enjoy this smooth, rich, and creamy Cashew Milk as a nutritious and delicious plant-based alternative to dairy milk!

TOFFEE BARS

0

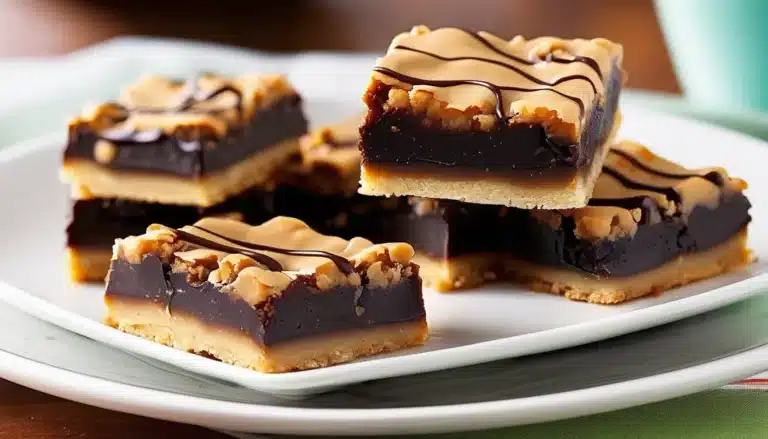
Toffee Bars are a sweet, buttery, and crunchy treat with layers of rich toffee flavor and a chocolate topping. These bars are incredibly simple to make and combine the satisfying crunch of a toffee base with a smooth chocolate layer, all topped off with nuts for extra texture. Perfect for holiday gatherings, afternoon snacks, or as a crowd-pleasing dessert, these bars pack all the indulgent flavor of toffee in a handheld treat.

Ingredients:

  • 1 cup unsalted butter, softened
  • 1 cup light brown sugar, packed
  • 1 large egg yolk
  • 1 teaspoon vanilla extract
  • 2 cups all-purpose flour
  • ¼ teaspoon salt
  • 1 cup semi-sweet chocolate chips
  • ½ cup chopped pecans, almonds, or walnuts (optional)

Instructions:

  1. Preheat the oven:
    • Preheat your oven to 350°F (175°C) and line a 9×13-inch baking dish with parchment paper or lightly grease it.
  2. Make the toffee base:
    • In a large bowl, cream together the softened butter and brown sugar until light and fluffy, about 2-3 minutes.
    • Add the egg yolk and vanilla extract, mixing until fully combined.
    • Gradually add the flour and salt, mixing until a dough forms. The dough will be thick and slightly crumbly but should come together when pressed.
  3. Press and bake the base:
    • Press the dough evenly into the prepared baking dish, making sure it’s spread in an even layer.
    • Bake in the preheated oven for 15-20 minutes, or until the edges are golden brown and the base is set. Remove from the oven.
  4. Add the chocolate layer:
    • While the base is still hot, sprinkle the chocolate chips evenly over the top. Let them sit for 2-3 minutes to soften, then use a spatula to spread the melted chocolate into a smooth layer.
  5. Add the nuts (optional):
    • If you’re using chopped nuts, sprinkle them over the melted chocolate while it’s still warm, gently pressing them into the chocolate.
  6. Cool and cut:
    • Allow the toffee bars to cool completely at room temperature, or speed up the process by placing the pan in the refrigerator for 30 minutes. Once the bars are fully set, lift them out of the pan using the parchment paper or cut them directly in the dish into squares or rectangles.

Enjoy these delicious, buttery Toffee Bars with a rich chocolate topping for a perfect balance of crunch and sweetness!

CRAB CAKE SLIDERS

Crab Cake Sliders are a fun, flavorful way to enjoy the rich taste of crab cakes in bite-sized form. These mini sandwiches feature crispy, golden crab cakes nestled in soft slider buns, paired with a tangy remoulade sauce or your favorite condiments. They’re perfect for parties, gatherings, or even as a delicious dinner option. Made with fresh lump crab meat and simple seasonings, these sliders are a gourmet treat that’s easy to assemble and serve.

Ingredients:

For the crab cakes:

  • 1 pound lump crab meat, picked over for shells
  • ½ cup breadcrumbs (use gluten-free breadcrumbs if needed)
  • 1 large egg
  • ¼ cup mayonnaise
  • 1 tablespoon Dijon mustard
  • 1 tablespoon lemon juice
  • 1 teaspoon Worcestershire sauce
  • 1 teaspoon Old Bay seasoning (or your favorite seafood seasoning)
  • 1 tablespoon fresh parsley, chopped
  • 1 tablespoon chives, chopped (optional)
  • Salt and pepper, to taste
  • 2 tablespoons vegetable oil (for frying)

For the sliders:

  • 8 slider buns or small rolls
  • Lettuce leaves
  • Tomato slices
  • Pickles (optional)

For the remoulade sauce (optional):

  • ½ cup mayonnaise
  • 1 tablespoon Dijon mustard
  • 1 tablespoon lemon juice
  • 1 teaspoon capers, chopped
  • 1 teaspoon hot sauce (optional, for heat)
  • 1 teaspoon smoked paprika
  • Salt and pepper, to taste

Instructions:

  1. Prepare the crab cake mixture:
    • In a large bowl, gently mix the lump crab meat with the breadcrumbs, egg, mayonnaise, Dijon mustard, lemon juice, Worcestershire sauce, Old Bay seasoning, parsley, chives (if using), salt, and pepper. Be careful not to overmix, as you want to keep the crab meat in chunks.
  2. Shape the crab cakes:
    • Using your hands, form the crab mixture into 8 small patties, about 2½ inches wide and ½ inch thick. Place them on a baking sheet and refrigerate for at least 30 minutes to help them hold their shape.
  3. Cook the crab cakes:
    • Heat the vegetable oil in a large skillet over medium heat. Once hot, gently add the crab cakes and cook for 3-4 minutes on each side, or until golden brown and crispy. Be careful when flipping to prevent them from falling apart.
    • Transfer the cooked crab cakes to a paper towel-lined plate to drain any excess oil.
  4. Make the remoulade sauce (optional):
    • In a small bowl, whisk together the mayonnaise, Dijon mustard, lemon juice, capers, hot sauce (if using), smoked paprika, salt, and pepper. Adjust seasoning to taste.
  5. Assemble the sliders:
    • Toast the slider buns lightly if desired. Spread a little remoulade sauce (or mayonnaise) on the bottom half of each bun. Add a lettuce leaf, a crab cake, a tomato slice, and pickles (if using). Top with the other half of the bun.
  6. Serve:
    • Serve these delicious Crab Cake Sliders immediately, with extra remoulade sauce on the side for dipping, or alongside fries or a fresh salad.

Enjoy these flavorful and elegant Crab Cake Sliders as a party appetizer, lunch, or dinner!

BROILED LOBSTER TAILS

Broiled Lobster Tails are an elegant and decadent dish that’s surprisingly easy to make at home. The broiling process gives the lobster meat a tender and succulent texture while enhancing its natural sweetness. A simple garlic butter sauce elevates the flavor, making this dish perfect for special occasions or whenever you want to treat yourself to a luxurious seafood meal. With just a few ingredients, you can have restaurant-quality lobster tails on your table in minutes.

Ingredients:

  • 4 lobster tails (4-6 ounces each)
  • ¼ cup unsalted butter, melted
  • 2 garlic cloves, minced
  • 1 tablespoon lemon juice
  • 1 teaspoon paprika
  • Salt and freshly ground black pepper, to taste
  • Fresh parsley, chopped (for garnish)
  • Lemon wedges, for serving

Instructions:

  1. Preheat the broiler: Set your oven to broil and place the oven rack in the top third of the oven (about 6 inches from the broiler). Line a baking sheet with foil or parchment paper for easy cleanup.
  2. Prepare the lobster tails:
    • Using kitchen shears, carefully cut down the top shell of each lobster tail, starting from the wide end and stopping just before the tail fin. Gently pry open the shell with your fingers and pull the lobster meat out, laying it on top of the shell while keeping it attached at the tail end.
    • Place the prepared lobster tails on the baking sheet.
  3. Make the garlic butter sauce:
    • In a small bowl, whisk together the melted butter, minced garlic, lemon juice, paprika, salt, and pepper.
  4. Brush the lobster tails:
    • Generously brush the lobster meat with the garlic butter sauce, ensuring the meat is fully coated.
  5. Broil the lobster tails:
    • Place the baking sheet under the broiler and cook for 6-10 minutes, depending on the size of your lobster tails. The lobster meat should be opaque and slightly browned on top, with an internal temperature of 140-145°F (60-63°C). Be sure to keep an eye on them to prevent overcooking.
  6. Garnish and serve:
    • Remove the lobster tails from the oven and brush them with any remaining garlic butter. Garnish with freshly chopped parsley and serve with lemon wedges on the side.

Enjoy your tender, buttery Broiled Lobster Tails with a side of steamed vegetables, rice, or a fresh salad for an indulgent meal that’s perfect for any occasion!

BLUEBERRY BUTTERMILK SCONES

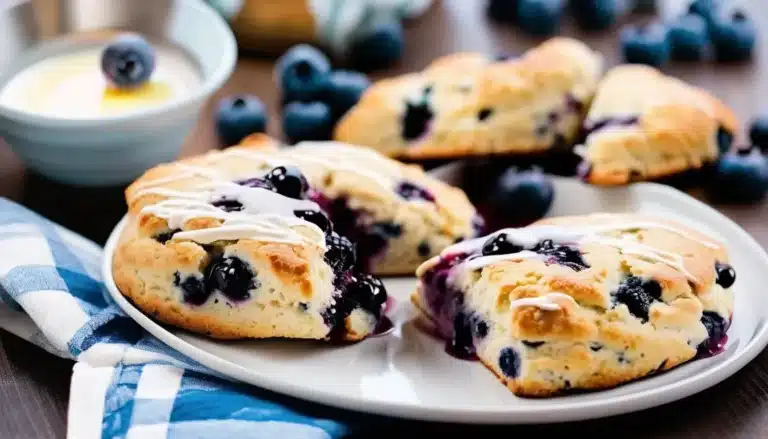
These Blueberry Buttermilk Scones are tender, flaky, and bursting with juicy blueberries. The tanginess of buttermilk adds a delightful contrast to the sweetness of the berries, while keeping the scones moist and light. Perfect for breakfast, brunch, or a snack with your favorite cup of tea or coffee, these scones are easy to make and come together quickly. Whether you’re baking for a special occasion or just want a fresh homemade treat, these blueberry scones are sure to impress.

Ingredients:

  • 2 cups all-purpose flour
  • ¼ cup granulated sugar
  • 1 tablespoon baking powder
  • ½ teaspoon baking soda
  • ½ teaspoon salt
  • ½ cup (1 stick) cold unsalted butter, cut into small cubes
  • ¾ cup buttermilk (plus a little extra for brushing)
  • 1 large egg
  • 1 teaspoon vanilla extract
  • 1½ cups fresh or frozen blueberries
  • 1 tablespoon lemon zest (optional, for extra flavor)
  • Coarse sugar for sprinkling (optional)

Instructions:

  1. Preheat the oven to 400°F (200°C). Line a baking sheet with parchment paper or a silicone baking mat.
  2. Mix the dry ingredients: In a large bowl, whisk together the flour, sugar, baking powder, baking soda, and salt.
  3. Cut in the butter: Add the cold butter cubes to the flour mixture. Using a pastry cutter or your fingers, cut the butter into the flour until the mixture resembles coarse crumbs with some pea-sized butter pieces remaining.
  4. Prepare the wet ingredients: In a separate bowl, whisk together the buttermilk, egg, and vanilla extract. Pour the wet ingredients into the dry ingredients and gently mix until just combined. Be careful not to overmix the dough.
  5. Fold in the blueberries: Gently fold the blueberries (and lemon zest, if using) into the dough, being careful not to crush the berries. The dough will be somewhat sticky, but that’s okay.
  6. Shape the scones: Turn the dough out onto a floured surface. Lightly knead the dough a few times to bring it together. Pat the dough into a circle or rectangle about 1-inch thick. Cut the dough into 8 triangles or squares and place them on the prepared baking sheet.
  7. Brush and sprinkle: Brush the tops of the scones with a little buttermilk and sprinkle with coarse sugar for extra crunch, if desired.
  8. Bake the scones: Bake in the preheated oven for 15-18 minutes, or until the scones are golden brown on top and a toothpick inserted into the center comes out clean.
  9. Cool and serve: Allow the scones to cool for a few minutes on the baking sheet before transferring them to a wire rack. Serve warm or at room temperature with butter, clotted cream, or jam.

Enjoy these Blueberry Buttermilk Scones fresh from the oven, with their perfect combination of sweet blueberries and buttery, tender crumb!

STRAWBERRY CHEESECAKE CUPCAKES

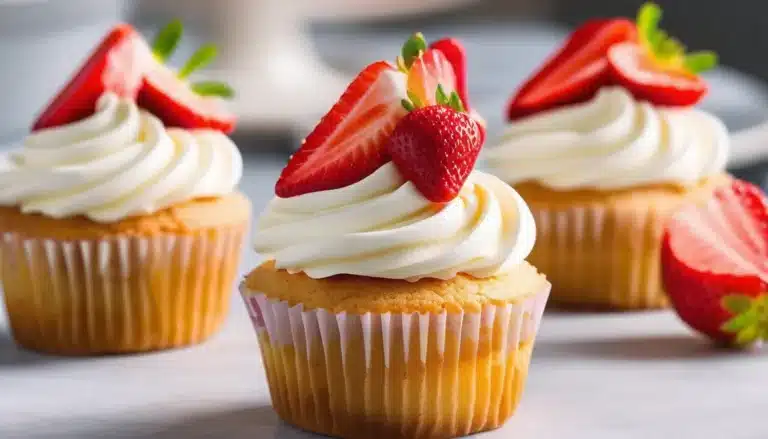
Strawberry Cheesecake Cupcakes combine the rich, creamy goodness of classic cheesecake with the convenience and charm of a cupcake. Each bite features a graham cracker crust, a smooth cheesecake filling, and a burst of fresh strawberry flavor, topped with a strawberry sauce or a whole berry for added sweetness. These mini cheesecakes are perfect for parties, special occasions, or as an indulgent treat, offering all the flavors of a traditional cheesecake in a portable, single-serving size.

Ingredients:

For the crust:

  • 1 cup graham cracker crumbs (use gluten-free graham crackers if needed)
  • 2 tablespoons granulated sugar
  • 4 tablespoons unsalted butter, melted

For the cheesecake filling:

  • 16 oz (2 packages) cream cheese, softened
  • ½ cup granulated sugar
  • 2 large eggs
  • 1 teaspoon vanilla extract
  • ¼ cup sour cream
  • 1 tablespoon lemon juice
  • 1 cup fresh strawberries, chopped into small pieces

For the strawberry topping:

  • 1 cup fresh strawberries, chopped
  • 2 tablespoons sugar
  • 1 tablespoon lemon juice
  • Optional: whole strawberries for garnish

Instructions:

  1. Preheat the oven to 325°F (163°C) and line a muffin tin with cupcake liners.
  2. Prepare the crust:
    • In a small bowl, combine the graham cracker crumbs, sugar, and melted butter. Stir until the crumbs are evenly coated and the mixture resembles wet sand.
    • Spoon about 1 tablespoon of the crust mixture into each cupcake liner and press down firmly to create an even layer. You can use the back of a spoon or a small cup to flatten the crust.
    • Bake the crusts for 5 minutes, then remove from the oven and set aside to cool.
  3. Make the cheesecake filling:
    • In a large bowl, beat the softened cream cheese and sugar together using an electric mixer until smooth and creamy.
    • Add the eggs, one at a time, beating on low speed after each addition. Mix in the vanilla extract, sour cream, and lemon juice until fully combined.
    • Gently fold in the chopped strawberries.
  4. Fill the cupcake liners:
    • Spoon the cheesecake filling over the prepared crusts, filling each liner about ¾ full. Smooth the tops with the back of a spoon.
  5. Bake the cupcakes:
    • Bake for 18-20 minutes, or until the centers are set and only slightly jiggly.
    • Remove from the oven and let the cupcakes cool in the tin for 10 minutes, then transfer them to a wire rack to cool completely. Once cool, refrigerate the cupcakes for at least 2 hours (or overnight) to set.
  6. Prepare the strawberry topping:
    • While the cupcakes are chilling, make the strawberry topping. In a small saucepan, combine the chopped strawberries, sugar, and lemon juice. Cook over medium heat for about 5-7 minutes, stirring occasionally, until the strawberries break down and the mixture thickens slightly.
    • Let the topping cool completely before spooning it over the chilled cheesecake cupcakes.
  7. Serve:
    • Once the cupcakes are fully chilled, top each one with a spoonful of strawberry topping or garnish with a whole strawberry for a beautiful finish.

Enjoy these delicious Strawberry Cheesecake Cupcakes as a perfectly portioned dessert that’s rich, creamy, and bursting with fresh strawberry flavor!

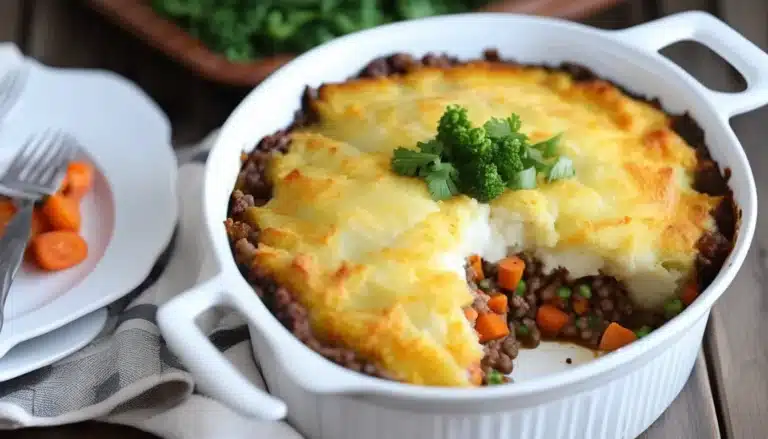
GLUTEN FREE SHEPHERD’S PIE

This Gluten-Free Shepherd’s Pie is a comforting and hearty dish that features a savory ground meat filling topped with creamy mashed potatoes. Traditional shepherd’s pie often uses flour to thicken the gravy, but this gluten-free version relies on naturally gluten-free ingredients like cornstarch to achieve a rich, thick sauce. Packed with vegetables and flavor, this dish is perfect for those following a gluten-free diet, while still delivering all the classic warmth of a traditional shepherd’s pie.

Ingredients:

For the mashed potato topping:

  • 2 pounds potatoes (Yukon Gold or Russet), peeled and chopped
  • ¼ cup butter (or dairy-free alternative)
  • ⅓ cup milk (or dairy-free milk)
  • Salt and pepper, to taste

For the filling:

  • 1 tablespoon olive oil
  • 1 small onion, diced
  • 2 garlic cloves, minced
  • 1 large carrot, peeled and diced
  • 1 cup frozen peas
  • 1½ pounds ground beef or lamb (or a mixture of both)
  • 1 tablespoon tomato paste
  • 1 teaspoon Worcestershire sauce (ensure it’s gluten-free)
  • 1 teaspoon dried thyme
  • 1 teaspoon dried rosemary
  • ½ teaspoon paprika
  • Salt and pepper, to taste
  • 1 cup beef or vegetable broth (gluten-free)
  • 1 tablespoon cornstarch (for thickening)

Instructions:

  1. Prepare the mashed potatoes:
    • In a large pot, add the chopped potatoes and cover with water. Bring to a boil and cook until tender, about 12-15 minutes.
    • Drain the potatoes and return them to the pot. Add butter, milk, salt, and pepper. Mash until smooth and creamy. Set aside.
  2. Cook the filling:
    • In a large skillet, heat the olive oil over medium heat. Add the diced onion, carrot, and garlic. Sauté for about 5 minutes, until the vegetables are softened.
    • Add the ground beef or lamb to the skillet and cook, breaking it up with a spoon, until browned and cooked through (about 7-8 minutes). Drain any excess fat if necessary.
  3. Add seasoning and thicken the filling:
    • Stir in the tomato paste, Worcestershire sauce, thyme, rosemary, paprika, salt, and pepper. Cook for another minute to blend the flavors.
    • Pour in the broth and bring the mixture to a simmer. In a small bowl, dissolve the cornstarch in 2 tablespoons of cold water, then add it to the skillet. Stir well and cook for another 2-3 minutes, until the sauce thickens.
    • Add the frozen peas and cook for an additional 2 minutes.
  4. Assemble the shepherd’s pie:
    • Preheat the oven to 400°F (200°C).
    • Spread the meat and vegetable filling evenly in a large baking dish. Spoon the mashed potatoes on top, spreading them out to completely cover the filling. Use a fork to create decorative ridges on the surface of the potatoes.
  5. Bake the pie:
    • Place the dish in the oven and bake for 20-25 minutes, or until the top is golden brown and the filling is bubbling.
  6. Serve:
    • Remove from the oven and let it rest for 5 minutes before serving.

Enjoy this Gluten-Free Shepherd’s Pie as a comforting and hearty meal, perfect for chilly evenings or a family gathering!