Home Blog Page 10

Blood Orange Mimosas

0

Blood Orange Mimosas are a vibrant twist on the classic brunch cocktail, offering a striking blend of sweet, tangy, and slightly bitter flavors. The deep red hue of the blood oranges adds a festive and elegant touch, making this drink perfect for celebrations or a leisurely weekend brunch. The combination of freshly squeezed blood orange juice and sparkling wine creates a refreshing and sophisticated beverage that’s as pleasing to the eye as it is to the palate. Whether you’re hosting a gathering or simply treating yourself, these mimosas are sure to impress.

Ingredients:

  • 1 cup freshly squeezed blood orange juice (about 4-5 blood oranges)
  • 1 bottle of chilled sparkling wine or champagne
  • Blood orange slices, for garnish (optional)
  • Fresh mint leaves, for garnish (optional)

Instructions:

  1. Juice the Blood Oranges: Cut the blood oranges in half and juice them until you have about 1 cup of juice. Strain the juice through a fine-mesh sieve to remove any pulp or seeds if desired.
  2. Prepare the Glasses: Pour about 2-3 tablespoons of blood orange juice into each champagne flute.
  3. Add the Sparkling Wine: Slowly top off each glass with chilled sparkling wine or champagne. Pour gently to preserve the bubbles and prevent overflow.
  4. Garnish and Serve: Garnish each glass with a slice of blood orange and a sprig of fresh mint, if desired. Serve immediately and enjoy the beautiful color and refreshing taste of your Blood Orange Mimosas.

These mimosas are the perfect way to add a splash of color and flavor to your brunch, offering a unique and delightful twist on a classic favorite.

Chicken Biscuit Stew

0

Chicken Biscuit Stew is the ultimate comfort food, combining tender pieces of chicken and hearty vegetables in a creamy, savory sauce, all topped with fluffy, golden biscuits. This dish is perfect for a cozy family dinner or a comforting meal on a chilly evening. The stew base is rich and flavorful, filled with carrots, celery, peas, and potatoes, while the biscuits add a delightful, buttery contrast that makes each bite satisfying. Easy to prepare and loved by all ages, this dish brings the warmth of a classic chicken pot pie with the convenience of a one-pan meal.

Ingredients:

  • 1 lb boneless, skinless chicken breasts, cut into bite-sized pieces
  • 1 cup carrots, sliced
  • 1 cup celery, sliced
  • 1 cup frozen peas
  • 1 cup potatoes, diced
  • 1 onion, chopped
  • 3 cloves garlic, minced
  • 4 cups chicken broth
  • 1 cup heavy cream or milk
  • 2 tbsp all-purpose flour
  • 2 tbsp butter
  • 1 tsp dried thyme
  • 1 tsp dried parsley
  • Salt and pepper to taste
  • 1 can refrigerated biscuit dough

Instructions:

  1. Prepare the Stew: In a large pot or Dutch oven, melt the butter over medium heat. Add the chopped onion, garlic, carrots, celery, and potatoes. Sauté until the vegetables begin to soften, about 5 minutes.
  2. Cook the Chicken: Add the chicken pieces to the pot and cook until browned on all sides, about 5-7 minutes.
  3. Create the Sauce: Sprinkle the flour over the chicken and vegetables, stirring to coat. Cook for 1-2 minutes to eliminate the raw flour taste. Slowly pour in the chicken broth, stirring constantly to avoid lumps. Add the thyme, parsley, salt, and pepper. Bring the mixture to a simmer and cook for 10-15 minutes, until the vegetables are tender and the stew has thickened.
  4. Add the Cream: Stir in the heavy cream or milk and frozen peas. Cook for an additional 5 minutes until the stew is creamy and heated through.
  5. Prepare the Biscuits: While the stew is simmering, preheat the oven according to the biscuit package instructions. Drop spoonfuls of the biscuit dough on top of the stew in the pot or transfer the stew to an oven-safe baking dish and then top with the biscuit dough.
  6. Bake: Place the pot or baking dish in the oven and bake according to the biscuit package instructions, usually 10-12 minutes, or until the biscuits are golden brown.
  7. Serve: Remove the stew from the oven and let it cool slightly before serving. Enjoy the comforting combination of rich stew and fluffy biscuits.

This Chicken Biscuit Stew is sure to become a favorite, offering a warm, hearty meal that’s as easy to make as it is delicious!

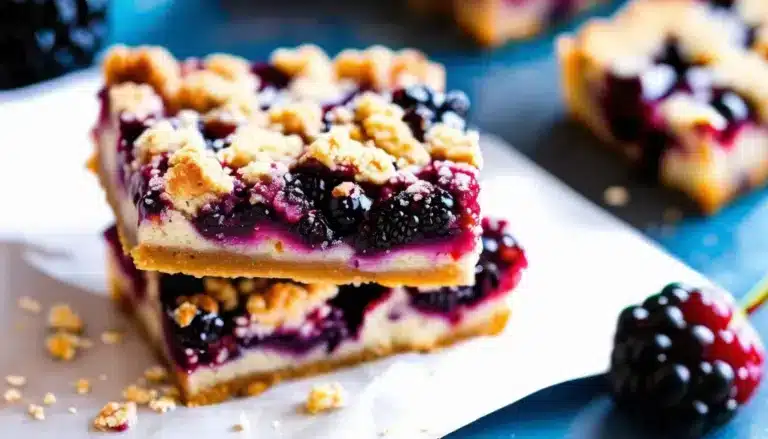
BLACKBERRY CRUMBLE BARS

Blackberry Crumble Bars are the perfect mix of a buttery shortbread base, a juicy blackberry filling, and a crunchy crumble topping. These bars are simple to make and are a delicious way to enjoy fresh or frozen blackberries. Perfect for dessert, picnics, or as a sweet snack, these bars are a delightful treat for any occasion!

Ingredients:

For the Crust and Crumble:

  • 1 1/2 cups all-purpose flour
  • 1/2 cup granulated sugar
  • 1/4 cup brown sugar, packed
  • 1/2 teaspoon baking powder
  • 1/4 teaspoon salt
  • 1/2 teaspoon ground cinnamon (optional)
  • 1/2 cup unsalted butter, cold and cubed
  • 1 large egg

For the Blackberry Filling:

  • 2 cups fresh or frozen blackberries
  • 1/4 cup granulated sugar
  • 1 tablespoon cornstarch
  • 1 tablespoon lemon juice
  • 1 teaspoon lemon zest (optional)

Instructions:

  1. Preheat the oven: Preheat your oven to 350°F (175°C). Grease and line an 8×8-inch baking pan with parchment paper, leaving an overhang for easy removal.
  2. Make the crust and crumble: In a large bowl, whisk together the flour, granulated sugar, brown sugar, baking powder, salt, and cinnamon (if using). Using a pastry cutter or your hands, cut in the cold butter until the mixture resembles coarse crumbs. Add the egg and stir until the dough starts to come together, but remains crumbly.
  3. Press the crust: Press about 2/3 of the crumb mixture firmly into the bottom of the prepared baking pan to form the crust. Set the remaining 1/3 of the mixture aside for the crumble topping.
  4. Prepare the blackberry filling: In a medium bowl, gently toss the blackberries with the sugar, cornstarch, lemon juice, and lemon zest (if using). Spread the blackberry mixture evenly over the crust in the pan.
  5. Add the crumble topping: Sprinkle the remaining crumble mixture over the blackberry layer, covering it evenly but leaving some of the blackberries exposed.
  6. Bake: Bake in the preheated oven for 35-40 minutes, or until the topping is golden brown and the blackberry filling is bubbling. Remove from the oven and let cool completely in the pan.
  7. Slice and serve: Once the bars are completely cooled, use the parchment overhang to lift them out of the pan. Slice into squares and serve.

These Blackberry Crumble Bars are buttery, fruity, and the perfect balance of sweet and tart. Enjoy them on their own or with a scoop of vanilla ice cream!

Chocolate Banana Smoothie

0

This Chocolate Banana Smoothie is a deliciously creamy treat that’s perfect for breakfast, a snack, or even dessert. Combining the natural sweetness of ripe bananas with the rich, deep flavor of cocoa, this smoothie is both indulgent and nourishing. Packed with fiber, potassium, and antioxidants, it’s a quick and easy way to satisfy your chocolate cravings while staying on track with your health goals. Whether you’re fueling up for the day or needing a post-workout pick-me-up, this smoothie is sure to hit the spot.

Ingredients:

  • 1 large ripe banana, frozen
  • 1 tbsp unsweetened cocoa powder
  • 1 scoop chocolate protein powder (optional)
  • 1 tbsp almond butter or peanut butter
  • 1/2 cup unsweetened almond milk (or any milk of choice)
  • 1/2 cup plain Greek yogurt
  • 1 tsp honey or maple syrup (optional, for added sweetness)
  • 1/2 tsp vanilla extract
  • A handful of ice cubes (optional, for a thicker consistency)

Instructions:

  1. Prepare the Ingredients: If your banana is not already frozen, slice it and place it in the freezer for at least 2 hours or until fully frozen.
  2. Blend Everything Together: In a blender, combine the frozen banana, cocoa powder, protein powder (if using), almond butter, almond milk, Greek yogurt, honey or maple syrup (if using), vanilla extract, and ice cubes.
  3. Blend Until Smooth: Blend on high until the mixture is smooth and creamy. If the smoothie is too thick, add a little more almond milk until you reach your desired consistency.
  4. Serve: Pour the smoothie into a glass and enjoy immediately. For an extra treat, top with a sprinkle of cocoa powder, chia seeds, or a few banana slices.

This Chocolate Banana Smoothie is a quick and satisfying way to indulge in the flavors of chocolate and banana while providing your body with essential nutrients.

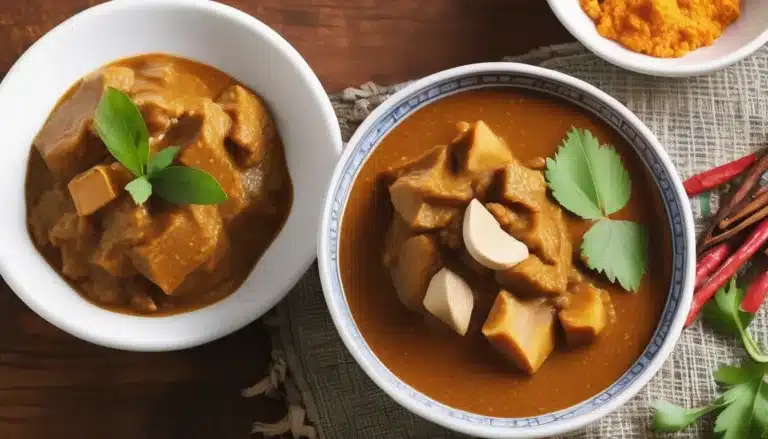
MASSAMAN CURRY PASTE

0

Massaman curry paste is the heart of the rich and aromatic Thai Massaman curry, known for its blend of Thai and Indian influences. This paste is a fragrant mix of spices, herbs, and seasonings like dried chilies, coriander, cumin, cinnamon, and cardamom, blended with fresh ingredients like lemongrass, garlic, and galangal. You can use this versatile paste to create delicious Massaman curries with beef, chicken, or vegetables.

Ingredients:

  • 6 dried red chilies (soaked in warm water for 10-15 minutes)
  • 1 tablespoon coriander seeds
  • 1 teaspoon cumin seeds
  • 1/4 teaspoon whole cloves
  • 1/2 teaspoon cardamom seeds (from 5-6 cardamom pods)
  • 1/4 teaspoon ground cinnamon
  • 1 teaspoon white peppercorns
  • 1 tablespoon shrimp paste (optional, for a more traditional taste)
  • 1 stalk lemongrass (white part only), finely chopped
  • 1 tablespoon galangal or ginger, finely chopped
  • 4 cloves garlic, chopped
  • 3 shallots, chopped
  • 1 tablespoon tamarind paste
  • 1/2 teaspoon salt
  • 1 tablespoon vegetable oil (optional, to help blend)

Instructions:

  1. Toast the spices: In a dry skillet over medium heat, toast the coriander seeds, cumin seeds, cloves, cardamom seeds, and white peppercorns for about 2-3 minutes until fragrant. Remove from heat and grind the toasted spices into a fine powder using a spice grinder or mortar and pestle.
  2. Prepare the dried chilies: Drain the soaked dried chilies and remove the seeds if you prefer less heat. Roughly chop the chilies.
  3. Blend the ingredients: In a mortar and pestle (for a traditional method) or food processor, combine the toasted spice mix, dried chilies, lemongrass, galangal, garlic, shallots, tamarind paste, and salt. Grind or blend until you form a smooth, thick paste. You may need to add a tablespoon of vegetable oil to help it blend smoothly, especially if using a food processor.
  4. Add shrimp paste (optional): If using shrimp paste, add it at this stage and continue to grind until fully incorporated into the paste.
  5. Store or use: Transfer the Massaman curry paste to an airtight container and store in the refrigerator for up to a week, or freeze for longer storage.

Tips:

  • Make ahead: This curry paste can be made in bulk and frozen in portions for quick and easy curries later.
  • Vegan option: To make it vegan, omit the shrimp paste.
  • Using the paste: Use about 2-3 tablespoons of this paste for a curry that serves 4 people. Fry the paste in oil before adding your protein and other ingredients to release its full flavor.

This Massaman Curry Paste is fragrant, mildly spiced, and forms the base of an authentic and flavorful Thai Massaman curry. Enjoy the rich depth of flavors in your homemade curry dishes!

Chicken & Sweet Potatoes

0

This wholesome Chicken & Sweet Potatoes recipe combines tender, juicy chicken with the natural sweetness of roasted sweet potatoes. The dish is seasoned with a flavorful blend of garlic, paprika, and thyme, creating a perfect balance between savory and sweet. It’s an easy, one-pan meal that is not only nutritious but also rich in comforting flavors, making it ideal for busy weeknights or a cozy weekend dinner. The chicken stays moist, while the sweet potatoes become caramelized and soft, resulting in a satisfying meal with minimal cleanup.

Ingredients:

  • 4 bone-in, skin-on chicken thighs
  • 2 large sweet potatoes, peeled and diced
  • 2 tablespoons olive oil
  • 3 garlic cloves, minced
  • 1 teaspoon paprika
  • 1 teaspoon dried thyme
  • ½ teaspoon ground cinnamon
  • Salt and pepper to taste
  • Fresh parsley for garnish (optional)

Instructions:

  1. Preheat your oven to 400°F (200°C). Line a large baking sheet with parchment paper.
  2. In a small bowl, mix together the olive oil, minced garlic, paprika, thyme, cinnamon, salt, and pepper.
  3. Place the chicken thighs on the prepared baking sheet. Rub the spice mixture over the chicken, making sure to coat the skin and the underside.
  4. Spread the diced sweet potatoes around the chicken on the baking sheet. Drizzle with a bit of olive oil and season with additional salt and pepper if desired.
  5. Roast in the preheated oven for 35-40 minutes, or until the chicken reaches an internal temperature of 165°F (75°C) and the sweet potatoes are tender and caramelized.
  6. Remove from the oven and let rest for 5 minutes. Garnish with fresh parsley, if using, and serve hot.

Enjoy the harmonious flavors of this Chicken & Sweet Potatoes meal!

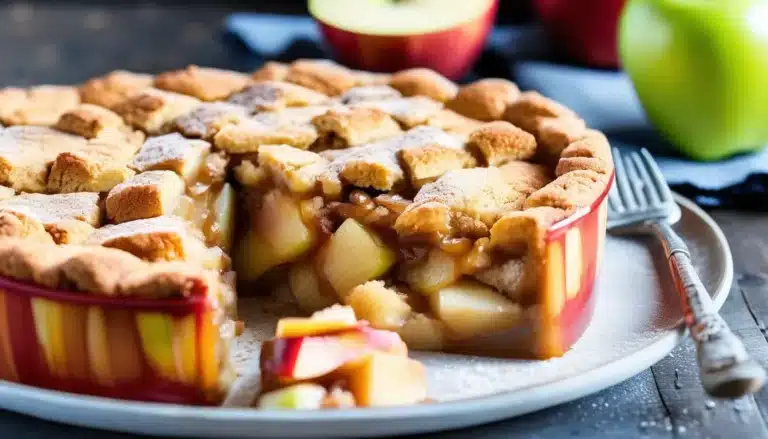
SNICKERDOODLE APPLE COBBLER

Snickerdoodle Apple Cobbler is a delightful mashup of the classic cinnamon-sugar Snickerdoodle cookie and a warm, comforting apple cobbler. Tender apples are baked under a layer of snickerdoodle cookie dough, resulting in a perfect combination of sweet, spiced, and buttery flavors. This dessert is perfect for fall and pairs wonderfully with a scoop of vanilla ice cream.

Ingredients:

For the Apple Filling:

  • 6 cups peeled, sliced apples (Granny Smith or Honeycrisp work well)
  • 1/2 cup granulated sugar
  • 1 tablespoon all-purpose flour
  • 1 teaspoon ground cinnamon
  • 1/4 teaspoon ground nutmeg
  • 1 teaspoon vanilla extract
  • 1 tablespoon lemon juice

For the Snickerdoodle Topping:

  • 1 1/2 cups all-purpose flour
  • 1/2 teaspoon baking soda
  • 1/4 teaspoon cream of tartar
  • 1/4 teaspoon salt
  • 1/2 cup unsalted butter, softened
  • 3/4 cup granulated sugar
  • 1 large egg
  • 1 teaspoon vanilla extract

For the Cinnamon-Sugar Topping:

  • 2 tablespoons granulated sugar
  • 1 teaspoon ground cinnamon

Instructions:

  1. Preheat the oven: Preheat your oven to 350°F (175°C) and grease a 9×13-inch baking dish or similar-sized dish.
  2. Prepare the apple filling: In a large bowl, toss the sliced apples with sugar, flour, cinnamon, nutmeg, vanilla extract, and lemon juice. Mix until the apples are evenly coated. Spread the apple mixture in the bottom of the prepared baking dish.
  3. Make the snickerdoodle topping: In a medium bowl, whisk together the flour, baking soda, cream of tartar, and salt. Set aside.
  4. Cream the butter and sugar: In a large bowl, beat the softened butter and sugar together with an electric mixer until light and fluffy, about 2-3 minutes. Beat in the egg and vanilla extract until smooth.
  5. Combine the wet and dry ingredients: Gradually add the dry ingredients to the butter mixture, mixing until a soft dough forms.
  6. Drop the cookie dough: Using a spoon or cookie scoop, drop the snickerdoodle dough in small portions over the apple filling, leaving a few gaps for the apples to peek through.
  7. Sprinkle the cinnamon-sugar topping: In a small bowl, mix the granulated sugar and cinnamon together. Sprinkle the cinnamon-sugar mixture generously over the top of the snickerdoodle dough.
  8. Bake: Bake the cobbler in the preheated oven for 35-40 minutes, or until the cookie topping is golden brown and the apple filling is bubbling.
  9. Cool and serve: Let the cobbler cool for a few minutes before serving. It’s delicious on its own or with a scoop of vanilla ice cream for added indulgence.

This Snickerdoodle Apple Cobbler combines the warm, spiced flavors of snickerdoodles with the sweet, tender apples of a classic cobbler, making it the ultimate cozy dessert for fall or any time you’re craving something sweet and comforting. Enjoy!

Protein Brownies

0

These Protein Brownies are a guilt-free treat that satisfies your sweet tooth while providing a boost of protein. Perfect for a post-workout snack or a healthier dessert option, these brownies are dense, fudgy, and packed with rich chocolate flavor. Made with a combination of protein powder, cocoa powder, and wholesome ingredients like almond flour and Greek yogurt, these brownies are both nutritious and delicious. They’re easy to make and can be enjoyed on their own or topped with a scoop of your favorite nut butter for an extra indulgent touch.

Ingredients:

  • 1/2 cup chocolate or vanilla protein powder
  • 1/2 cup almond flour
  • 1/4 cup unsweetened cocoa powder
  • 1/4 cup coconut sugar or sweetener of choice
  • 1/2 tsp baking powder
  • 1/4 tsp salt
  • 1/2 cup plain Greek yogurt
  • 1/4 cup unsweetened almond milk (or any milk of choice)
  • 2 large eggs
  • 1 tsp vanilla extract
  • 1/4 cup dark chocolate chips (optional)

Instructions:

  1. Preheat the Oven: Preheat your oven to 350°F (175°C). Line an 8×8-inch baking dish with parchment paper or lightly grease it.
  2. Mix Dry Ingredients: In a large mixing bowl, combine the protein powder, almond flour, cocoa powder, coconut sugar, baking powder, and salt. Stir until well mixed.
  3. Combine Wet Ingredients: In a separate bowl, whisk together the Greek yogurt, almond milk, eggs, and vanilla extract until smooth.
  4. Make the Batter: Add the wet ingredients to the dry ingredients and stir until just combined. If using, fold in the dark chocolate chips.
  5. Bake the Brownies: Pour the batter into the prepared baking dish, spreading it out evenly. Bake for 20-25 minutes, or until a toothpick inserted into the center comes out mostly clean with a few moist crumbs.
  6. Cool and Serve: Allow the brownies to cool in the pan for at least 10 minutes before cutting into squares. Enjoy them warm or store in an airtight container for up to 3 days.

These protein brownies are the perfect blend of healthy and decadent, giving you the energy boost you need while still indulging in a chocolatey treat!

Chocolate Birthday Cake

0

This Chocolate Birthday Cake is rich, moist, and perfect for any celebration. The deep cocoa flavor, combined with a smooth and creamy chocolate buttercream frosting, makes it a showstopper at any birthday party. With its soft crumb and velvety texture, this cake is both indulgent and comforting. Whether you’re celebrating a milestone birthday or simply want to treat yourself, this classic cake is a guaranteed crowd-pleaser. Plus, it’s easy to make and decorate, allowing you to get creative with sprinkles, candles, or fresh fruit for the ultimate birthday centerpiece.

Ingredients:

  • For the Cake:
    • 1 ¾ cups all-purpose flour
    • ¾ cup unsweetened cocoa powder
    • 1 ½ teaspoons baking powder
    • 1 ½ teaspoons baking soda
    • 1 teaspoon salt
    • 2 cups granulated sugar
    • 2 large eggs
    • 1 cup whole milk
    • ½ cup vegetable oil
    • 2 teaspoons vanilla extract
    • 1 cup boiling water
  • For the Chocolate Buttercream Frosting:
    • 1 cup unsalted butter, softened
    • 3 ½ cups powdered sugar
    • ½ cup unsweetened cocoa powder
    • ½ cup heavy cream
    • 1 teaspoon vanilla extract
    • Pinch of salt

Instructions:

  1. Prepare the Cake:
    • Preheat your oven to 350°F (175°C) and grease and flour two 9-inch round cake pans.
    • In a large bowl, whisk together the flour, cocoa powder, baking powder, baking soda, salt, and sugar.
    • Add the eggs, milk, oil, and vanilla extract. Beat on medium speed until well combined.
    • Slowly stir in the boiling water. The batter will be thin, but that’s okay.
    • Pour the batter evenly into the prepared cake pans.
    • Bake for 30-35 minutes, or until a toothpick inserted in the center comes out clean.
    • Let the cakes cool in the pans for 10 minutes, then transfer them to wire racks to cool completely.
  2. Make the Frosting:
    • In a large bowl, beat the softened butter on medium speed until creamy.
    • Gradually add the powdered sugar and cocoa powder, beating on low speed until combined.
    • Add the heavy cream, vanilla extract, and salt, and continue beating until the frosting is light and fluffy. If needed, add more cream to reach your desired consistency.
  3. Assemble the Cake:
    • Once the cakes are completely cool, level the tops with a knife if necessary.
    • Place one cake layer on a serving plate and spread a generous layer of frosting on top.
    • Place the second layer on top and frost the entire cake with the remaining buttercream.
    • Decorate with sprinkles, fruit, or birthday candles as desired.
  4. Serve:
    • Slice and enjoy your delicious chocolate birthday cake!

HAM AND CHEESE CRESCENT ROLL-UPS

Ham and Cheese Crescent Roll-Ups are a quick, easy, and delicious snack or appetizer. Made with flaky crescent dough, these roll-ups are filled with savory ham and melty cheese, making them perfect for breakfast, lunch, or even a party. Serve them warm and watch them disappear!

Ingredients:

  • 1 can (8 oz) refrigerated crescent roll dough
  • 8 slices of deli ham
  • 8 slices of cheese (cheddar, Swiss, or your favorite)
  • 1 tablespoon Dijon mustard (optional, for extra flavor)
  • 1 tablespoon melted butter (optional, for brushing)

Instructions:

  1. Preheat the oven: Preheat your oven to 375°F (190°C). Line a baking sheet with parchment paper or lightly grease it.
  2. Prepare the dough: Unroll the crescent roll dough and separate it into 8 triangles.
  3. Add the filling: Spread a thin layer of Dijon mustard on each triangle of dough (if using). Place one slice of ham and one slice of cheese on each triangle, folding them if needed to fit.
  4. Roll up the crescents: Starting from the wide end, roll up each crescent dough triangle toward the point, encasing the ham and cheese inside. Place the rolled crescents on the prepared baking sheet, point side down to prevent them from unrolling during baking.
  5. Brush with butter: Brush the tops of the roll-ups with melted butter for extra flavor and a golden finish.
  6. Bake: Bake in the preheated oven for 12-15 minutes, or until the crescents are golden brown and the cheese is melted.
  7. Serve: Let the roll-ups cool slightly before serving. Serve warm with a side of mustard or your favorite dipping sauce, if desired.

These Ham and Cheese Crescent Roll-Ups are a delicious, flaky, and cheesy snack that’s perfect for any occasion. Easy to make and guaranteed to please, they are great for both kids and adults alike!