Home Blog Page 806

Quick Noodle-Veggie Bowls

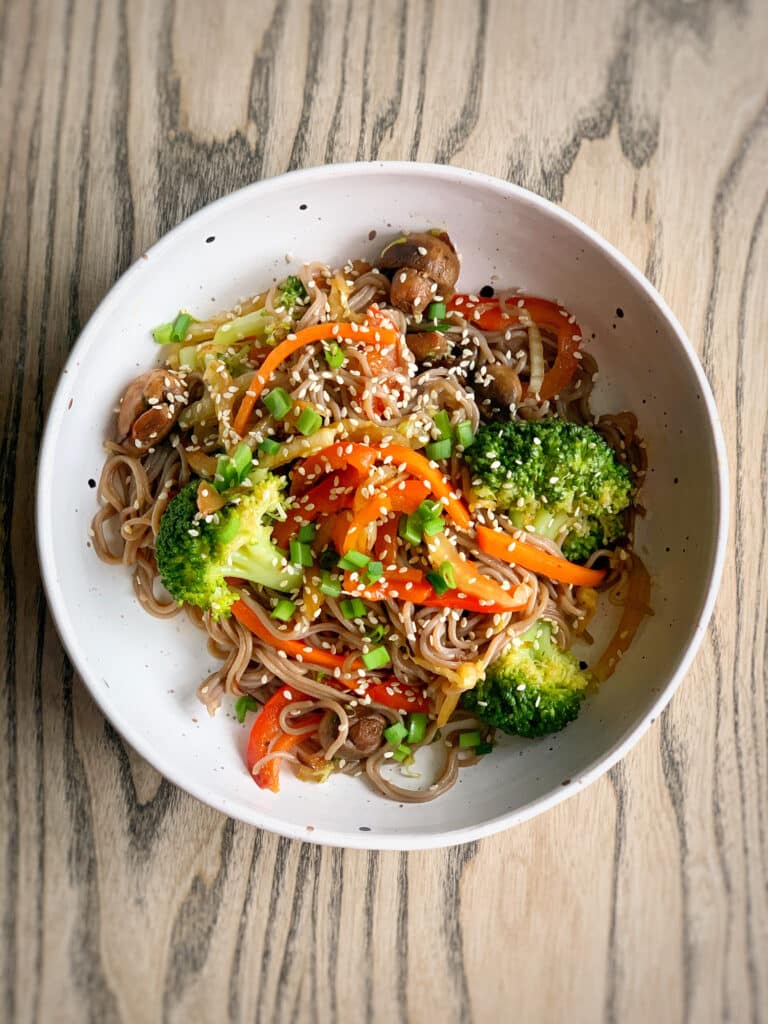
Quick Noodle-Veggie Bowls are the perfect solution for a fast, delicious, and nutritious meal that comes together in no time. These bowls are filled with your choice of noodles and a colorful array of fresh vegetables, all tossed in a flavorful sauce. With the versatility to include whatever veggies you have on hand and the option to adjust the sauce to your taste, this dish is incredibly adaptable. Perfect for busy weeknights or a healthy lunch, Quick Noodle-Veggie Bowls offer a satisfying and wholesome meal that everyone will love, providing a delightful balance of textures and flavors in every bite.

Ingredients

  • 8 ounces noodles (such as soba, udon, rice noodles, or spaghetti)
  • 1 tablespoon olive oil
  • 1 tablespoon sesame oil
  • 2 cloves garlic, minced
  • 1-inch piece of ginger, grated
  • 1 red bell pepper, sliced
  • 1 cup broccoli florets
  • 1 cup snap peas
  • 1 carrot, julienned
  • 1 cup mushrooms, sliced
  • 2 tablespoons soy sauce
  • 1 tablespoon rice vinegar
  • 1 tablespoon hoisin sauce
  • 1 teaspoon chili paste or sriracha (optional, for heat)
  • 2 green onions, sliced
  • 1 tablespoon sesame seeds
  • Fresh cilantro, chopped (for garnish)
  • Lime wedges (for serving)

Instructions

  1. Cook the noodles: Bring a large pot of water to a boil. Add the noodles and cook according to the package instructions until al dente. Drain and set aside.
  2. Sauté the aromatics: In a large skillet or wok, heat the olive oil and sesame oil over medium heat. Add the minced garlic and grated ginger, and sauté for about 30 seconds until fragrant.
  3. Cook the vegetables: Add the sliced red bell pepper, broccoli florets, snap peas, julienned carrot, and sliced mushrooms to the skillet. Stir-fry for 5-7 minutes, or until the vegetables are tender-crisp.
  4. Make the sauce: In a small bowl, whisk together the soy sauce, rice vinegar, hoisin sauce, and chili paste or sriracha (if using).
  5. Combine noodles and sauce: Add the cooked noodles to the skillet with the vegetables. Pour the sauce over the noodles and toss everything together until well combined and heated through.
  6. Garnish and serve: Remove the skillet from the heat. Garnish the noodle-veggie bowls with sliced green onions, sesame seeds, and chopped fresh cilantro. Serve with lime wedges on the side for squeezing over the top.

Enjoy your Quick Noodle-Veggie Bowls as a fresh and flavorful meal that’s both satisfying and easy to prepare, offering a delightful combination of noodles and vegetables in every bite.
Grilled Mediterranean Vegetable Sandwich

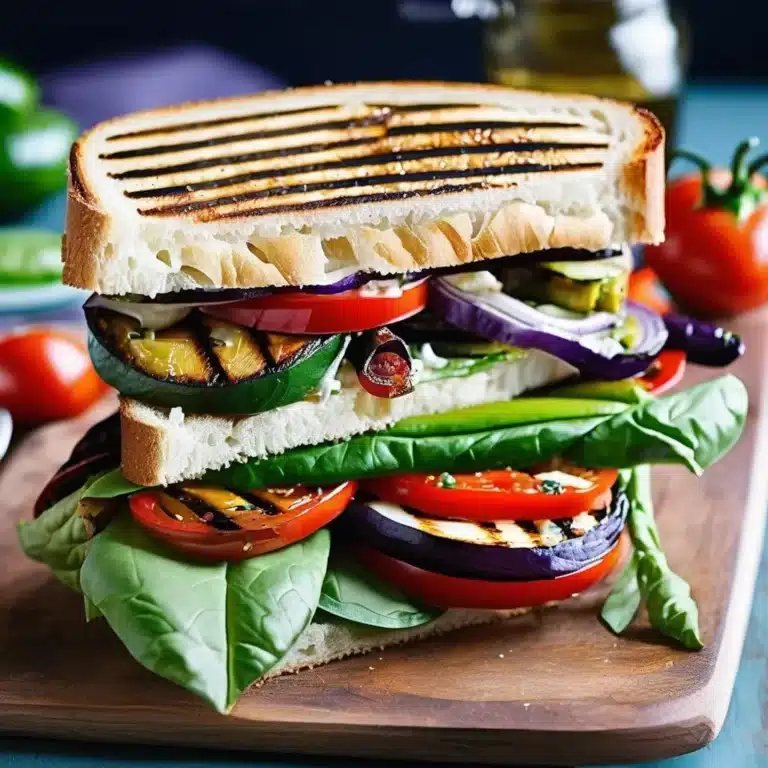
Grilled Mediterranean Vegetable Sandwich is a colorful and flavorful dish that captures the essence of Mediterranean cuisine. Packed with fresh, grilled vegetables like zucchini, bell peppers, and eggplant, this sandwich offers a healthy and satisfying option for lunch or dinner. The vegetables are marinated in olive oil, garlic, and herbs, then grilled to perfection and layered on crusty bread with creamy hummus and tangy feta cheese. This delicious sandwich is not only visually appealing but also bursting with taste, making it a great choice for vegetarians and anyone looking for a lighter, yet fulfilling meal.

Ingredients

  • 1 zucchini, sliced lengthwise
  • 1 eggplant, sliced lengthwise
  • 1 red bell pepper, cut into strips
  • 1 yellow bell pepper, cut into strips
  • 1 red onion, sliced into rings
  • 3 tablespoons olive oil
  • 2 cloves garlic, minced
  • 1 teaspoon dried oregano
  • Salt and pepper, to taste
  • 4 slices crusty bread (such as ciabatta or sourdough)
  • 1/2 cup hummus
  • 1/4 cup crumbled feta cheese
  • 1/4 cup fresh basil leaves
  • 1 tablespoon balsamic glaze (optional)

Instructions

  1. Marinate the vegetables: In a large bowl, combine the olive oil, minced garlic, dried oregano, salt, and pepper. Add the sliced zucchini, eggplant, bell peppers, and onion to the bowl and toss to coat the vegetables evenly with the marinade. Let them marinate for at least 15 minutes.
  2. Preheat the grill: Preheat your grill or grill pan to medium-high heat.
  3. Grill the vegetables: Place the marinated vegetables on the grill and cook for 3-4 minutes on each side, or until they are tender and have nice grill marks. Remove the vegetables from the grill and set aside.
  4. Assemble the sandwiches: Spread a generous layer of hummus on each slice of bread. Layer the grilled vegetables evenly on two slices of the bread. Sprinkle crumbled feta cheese and fresh basil leaves over the vegetables.
  5. Finish and serve: Drizzle balsamic glaze over the vegetables if desired. Top each sandwich with the remaining bread slices. Serve immediately.

Enjoy your Grilled Mediterranean Vegetable Sandwich as a delicious and wholesome meal that brings the fresh and vibrant flavors of the Mediterranean to your table.

Tacos de Jamaica (Vegan Hibiscus Tacos)

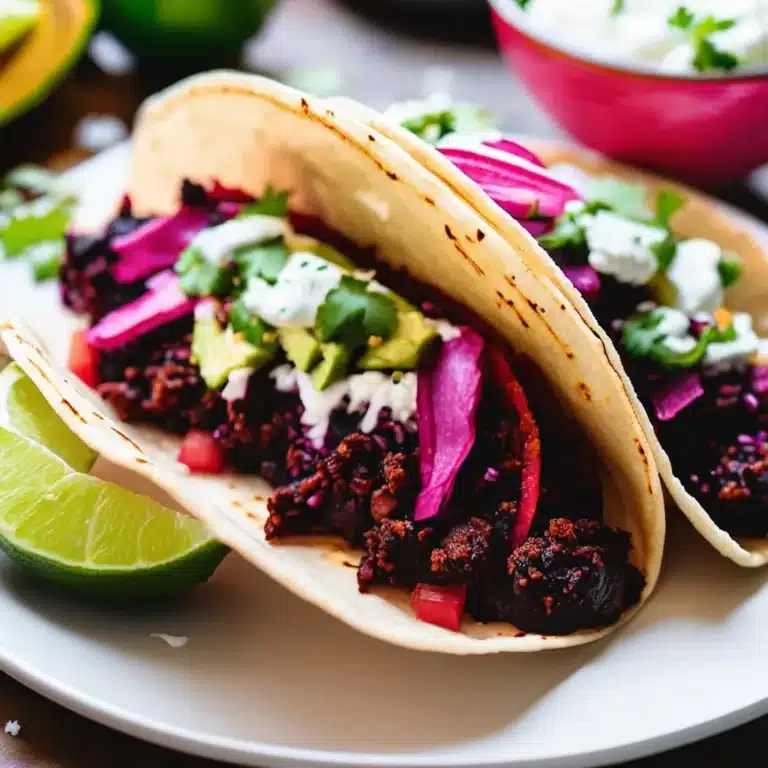
Tacos de Jamaica, or Vegan Hibiscus Tacos, offer a deliciously unique take on traditional tacos by utilizing the versatile hibiscus flower. Known for its tangy, slightly tart flavor, hibiscus is often used in refreshing drinks, but it shines just as brightly in savory dishes. In these tacos, the rehydrated hibiscus flowers are sautéed with onions, garlic, and spices to create a flavorful and satisfying filling. Paired with vibrant toppings like avocado, cilantro, and a squeeze of lime, these tacos provide a refreshing and healthy twist on a classic favorite, perfect for vegans and taco lovers alike.

Ingredients

  • 2 cups dried hibiscus flowers (jamaica)
  • 2 tablespoons olive oil
  • 1 onion, thinly sliced
  • 2 cloves garlic, minced
  • 1 teaspoon ground cumin
  • 1 teaspoon smoked paprika
  • 1 teaspoon chili powder
  • Salt and pepper, to taste
  • 8 corn tortillas
  • 1 avocado, sliced
  • 1/4 cup fresh cilantro, chopped
  • 1/4 cup radishes, thinly sliced
  • Lime wedges, for serving

Instructions

  1. Prepare the hibiscus flowers: Rinse the dried hibiscus flowers thoroughly under cold water to remove any dust or debris. Place them in a pot with enough water to cover and bring to a boil. Reduce the heat and simmer for 10 minutes until the flowers are tender. Drain and set aside.
  2. Sauté the vegetables: In a large skillet, heat the olive oil over medium heat. Add the sliced onion and cook until soft and translucent, about 5 minutes. Add the minced garlic and cook for an additional 1 minute until fragrant.
  3. Cook the hibiscus filling: Add the drained hibiscus flowers to the skillet with the onion and garlic. Stir in the ground cumin, smoked paprika, chili powder, salt, and pepper. Cook for 5-7 minutes, stirring occasionally, until the hibiscus is heated through and well combined with the spices.
  4. Warm the tortillas: While the hibiscus mixture is cooking, warm the corn tortillas in a dry skillet over medium heat or directly over a gas flame until pliable and slightly charred.
  5. Assemble the tacos: Divide the hibiscus mixture evenly among the warmed tortillas. Top with sliced avocado, chopped cilantro, and radishes.
  6. Serve: Serve the tacos with lime wedges on the side for squeezing over the top.

Enjoy your Tacos de Jamaica as a vibrant and flavorful vegan option that’s both satisfying and refreshing, perfect for any occasion.

Grilled Stuffed Portobello Mushroom Caps

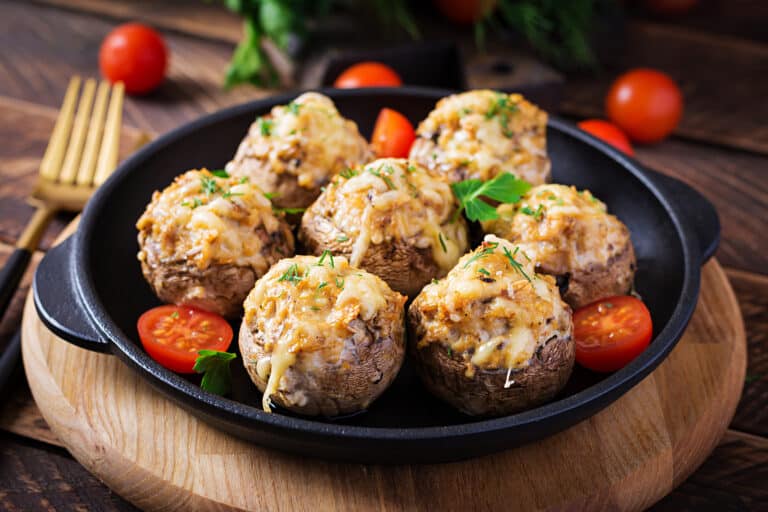
Grilled Stuffed Portobello Mushroom Caps are a delicious and nutritious dish that makes an excellent appetizer or main course for both vegetarians and meat-lovers alike. These large, meaty mushrooms are filled with a flavorful mixture of spinach, sun-dried tomatoes, garlic, and cheeses, creating a savory, cheesy delight with every bite. The grilling process adds a smoky depth, enhancing the natural umami of the mushrooms. This dish is quick to prepare and can be customized with your favorite ingredients, making it perfect for any occasion, whether it’s a casual barbecue or an elegant dinner party.

Ingredients

  • 4 large Portobello mushroom caps
  • 2 tablespoons olive oil
  • Salt and pepper, to taste
  • 1 tablespoon balsamic vinegar
  • 1 cup fresh spinach, chopped
  • 1/4 cup sun-dried tomatoes, chopped
  • 2 cloves garlic, minced
  • 1/2 cup ricotta cheese
  • 1/4 cup grated Parmesan cheese
  • 1/2 cup shredded mozzarella cheese
  • 1 tablespoon fresh basil, chopped
  • 1 tablespoon fresh parsley, chopped

Instructions

  1. Prepare the mushrooms: Clean the Portobello mushroom caps by gently wiping them with a damp cloth or paper towel to remove any dirt. Remove the stems and gently scrape out the gills using a spoon.
  2. Marinate the mushrooms: In a small bowl, mix the olive oil, balsamic vinegar, salt, and pepper. Brush both sides of each mushroom cap with the mixture and let them marinate for about 10 minutes.
  3. Preheat the grill: Preheat your grill to medium-high heat.
  4. Prepare the filling: In a medium bowl, combine the chopped spinach, sun-dried tomatoes, minced garlic, ricotta cheese, Parmesan cheese, mozzarella cheese, chopped basil, and parsley. Mix well until all the ingredients are evenly combined.
  5. Stuff the mushrooms: Place the mushroom caps on a baking sheet or plate, gill-side up. Evenly divide the filling mixture among the mushroom caps, pressing it gently into the cavity.
  6. Grill the mushrooms: Place the stuffed mushrooms on the grill, gill-side up. Close the lid and grill for about 10-15 minutes, or until the mushrooms are tender and the cheese is melted and bubbly.
  7. Serve: Remove the mushrooms from the grill and let them cool slightly before serving. Garnish with additional fresh herbs if desired.

Enjoy your Grilled Stuffed Portobello Mushroom Caps as a savory and satisfying dish that’s perfect for any occasion, offering a delicious blend of flavors and textures in every bite.

Plum and Pecan Muffins

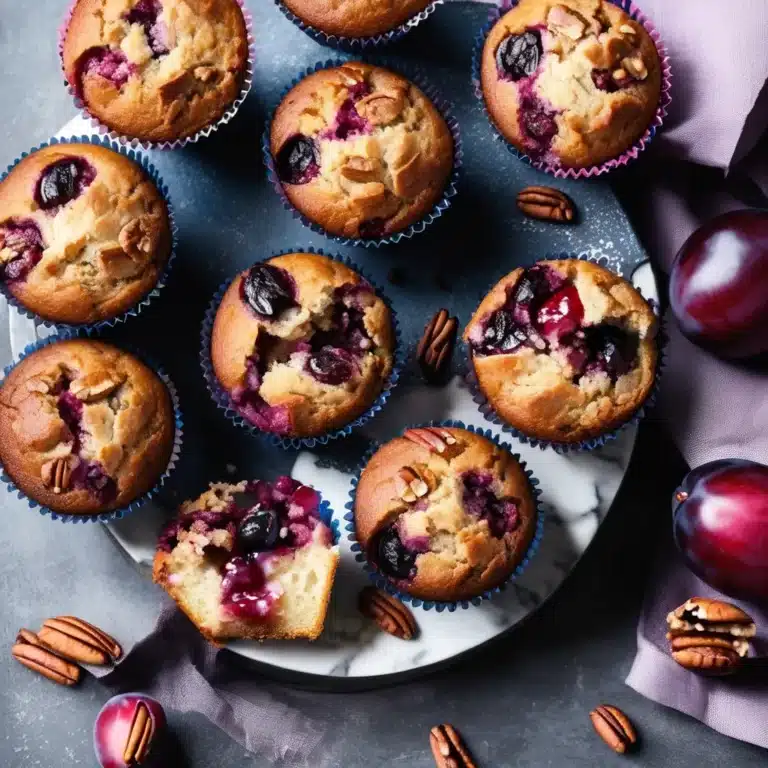
Plum and Pecan Muffins are a delightful treat that combines the sweet, juicy flavor of ripe plums with the rich, nutty crunch of pecans. These moist and tender muffins are perfect for breakfast, brunch, or a snack, offering a delightful balance of flavors and textures. The natural sweetness of the plums complements the buttery pecans, while a hint of cinnamon adds warmth and depth. Easy to make and wonderfully aromatic, these muffins are sure to become a favorite for any occasion.

Ingredients

  • 1 3/4 cups all-purpose flour
  • 1/2 cup granulated sugar
  • 2 teaspoons baking powder
  • 1/2 teaspoon baking soda
  • 1/2 teaspoon salt
  • 1 teaspoon ground cinnamon
  • 1/2 cup unsalted butter, melted
  • 2 large eggs
  • 1/2 cup milk
  • 1 teaspoon vanilla extract
  • 1 1/2 cups diced plums (about 2-3 medium plums)
  • 3/4 cup chopped pecans
  • 2 tablespoons brown sugar (for topping)
  • 1/4 teaspoon ground cinnamon (for topping)

Instructions

  1. Preheat the oven: Preheat your oven to 375°F (190°C). Line a 12-cup muffin tin with paper liners or grease the cups with butter or non-stick spray.
  2. Mix the dry ingredients: In a large bowl, whisk together the flour, granulated sugar, baking powder, baking soda, salt, and ground cinnamon.
  3. Prepare the wet ingredients: In a separate bowl, whisk together the melted butter, eggs, milk, and vanilla extract until well combined.
  4. Combine the mixtures: Pour the wet ingredients into the dry ingredients and stir gently until just combined. Be careful not to overmix. Fold in the diced plums and chopped pecans.
  5. Fill the muffin cups: Divide the batter evenly among the prepared muffin cups, filling each about 3/4 full.
  6. Make the topping: In a small bowl, combine the brown sugar and ground cinnamon. Sprinkle the mixture evenly over the tops of the muffins.
  7. Bake: Place the muffin tin in the preheated oven and bake for 18-22 minutes, or until a toothpick inserted into the center of a muffin comes out clean.
  8. Cool and serve: Remove the muffins from the oven and let them cool in the tin for a few minutes before transferring them to a wire rack to cool completely.

Enjoy your Plum and Pecan Muffins as a delicious and satisfying treat that showcases the perfect harmony of sweet, fruity, and nutty flavors in every bite.

Cheesy Garlic Bread

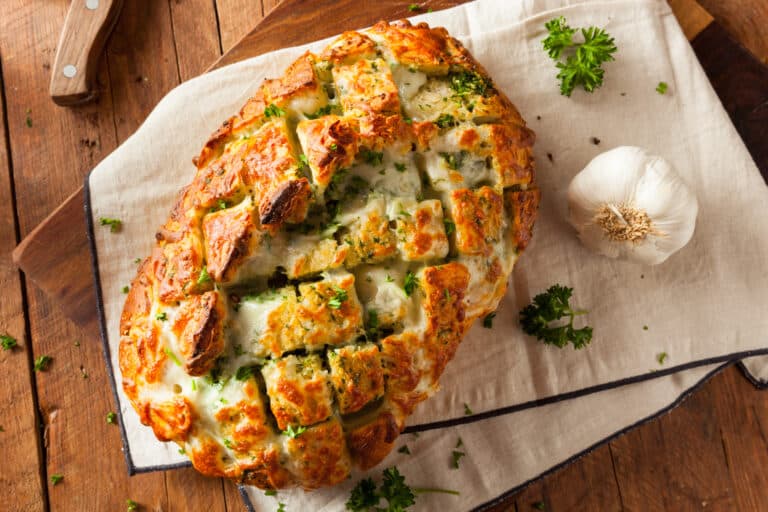
Cheesy Garlic Bread is a delectable appetizer or side dish that combines the irresistible flavors of garlic, butter, and melted cheese on a crusty loaf of bread. This simple yet delicious recipe elevates any meal with its rich and savory taste, making it perfect for family dinners, parties, or as a comforting snack. The combination of garlic-infused butter and gooey, melted cheese creates a delightful texture contrast with the crispy bread, while fresh herbs add a touch of brightness. Whether served with pasta, soup, or salad, Cheesy Garlic Bread is a crowd-pleaser that never fails to impress.

Ingredients

  • 1 loaf of French or Italian bread
  • 1/2 cup unsalted butter, softened
  • 4 cloves garlic, minced
  • 1 tablespoon fresh parsley, chopped
  • 1 teaspoon dried oregano
  • 1/2 teaspoon salt
  • 1/4 teaspoon black pepper
  • 1 1/2 cups shredded mozzarella cheese
  • 1/2 cup grated Parmesan cheese
  • Fresh basil leaves (optional, for garnish)

Instructions

  1. Preheat the oven: Preheat your oven to 400°F (200°C). Line a baking sheet with aluminum foil for easy cleanup.
  2. Prepare the garlic butter: In a small bowl, mix together the softened butter, minced garlic, chopped parsley, dried oregano, salt, and black pepper until well combined.
  3. Slice the bread: Cut the loaf of bread in half lengthwise to create two long pieces. Place the halves on the prepared baking sheet, cut side up.
  4. Spread the garlic butter: Evenly spread the garlic butter mixture over the cut sides of the bread.
  5. Add the cheese: Sprinkle the shredded mozzarella and grated Parmesan cheese evenly over the garlic butter.
  6. Bake: Place the baking sheet in the preheated oven and bake for 10-12 minutes, or until the cheese is melted and bubbly, and the edges of the bread are golden brown.
  7. Broil (optional): For an extra crispy top, switch the oven to broil and cook for an additional 1-2 minutes, watching carefully to avoid burning.
  8. Garnish and serve: Remove the cheesy garlic bread from the oven and let it cool for a minute. Slice into pieces and garnish with fresh basil leaves, if desired.

Enjoy your Cheesy Garlic Bread as a deliciously savory addition to any meal, providing a satisfying combination of flavors and textures in every bite.

Pizza Grilled Cheese Sandwich

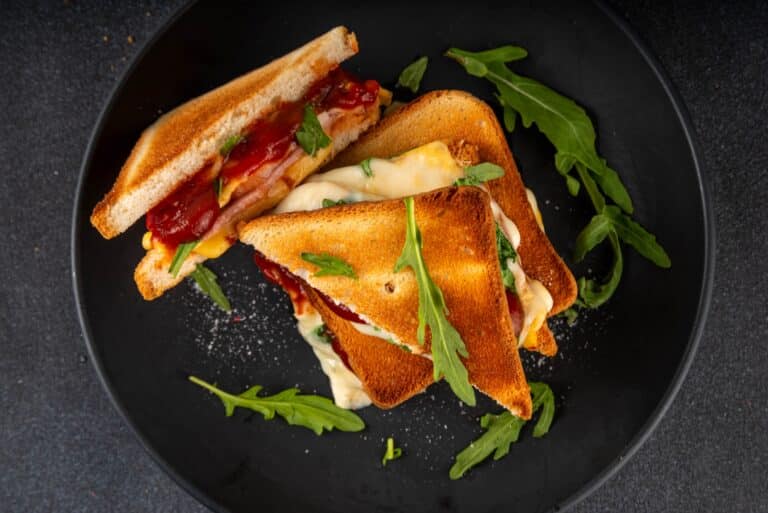
Pizza Grilled Cheese Sandwich is the ultimate fusion of two comfort food favorites, combining the gooey goodness of grilled cheese with the savory flavors of pizza. This delicious sandwich features layers of melted mozzarella, tangy marinara sauce, and pepperoni slices nestled between crispy, buttery bread. It’s a quick and satisfying meal that can be customized with your favorite pizza toppings, making it perfect for lunch, dinner, or a tasty snack. Easy to make and irresistibly delicious, this Pizza Grilled Cheese Sandwich is sure to become a household favorite.

Ingredients

  • 4 slices of bread (such as sourdough or Italian)
  • 2 tablespoons butter, softened
  • 1/2 cup marinara sauce
  • 1 cup shredded mozzarella cheese
  • 12 slices pepperoni (or other toppings like mushrooms, bell peppers, or olives)
  • 1 teaspoon dried oregano
  • 1/2 teaspoon garlic powder
  • Fresh basil leaves (optional, for garnish)

Instructions

  1. Prepare the bread: Spread softened butter on one side of each slice of bread.
  2. Assemble the sandwiches: Place two slices of bread, buttered side down, on a cutting board or plate. Spread a thin layer of marinara sauce on each slice. Top with shredded mozzarella cheese, pepperoni slices, and a sprinkle of dried oregano and garlic powder. Place the remaining slices of bread on top, buttered side up.
  3. Heat the skillet: Heat a non-stick skillet or griddle over medium heat.
  4. Cook the sandwiches: Place the sandwiches in the skillet and cook for 3-4 minutes on each side, or until the bread is golden brown and the cheese is melted. Press down gently with a spatula to help the sandwiches adhere and the cheese to melt evenly.
  5. Serve: Remove the sandwiches from the skillet and let them cool for a minute. Slice in half and garnish with fresh basil leaves, if desired.

Enjoy your Pizza Grilled Cheese Sandwich as a delicious and comforting meal that brings the best of both pizza and grilled cheese into one irresistible bite!

Sheet Pan Salmon and Veggies

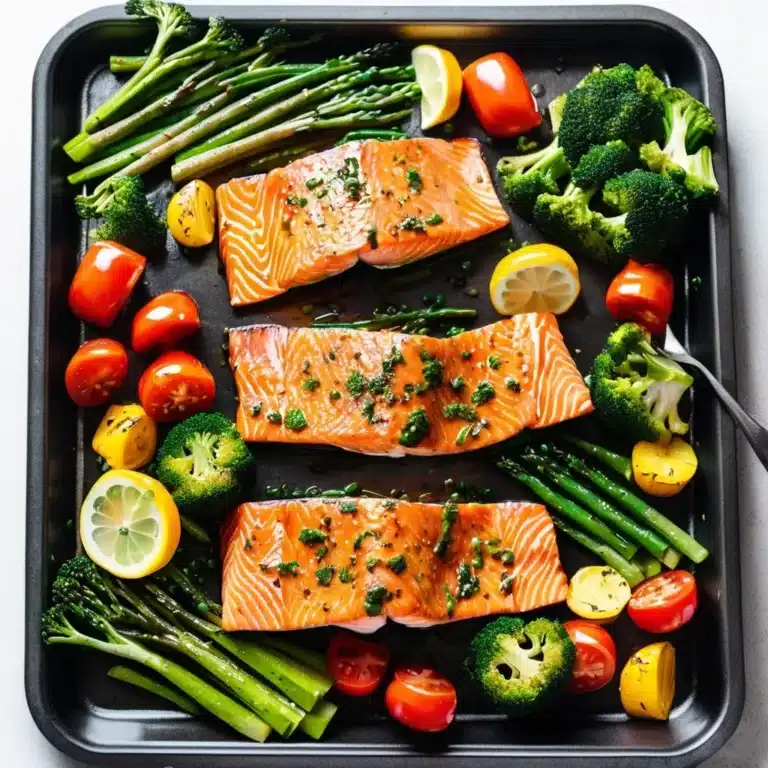
Sheet Pan Salmon and Veggies is a quick, healthy, and flavorful meal that makes weeknight dinners a breeze. This dish features tender, flaky salmon fillets roasted alongside a colorful array of vegetables, all drizzled with a simple yet delicious lemon-garlic sauce. The beauty of this recipe lies in its simplicity—everything cooks together on one pan, which means minimal cleanup and maximum flavor. Whether you’re looking for a nutritious meal for the family or an impressive dish for guests, this Sheet Pan Salmon and Veggies recipe is sure to satisfy.

Ingredients

  • 4 salmon fillets (about 6 ounces each)
  • 1 pound asparagus, trimmed
  • 1 red bell pepper, sliced
  • 1 yellow bell pepper, sliced
  • 1 red onion, cut into wedges
  • 1 zucchini, sliced
  • 2 tablespoons olive oil
  • 2 tablespoons lemon juice
  • 3 cloves garlic, minced
  • 1 teaspoon dried oregano
  • 1 teaspoon dried thyme
  • Salt and pepper, to taste
  • Lemon slices (for serving)
  • Fresh parsley, chopped (for garnish)

Instructions

  1. Preheat the oven: Preheat your oven to 400°F (200°C). Line a large baking sheet with parchment paper or aluminum foil for easy cleanup.
  2. Prepare the sauce: In a small bowl, whisk together the olive oil, lemon juice, minced garlic, dried oregano, dried thyme, salt, and pepper.
  3. Arrange the vegetables: Spread the asparagus, red bell pepper, yellow bell pepper, red onion, and zucchini evenly on the prepared baking sheet. Drizzle half of the lemon-garlic sauce over the vegetables and toss to coat evenly.
  4. Add the salmon: Place the salmon fillets on the baking sheet, skin-side down, nestled among the vegetables. Drizzle the remaining lemon-garlic sauce over the salmon.
  5. Bake: Place the baking sheet in the preheated oven and bake for 15-20 minutes, or until the salmon is cooked through and flakes easily with a fork, and the vegetables are tender.
  6. Serve: Remove the sheet pan from the oven and let it cool for a few minutes. Serve the salmon and veggies with lemon slices and garnish with chopped fresh parsley.

Enjoy your Sheet Pan Salmon and Veggies as a delicious and wholesome meal that delivers vibrant flavors and balanced nutrition, perfect for any night of the week.

Meatless Grain Bowl

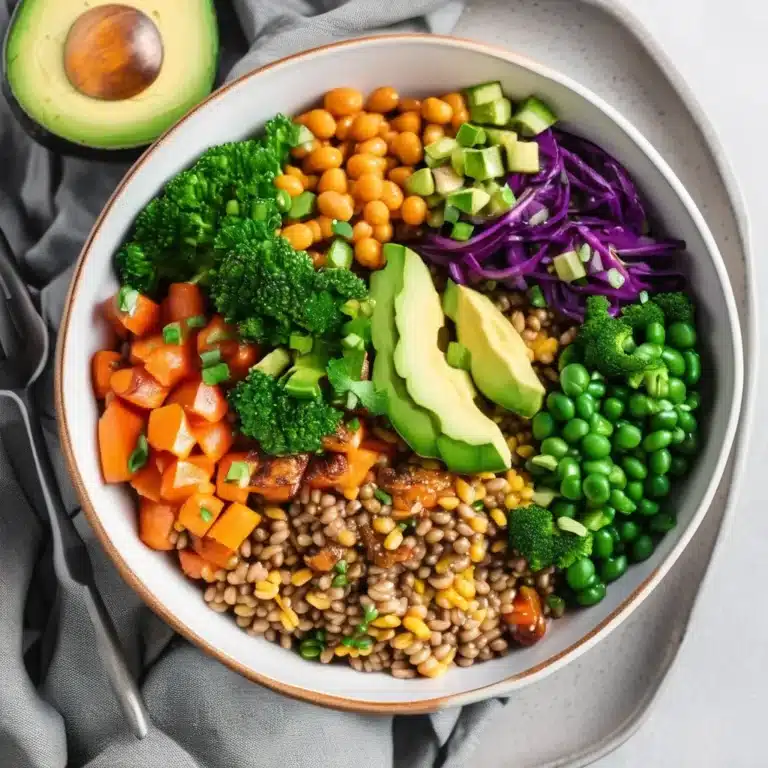
A Meatless Grain Bowl is a nourishing and versatile dish that brings together a variety of textures and flavors in one satisfying meal. This wholesome bowl features a base of hearty grains like quinoa, brown rice, or farro, topped with an assortment of fresh and cooked vegetables, legumes, and a flavorful dressing. The beauty of this dish lies in its adaptability, allowing you to customize it with your favorite ingredients or whatever you have on hand. Perfect for a quick lunch or dinner, this grain bowl is not only delicious but also packed with nutrients, making it an ideal choice for a healthy, plant-based meal.

Ingredients

  • 1 cup quinoa, brown rice, or farro
  • 2 cups vegetable broth or water
  • 1 can (15 ounces) chickpeas, drained and rinsed
  • 1 tablespoon olive oil
  • 1 teaspoon smoked paprika
  • Salt and pepper, to taste
  • 1 cup cherry tomatoes, halved
  • 1 cucumber, diced
  • 1 avocado, sliced
  • 1/2 cup shredded carrots
  • 1/4 cup sliced radishes
  • 1/4 cup chopped fresh parsley
  • 2 tablespoons sunflower seeds or pumpkin seeds

For the dressing:

  • 3 tablespoons tahini
  • 2 tablespoons lemon juice
  • 1 tablespoon maple syrup or honey
  • 2 tablespoons water (more as needed)
  • 1 clove garlic, minced
  • Salt and pepper, to taste

Instructions

  1. Cook the grains: In a medium saucepan, bring the vegetable broth or water to a boil. Add the quinoa, brown rice, or farro. Reduce the heat to low, cover, and simmer according to package instructions until the grains are tender and the liquid is absorbed. Fluff with a fork and set aside.
  2. Prepare the chickpeas: In a skillet, heat the olive oil over medium heat. Add the chickpeas, smoked paprika, salt, and pepper. Sauté for 5-7 minutes until the chickpeas are lightly browned and crispy. Remove from heat.
  3. Make the dressing: In a small bowl, whisk together the tahini, lemon juice, maple syrup or honey, minced garlic, salt, and pepper. Add water, one tablespoon at a time, until the dressing reaches your desired consistency.
  4. Assemble the grain bowl: Divide the cooked grains among four bowls. Arrange the cherry tomatoes, cucumber, avocado slices, shredded carrots, sliced radishes, and crispy chickpeas on top of the grains.
  5. Garnish and serve: Drizzle the tahini dressing over each bowl. Sprinkle with chopped parsley and sunflower or pumpkin seeds for added texture and flavor.

Enjoy your Meatless Grain Bowl as a vibrant and satisfying meal that offers a perfect balance of taste and nutrition, providing all the goodness of plant-based ingredients in every bite.

Zucchini Pizza Boats

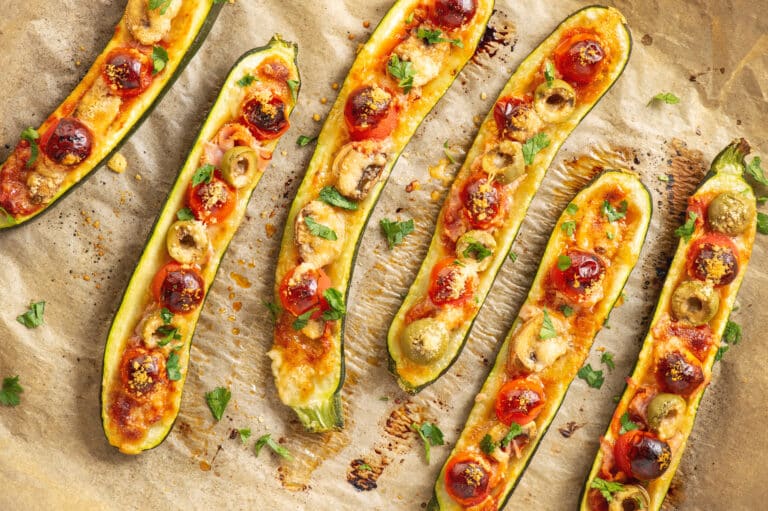
Zucchini Pizza Boats are a delicious and healthy alternative to traditional pizza, perfect for those looking to enjoy the classic flavors of pizza with a low-carb twist. These boats feature fresh zucchini halves filled with a savory tomato sauce, topped with melted cheese, and adorned with your favorite pizza toppings. Whether you’re following a specific diet or simply looking to incorporate more vegetables into your meals, Zucchini Pizza Boats are a fun and satisfying way to do so. Easy to prepare and customizable, these pizza boats make for a quick weeknight dinner or a delightful appetizer that everyone will love.

Ingredients

  • 4 medium zucchini
  • 1 cup marinara sauce or pizza sauce
  • 1 1/2 cups shredded mozzarella cheese
  • 1/4 cup grated Parmesan cheese
  • 1/2 cup sliced pepperoni or any preferred toppings (mushrooms, bell peppers, olives, etc.)
  • 1 teaspoon Italian seasoning
  • Salt and pepper, to taste
  • 1 tablespoon olive oil
  • Fresh basil or parsley, chopped (for garnish)

Instructions

  1. Preheat the oven: Preheat your oven to 400°F (200°C). Line a baking sheet with parchment paper or lightly grease it with olive oil.
  2. Prepare the zucchini: Cut each zucchini in half lengthwise. Use a spoon to scoop out the seeds and create a hollow center in each half, leaving about 1/4 inch of flesh around the edges.
  3. Season the zucchini: Brush the cut sides of the zucchini with olive oil and season with salt, pepper, and Italian seasoning.
  4. Assemble the pizza boats: Place the zucchini halves on the prepared baking sheet, cut side up. Spread a spoonful of marinara sauce into each zucchini half. Sprinkle the shredded mozzarella cheese evenly over the sauce. Add your desired pizza toppings, such as pepperoni, mushrooms, bell peppers, or olives. Finish with a sprinkle of grated Parmesan cheese.
  5. Bake: Place the baking sheet in the preheated oven and bake for 15-20 minutes, or until the zucchini is tender and the cheese is melted and bubbly.
  6. Serve: Remove the zucchini pizza boats from the oven and let them cool for a few minutes. Garnish with chopped fresh basil or parsley before serving.

Enjoy your Zucchini Pizza Boats as a flavorful and nutritious meal that satisfies your pizza cravings in a healthy way, offering a fun and tasty option for any occasion.