Home Blog Page 804

The Best Vegetable Salad

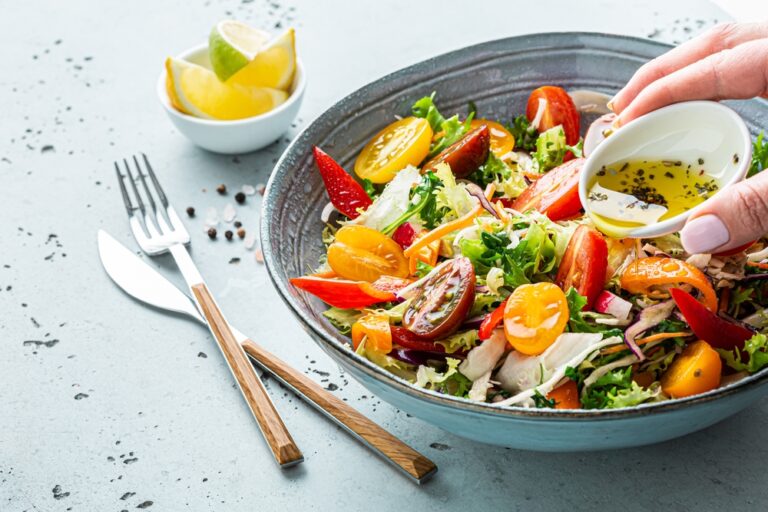
The Best Vegetable Salad is a refreshing and colorful dish that celebrates the natural flavors and textures of fresh produce. Bursting with vibrant vegetables like crisp lettuce, juicy tomatoes, crunchy cucumbers, and sweet bell peppers, this salad is a feast for the eyes and the palate. A zesty lemon vinaigrette ties everything together, enhancing the natural sweetness of the vegetables and adding a tangy brightness to every bite. Perfect as a side dish or a light meal on its own, this vegetable salad is not only delicious but also packed with nutrients to keep you feeling energized and satisfied.

Ingredients:

  • For the Salad:
    • 4 cups mixed salad greens (e.g., romaine, spinach, arugula)
    • 1 cup cherry tomatoes, halved
    • 1 cup cucumber, sliced
    • 1 red bell pepper, diced
    • 1 yellow bell pepper, diced
    • 1 carrot, julienned
    • 1/4 red onion, thinly sliced
    • 1/4 cup radishes, thinly sliced
    • 1/4 cup black olives, sliced
    • 1/4 cup feta cheese, crumbled (optional)
    • 2 tablespoons sunflower seeds or pumpkin seeds (optional)
  • For the Lemon Vinaigrette:
    • 1/4 cup olive oil
    • 3 tablespoons freshly squeezed lemon juice
    • 1 teaspoon Dijon mustard
    • 1 clove garlic, minced
    • 1 teaspoon honey
    • Salt and pepper to taste

Instructions:

  1. Prepare the Vegetables:
    • Wash and dry all the vegetables thoroughly.
    • Chop the salad greens into bite-sized pieces if needed and place them in a large salad bowl.
    • Add the halved cherry tomatoes, sliced cucumber, diced bell peppers, julienned carrot, sliced red onion, sliced radishes, and black olives to the bowl.
  2. Make the Lemon Vinaigrette:
    • In a small bowl or jar, combine the olive oil, lemon juice, Dijon mustard, minced garlic, and honey.
    • Whisk together until well combined. Season with salt and pepper to taste.
  3. Assemble the Salad:
    • Pour the lemon vinaigrette over the salad and toss gently to coat all the vegetables evenly.
    • Sprinkle the crumbled feta cheese and sunflower seeds or pumpkin seeds on top, if using.
  4. Serve:
    • Serve the salad immediately as a refreshing side dish or a light meal.

Enjoy your Best Vegetable Salad, a vibrant and nutritious dish that’s perfect for any occasion!
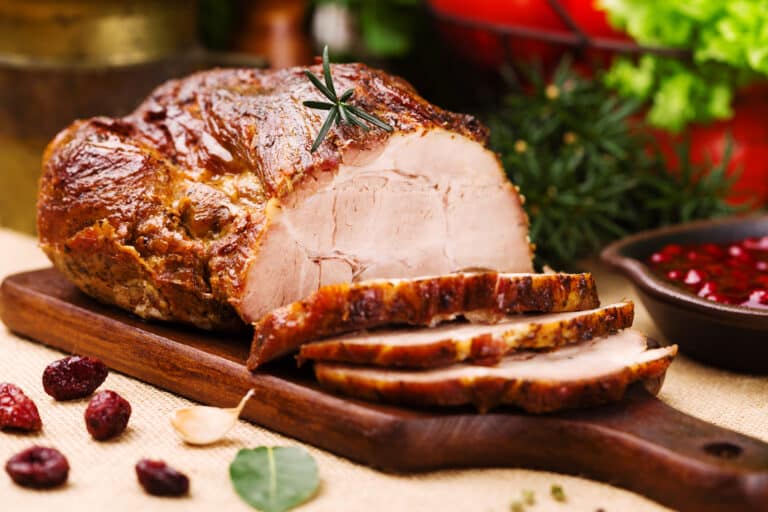
Roasted Pork Loin

Roasted Pork Loin is a classic and versatile dish that’s perfect for family dinners or special occasions. This juicy and tender roast is seasoned with a simple blend of herbs and spices, creating a flavorful crust that complements the succulent meat inside. The roasting process allows the pork loin to cook evenly, resulting in a beautifully caramelized exterior and a juicy, flavorful interior. Serve it with roasted vegetables or a fresh salad for a complete and satisfying meal. With its easy preparation and delicious taste, this roasted pork loin recipe is sure to become a staple in your cooking repertoire.

Ingredients

  • 3-pound boneless pork loin
  • 2 tablespoons olive oil
  • 4 cloves garlic, minced
  • 1 tablespoon fresh rosemary, chopped
  • 1 tablespoon fresh thyme, chopped
  • 1 teaspoon dried oregano
  • 1 teaspoon salt
  • 1/2 teaspoon black pepper
  • 1 teaspoon smoked paprika
  • 1 tablespoon Dijon mustard
  • 1 cup chicken broth or white wine

Instructions

  1. Preheat the oven: Preheat your oven to 375°F (190°C).
  2. Prepare the pork loin: Pat the pork loin dry with paper towels to remove any excess moisture. Place it on a cutting board or a baking sheet.
  3. Make the seasoning paste: In a small bowl, mix together the olive oil, minced garlic, rosemary, thyme, oregano, salt, black pepper, smoked paprika, and Dijon mustard until it forms a paste.
  4. Season the pork loin: Rub the seasoning paste all over the pork loin, ensuring it’s evenly coated.
  5. Sear the pork loin (optional): For an extra crispy crust, heat a skillet over medium-high heat and sear the pork loin on all sides for about 2-3 minutes per side until browned. This step is optional but adds extra flavor.
  6. Roast the pork loin: Place the pork loin in a roasting pan or baking dish. Pour the chicken broth or white wine into the bottom of the pan. Roast in the preheated oven for 50-60 minutes, or until the internal temperature reaches 145°F (63°C) using a meat thermometer.
  7. Rest the pork loin: Remove the pork loin from the oven and transfer it to a cutting board. Tent it with foil and let it rest for 10-15 minutes to allow the juices to redistribute.
  8. Slice and serve: Slice the roasted pork loin into thick pieces and serve with the pan juices or your favorite sauce. Pair it with roasted vegetables, mashed potatoes, or a fresh salad for a complete meal.

Enjoy your Roasted Pork Loin as a delicious and satisfying main course, perfect for any occasion. Its savory flavor and juicy texture are sure to impress your family and guests.

Mini Sausage Pancake Muffins

Mini Sausage Pancake Muffins are a delightful twist on the classic breakfast combination of pancakes and sausages. These bite-sized treats are perfect for busy mornings, brunch gatherings, or as a fun snack. With fluffy pancake batter encasing savory sausage pieces, these muffins offer a satisfying blend of sweet and savory flavors in every bite. Easy to make and convenient to grab on the go, they’re sure to be a hit with kids and adults alike. Pair them with maple syrup for dipping or enjoy them plain for a quick and delicious breakfast option.

Ingredients:

  • 1 cup all-purpose flour
  • 1 tablespoon sugar
  • 1 teaspoon baking powder
  • 1/2 teaspoon baking soda
  • 1/4 teaspoon salt
  • 1 cup buttermilk
  • 1 large egg
  • 2 tablespoons melted butter
  • 1 teaspoon vanilla extract
  • 8-10 breakfast sausage links, cooked and chopped
  • Maple syrup (for serving)

Instructions:

  1. Preheat the Oven:
    • Preheat your oven to 375°F (190°C). Lightly grease a mini muffin tin or line it with paper liners.
  2. Mix Dry Ingredients:
    • In a large bowl, whisk together the flour, sugar, baking powder, baking soda, and salt.
  3. Combine Wet Ingredients:
    • In a separate bowl, whisk together the buttermilk, egg, melted butter, and vanilla extract until well combined.
  4. Prepare the Batter:
    • Pour the wet ingredients into the dry ingredients and stir until just combined. Be careful not to overmix; the batter should be slightly lumpy.
  5. Assemble the Muffins:
    • Fill each muffin cup about two-thirds full with the pancake batter.
    • Place a piece of chopped sausage into the center of each muffin cup.
  6. Bake:
    • Bake in the preheated oven for 12-15 minutes, or until the muffins are golden brown and a toothpick inserted into the center comes out clean.
  7. Serve:
    • Allow the muffins to cool slightly before removing them from the tin.
    • Serve warm with maple syrup for dipping or drizzling.

Enjoy your Mini Sausage Pancake Muffins, a delicious and portable breakfast option that’s perfect for any time of the day!

Spicy Salmon Salad Rice Bowl

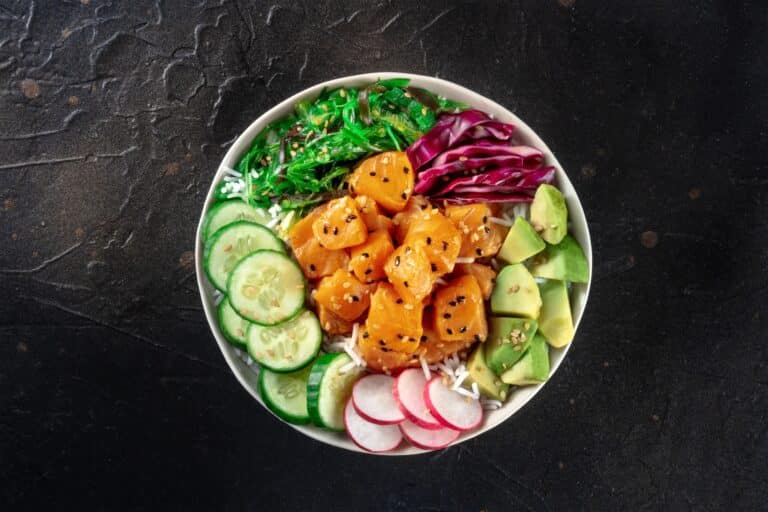
The Spicy Salmon Salad Rice Bowl is a delicious, nutritious, and quick meal perfect for lunch or dinner. Combining tender salmon with spicy sriracha, creamy avocado, and crisp veggies over a bed of fluffy rice, this bowl is a feast for both the eyes and the palate. The dish is packed with flavor, featuring a delightful balance of heat, creaminess, and freshness. This recipe is easy to prepare and customizable, making it ideal for those who love to experiment with flavors while maintaining a healthy diet. It’s a great way to enjoy the benefits of salmon and vegetables in a vibrant, wholesome meal.

Ingredients

  • 1 pound salmon fillet, skin removed
  • Salt and pepper, to taste
  • 1 tablespoon olive oil
  • 2 cups cooked jasmine or brown rice
  • 1 avocado, sliced
  • 1 cucumber, thinly sliced
  • 1 carrot, julienned
  • 1/4 cup radishes, thinly sliced
  • 2 tablespoons soy sauce
  • 1 tablespoon sriracha (adjust to taste)
  • 2 tablespoons mayonnaise
  • 1 tablespoon rice vinegar
  • 1 tablespoon sesame oil
  • 1 tablespoon sesame seeds
  • 2 green onions, chopped
  • 1/4 cup fresh cilantro, chopped
  • Lime wedges, for serving

Instructions

  1. Cook the salmon: Season the salmon fillet with salt and pepper. In a skillet, heat the olive oil over medium-high heat. Add the salmon and cook for 3-4 minutes per side, until cooked through and flaky. Remove from heat and let it cool slightly before flaking the salmon into bite-sized pieces.
  2. Prepare the spicy sauce: In a small bowl, mix the soy sauce, sriracha, mayonnaise, rice vinegar, and sesame oil until well combined.
  3. Assemble the rice bowls: Divide the cooked rice among four bowls. Top each bowl with flaked salmon, avocado slices, cucumber, carrot, and radishes.
  4. Drizzle the sauce: Drizzle the spicy sauce evenly over each bowl.
  5. Garnish: Sprinkle sesame seeds, chopped green onions, and cilantro over the top of each bowl.
  6. Serve: Serve immediately with lime wedges on the side for squeezing over the top.

Enjoy your Spicy Salmon Salad Rice Bowl as a delicious and wholesome meal that combines the rich flavors of salmon with fresh vegetables, offering a delightful and healthy dining experience.

Tex-Mex Pork Chops and Rice Skillet

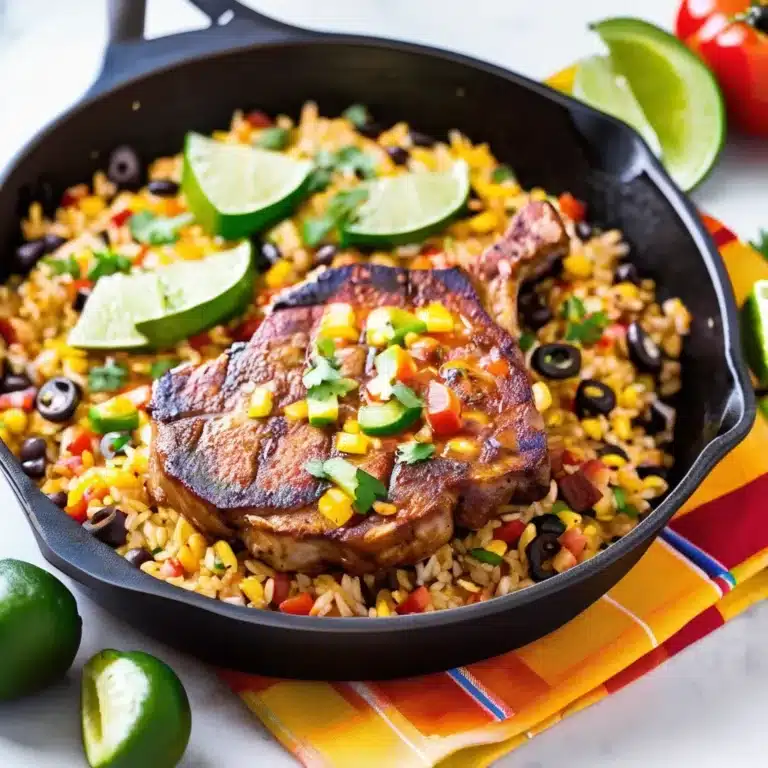
Tex-Mex Pork Chops and Rice Skillet is a one-pan wonder that brings the bold flavors of the Southwest to your dinner table. This dish features tender, juicy pork chops nestled in a bed of flavorful rice, simmered with vibrant bell peppers, onions, tomatoes, and classic Tex-Mex spices. The combination of savory pork, aromatic vegetables, and spiced rice makes for a hearty and satisfying meal that’s perfect for any night of the week. With minimal cleanup and maximum flavor, this skillet dish is sure to become a family favorite, offering a delicious and easy solution for busy weeknights.

Ingredients

  • 4 bone-in or boneless pork chops
  • Salt and pepper, to taste
  • 1 tablespoon olive oil
  • 1 onion, diced
  • 2 cloves garlic, minced
  • 1 red bell pepper, diced
  • 1 green bell pepper, diced
  • 1 cup long-grain rice
  • 1 teaspoon chili powder
  • 1 teaspoon ground cumin
  • 1/2 teaspoon smoked paprika
  • 1 (14.5-ounce) can diced tomatoes with green chilies
  • 2 cups chicken broth
  • 1 cup frozen corn
  • 1/4 cup chopped fresh cilantro (for garnish)
  • Lime wedges (for serving)

Instructions

  1. Season the pork chops: Season both sides of the pork chops with salt and pepper.
  2. Sear the pork chops: In a large skillet, heat the olive oil over medium-high heat. Add the pork chops and cook for 3-4 minutes on each side, until browned. Remove the pork chops from the skillet and set aside.
  3. Sauté the vegetables: In the same skillet, add the diced onion, minced garlic, red bell pepper, and green bell pepper. Sauté for about 5 minutes, until the vegetables are softened.
  4. Add the rice and spices: Stir in the rice, chili powder, ground cumin, and smoked paprika. Cook for 1-2 minutes, until the rice is lightly toasted.
  5. Simmer with liquids: Add the diced tomatoes with green chilies and chicken broth to the skillet. Stir to combine, then bring the mixture to a simmer.
  6. Cook the pork chops and rice: Nestle the pork chops into the rice mixture. Cover the skillet, reduce the heat to low, and cook for 20-25 minutes, or until the rice is tender and the pork chops are cooked through.
  7. Add the corn: Stir in the frozen corn and cook for an additional 5 minutes, until heated through.
  8. Serve: Remove from heat and garnish with chopped fresh cilantro. Serve with lime wedges on the side.

Enjoy your Tex-Mex Pork Chops and Rice Skillet as a delicious and hearty meal that delivers the vibrant flavors of the Southwest, perfect for any occasion.

Yummy Chicken Tortellini

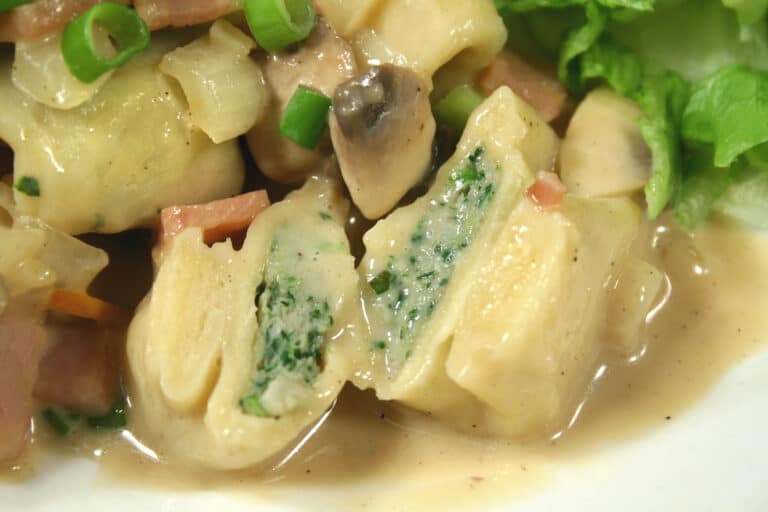
Yummy Chicken Tortellini is a deliciously comforting dish that combines tender pieces of chicken with cheese-filled tortellini in a creamy, flavorful sauce. This one-pot wonder is perfect for a cozy family dinner or a quick and satisfying weeknight meal. With its rich and creamy texture complemented by a hint of garlic and fresh herbs, this dish offers a delightful blend of flavors and textures that will keep everyone coming back for seconds. Easy to prepare and packed with flavor, Yummy Chicken Tortellini is sure to become a favorite in your recipe collection.

Ingredients

  • 1 tablespoon olive oil
  • 1 pound boneless, skinless chicken breasts, cut into bite-sized pieces
  • Salt and pepper, to taste
  • 3 cloves garlic, minced
  • 1/2 teaspoon dried Italian seasoning
  • 1/4 teaspoon red pepper flakes (optional)
  • 1 cup chicken broth
  • 1 cup heavy cream
  • 1 (9-ounce) package cheese tortellini
  • 1/2 cup grated Parmesan cheese
  • 2 cups fresh spinach
  • 1 tablespoon fresh basil, chopped (for garnish)

Instructions

  1. Cook the chicken: Heat the olive oil in a large skillet over medium-high heat. Add the chicken pieces, season with salt and pepper, and cook for 5-7 minutes, or until golden brown and cooked through. Remove the chicken from the skillet and set aside.
  2. Sauté the garlic: In the same skillet, add the minced garlic, dried Italian seasoning, and red pepper flakes (if using). Sauté for about 30 seconds until fragrant.
  3. Add the liquids and tortellini: Pour in the chicken broth and heavy cream, stirring to combine. Bring the mixture to a simmer, then add the cheese tortellini. Cook for about 5-7 minutes, stirring occasionally, until the tortellini is tender and cooked through.
  4. Finish the dish: Return the cooked chicken to the skillet and stir in the grated Parmesan cheese. Add the fresh spinach and cook until wilted, about 2 minutes.
  5. Serve: Remove from heat and garnish with chopped fresh basil. Serve hot and enjoy your Yummy Chicken Tortellini as a delicious and satisfying meal.

Enjoy your Yummy Chicken Tortellini as a comforting and flavorful dish that’s perfect for any occasion, offering a delightful blend of creamy, cheesy, and savory goodness in every bite.

Adobong Pusit (Squid Adobo)

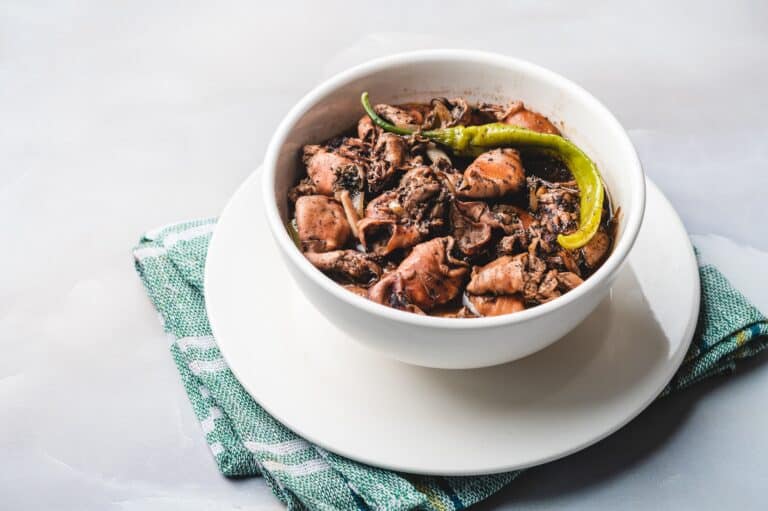
Adobong Pusit, or Squid Adobo, is a delicious Filipino dish that features tender squid cooked in a savory-sour sauce made from soy sauce, vinegar, and aromatics. This unique version of the classic adobo brings a delightful seafood twist to the table, combining the rich flavors of the sauce with the natural sweetness of squid. Perfect for seafood lovers, Adobong Pusit is easy to prepare and offers a quick cooking time that preserves the delicate texture of the squid. Serve it over steamed rice to soak up the flavorful sauce and enjoy a taste of the Philippines.

Ingredients

  • 1 1/2 pounds squid, cleaned and sliced into rings
  • 2 tablespoons vegetable oil
  • 1 onion, sliced
  • 4 cloves garlic, minced
  • 2 tablespoons soy sauce
  • 2 tablespoons vinegar
  • 1/4 cup water
  • 1 teaspoon sugar
  • 1 bay leaf
  • Salt and pepper, to taste
  • 2 tomatoes, chopped
  • 1 green chili pepper, sliced (optional)
  • Fresh parsley or green onions, chopped (for garnish)

Instructions

  1. Prepare the squid: Clean the squid by removing the head, tentacles, and innards. Remove the plastic-like spine and rinse the squid thoroughly. Slice the body into rings and set aside.
  2. Sauté the aromatics: Heat the vegetable oil in a large pan over medium heat. Add the sliced onion and minced garlic, and sauté until the onion becomes translucent.
  3. Cook the squid: Add the squid rings to the pan and cook for 1-2 minutes until they start to turn opaque.
  4. Add the sauce ingredients: Stir in the soy sauce, vinegar, water, and sugar. Add the bay leaf and season with salt and pepper. Bring the mixture to a simmer and cook for about 5 minutes, allowing the squid to absorb the flavors of the sauce.
  5. Finish with tomatoes and chili: Add the chopped tomatoes and sliced green chili pepper (if using) to the pan. Cook for an additional 2-3 minutes until the tomatoes are soft and the sauce is well combined.
  6. Serve: Remove the Adobong Pusit from the heat and discard the bay leaf. Garnish with chopped fresh parsley or green onions. Serve hot over steamed rice.

Enjoy your Adobong Pusit as a flavorful and aromatic dish that showcases the wonderful taste of Filipino cuisine, perfect for any occasion.

Air Fryer Chicken Katsu

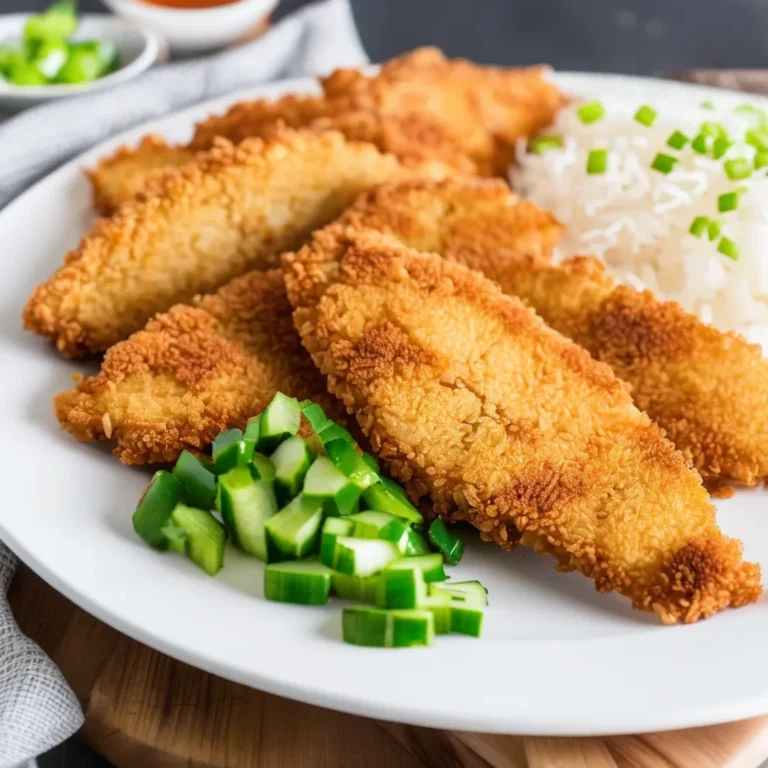
Air Fryer Chicken Katsu is a lighter version of the popular Japanese dish that delivers the same satisfying crunch and flavor without the excess oil. This dish features tender chicken cutlets coated in crispy panko breadcrumbs, air-fried to golden perfection. The air fryer makes it easy to achieve that signature crispiness with less mess and fewer calories. Chicken Katsu is typically served with a tangy tonkatsu sauce, which perfectly complements the savory chicken. Whether you’re serving it over rice, in a sandwich, or alongside a fresh salad, this Air Fryer Chicken Katsu is a delicious and healthier twist on a beloved classic.

Ingredients

  • 2 boneless, skinless chicken breasts
  • Salt and pepper, to taste
  • 1/2 cup all-purpose flour
  • 2 large eggs, beaten
  • 1 1/2 cups panko breadcrumbs
  • Cooking spray

For the Tonkatsu Sauce:

  • 1/4 cup ketchup
  • 2 tablespoons Worcestershire sauce
  • 1 tablespoon soy sauce
  • 1 tablespoon mirin (or rice vinegar)
  • 1 teaspoon sugar

Instructions

  1. Prepare the chicken: Slice each chicken breast in half horizontally to create two thin cutlets. Season both sides with salt and pepper.
  2. Set up the breading station: Place the flour, beaten eggs, and panko breadcrumbs in three separate shallow dishes.
  3. Bread the chicken: Dredge each chicken cutlet in flour, shaking off any excess. Dip into the beaten eggs, then coat thoroughly with panko breadcrumbs, pressing gently to adhere.
  4. Preheat the air fryer: Preheat your air fryer to 375°F (190°C) for about 5 minutes.
  5. Cook the chicken: Lightly spray the breaded chicken cutlets with cooking spray. Place them in a single layer in the air fryer basket, ensuring they do not overlap. Cook for 10-12 minutes, flipping halfway through, until the chicken is golden brown and cooked through. The internal temperature should reach 165°F (75°C).
  6. Prepare the tonkatsu sauce: In a small bowl, whisk together the ketchup, Worcestershire sauce, soy sauce, mirin, and sugar until smooth.
  7. Serve: Slice the Air Fryer Chicken Katsu into strips and serve hot with tonkatsu sauce. Enjoy with steamed rice, shredded cabbage, or as a sandwich filling.

Enjoy your Air Fryer Chicken Katsu as a delicious and healthier version of the traditional dish, perfect for a quick meal or a satisfying snack.

Quick and Easy Pancit

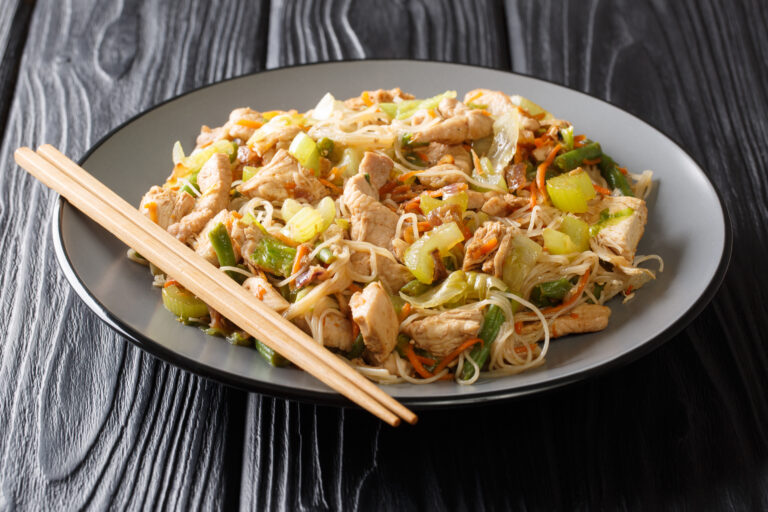
Quick and Easy Pancit is a flavorful Filipino noodle dish that brings together a vibrant mix of vegetables, protein, and rice noodles for a satisfying meal. Known for its delicious combination of savory and umami flavors, pancit is a popular dish for celebrations and everyday meals alike. This simplified version uses readily available ingredients and requires minimal preparation, making it perfect for busy weeknights. Packed with colorful vegetables and customizable with your choice of chicken, shrimp, or tofu, this dish offers a delightful taste of the Philippines in every bite.

Ingredients

  • 8 ounces rice noodles
  • 2 tablespoons vegetable oil
  • 1 onion, thinly sliced
  • 3 cloves garlic, minced
  • 1 cup cooked chicken, shredded (or shrimp, tofu, etc.)
  • 1 cup cabbage, shredded
  • 1 cup carrots, julienned
  • 1 cup green beans, sliced
  • 1/4 cup soy sauce
  • 1 tablespoon oyster sauce
  • 1 tablespoon fish sauce (optional)
  • 1 teaspoon ground black pepper
  • 1/2 cup chicken broth or water
  • 2 green onions, chopped
  • Lemon wedges, for serving

Instructions

  1. Prepare the noodles: Soak the rice noodles in warm water for 10-15 minutes until they are softened. Drain and set aside.
  2. Sauté the aromatics: In a large skillet or wok, heat the vegetable oil over medium-high heat. Add the sliced onion and minced garlic, and sauté for 2-3 minutes until the onion is translucent.
  3. Cook the protein and vegetables: Add the cooked chicken (or shrimp, tofu) to the skillet and stir-fry for 2 minutes. Add the shredded cabbage, julienned carrots, and sliced green beans. Stir-fry for another 3-4 minutes until the vegetables are tender-crisp.
  4. Add the noodles and sauce: Add the soaked rice noodles to the skillet along with the soy sauce, oyster sauce, fish sauce (if using), black pepper, and chicken broth or water. Toss everything together to combine, cooking for another 2-3 minutes until the noodles are heated through and evenly coated with the sauce.
  5. Serve: Remove from heat and garnish with chopped green onions. Serve with lemon wedges on the side for squeezing over the pancit.

Enjoy your Quick and Easy Pancit as a delicious and versatile dish that brings the vibrant flavors of Filipino cuisine to your table, perfect for any occasion.

Light and Easy Greek Potato Salad

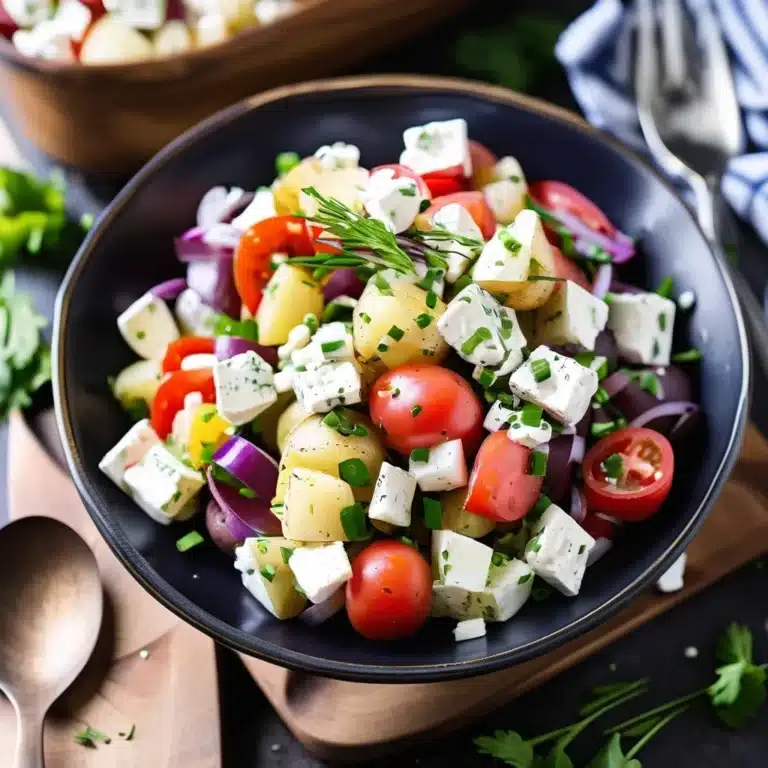
Light and Easy Greek Potato Salad is a refreshing and flavorful twist on the traditional potato salad. This Mediterranean-inspired dish features tender potatoes tossed with crisp cucumbers, juicy tomatoes, briny olives, and tangy feta cheese, all coated in a light, zesty lemon-oregano dressing. Unlike mayonnaise-based potato salads, this Greek version is both vibrant and healthy, making it perfect for summer picnics, barbecues, or as a side dish for any meal. Its bright flavors and simple preparation will leave you and your guests feeling satisfied without feeling weighed down.

Ingredients

  • 2 pounds small red or Yukon Gold potatoes
  • 1 cup cherry tomatoes, halved
  • 1 cucumber, diced
  • 1/2 red onion, thinly sliced
  • 1/2 cup Kalamata olives, pitted and sliced
  • 1/2 cup feta cheese, crumbled
  • 1/4 cup fresh parsley, chopped

For the Dressing:

  • 1/4 cup olive oil
  • 2 tablespoons fresh lemon juice
  • 1 tablespoon red wine vinegar
  • 2 cloves garlic, minced
  • 1 teaspoon dried oregano
  • Salt and pepper, to taste

Instructions

  1. Cook the potatoes: Place the potatoes in a large pot and cover them with cold water. Add a pinch of salt and bring to a boil over medium-high heat. Reduce the heat and simmer for 15-20 minutes, or until the potatoes are tender when pierced with a fork. Drain and let them cool slightly. Cut into bite-sized pieces if necessary.
  2. Prepare the dressing: In a small bowl, whisk together the olive oil, lemon juice, red wine vinegar, minced garlic, dried oregano, salt, and pepper.
  3. Assemble the salad: In a large bowl, combine the cooked potatoes, cherry tomatoes, cucumber, red onion, Kalamata olives, and crumbled feta cheese. Pour the dressing over the salad and gently toss to combine.
  4. Chill and serve: Refrigerate the potato salad for at least 30 minutes to allow the flavors to meld. Garnish with chopped fresh parsley before serving.

Enjoy your Light and Easy Greek Potato Salad as a delightful and healthy side dish that captures the essence of Mediterranean cuisine, perfect for any occasion.