Home Blog Page 796

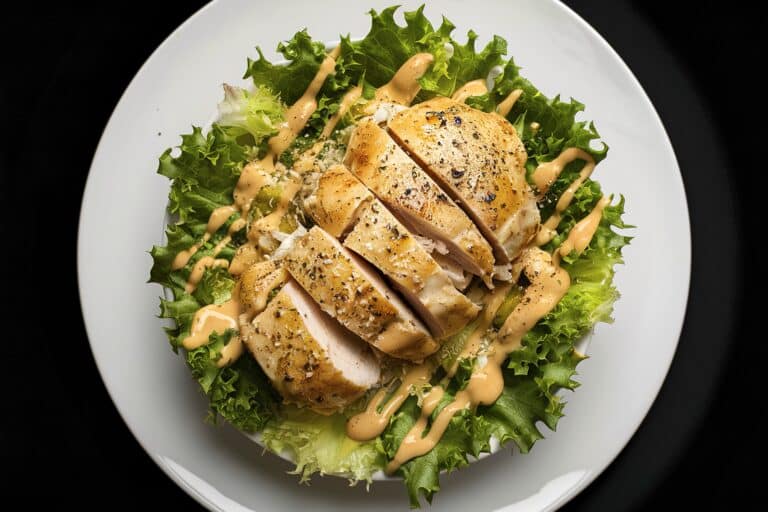
THE PERFECT GRILLED CHICKEN BREASTS

The Perfect Grilled Chicken Breasts are a staple in any cook’s repertoire, offering juicy, flavorful meat with a beautifully charred exterior. This recipe transforms simple chicken breasts into a mouthwatering dish, ideal for barbecues, family dinners, or meal prep. By marinating the chicken in a blend of olive oil, lemon juice, garlic, and herbs, the meat becomes tender and infused with vibrant flavors. Grilling the chicken over medium-high heat ensures that it cooks evenly and remains moist. Serve these delicious chicken breasts with your favorite sides, or slice them for salads and sandwiches for a versatile and satisfying meal.

Ingredients

  • 4 boneless, skinless chicken breasts
  • 1/4 cup olive oil
  • 3 tablespoons lemon juice
  • 3 cloves garlic, minced
  • 1 tablespoon Dijon mustard
  • 1 teaspoon dried oregano
  • 1 teaspoon dried thyme
  • 1 teaspoon paprika
  • Salt and pepper, to taste

Instructions

  1. Prepare the marinade: In a bowl, whisk together the olive oil, lemon juice, minced garlic, Dijon mustard, oregano, thyme, paprika, salt, and pepper.
  2. Marinate the chicken: Place the chicken breasts in a large resealable plastic bag or shallow dish. Pour the marinade over the chicken, ensuring each piece is well-coated. Seal the bag or cover the dish, and refrigerate for at least 30 minutes, or up to 4 hours for maximum flavor.
  3. Preheat the grill: Preheat your grill to medium-high heat (about 400°F/200°C). Lightly oil the grill grates to prevent sticking.
  4. Grill the chicken: Remove the chicken from the marinade and let any excess drip off. Place the chicken breasts on the grill and cook for 6-7 minutes per side, or until the internal temperature reaches 165°F (74°C) and the chicken is no longer pink inside. Avoid pressing down on the chicken with a spatula to retain its juices.
  5. Rest the chicken: Remove the chicken from the grill and let it rest for 5 minutes before slicing. This allows the juices to redistribute, keeping the meat moist and flavorful.
  6. Serve: Serve the grilled chicken breasts hot with your choice of sides, or slice and use in salads, sandwiches, or wraps.

Enjoy your Perfect Grilled Chicken Breasts as a delicious and versatile dish that brings a touch of outdoor grilling flavor to your table, suitable for any occasion.
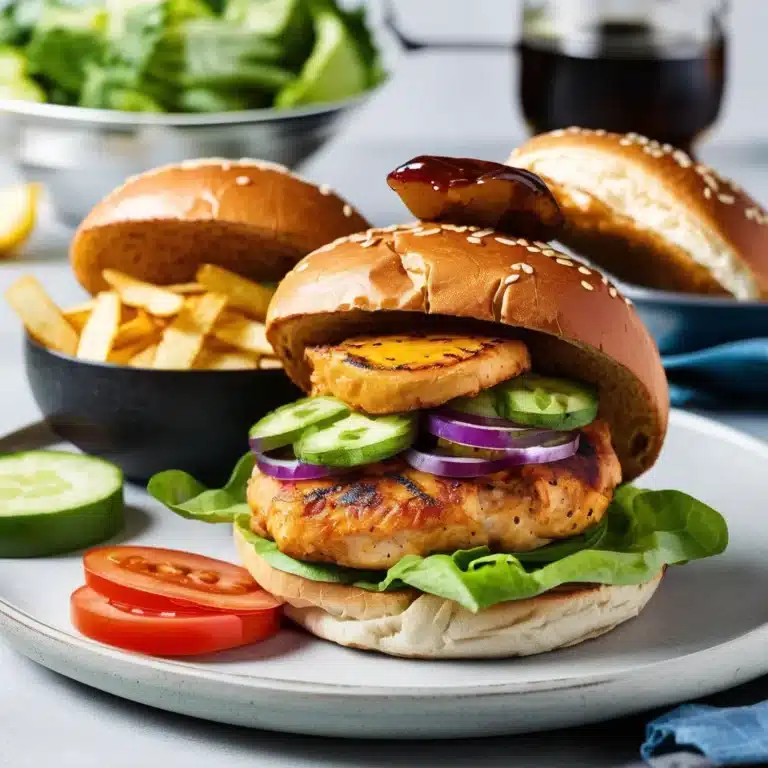
Cajun chicken burgers

Cajun Chicken Burgers are a flavorful and spicy twist on a classic favorite, offering a taste of the vibrant and zesty flavors of Louisiana cuisine. These juicy chicken patties are seasoned with a homemade Cajun spice blend that gives them a delicious kick, while the addition of fresh ingredients like bell peppers and onions adds texture and depth. Topped with a creamy and tangy Cajun mayo, these burgers are perfect for grilling season or any time you want to spice up your burger game. Serve them on a toasted bun with your favorite toppings for a satisfying and mouthwatering meal that’s sure to impress.

Ingredients:

  • For the Chicken Patties:
    • 1 lb ground chicken
    • 1/2 cup red bell pepper, finely chopped
    • 1/4 cup onion, finely chopped
    • 2 cloves garlic, minced
    • 2 tablespoons Cajun seasoning
    • 1/4 cup breadcrumbs
    • 1 egg
    • Salt and pepper to taste
  • For the Cajun Mayo:
    • 1/2 cup mayonnaise
    • 1 tablespoon Cajun seasoning
    • 1 teaspoon lemon juice
  • For Assembly:
    • 4 hamburger buns, toasted
    • Lettuce leaves
    • Tomato slices
    • Pickles (optional)
    • Sliced red onion (optional)

Instructions:

  1. Make the Cajun Mayo:
    • In a small bowl, mix together the mayonnaise, Cajun seasoning, and lemon juice until well combined. Refrigerate until ready to use.
  2. Prepare the Chicken Patties:
    • In a large mixing bowl, combine the ground chicken, red bell pepper, onion, minced garlic, Cajun seasoning, breadcrumbs, and egg. Mix until all ingredients are well incorporated.
    • Divide the mixture into four equal portions and shape each into a patty.
  3. Cook the Patties:
    • Preheat a grill or stovetop skillet over medium-high heat. Lightly oil the grill grates or skillet.
    • Cook the chicken patties for about 5-6 minutes per side, or until they are cooked through and reach an internal temperature of 165°F (74°C).
  4. Assemble the Burgers:
    • Spread a generous amount of Cajun mayo on the top and bottom halves of the toasted buns.
    • Place a chicken patty on the bottom half of each bun. Top with lettuce leaves, tomato slices, and additional toppings like pickles and red onion if desired.
    • Cover with the top half of the bun.

Enjoy your Cajun Chicken Burgers, a spicy and flavorful dish that’s perfect for any occasion!

SWEET AND STICKY BAKED BBQ RIBS

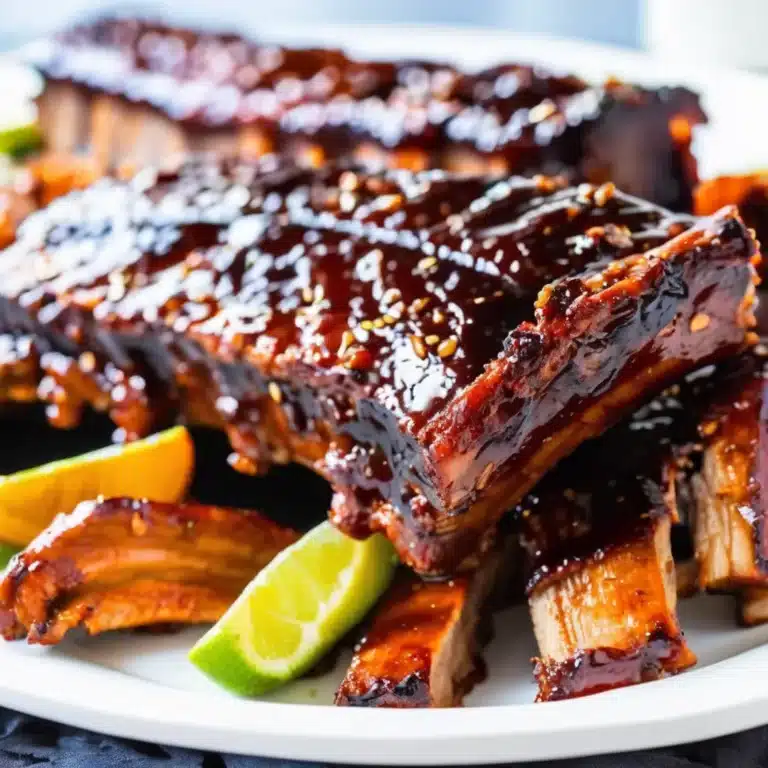
Sweet and Sticky Baked BBQ Ribs are the ultimate comfort food, combining tender, fall-off-the-bone meat with a rich and flavorful sauce that’s both sweet and smoky. Perfect for any occasion, these ribs are oven-baked to perfection, ensuring a juicy and succulent result every time. The homemade BBQ sauce is infused with brown sugar, honey, and spices, creating a glaze that caramelizes beautifully in the oven. Whether you’re hosting a backyard gathering or craving a satisfying meal at home, these ribs will leave everyone reaching for seconds.

Ingredients

  • 2 racks of pork baby back ribs
  • 1 tablespoon olive oil
  • Salt and pepper, to taste

For the Dry Rub:

  • 2 tablespoons brown sugar
  • 1 tablespoon paprika
  • 1 tablespoon garlic powder
  • 1 tablespoon onion powder
  • 1 teaspoon ground cumin
  • 1 teaspoon chili powder
  • 1 teaspoon smoked paprika
  • 1/2 teaspoon cayenne pepper (optional)

For the BBQ Sauce:

  • 1 cup ketchup
  • 1/2 cup brown sugar
  • 1/4 cup apple cider vinegar
  • 1/4 cup honey
  • 2 tablespoons Worcestershire sauce
  • 1 tablespoon soy sauce
  • 2 cloves garlic, minced
  • 1 teaspoon smoked paprika
  • 1 teaspoon mustard powder

Instructions

  1. Preheat the oven: Preheat your oven to 300°F (150°C). Line a baking sheet with aluminum foil for easy cleanup.
  2. Prepare the ribs: Remove the membrane from the back of the ribs for tender meat. Rub the ribs with olive oil, and season generously with salt and pepper.
  3. Make the dry rub: In a small bowl, mix together the brown sugar, paprika, garlic powder, onion powder, cumin, chili powder, smoked paprika, and cayenne pepper. Rub the mixture evenly over both sides of the ribs.
  4. Bake the ribs: Place the ribs on the prepared baking sheet and cover them tightly with aluminum foil. Bake in the preheated oven for 2 1/2 to 3 hours, or until the ribs are tender.
  5. Prepare the BBQ sauce: While the ribs are baking, combine the ketchup, brown sugar, apple cider vinegar, honey, Worcestershire sauce, soy sauce, minced garlic, smoked paprika, and mustard powder in a saucepan. Simmer over medium heat for 10-15 minutes, stirring occasionally, until the sauce thickens.
  6. Glaze the ribs: Remove the ribs from the oven and increase the oven temperature to 425°F (220°C). Brush the BBQ sauce generously over both sides of the ribs.
  7. Finish baking: Return the ribs to the oven, uncovered, and bake for an additional 10-15 minutes, or until the sauce is sticky and caramelized.
  8. Serve: Let the ribs rest for a few minutes before slicing and serving with extra BBQ sauce on the side.

Enjoy your Sweet and Sticky Baked BBQ Ribs as a delicious and satisfying meal that captures the rich flavors of classic barbecue, perfect for sharing with family and friends.

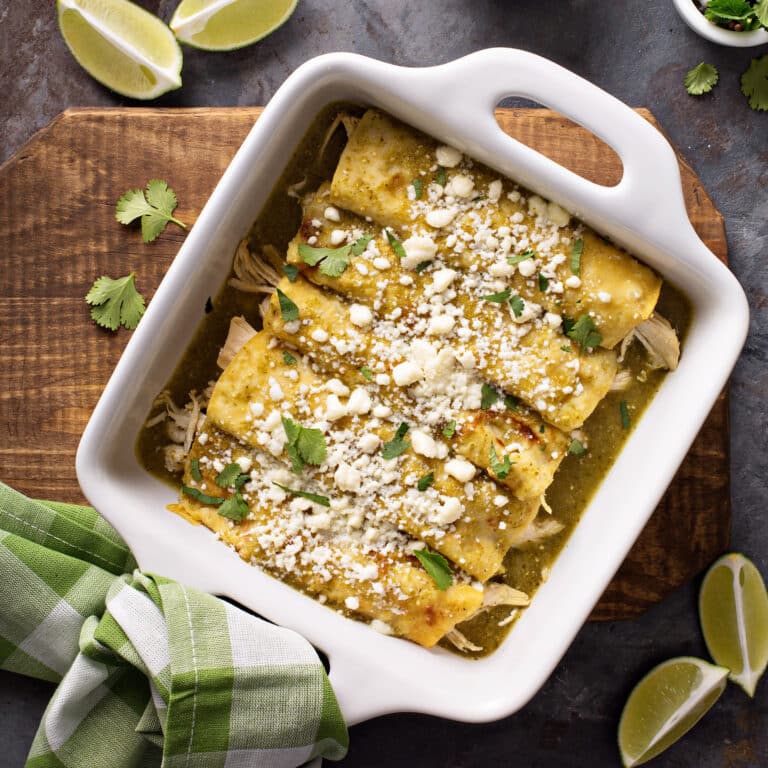
GREEN ENCHILADAS

Green Enchiladas are a vibrant and delicious Mexican dish that combines tender chicken, melty cheese, and tangy green sauce, all wrapped in soft corn tortillas. This dish is perfect for a weeknight dinner or a festive gathering, offering bold flavors and satisfying textures that everyone will love. The green sauce, typically made from tomatillos and green chilies, adds a bright and zesty element that pairs beautifully with the creamy filling. Topped with fresh cilantro and a squeeze of lime, these enchiladas are a delightful and comforting meal that brings the taste of Mexico to your table.

Ingredients

  • 2 tablespoons olive oil
  • 1 onion, chopped
  • 2 cloves garlic, minced
  • 2 cups cooked chicken, shredded
  • 1 teaspoon ground cumin
  • 1 teaspoon chili powder
  • Salt and pepper, to taste
  • 1 cup sour cream
  • 2 cups shredded Monterey Jack cheese, divided
  • 12 corn tortillas
  • 2 cups green enchilada sauce (store-bought or homemade)
  • 1/4 cup fresh cilantro, chopped
  • Lime wedges, for serving

Instructions

  1. Preheat the oven: Preheat your oven to 375°F (190°C). Grease a 9×13-inch baking dish with cooking spray or olive oil.
  2. Prepare the filling: In a large skillet, heat the olive oil over medium heat. Add the chopped onion and sauté for 3-4 minutes until softened. Add the minced garlic and cook for another minute.
  3. Add the chicken and spices: Stir in the shredded chicken, cumin, chili powder, salt, and pepper. Cook for 2-3 minutes until heated through. Remove from heat and stir in the sour cream and 1 cup of shredded Monterey Jack cheese.
  4. Warm the tortillas: Wrap the corn tortillas in a damp paper towel and microwave for 30-45 seconds until pliable.
  5. Assemble the enchiladas: Spread 1/2 cup of green enchilada sauce in the bottom of the prepared baking dish. Place about 1/4 cup of the chicken mixture onto each tortilla, roll it up, and place it seam-side down in the baking dish.
  6. Top with sauce and cheese: Pour the remaining green enchilada sauce over the rolled tortillas, ensuring they are fully covered. Sprinkle the remaining 1 cup of shredded Monterey Jack cheese over the top.
  7. Bake the enchiladas: Cover the dish with foil and bake in the preheated oven for 20 minutes. Remove the foil and bake for an additional 10 minutes until the cheese is melted and bubbly.
  8. Garnish and serve: Remove the enchiladas from the oven and let them cool for a few minutes. Garnish with chopped cilantro and serve with lime wedges on the side.

Enjoy your Green Enchiladas as a flavorful and satisfying meal that captures the essence of Mexican cuisine, perfect for any occasion.

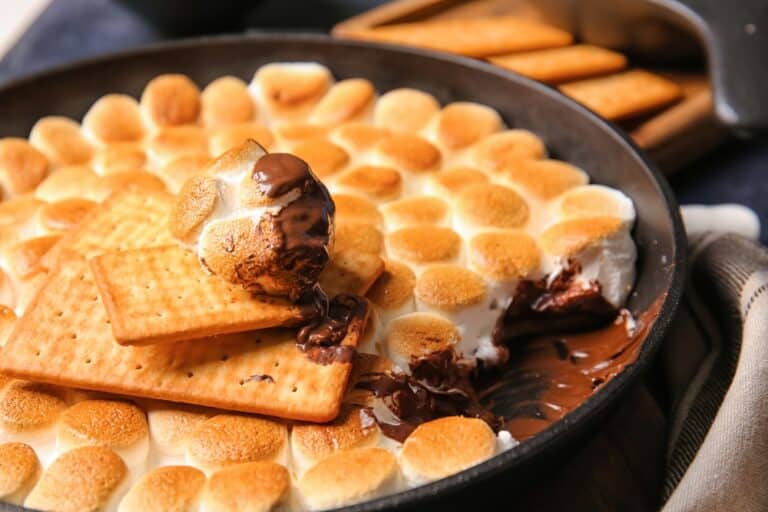
S’mores dip

S’mores Dip is a decadent and fun twist on the classic campfire treat, perfect for sharing with friends and family at gatherings or cozy nights in. This easy-to-make dessert brings together the irresistible flavors of melted chocolate, gooey marshmallows, and crunchy graham crackers in a single skillet. No campfire is needed for this delightful treat, making it an excellent year-round indulgence. The warm, gooey layers make it ideal for dipping, and it can be prepared in just a few minutes, making it a convenient and delicious option for satisfying your sweet cravings.

Ingredients:

  • 1 1/2 cups chocolate chips (semi-sweet or milk chocolate)
  • 1 tablespoon heavy cream (optional for creaminess)
  • 1 bag (about 10 oz) of large marshmallows
  • Graham crackers, for serving

Instructions:

  1. Preheat the Oven:
    • Preheat your oven to 350°F (175°C).
  2. Prepare the Dip:
    • In a cast-iron skillet or oven-safe baking dish, evenly spread the chocolate chips. Add the heavy cream if using, and stir to combine slightly.
    • Arrange the marshmallows on top of the chocolate chips in a single layer, covering the chocolate completely.
  3. Bake the Dip:
    • Place the skillet in the preheated oven and bake for 8–10 minutes, or until the marshmallows are golden brown and puffed.
  4. Serve:
    • Carefully remove the skillet from the oven and let it cool for a minute or two.
    • Serve the dip immediately with graham crackers for dipping.

Enjoy your S’mores Dip, a delightful, gooey treat that captures the essence of classic s’mores in every bite!

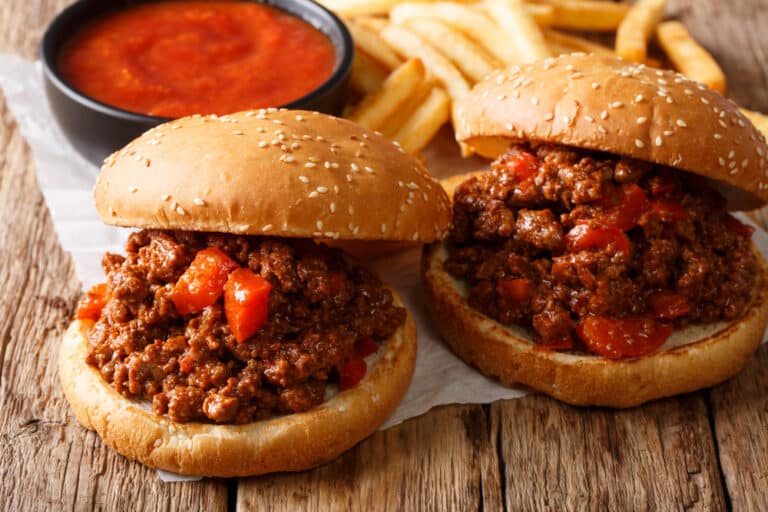
Sloppy joes

Sloppy Joes are a classic American comfort food known for their rich, tangy, and slightly sweet flavor. This nostalgic dish features ground beef simmered in a flavorful tomato-based sauce, served on a soft hamburger bun. The combination of savory beef, onions, and spices makes for a satisfying and easy-to-make meal that the whole family will love. Perfect for busy weeknights or casual gatherings, these Sloppy Joes are a quick and delicious way to enjoy a hearty and comforting meal.

Ingredients:

  • 1 lb ground beef
  • 1 tablespoon vegetable oil
  • 1 medium onion, finely chopped
  • 1 small green bell pepper, finely chopped
  • 2 cloves garlic, minced
  • 1 cup ketchup
  • 2 tablespoons tomato paste
  • 1 tablespoon Worcestershire sauce
  • 1 tablespoon brown sugar
  • 1 teaspoon yellow mustard
  • 1/2 teaspoon smoked paprika
  • Salt and pepper to taste
  • 4 hamburger buns
  • Optional toppings: sliced pickles, shredded cheese, or coleslaw

Instructions:

  1. Cook the Beef:
    • In a large skillet, heat the vegetable oil over medium-high heat. Add the ground beef and cook until browned, breaking it up with a spoon as it cooks. Drain excess fat if necessary.
  2. Sauté the Vegetables:
    • Add the chopped onion, green bell pepper, and minced garlic to the skillet with the beef. Cook until the vegetables are softened, about 5 minutes.
  3. Make the Sauce:
    • Stir in the ketchup, tomato paste, Worcestershire sauce, brown sugar, yellow mustard, smoked paprika, salt, and pepper. Mix well to combine.
  4. Simmer:
    • Reduce the heat to low and let the mixture simmer for 15-20 minutes, stirring occasionally, until the sauce has thickened and the flavors have melded together.
  5. Assemble the Sloppy Joes:
    • Spoon the beef mixture onto the bottom half of each hamburger bun. Add optional toppings like sliced pickles, shredded cheese, or coleslaw, if desired.
    • Top with the other half of the bun and serve immediately.

Enjoy your Sloppy Joes, a delicious and nostalgic meal that’s sure to satisfy any craving for comfort food!

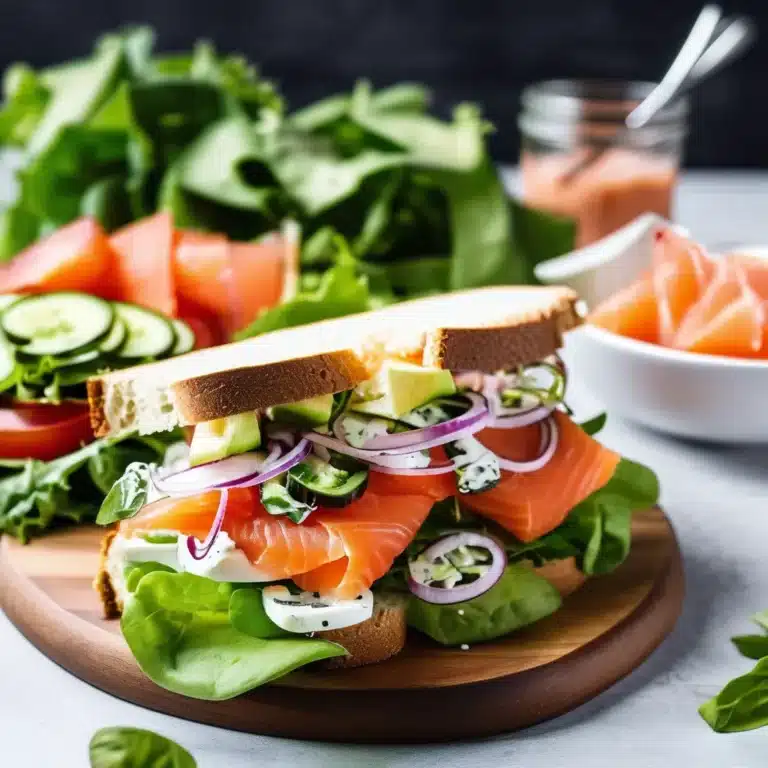
Smoked Salmon Salad Sandwich

The Smoked Salmon Salad Sandwich is a delightful twist on a classic sandwich that combines the rich, smoky flavors of salmon with fresh, crisp vegetables and creamy dressing. This sandwich is perfect for a quick lunch or a light dinner, offering a sophisticated and refreshing taste. The combination of dill and lemon adds a bright and tangy note, while capers provide a briny punch that complements the salmon beautifully. Served on crusty bread or a soft roll, this sandwich is a wonderful way to enjoy the luxurious taste of smoked salmon in a simple, yet elegant meal.

Ingredients:

  • 8 oz smoked salmon, chopped
  • 1/4 cup mayonnaise
  • 1 tablespoon Dijon mustard
  • 1 tablespoon lemon juice
  • 1 tablespoon capers, drained and chopped
  • 1/4 cup red onion, finely chopped
  • 1/4 cup celery, finely chopped
  • 2 tablespoons fresh dill, chopped
  • Salt and pepper to taste
  • 4 slices of crusty bread or 2 rolls, split
  • Lettuce leaves
  • Sliced cucumber (optional)

Instructions:

  1. Make the Salmon Salad:
    • In a mixing bowl, combine the chopped smoked salmon, mayonnaise, Dijon mustard, lemon juice, and capers.
    • Add the finely chopped red onion, celery, and fresh dill. Mix well to combine all the ingredients.
    • Season with salt and pepper to taste.
  2. Prepare the Bread:
    • Toast the bread slices or rolls if desired for added texture and flavor.
  3. Assemble the Sandwiches:
    • Lay lettuce leaves on one side of the bread or roll.
    • Spoon the smoked salmon salad generously over the lettuce.
    • Top with sliced cucumber if using, and place the other half of the bread or roll on top to complete the sandwich.
  4. Serve:
    • Cut the sandwiches in half and serve immediately.

Enjoy your Smoked Salmon Salad Sandwich, a flavorful and satisfying dish that’s perfect for any occasion!

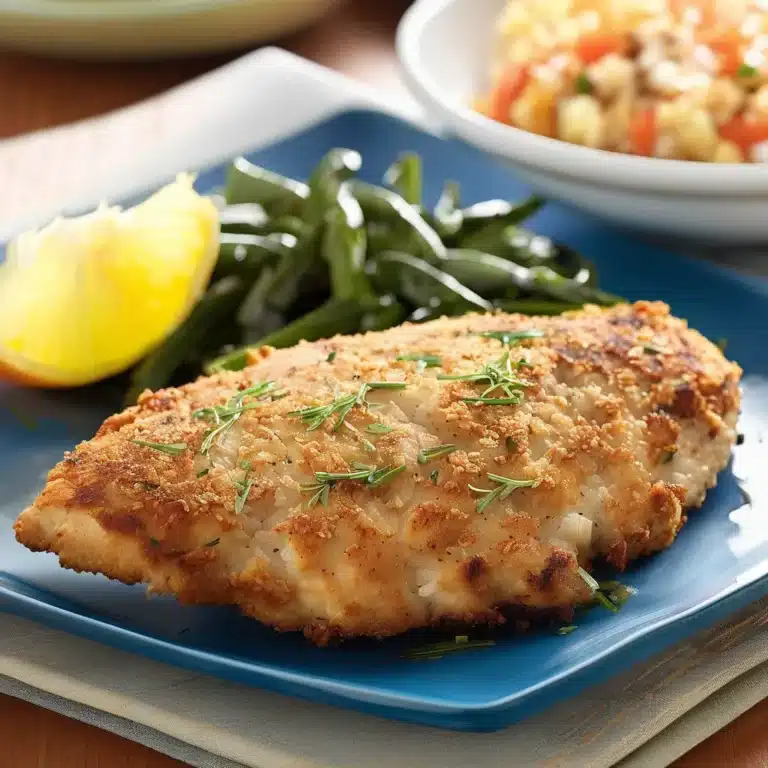
Savory Onion-Crusted Chicken

Savory Onion-Crusted Chicken is a deliciously flavorful dish that combines juicy, tender chicken breasts with a crispy onion coating. This recipe uses French-fried onions to create a savory crust that is both crunchy and full of flavor, elevating the classic chicken dinner to a new level. Perfect for a quick weeknight meal or an elegant dinner party, this dish is sure to please even the pickiest of eaters. With minimal ingredients and effort, you can have a mouthwatering chicken dish that pairs well with a variety of sides, from mashed potatoes to fresh vegetables.

Ingredients:

  • 4 boneless, skinless chicken breasts
  • 1 cup French-fried onions, crushed
  • 1/2 cup all-purpose flour
  • 1/2 cup buttermilk (or regular milk with 1 tablespoon lemon juice)
  • 1 teaspoon garlic powder
  • 1 teaspoon paprika
  • 1/2 teaspoon salt
  • 1/2 teaspoon black pepper
  • 2 tablespoons butter, melted
  • Fresh parsley, chopped (for garnish)

Instructions:

  1. Preheat the Oven:
    • Preheat your oven to 375°F (190°C). Line a baking sheet with parchment paper or lightly grease it with cooking spray.
  2. Prepare the Chicken:
    • In a shallow bowl, mix the crushed French-fried onions with the flour, garlic powder, paprika, salt, and black pepper.
    • Pour the buttermilk into another shallow bowl.
  3. Coat the Chicken:
    • Dip each chicken breast into the buttermilk, ensuring it is fully coated.
    • Dredge the chicken in the onion mixture, pressing the mixture onto the chicken to create a thick, even coating.
  4. Bake the Chicken:
    • Place the coated chicken breasts on the prepared baking sheet.
    • Drizzle the melted butter over the top of the chicken to enhance the crispiness.
    • Bake in the preheated oven for 25-30 minutes, or until the chicken is cooked through and the coating is golden brown and crispy.
  5. Garnish and Serve:
    • Remove the chicken from the oven and let it rest for a few minutes.
    • Garnish with freshly chopped parsley before serving.

Enjoy your Savory Onion-Crusted Chicken with your favorite side dishes for a meal that’s sure to become a family favorite!

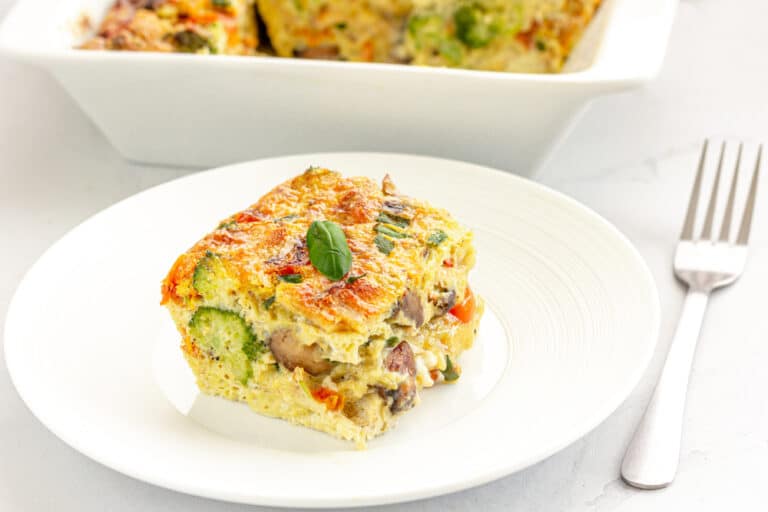
Super Easy Egg Casserole

Super Easy Egg Casserole is a versatile and crowd-pleasing dish perfect for breakfast, brunch, or even a light dinner. This casserole combines fluffy eggs with cheese, savory sausage, and colorful vegetables to create a delicious and satisfying meal. With minimal prep and just a few ingredients, it’s incredibly simple to put together and can be customized with your favorite add-ins. Whether you’re hosting a gathering or preparing a make-ahead meal for the week, this egg casserole is a surefire way to delight everyone at the table with its comforting flavors and hearty texture.

Ingredients:

  • 8 large eggs
  • 1 cup milk
  • 1 teaspoon salt
  • 1/2 teaspoon black pepper
  • 1 cup shredded cheddar cheese
  • 1/2 pound breakfast sausage, cooked and crumbled
  • 1/2 cup bell peppers, diced (any color)
  • 1/2 cup onions, diced
  • 1 cup spinach or kale, chopped
  • 1 cup bread cubes (optional, for added texture)
  • Cooking spray or butter (for greasing)

Instructions:

  1. Preheat the Oven:
    • Preheat your oven to 350°F (175°C). Grease a 9×13-inch baking dish with cooking spray or butter.
  2. Cook the Sausage:
    • In a skillet over medium heat, cook the breakfast sausage until browned and crumbled. Remove from heat and drain any excess fat.
  3. Prepare the Egg Mixture:
    • In a large bowl, whisk together the eggs, milk, salt, and black pepper until well combined.
  4. Assemble the Casserole:
    • Spread the bread cubes evenly in the bottom of the prepared baking dish (if using).
    • Sprinkle the cooked sausage, diced bell peppers, onions, and chopped spinach or kale over the bread cubes.
    • Pour the egg mixture over the top, ensuring all ingredients are evenly covered.
    • Sprinkle the shredded cheddar cheese over the top of the casserole.
  5. Bake:
    • Place the casserole in the preheated oven and bake for 30-35 minutes, or until the eggs are set and the top is golden brown.
  6. Serve:
    • Remove from the oven and let the casserole cool for a few minutes before slicing. Serve warm.

Enjoy your Super Easy Egg Casserole, a delicious and customizable dish that’s perfect for any meal of the day!

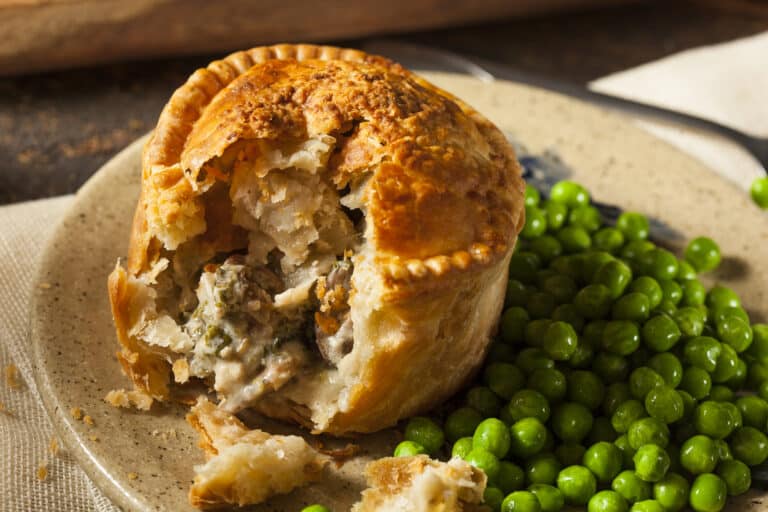
CHICKEN POTPIE

Chicken Potpie is a classic comfort food that brings together tender chicken, a medley of vegetables, and a creamy, savory sauce encased in a flaky, golden crust. This dish is perfect for cozy family dinners or as a warming meal on a chilly day. The rich filling, flavored with aromatic herbs, creates a delicious balance of textures and flavors, while the buttery crust adds a satisfying crunch. Easy to make and deeply satisfying, Chicken Potpie is a timeless favorite that never fails to delight both kids and adults alike.

Ingredients

For the Filling:

  • 2 tablespoons olive oil
  • 1 pound boneless, skinless chicken breasts, diced
  • Salt and pepper, to taste
  • 1 onion, chopped
  • 2 cloves garlic, minced
  • 3 carrots, diced
  • 2 celery stalks, diced
  • 1 cup frozen peas
  • 1/4 cup all-purpose flour
  • 2 cups chicken broth
  • 1 cup milk or heavy cream
  • 1 teaspoon dried thyme
  • 1 teaspoon dried rosemary
  • 1/4 teaspoon nutmeg (optional)

For the Crust:

  • 1 package (14 ounces) refrigerated pie crusts
  • 1 egg, beaten (for egg wash)

Instructions

  1. Preheat the oven: Preheat your oven to 400°F (200°C).
  2. Cook the chicken: Heat the olive oil in a large skillet over medium-high heat. Add the diced chicken, season with salt and pepper, and cook until browned and cooked through, about 5-7 minutes. Remove the chicken from the skillet and set aside.
  3. Sauté the vegetables: In the same skillet, add the chopped onion, garlic, carrots, and celery. Cook for 5-7 minutes, or until the vegetables are softened.
  4. Make the sauce: Stir in the flour and cook for 1-2 minutes to create a roux. Gradually whisk in the chicken broth and milk, stirring constantly until the sauce thickens. Add the cooked chicken, frozen peas, thyme, rosemary, and nutmeg. Season with additional salt and pepper to taste. Remove from heat.
  5. Assemble the potpie: Roll out one pie crust and fit it into the bottom of a 9-inch pie dish. Pour the chicken and vegetable filling into the crust. Roll out the second pie crust and place it over the filling. Trim any excess crust and crimp the edges to seal. Cut a few slits in the top crust to allow steam to escape. Brush the top with beaten egg.
  6. Bake the potpie: Place the potpie on a baking sheet to catch any drips and bake in the preheated oven for 25-30 minutes, or until the crust is golden brown.
  7. Cool and serve: Allow the potpie to cool for at least 10 minutes before slicing and serving.

Enjoy your Chicken Potpie as a comforting and hearty meal that captures the essence of home-cooked goodness, perfect for any occasion.