Home Blog Page 12

PUMPKIN OATMEAL RAISIN COOKIES

Pumpkin Oatmeal Raisin Cookies are soft, chewy, and full of fall flavors. The pumpkin puree adds moisture and a rich, subtle flavor, while warm spices like cinnamon and nutmeg bring warmth to every bite. These cookies are perfect for the fall season, making a delicious snack or dessert that pairs well with coffee, tea, or even a cold glass of milk.

Ingredients:

  • 1 1/2 cups all-purpose flour
  • 1 1/2 cups old-fashioned rolled oats
  • 1 teaspoon baking soda
  • 1 teaspoon ground cinnamon
  • 1/2 teaspoon ground nutmeg
  • 1/4 teaspoon ground ginger
  • 1/4 teaspoon ground cloves (optional)
  • 1/4 teaspoon salt
  • 1/2 cup unsalted butter, softened
  • 1/2 cup granulated sugar
  • 1/2 cup brown sugar, packed
  • 1/2 cup pumpkin puree (not pumpkin pie filling)
  • 1 large egg
  • 1 teaspoon vanilla extract
  • 3/4 cup raisins
  • 1/2 cup chopped walnuts or pecans (optional)

Instructions:

  1. Preheat the oven: Preheat your oven to 350°F (175°C). Line two baking sheets with parchment paper or silicone baking mats.
  2. Mix dry ingredients: In a medium bowl, whisk together the flour, oats, baking soda, cinnamon, nutmeg, ginger, cloves (if using), and salt. Set aside.
  3. Cream the butter and sugars: In a large bowl, using an electric mixer, beat the softened butter, granulated sugar, and brown sugar until light and fluffy, about 2-3 minutes.
  4. Add wet ingredients: Beat in the pumpkin puree, egg, and vanilla extract until well combined.
  5. Combine wet and dry ingredients: Gradually add the dry ingredients to the wet mixture, mixing until just combined. Stir in the raisins and, if using, chopped walnuts or pecans.
  6. Scoop the dough: Using a tablespoon or cookie scoop, drop the dough onto the prepared baking sheets, spacing the cookies about 2 inches apart.
  7. Bake: Bake for 12-15 minutes, or until the edges are set and the cookies are lightly golden. The centers should remain soft and chewy. Be careful not to overbake.
  8. Cool and serve: Allow the cookies to cool on the baking sheets for 5 minutes before transferring them to a wire rack to cool completely.

These Pumpkin Oatmeal Raisin Cookies are soft, spiced, and packed with hearty oats and plump raisins, making them the perfect fall treat. Enjoy them with a warm beverage or as a delightful snack any time of day!

Chewy Ginger Molasses Cookies

0

Chewy Ginger Molasses Cookies are the epitome of cozy comfort, combining the warm, spicy flavors of ginger, cinnamon, and cloves with the deep, rich sweetness of molasses. These cookies have a perfectly soft and chewy texture, with slightly crisp edges and a sugary coating that adds a delightful crunch. Ideal for holiday baking or any time you crave something sweet and spiced, these cookies are perfect for enjoying with a cup of tea or coffee. The intense flavors and satisfying chew make these cookies a timeless classic that everyone will love.

Ingredients:

  • 2 1/4 cups all-purpose flour
  • 2 teaspoons ground ginger
  • 1 teaspoon ground cinnamon
  • 1/2 teaspoon ground cloves
  • 1/4 teaspoon ground nutmeg
  • 1 teaspoon baking soda
  • 1/2 teaspoon salt
  • 3/4 cup unsalted butter, softened
  • 1 cup granulated sugar (plus extra for rolling)
  • 1/4 cup brown sugar, packed
  • 1 large egg
  • 1/4 cup molasses
  • 1 teaspoon vanilla extract

Instructions:

  1. Preheat the Oven: Preheat your oven to 350°F (175°C). Line two baking sheets with parchment paper or silicone baking mats.
  2. Mix the Dry Ingredients: In a medium bowl, whisk together the flour, ground ginger, cinnamon, cloves, nutmeg, baking soda, and salt. Set aside.
  3. Cream the Butter and Sugars: In a large mixing bowl, cream together the softened butter, granulated sugar, and brown sugar until light and fluffy, about 3-4 minutes.
  4. Add the Wet Ingredients: Beat in the egg, molasses, and vanilla extract until well combined.
  5. Combine Wet and Dry Ingredients: Gradually add the dry ingredients to the wet ingredients, mixing just until incorporated. Be careful not to overmix the dough.
  6. Shape the Cookies: Scoop out tablespoon-sized portions of dough and roll them into balls. Roll each ball in the extra granulated sugar until fully coated.
  7. Bake: Place the dough balls on the prepared baking sheets, spacing them about 2 inches apart. Bake in the preheated oven for 8-10 minutes, or until the edges are set and the tops are slightly cracked. The centers should still look soft.
  8. Cool: Allow the cookies to cool on the baking sheets for 5 minutes before transferring them to a wire rack to cool completely.

Chewy Ginger Molasses Cookies are a delightful treat with their warm spices and deep molasses flavor, making them perfect for any cozy occasion. Enjoy these soft, chewy cookies fresh from the oven or store them in an airtight container to savor their deliciousness over several days.

Christmas Pudding Ice Cream

0

Christmas Pudding Ice Cream is a festive and indulgent dessert that brings the rich, traditional flavors of Christmas pudding into a creamy, refreshing ice cream. Perfect for the holiday season, this ice cream combines the warm spices, dried fruits, and hints of brandy or rum typically found in Christmas pudding, creating a luxurious treat that’s both nostalgic and innovative. The contrast between the cool, velvety ice cream and the intense, spiced flavors makes this dessert a showstopper for any holiday gathering. Whether served on its own or alongside a slice of warm Christmas cake, Christmas Pudding Ice Cream is a delightful way to enjoy the flavors of the season in a new and exciting way.

Ingredients:

  • 2 cups heavy cream
  • 1 cup whole milk
  • 3/4 cup granulated sugar
  • 4 large egg yolks
  • 1 teaspoon vanilla extract
  • 1/2 teaspoon ground cinnamon
  • 1/4 teaspoon ground nutmeg
  • 1/4 teaspoon ground allspice
  • 1/4 cup brandy or rum (optional)
  • 1 cup mixed dried fruits (such as raisins, currants, chopped dates, and candied peel)
  • 1/4 cup chopped nuts (such as almonds or walnuts)
  • 1 tablespoon molasses or dark treacle

Instructions:

  1. Prepare the Custard Base: In a medium saucepan, combine the heavy cream, milk, and half of the sugar. Heat over medium heat until the mixture is hot but not boiling, stirring occasionally.
  2. Whisk the Egg Yolks: In a separate bowl, whisk together the egg yolks and the remaining sugar until thick and pale.
  3. Temper the Egg Yolks: Slowly pour about 1/2 cup of the hot cream mixture into the egg yolk mixture, whisking constantly to temper the eggs. Then, slowly pour the egg mixture back into the saucepan with the remaining cream mixture, stirring constantly.
  4. Cook the Custard: Continue to cook the mixture over medium-low heat, stirring constantly, until it thickens slightly and coats the back of a spoon, about 5-7 minutes. Do not let it boil.
  5. Flavor the Custard: Remove the custard from heat and stir in the vanilla extract, cinnamon, nutmeg, allspice, brandy or rum (if using), and molasses. Let the mixture cool slightly.
  6. Add the Mix-ins: Stir in the mixed dried fruits and chopped nuts. Allow the custard to cool completely to room temperature, then cover and refrigerate for at least 4 hours, or overnight.
  7. Churn the Ice Cream: Once the custard is fully chilled, churn it in an ice cream maker according to the manufacturer’s instructions until it reaches a soft-serve consistency.
  8. Freeze the Ice Cream: Transfer the churned ice cream to an airtight container and freeze for at least 4 hours, or until firm.
  9. Serve: Scoop the Christmas Pudding Ice Cream into bowls or cones and enjoy! It pairs beautifully with gingerbread, fruitcake, or simply on its own as a festive treat.

Christmas Pudding Ice Cream is a luxurious and flavorful dessert that captures the essence of traditional Christmas pudding in a cool and creamy form, making it a perfect finale to your holiday meals.

Zucchini Crisp

0

Zucchini Crisp is a delightful dessert that surprises and delights with its unexpected twist—using zucchini in place of the traditional apples! This clever take on a fruit crisp combines the tender, mildly sweet zucchini with warm spices like cinnamon and nutmeg, topped with a buttery, oat-filled crumble that’s golden and crispy. The zucchini absorbs the flavors of the spices and sugar, creating a dessert that tastes remarkably like an apple crisp. It’s a perfect way to use up an abundance of zucchini, offering a sweet, comforting treat that’s sure to become a favorite, especially when served warm with a scoop of vanilla ice cream.

Ingredients:

For the Filling:

  • 4 cups zucchini, peeled, seeded, and sliced thin (about 2-3 medium zucchinis)
  • 2 tablespoons lemon juice
  • 1/2 cup granulated sugar
  • 1/2 teaspoon ground cinnamon
  • 1/4 teaspoon ground nutmeg
  • 1 tablespoon all-purpose flour

For the Crumble Topping:

  • 1 cup old-fashioned oats
  • 1/2 cup all-purpose flour
  • 1/2 cup brown sugar, packed
  • 1/2 teaspoon ground cinnamon
  • 1/4 teaspoon ground nutmeg
  • 1/2 cup unsalted butter, melted
  • 1/4 cup chopped nuts (optional, such as walnuts or pecans)

Instructions:

  1. Preheat the Oven: Preheat your oven to 375°F (190°C). Grease an 8×8-inch baking dish or a similar-sized dish.
  2. Prepare the Zucchini Filling: In a large mixing bowl, toss the sliced zucchini with the lemon juice. In a small bowl, mix together the granulated sugar, cinnamon, nutmeg, and flour. Sprinkle this mixture over the zucchini and toss to coat evenly. Spread the zucchini mixture evenly in the prepared baking dish.
  3. Make the Crumble Topping: In another bowl, combine the oats, flour, brown sugar, cinnamon, and nutmeg. Pour the melted butter over the mixture and stir until everything is well combined and forms a crumbly texture. If using, stir in the chopped nuts.
  4. Assemble the Crisp: Sprinkle the crumble topping evenly over the zucchini mixture.
  5. Bake: Bake in the preheated oven for 40-45 minutes, or until the topping is golden brown and the filling is bubbly.
  6. Cool and Serve: Let the Zucchini Crisp cool slightly before serving. It’s delicious served warm with a scoop of vanilla ice cream or a dollop of whipped cream.

Zucchini Crisp is a deliciously surprising dessert that cleverly disguises zucchini as a sweet, spiced fruit-like filling, making it an ideal way to use up your garden’s zucchini bounty. The crisp, buttery topping pairs perfectly with the tender, flavorful zucchini, creating a treat that’s both unique and comforting.

London Broil

0

London Broil is a classic dish known for its rich flavor and tender texture, making it a perfect choice for a hearty dinner. Typically made with flank steak or top round, this dish involves marinating the beef in a savory blend of ingredients to infuse it with flavor before broiling it to perfection. The steak is then thinly sliced against the grain, resulting in juicy, flavorful slices that are perfect for serving with roasted vegetables, mashed potatoes, or a fresh salad. London Broil is a straightforward yet impressive dish that’s ideal for both weeknight meals and special occasions, offering a satisfying and delicious experience for meat lovers.

Ingredients:

  • 1 1/2 to 2 lbs flank steak or top round steak
  • 1/4 cup soy sauce
  • 1/4 cup olive oil
  • 2 tablespoons Worcestershire sauce
  • 2 tablespoons balsamic vinegar
  • 3 cloves garlic, minced
  • 1 tablespoon Dijon mustard
  • 1 teaspoon dried oregano
  • 1 teaspoon black pepper
  • 1/2 teaspoon salt
  • 1/2 teaspoon red pepper flakes (optional, for a bit of heat)
  • Fresh parsley, chopped (for garnish)

Instructions:

  1. Prepare the Marinade: In a medium bowl, whisk together the soy sauce, olive oil, Worcestershire sauce, balsamic vinegar, minced garlic, Dijon mustard, oregano, black pepper, salt, and red pepper flakes (if using).
  2. Marinate the Steak: Place the steak in a large resealable plastic bag or a shallow dish. Pour the marinade over the steak, making sure it is well-coated. Seal the bag or cover the dish, and refrigerate for at least 4 hours, preferably overnight, to allow the flavors to penetrate the meat.
  3. Preheat the Broiler: When ready to cook, preheat your broiler to high. If using an oven broiler, position the oven rack so the steak will be about 4-6 inches from the heat source.
  4. Broil the Steak: Remove the steak from the marinade and shake off any excess. Place the steak on a broiler pan or a wire rack set on a baking sheet. Broil the steak for 5-7 minutes per side for medium-rare, or until it reaches your desired level of doneness. Use a meat thermometer to check for an internal temperature of 130-135°F for medium-rare.
  5. Rest the Steak: Once cooked, remove the steak from the broiler and let it rest on a cutting board for about 10 minutes. This allows the juices to redistribute throughout the meat, ensuring it stays moist and flavorful.
  6. Slice and Serve: After resting, slice the steak thinly against the grain. This helps to tenderize the meat and ensures each bite is juicy and tender. Garnish with chopped fresh parsley and serve with your favorite sides.

London Broil is a flavorful and satisfying dish that’s easy to prepare yet impressive enough to serve to guests. With its delicious marinade and perfectly broiled finish, this steak dish is sure to become a favorite in your recipe repertoire.

M&M Blondies

0

M&M Blondies are a colorful and delightful treat that combines the rich, buttery flavor of a classic blondie with the fun crunch of M&M candies. These blondies are soft and chewy, with a golden-brown top and a slightly gooey center, making them the perfect dessert for any occasion. The addition of M&M’s not only adds a pop of color but also a burst of chocolatey sweetness in every bite. Easy to make and incredibly satisfying, M&M Blondies are sure to be a hit with kids and adults alike, whether you’re baking for a party, a bake sale, or just a sweet snack at home.

Ingredients:

  • 1 cup (2 sticks) unsalted butter, melted and slightly cooled
  • 1 1/2 cups brown sugar, packed
  • 2 large eggs
  • 2 teaspoons vanilla extract
  • 2 cups all-purpose flour
  • 1 teaspoon baking powder
  • 1/2 teaspoon salt
  • 1 cup M&M candies (plus extra for topping)

Instructions:

  1. Preheat the Oven: Preheat your oven to 350°F (175°C). Grease and line a 9×13-inch baking dish with parchment paper, leaving an overhang on the sides for easy removal.
  2. Mix the Wet Ingredients: In a large mixing bowl, whisk together the melted butter and brown sugar until well combined and smooth. Add the eggs one at a time, mixing well after each addition. Stir in the vanilla extract.
  3. Combine the Dry Ingredients: In a separate bowl, whisk together the flour, baking powder, and salt. Gradually add the dry ingredients to the wet ingredients, stirring just until combined. Be careful not to overmix the batter.
  4. Add the M&Ms: Fold in 1 cup of M&M candies, distributing them evenly throughout the batter.
  5. Pour and Spread the Batter: Pour the batter into the prepared baking dish and spread it evenly with a spatula. Sprinkle a few extra M&Ms on top for added color and crunch.
  6. Bake: Bake in the preheated oven for 25-30 minutes, or until the edges are golden brown and a toothpick inserted into the center comes out clean or with just a few moist crumbs.
  7. Cool and Serve: Allow the blondies to cool completely in the baking dish before lifting them out using the parchment paper overhang. Cut into squares and serve.

M&M Blondies are a sweet and festive dessert that’s easy to whip up and sure to please everyone with their chewy texture and vibrant bursts of chocolate. Perfect for sharing, these blondies are a delicious way to enjoy a classic treat with a fun twist.

BISI BELE BATH

Bisi Bele Bath is a traditional South Indian rice and lentil dish that’s flavorful, hearty, and comforting. The name “Bisi Bele Bath” translates to “hot lentil rice” in Kannada, and it’s a one-pot meal made with rice, toor dal (split pigeon peas), vegetables, and a special spice blend. This dish is perfect for lunch or dinner and is often served with papad, raita, or pickles for a complete meal.

Ingredients:

For the Rice and Lentils:

  • 1/2 cup toor dal (split pigeon peas)
  • 1/2 cup rice (Sona Masoori or any short-grain rice)
  • 1 tablespoon ghee (clarified butter) or oil
  • 2 medium carrots, diced
  • 1/2 cup green beans, chopped
  • 1/4 cup peas
  • 1 medium potato, diced
  • 1 small tomato, chopped
  • 1/4 teaspoon turmeric powder
  • Salt, to taste

For the Bisi Bele Bath Masala (Spice Mix):

  • 1 tablespoon chana dal (split chickpeas)
  • 1 tablespoon urad dal (split black gram)
  • 1 tablespoon coriander seeds
  • 2 dried red chilies
  • 1/4 teaspoon fenugreek seeds
  • 1/2 inch cinnamon stick
  • 2 cloves
  • 1/4 cup grated fresh coconut (optional)

For Tempering:

  • 2 tablespoons ghee or oil
  • 1/2 teaspoon mustard seeds
  • 1/2 teaspoon cumin seeds
  • 1 pinch asafoetida (hing)
  • 1 sprig curry leaves
  • 2 dried red chilies
  • 10-12 cashews (optional)

Instructions:

Step 1: Cook Rice and Lentils

  1. Rinse the dal and rice: Wash the toor dal and rice thoroughly under cold water until the water runs clear. Drain and set aside.
  2. Cook the dal and rice: In a pressure cooker or large pot, combine the rice, toor dal, turmeric, and 3 cups of water. Cook for 4-5 whistles in a pressure cooker (or about 20-25 minutes on the stovetop until soft and mushy). Set aside.

Step 2: Prepare the Vegetables

  1. Sauté the vegetables: Heat 1 tablespoon of ghee or oil in a large pan. Add the carrots, green beans, peas, potatoes, and tomatoes. Sauté for about 5 minutes until the vegetables soften slightly. Add a pinch of salt and set aside.

Step 3: Make the Bisi Bele Bath Masala

  1. Dry roast the spices: In a small pan, dry roast chana dal, urad dal, coriander seeds, red chilies, fenugreek seeds, cinnamon, and cloves over medium heat until aromatic and lightly browned. Be careful not to burn the spices.
  2. Grind the masala: Let the roasted spices cool, then grind them into a fine powder using a spice grinder or blender. If using fresh coconut, grind it along with the spices.

Step 4: Assemble the Bisi Bele Bath

  1. Combine the cooked rice, dal, and vegetables: In a large pot, mix the cooked rice and dal with the sautéed vegetables. Add about 2-3 cups of water (adjust depending on desired consistency).
  2. Add the masala: Stir in the prepared Bisi Bele Bath masala and bring the mixture to a simmer. Cook for 10-15 minutes, allowing the flavors to blend. Adjust salt to taste.

Step 5: Tempering

  1. Make the tempering: In a small pan, heat 2 tablespoons of ghee or oil. Add mustard seeds and cumin seeds, and let them splutter. Add asafoetida, curry leaves, dried red chilies, and cashews (if using). Sauté until the cashews turn golden brown.
  2. Pour over the Bisi Bele Bath: Pour the tempering mixture over the prepared Bisi Bele Bath and gently mix.

Step 6: Serve

Serve Bisi Bele Bath hot, garnished with extra ghee if desired, and accompanied by papad, raita, or pickles for a traditional meal.

Bisi Bele Bath is a flavorful, hearty dish that’s perfect for any meal. The rich aroma of the homemade masala and the creamy texture of the rice and dal make it an irresistible dish loved by all!

Bacon Cheddar Waffles

0

Bacon Cheddar Waffles are a savory twist on the classic breakfast favorite, combining the irresistible flavors of crispy bacon and sharp cheddar cheese with the light, fluffy texture of a waffle. These waffles are perfect for those who enjoy a hearty, savory start to their day or as a unique brunch dish that’s sure to impress. The smoky bacon and melty cheddar create a rich and satisfying flavor that pairs beautifully with a drizzle of maple syrup for a sweet and savory contrast. Whether served as a main dish or as a side to fried eggs, these Bacon Cheddar Waffles are a delicious way to elevate your breakfast game.

Ingredients:

  • 2 cups all-purpose flour
  • 2 tablespoons sugar
  • 1 tablespoon baking powder
  • 1/2 teaspoon baking soda
  • 1/2 teaspoon salt
  • 2 large eggs
  • 1 3/4 cups buttermilk
  • 1/2 cup unsalted butter, melted and slightly cooled
  • 1 cup sharp cheddar cheese, shredded
  • 8 slices bacon, cooked and crumbled
  • 1 teaspoon vanilla extract (optional)
  • Maple syrup or butter, for serving

Instructions:

  1. Preheat the Waffle Iron: Preheat your waffle iron according to the manufacturer’s instructions.
  2. Mix the Dry Ingredients: In a large mixing bowl, whisk together the flour, sugar, baking powder, baking soda, and salt.
  3. Combine the Wet Ingredients: In a separate bowl, whisk together the eggs, buttermilk, melted butter, and vanilla extract (if using) until well combined.
  4. Make the Batter: Pour the wet ingredients into the dry ingredients and stir until just combined. Be careful not to overmix; the batter should be slightly lumpy.
  5. Add the Bacon and Cheese: Gently fold in the shredded cheddar cheese and crumbled bacon until evenly distributed throughout the batter.
  6. Cook the Waffles: Lightly grease the waffle iron with non-stick spray or butter. Pour the batter into the preheated waffle iron, using enough to cover the surface without overflowing. Cook according to your waffle iron’s instructions, usually about 3-5 minutes, until the waffles are golden brown and crisp.
  7. Serve: Serve the Bacon Cheddar Waffles hot, topped with butter and a drizzle of maple syrup if desired.

These Bacon Cheddar Waffles are a perfect blend of savory flavors and comforting textures, making them an excellent choice for breakfast, brunch, or even dinner. Enjoy the delicious combination of bacon and cheddar in every bite!

HUMMINGBIRD CAKE

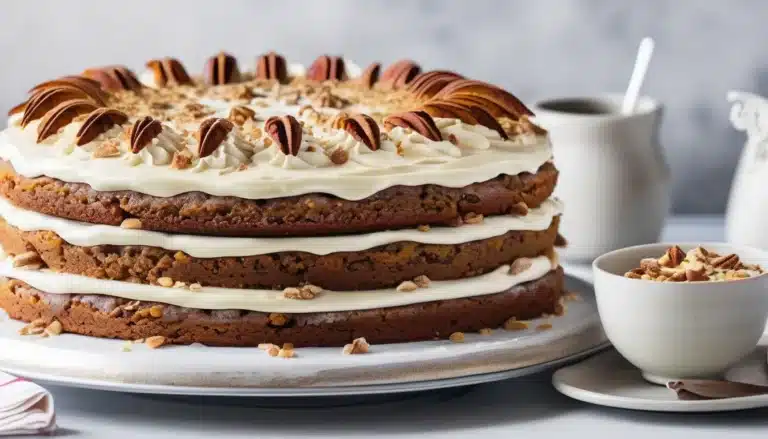
Hummingbird Cake is a classic Southern dessert that’s irresistibly moist, packed with tropical flavors of banana, pineapple, and coconut, and topped with a rich cream cheese frosting. With hints of cinnamon and a deliciously tender crumb, this cake is perfect for celebrations or just an indulgent treat. It’s often garnished with chopped pecans for added texture and flavor.

Ingredients:

For the Cake:

  • 3 cups all-purpose flour
  • 1 teaspoon baking soda
  • 1 teaspoon ground cinnamon
  • 1/2 teaspoon salt
  • 1 cup granulated sugar
  • 1 cup brown sugar, packed
  • 3 large eggs, room temperature
  • 1 cup vegetable oil
  • 1 teaspoon vanilla extract
  • 1 (8-ounce) can crushed pineapple, undrained
  • 1 1/2 cups mashed ripe bananas (about 3 bananas)
  • 1 cup sweetened shredded coconut
  • 1 cup chopped pecans (optional, plus extra for garnish)

For the Cream Cheese Frosting:

  • 8 oz cream cheese, softened
  • 1/2 cup unsalted butter, softened
  • 4 cups powdered sugar
  • 1 teaspoon vanilla extract
  • 1-2 tablespoons milk (if needed, for thinning)

Instructions:

  1. Preheat the oven: Preheat your oven to 350°F (175°C). Grease and flour two 9-inch round cake pans, or line the bottoms with parchment paper for easier removal.
  2. Mix dry ingredients: In a large bowl, whisk together the flour, baking soda, cinnamon, and salt. Set aside.
  3. Mix wet ingredients: In a separate large bowl, whisk together the granulated sugar, brown sugar, eggs, oil, and vanilla extract until smooth and well combined. Stir in the crushed pineapple (with its juice), mashed bananas, coconut, and chopped pecans.
  4. Combine wet and dry: Gradually add the dry ingredients to the wet ingredients, stirring gently until just combined. Be careful not to overmix.
  5. Bake: Divide the batter evenly between the prepared cake pans. Bake for 25-30 minutes, or until a toothpick inserted into the center of the cakes comes out clean. Let the cakes cool in the pans for 10 minutes before transferring them to a wire rack to cool completely.

For the Cream Cheese Frosting:

  1. Make the frosting: In a large bowl, beat the softened cream cheese and butter together with an electric mixer until smooth and creamy. Gradually add the powdered sugar and vanilla extract, beating until fluffy. If the frosting is too thick, add 1-2 tablespoons of milk to achieve the desired consistency.
  2. Frost the cake: Once the cakes are completely cooled, spread a layer of frosting over the top of one cake layer. Place the second cake layer on top, then frost the top and sides of the entire cake.
  3. Garnish: Garnish with extra chopped pecans, coconut, or fresh fruit if desired.

This Hummingbird Cake is a flavorful, moist, and sweet cake with a luscious cream cheese frosting that perfectly complements the tropical flavors. It’s a crowd-pleaser for any special occasion or family gathering!

Chocolate Chip Bread

0

Chocolate Chip Bread is a delightful treat that combines the soft, tender texture of a quick bread with the indulgent sweetness of chocolate chips. This versatile bread is perfect for breakfast, a snack, or even dessert, offering just the right amount of sweetness to satisfy your cravings without being overly rich. With a golden-brown crust and a soft, moist interior dotted with melty chocolate chips, each slice is pure comfort food. Whether enjoyed on its own, with a smear of butter, or toasted for extra warmth, Chocolate Chip Bread is an easy-to-make crowd-pleaser that’s sure to become a household favorite.

Ingredients:

  • 2 cups all-purpose flour
  • 1 teaspoon baking powder
  • 1/2 teaspoon baking soda
  • 1/2 teaspoon salt
  • 1/2 cup unsalted butter, softened
  • 1 cup granulated sugar
  • 2 large eggs
  • 1 teaspoon vanilla extract
  • 1/2 cup milk (dairy or plant-based)
  • 1 1/2 cups semisweet chocolate chips
  • Optional: 1/2 cup chopped nuts (such as walnuts or pecans)

Instructions:

  1. Preheat the Oven: Preheat your oven to 350°F (175°C). Grease and flour a 9×5-inch loaf pan or line it with parchment paper.
  2. Mix the Dry Ingredients: In a medium bowl, whisk together the flour, baking powder, baking soda, and salt. Set aside.
  3. Cream the Butter and Sugar: In a large mixing bowl, cream the softened butter and granulated sugar together until light and fluffy, about 2-3 minutes.
  4. Add the Eggs and Vanilla: Beat in the eggs one at a time, making sure each egg is fully incorporated before adding the next. Stir in the vanilla extract.
  5. Combine Wet and Dry Ingredients: Gradually add the dry ingredients to the butter mixture, alternating with the milk. Begin and end with the dry ingredients, mixing just until combined. Be careful not to overmix.
  6. Fold in the Chocolate Chips: Gently fold in the chocolate chips (and nuts, if using) until evenly distributed throughout the batter.
  7. Bake the Bread: Pour the batter into the prepared loaf pan and spread it evenly. Bake in the preheated oven for 50-60 minutes, or until a toothpick inserted into the center of the loaf comes out clean or with just a few crumbs.
  8. Cool and Serve: Allow the bread to cool in the pan for 10 minutes before transferring it to a wire rack to cool completely. Slice and serve warm or at room temperature.

Chocolate Chip Bread is a simple yet indulgent baked good that’s perfect for any time of day. Whether you’re enjoying it fresh out of the oven or as a quick grab-and-go snack, this bread is sure to delight with every bite.